Hello friends, I hope you all are having fun. Welcome to the 10th tutorial of our Raspberry Pi programming course. In the last chapter,
PWM was utilized to regulate the DC motor's speed and direction
with a motor driver L293D. In this chapter, we'll advance our skills with PWM and use it to control a stepper motor using the same motor driver L293D.Here's the video demonstration of this project:Let's get started:
Components RequiredHere's the list of components, which we will use to control the speed and direction of Raspberry Pi 4:
Raspberry Pi 4.Stepper Motor.
Motor Driver IC(L293D).
Jumper wires.
9V Battery.
Breadboard.
The Raspberry Pi with desktop is required for this project. An SSH connection can be made, or the RPi can ...
Introduction
Welcome to the next tutorial in our raspberry pi programming. In the previous tutorial, we learned how we could run Xbox cloud on our pi 4. We found that we can run any game easily without lag or having raspberry pi shut down, proving that pi 4 is quite a powerful minicomputer. However, this tutorial will demonstrate how to use Python on raspberry to monitor websites. This Python program will execute on Pi 4 and watch over a website, alerting you whenever it changes or goes down. This is accomplished by keeping a straightforward webpage duplicate locally and monitoring for updates. This webpage monitor is straightforward, so it should work well on pi Zero. Throughout this tutorial, we will demonstrate how to develop your custom code to monitor a webpage. With this information ...
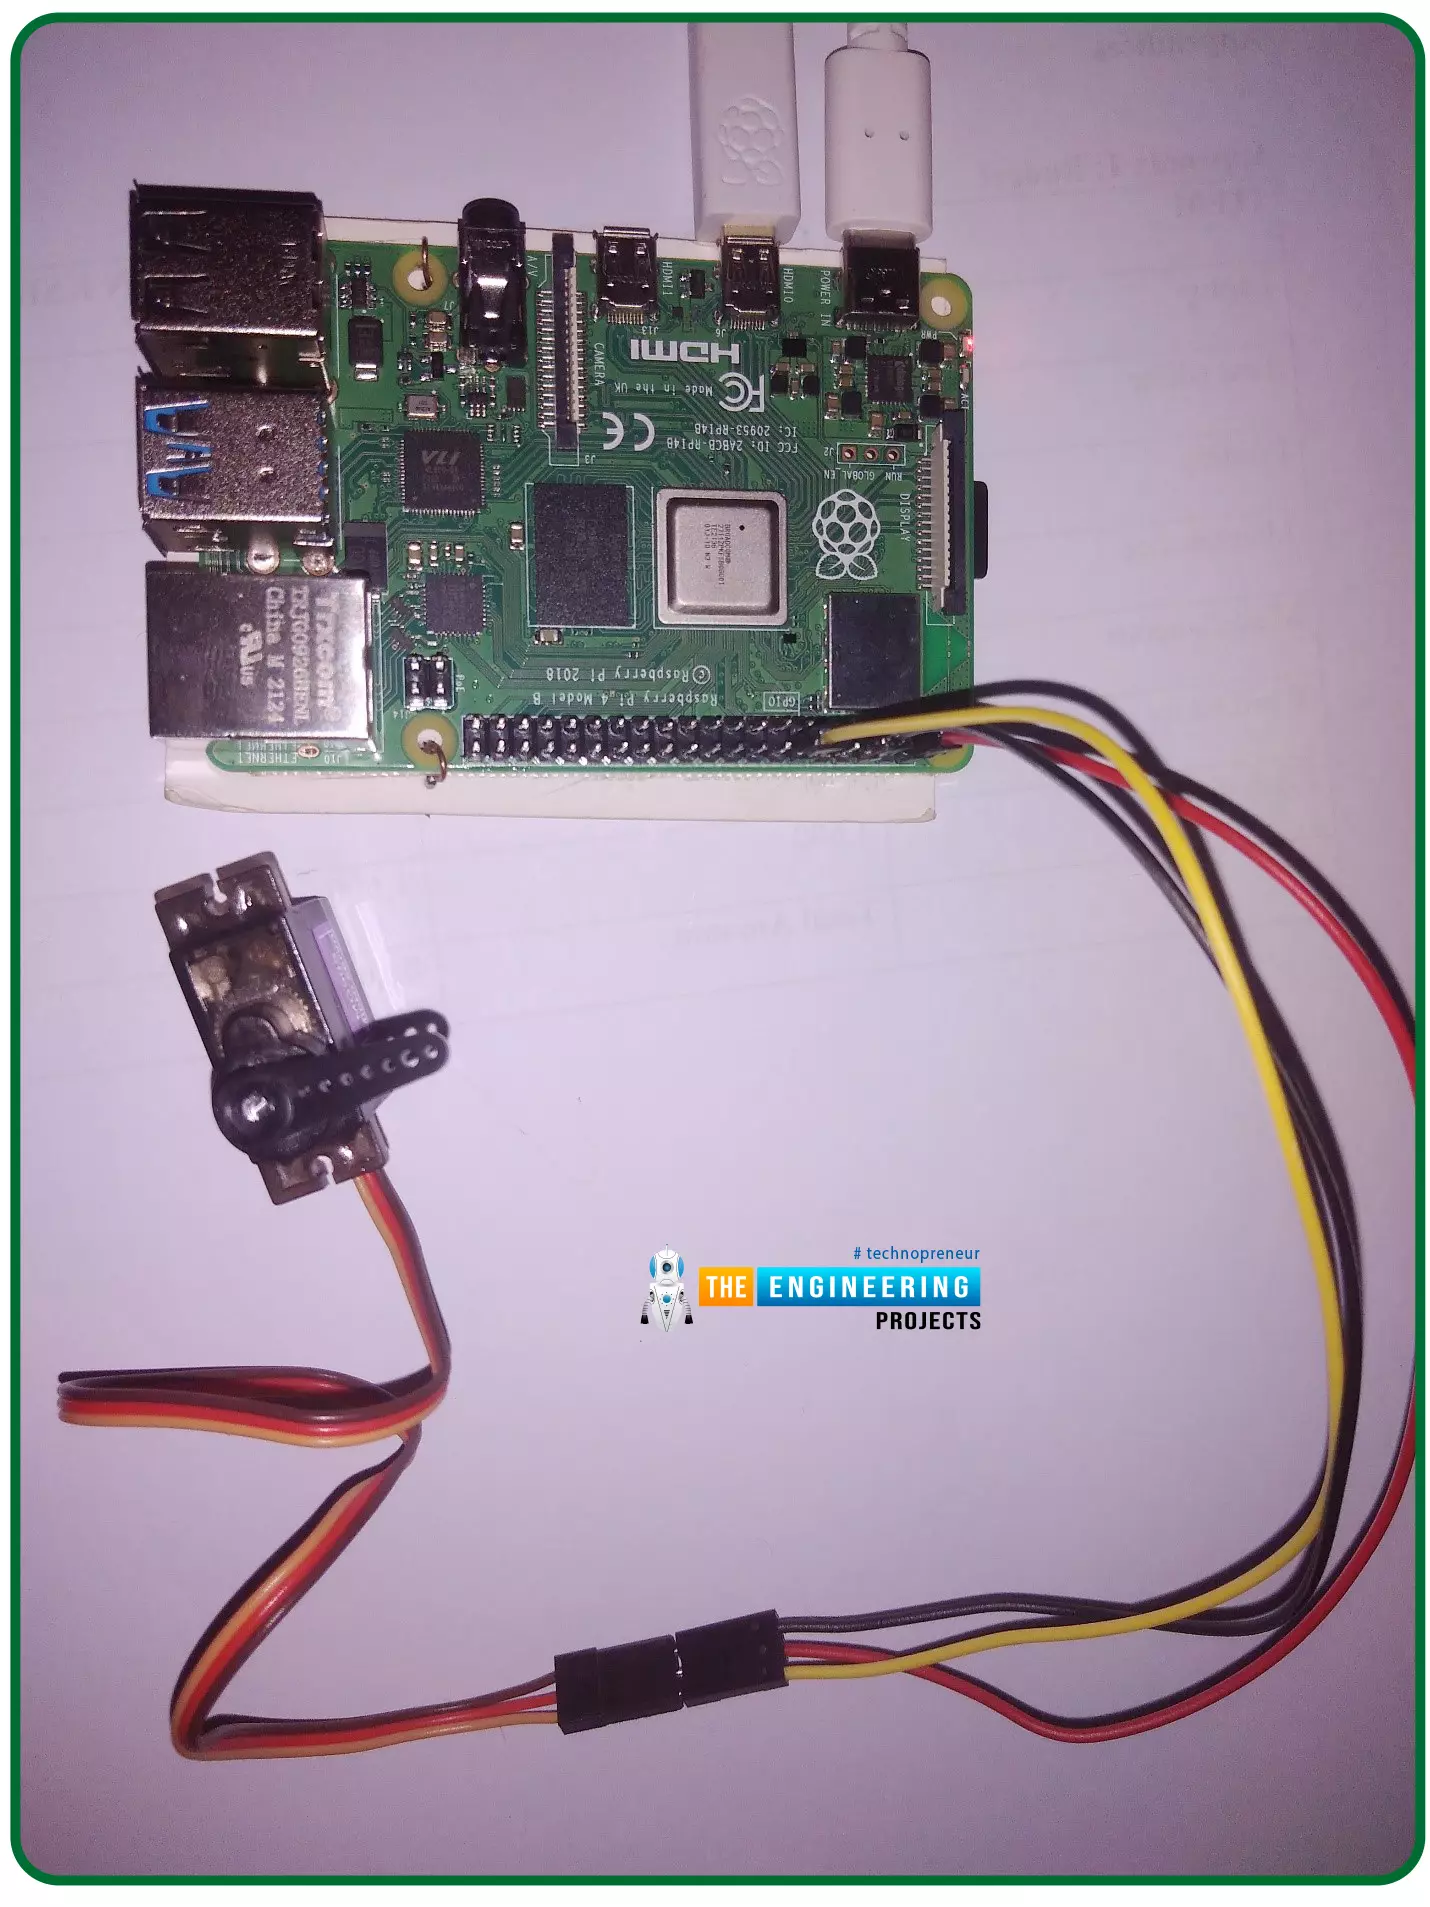
Hello friends, I hope you all are doing well. Welcome to the 11th tutorial of our Raspberry Pi programming course. In the previous chapter, we have seen how to regulate the speed of a Stepper motor with Raspberry Pi 4. Today, we'll work on the servo motor and will control it with RPi4. So, let's get started:
Components Required:We will need the following components to control Servo Motor with Raspberry Pi 4:
Raspberry Pi 4.
Servo Motor.
Male-to-female jumper wires.
What is a servo motor?
A Servo Motor is a simple DC motor with a position feedback Control System and a gearbox.A Servo Motor's primary advantage is its ability to maintain its shaft's angular position at any desired angle i.e. if we want to keep our shaft at 67 degre ...
Thank you for being here for today's tutorial of our in-depth Raspberry Pi programming tutorial. The previous tutorial taught us how to install a PIR sensor on a Raspberry Pi 4 to create a motion detector. However, this tutorial will teach you how to connect a single seven-segment display to a Raspberry Pi 4. In the following sections, we will show you how to connect a Raspberry Pi to a 4-digit Seven-Segment Display Module so that the time can be shown on it.
Seven-segment displays are a simple type of Display that use eight light-emitting diodes to show off decimal numbers. It's common to find it in gadgets like digital clocks, calculators, and electronic meters that show numbers. Raspberry Pi, built around an ARM chip, is widely acknowledged as ...
Welcome to the next tutorial of our Raspberry Pi programming course. Our previous tutorial taught us to how to tweet from Raspberry pi. We also discussed some methods used by the tweepy library to perform some API calls in our project. We will learn how to print from a Raspberry pi in this lesson.
Let us get started
There are several benefits of having a print server. Print servers may link numerous computers to one or multiple printers, either physically or wirelessly, allowing you to access the printer with various devices and send print instructions from all the other connected computers.
It is not easy to print from an Android smartphone to a cabled printer; however, a printer server makes it simple. A print server is useful in small workpl ...
Welcome to the next tutorial of our Raspberry Pi programming course. Our previous tutorial taught us to how to print from a Raspberry pi. We also discussed some libraries to create a print server in our raspberry pi. We will learn how to take screenshots on Raspberry Pi using a few different methods in this lesson. We will also look at how to take snapshots on our Raspberry Pi using SSH remotely.
Why should you read this article?
This article will assist you when working with projects that require snapshots for documenting your work, sharing, or generating tutorials.
So, let us begin.
Screenshots are said to be the essential items on the internet today. And if you have seen these screenshots in tutorial videos or even used them in regular commu ...
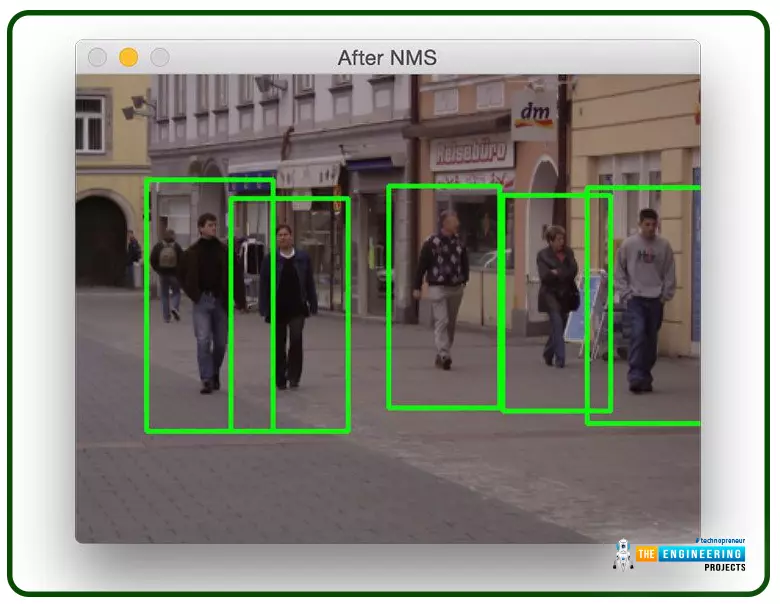
Welcome to the next tutorial on our raspberry pi four python programming. In the previous article, we built a system that recognizes when two people are in physical contact using OpenCV and a Raspberry Pi 4. We used the weights from the YOLO version 3 Object Recognition Algorithm to implement the Deep Neural Networks part. Regarding image processing, the Raspberry Pi consistently comes out on top compared to other controllers. A facial recognition program was among the earlier attempts to use Raspberry Pi for sophisticated picture processing. In today's world of cutting-edge technology, digital image processing has expanded rapidly to become an integral feature of many portable electronic gadgets.
Digital image processing is widely used for such t ...
Welcome to the next tutorial of our raspberry pi 4 programming course. The last guide covered connecting a Sharp infrared distance measurement sensor to a Raspberry Pi 4. Infrared (IR) sensors were demonstrated to be widely used for nearby object recognition and motion tracking. But in this session, we'll utilize Raspberry Pi 4 to create a radio-frequency (RF) remote control that can be used to operate the gadgets wirelessly. With the help of this RF remote control, we can Power On/Off the devices.
Components
Transmitter Side
RF Transmitter
HT12E IC
4 Push Buttons
750k resistor
9 Volt battery
Receiver Side
Raspberry Pi
16x2 LCD
10K POT
Breadboard
1K Resistor (Five)
33K resistor
HT12D IC
RF Receiver
LEDs (Five)
4 10K resistor
Jumper wires
RF Module
This ...
This is the third tutorial in our Raspberry Pi programming course. In the previous chapter, we learned how to install Raspbian on our Raspberry Pi mini-computer. In this chapter, we'll learn how to use a VNC server to remotely control and see its desktop from our computer.
What is VNC?
Computing over a network is known as "virtual network computing," or "VNC." To remotely control another computer, you can use this screen-sharing technology, which works on all major operating systems. As a result, a remote user can interact with a computer's display (screen, keyboard, and mouse) as if they were sitting right in front of it.
VNC takes advantage of the client/server concept. Rather than installing a VNC s ...
Hello friends, I hope you all are doing great. Today, we are going to share the 2nd tutorial of Section-VIII in the Raspberry Pi Programming Course. In the previous tutorial, we interfaced a Barcode Scanner with Raspberry Pi 4. In today's tutorial, we will discuss how to set up a web server in raspberry pi. So, let's get started:
Components Required
We are going to use the following components, in today's project:
Ethernet cable
MicroSD card
Keyboard
Mouse
HDMI cable
Monitor
Expand FileSystem
When configuring a Raspberry Pi, select the expand FileSystem option to ensure that all of the Micro SD storage is allocated for the operating system and modify the default Pi passwords to protect your server from attacker ...