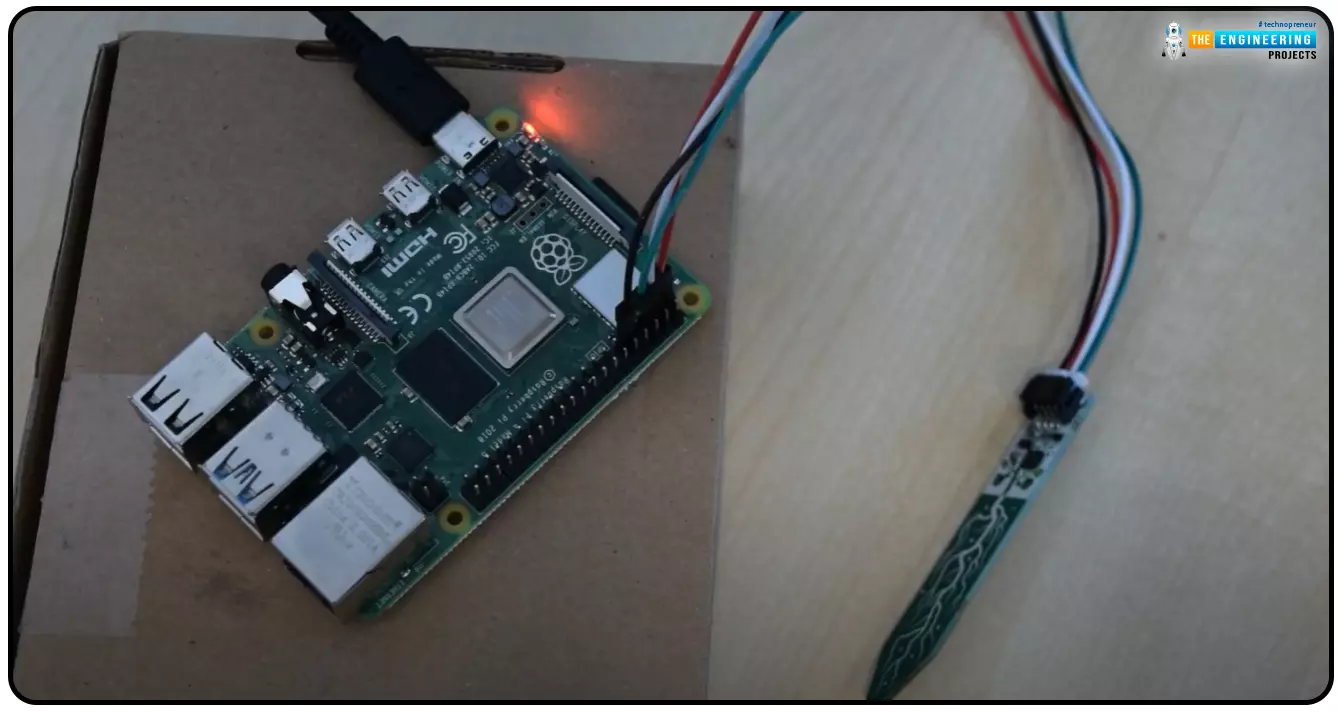
Hello everyone, I hope you all are doing great. Today, we are going to share the second chapter of Section-III in our Raspberry Pi programming course. The previous guide covered how to interface an LDR Sensor with Raspberry Pi 4. This tutorial will cover the basics of hooking up a soil humidity sensor to a Raspberry Pi 4 to get accurate readings. Next, we'll write a Python script to collect the data from the sensors and display it on a Serial monitor.
Are you aware that you can utilize a Raspberry Pi 4 to track the water absorbed by the soil around your houseplants or garden? This helpful guide will show you how to install a soil humidity sensor that will send you a text message when your plant needs watering. A Pi 4, a soil humidity sensor, and a few low-priced components are required. A ...
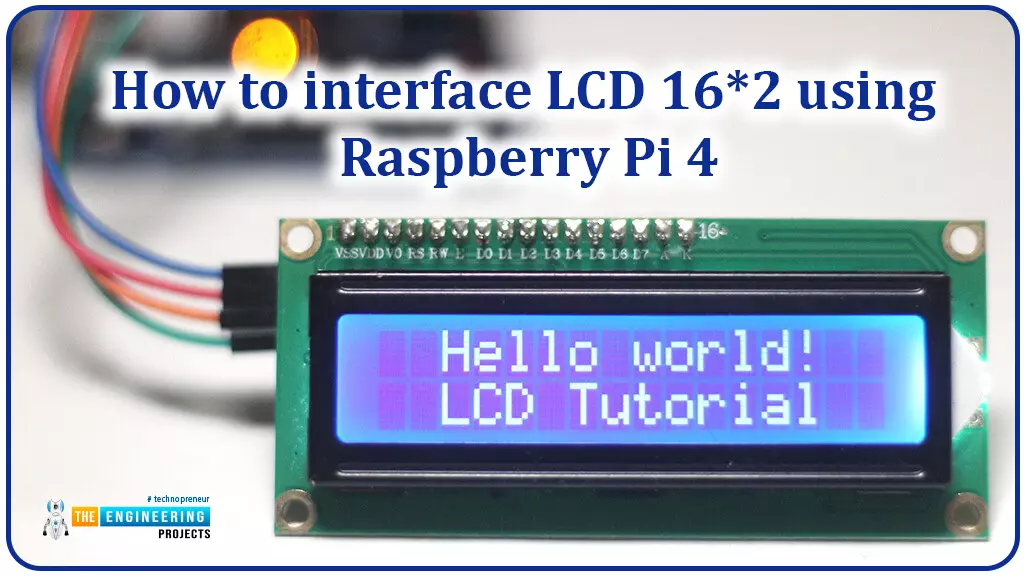
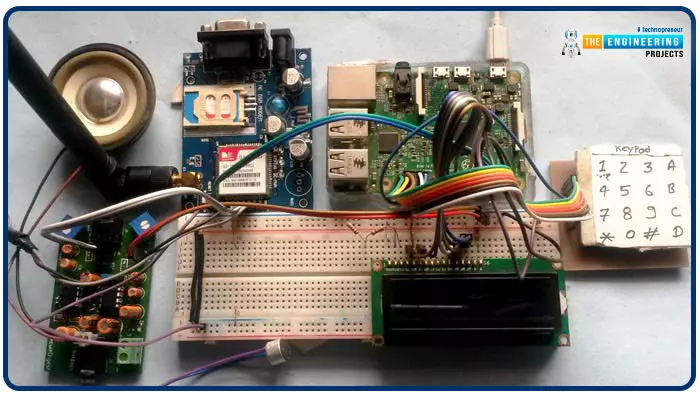
Hello friends, I hope you all are doing great. Today, I am going to share the 6th lecture in the Raspberry Pi 4 Programming series. We're glad you could join us for another lesson in our comprehensive Raspberry Pi programming guide. In today's guide, I'll show you how to interface a 16x2 LCD screen with Raspberry Pi 4.
So, let's get started:Interface LCD 16x2 with Raspberry Pi 4Today, we are going to interface a 16x2 LCD screen with Raspberry Pi 4. At first, we will print the "Hello World" text on the LCD, and in the last section, we will implement the scrolling and blinking of text on the LCD.Here's the video tutorial on LCD interfacing with Raspberry Pi 4:Components RequiredWe will need the following components for today's project:Raspberry Pi 4.M ...
We're glad you could join us for another lesson in our comprehensive Raspberry Pi programming guide. I will show you how to install and connect the RFID card chip to your Raspberry Pi through step-by-step instructions.
Modern security systems would only be complete using radio frequency (RFID) devices. To control who can enter a facility or which rooms they can access, RFID chips and card readers are employed. The RFID card's unique identification number can be read wirelessly with a wall-mounted RFID reader. A door will only unlock and allow entry if the RFID card's unique identification number matches a list of approved cards.
It's fun to tinker with this circuit, and it may be used in many other applications, from opening locks to taking a ...
Greetings, and welcome to today's tutorial. In the last tutorial, we learned how to construct a system for tallying individuals using Raspberry Pi, astute subtraction, and blob tracking. We demonstrated the total number of building entrances and exits. Feature computation and HOG theory were also discussed. The tests proved that a device based on the raspberry pi could effectively function as a people counting station. One of the many benefits of the Pi 4 is its internet connectivity, which is especially useful for home automation projects due to its low price and ease of use. We're going to see if we can use a web page's buttons to manage our air conditioner today. With this Internet of Things (IoT) based home automation, you can command your home gadgets from the comfort of your couch. T ...
Welcome to the next tutorial on our raspberry pi four python programming. In the previous article, we built a system that recognizes when two people are in physical contact using OpenCV and a Raspberry Pi 4. We used the weights from the YOLO version 3 Object Recognition Algorithm to implement the Deep Neural Networks part. Regarding image processing, the Raspberry Pi consistently comes out on top compared to other controllers. A facial recognition program was among the earlier attempts to use Raspberry Pi for sophisticated picture processing. In today's world of cutting-edge technology, digital image processing has expanded rapidly to become an integral feature of many portable electronic gadgets.
Digital image processing is widely used for such t ...
During the era of Covid-19, social distancing has proven to be an efficient method of reducing the spread of contagious viruses. It is recommended that people avoid close contact as much as possible because of the potential for disease transmission. Many public spaces, including workplaces, banks, bus terminals, train stations, etc., struggle with the issue of keeping a safe distance.
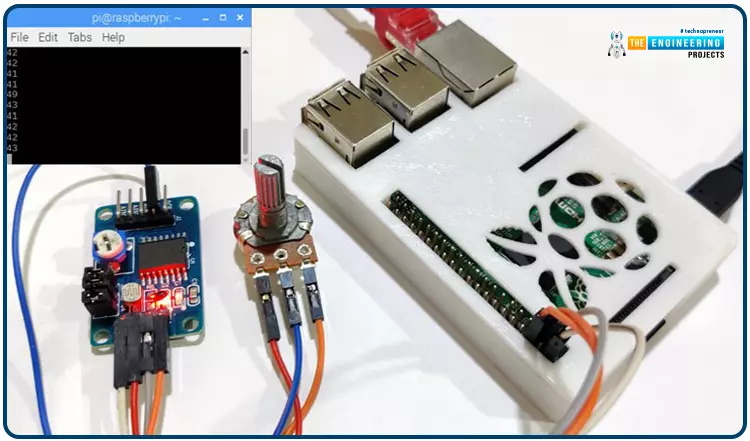
The previous guide covered the steps necessary to connect the PCF8591 ADC/DAC Analog Digital Converter Module to a Raspberry Pi 4. On our Terminal, we saw the results displayed as integers. We dug deeper into the topic, figuring out exactly how the ADC produces its output signals. In this article, however, we will use OpenCV and a Raspberry Pi to create a system that can detect when people are trying to avoi ...
Welcome back to another Python tutorial for the Raspberry Pi 4! The previous tutorial showed us how to construct a Raspberry Pi-powered cell phone with a microphone and speaker for making and receiving calls and reading text messages (SMS). To make our Raspberry Pi 4 into a fully functional smartphone, we built software in Python. As we monitored text and phone calls being sent and received between the raspberry pi and our mobile phone, we experienced no technical difficulties. But in this tutorial, you'll learn how to hook up the PCF8591 ADC/DAC module to a Raspberry Pi 4.
Since most sensors only output their data in analog values, converting them to binary values that a microcontroller can understand is a crucial part of any integrated electroni ...
Greetings, and welcome to another tutorial in our series on the raspberry pi 4 Python programming. The previous guide covered the basics of transmitting data over the radio using the nrf24l01 chip in Pi 4. We also learned about interfacing Arduino and raspberry pi 4 and sending radio signals between the two devices. However, this tutorial will walk you through building a Raspberry Pi-based mobile phone with a microphone and speaker for making and receiving calls and reading text messages (SMS). This Project also serves as a proper GSM Module for the Raspberry Pi interface, with all the necessary Code to run the most fundamental features of any modern smartphone. First, we will understand what gsm is, its architecture and how it works, then we will learn how to program it in our pi 4; there ...
Introduction
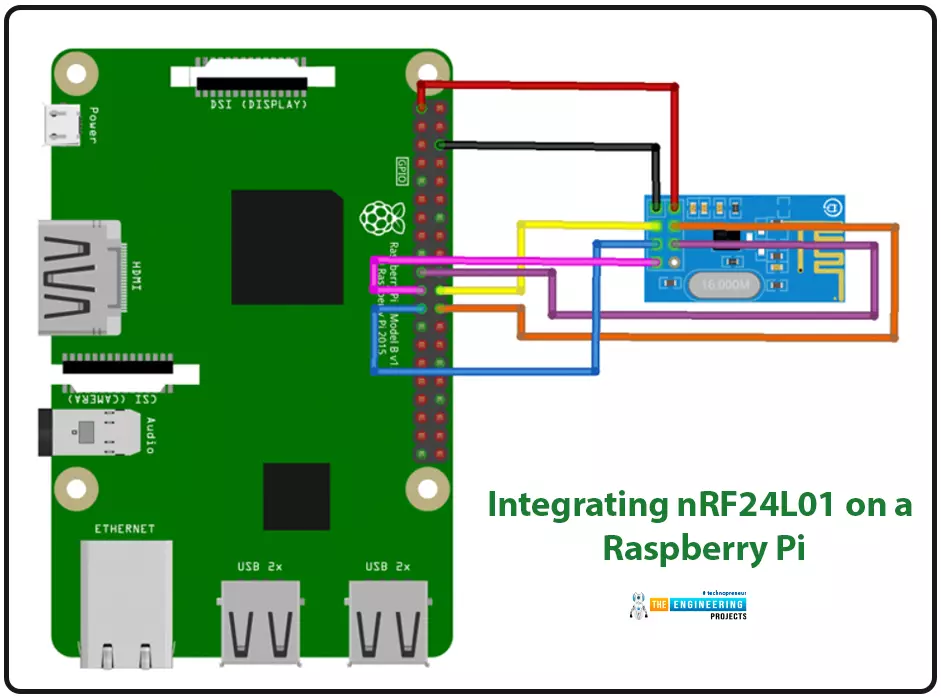
We're glad you could join us for another lesson in our series on programming for the Raspberry Pi 4. The previous chapter covered how to interface the USB barcode scanner with raspberry pi 4. We looked at different types of barcodes and what each stripe represents as well as the different types of barcode scanners available today. We also built a python program for the intelligent shopping cart and now our familiarity with barcodes and scanners and how they function has significantly increased. The benefits and drawbacks of its use were also discussed, but what we're interested in for this article is the transmission of radio frequency signals using the nrf24l01 Module in a raspberry pi 4.
Components
nRF24L01 RF module
Raspberry pi 4
Arduino Uno
Jumper wires
Power suppl ...
Hello friends, I hope you all are doing great. Today, we are going to start a new section in our Raspberry Pi Programming Course. In this section-VIII, we will implement advance protocols in the RPi4 board. Today's our first lecture in this section and we are going to interface a USB Bar Code Scanner with Raspberry Pi 4.If you have visited any big grocery store, you must have seen, it's
quite important as well as difficult to maintain the products in stock
at all times. To ease the job, barcode technology is used because it can
easily maintain an organized database of your items, costs, and
inventory levels in one convenient location. Price changes can be
implemented whenever you desire without requiring new labels for
previously packaged goods. You can tell exactly when your s ...