Hello friends, I hope you all are doing great. Today, we are going to start a new section in our Raspberry Pi Programming Course. In this section-VIII, we will implement advance protocols in the RPi4 board. Today's our first lecture in this section and we are going to interface a USB Bar Code Scanner with Raspberry Pi 4.If you have visited any big grocery store, you must have seen, it's
quite important as well as difficult to maintain the products in stock
at all times. To ease the job, barcode technology is used because it can
easily maintain an organized database of your items, costs, and
inventory levels in one convenient location. Price changes can be
implemented whenever you desire without requiring new labels for
previously packaged goods. You can tell exactly when your s ...
Welcome to the next tutorial of our Raspberry Pi programming course. Our previous tutorial taught us to how to tweet from Raspberry pi. We also discussed some methods used by the tweepy library to perform some API calls in our project. We will learn how to print from a Raspberry pi in this lesson.
Let us get started
There are several benefits of having a print server. Print servers may link numerous computers to one or multiple printers, either physically or wirelessly, allowing you to access the printer with various devices and send print instructions from all the other connected computers.
It is not easy to print from an Android smartphone to a cabled printer; however, a printer server makes it simple. A print server is useful in small workpl ...
Welcome to the next tutorial of our Raspberry Pi programming course. Our previous tutorial taught us to how to print from a Raspberry pi. We also discussed some libraries to create a print server in our raspberry pi. We will learn how to take screenshots on Raspberry Pi using a few different methods in this lesson. We will also look at how to take snapshots on our Raspberry Pi using SSH remotely.
Why should you read this article?
This article will assist you when working with projects that require snapshots for documenting your work, sharing, or generating tutorials.
So, let us begin.
Screenshots are said to be the essential items on the internet today. And if you have seen these screenshots in tutorial videos or even used them in regular commu ...
Welcome to the second chapter of our beginner's course on the Raspberry Pi. In the previous tutorial, we learned about the components of this little computer. We also considered its uses, as well as the most important advantages and disadvantages. Let's get started with setting up our little computer to run the Raspbian operating system in this lesson.
How to Install Raspbian using an imager
The next step is to make sure you have your board and SD card. The Raspberry Pi has an operating system because it is a full computer. For those who prefer a GUI desktop experience, a headless mode is still an option. Most people use Raspbian, a Debian-based operating system tailored specifically for the Raspberry Pi. However, there are other options. An exce ...
Welcome to the next tutorial of our raspberry pi four programming course. Before, we saw how to connect a Raspberry Pi 4 to a relay with four independent channels. To complement the relay circuit, we programmed a python script to turn on and off a single bulb. However, in this tutorial, we'll show you how to connect a GPS module to a Raspberry Pi 4.
Raspberry Pi 4, one of the most popular embedded platforms, has made it simple for developers to obtain location data via a GPS module, allowing them to create devices with a greater reliance on precise positioning. Because of the Raspberry Pi's impressive processing capabilities, this essay focuses on the exciting prospect of creating GPS-based projects using the same inexpensive GPS chips.
Since thi ...
Thank you for joining us for yet another session of this series on Raspberry Pi programming. In the preceding tutorial, we constructed a personal Twitter bot using Tweepy, a Py framework for querying the Twitter application programming interface. We also constructed a Response to robot mentions that would post a response to everybody's tweet mentioning it with a certain keyword. However, in this tutorial, we will implement a security system using a motion sensor with an alarm. This is what it looks like:
PIR Motion Sensors can be implemented with RPi by understanding how it is connected to a Raspberry Pi. Whenever the motion sensor detects human movement, an alarm is triggered in this project and the LEDs blink. You may create a simple motion-det ...
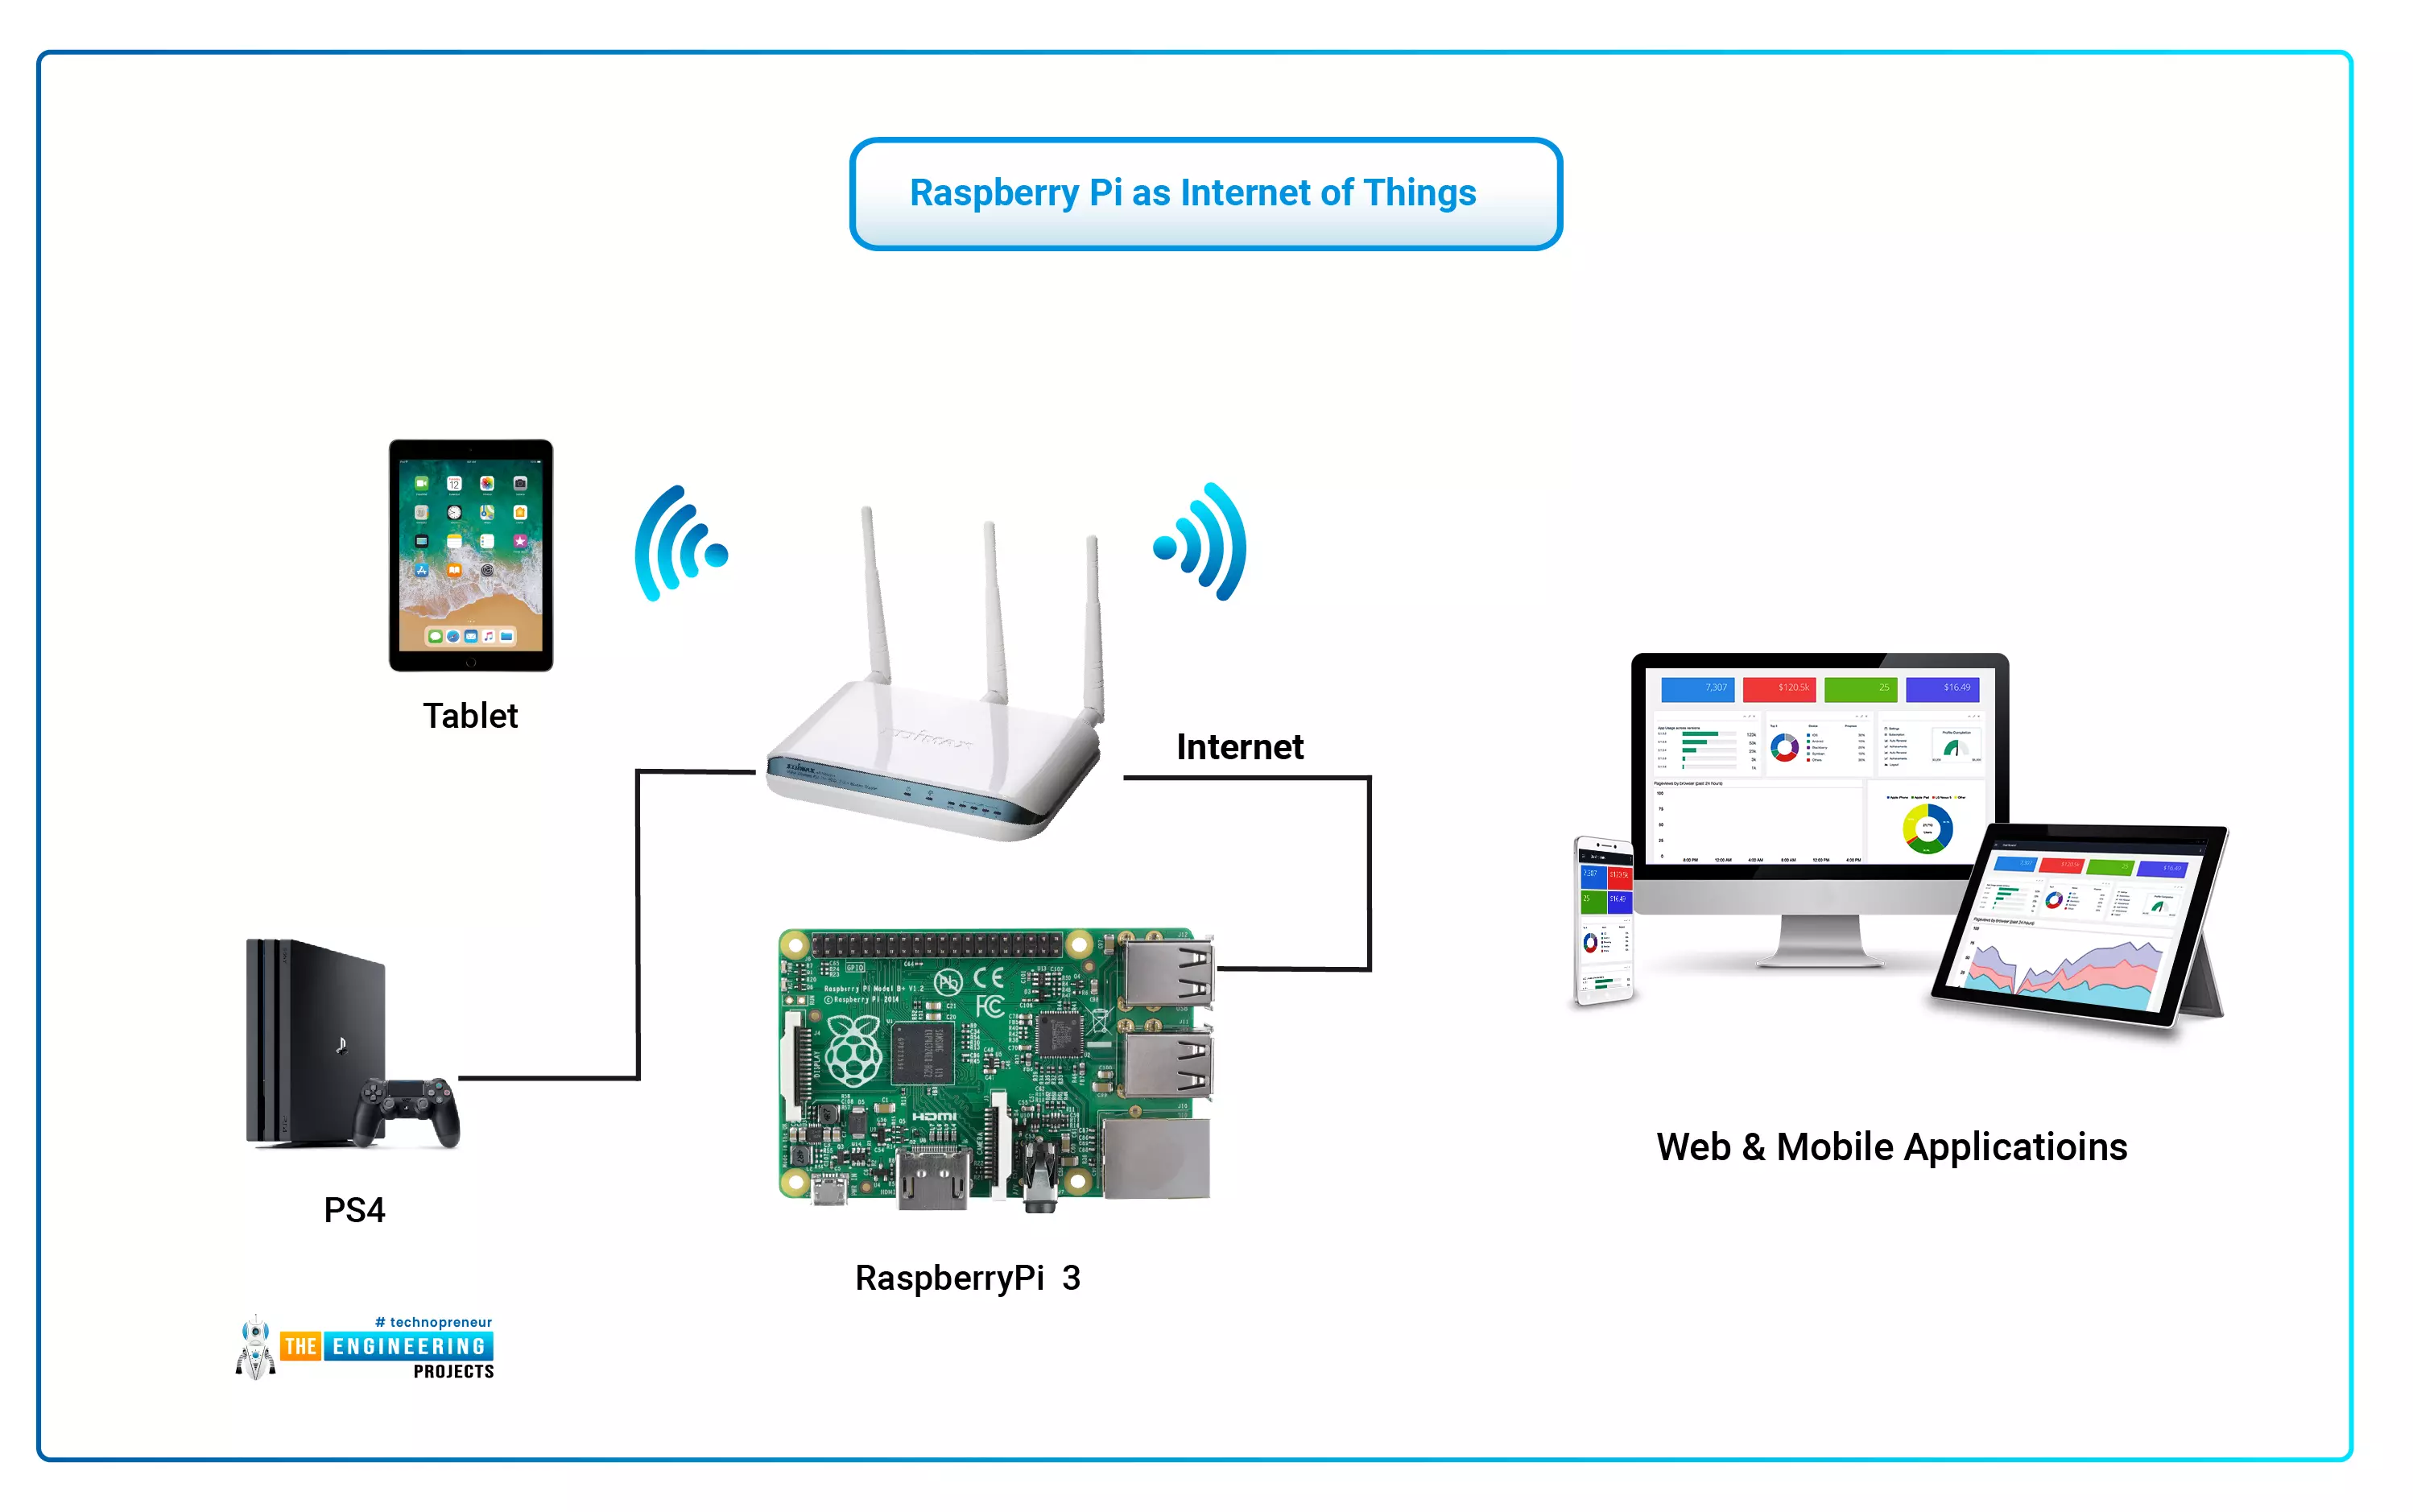
The Internet of Things (IoT) philosophy may be viewed as a highly dynamic and radically dispersed networked system comprised of a huge number of identifiable smart devices. These objects may communicate and interact with one another, as well as with end-users and other network entities. As the Internet of Things era begins, the usage of small, inexpensive, and flexible computer hardware that allows end-user programming becomes more prevalent. The Raspberry Pi, a fully configurable and programmable tiny computer board, is one of them discussed in this article. Although there are certain limitations, the Raspberry Pi remains a low-cost computer that has been used effectively in a wide range of IoT vision research applications despite its few shortcomings.
...
Thank you for being here for today's tutorial of our in-depth Raspberry Pi programming tutorial. The previous tutorial demonstrated the proper wiring of the photoresistor sensor to the GPIO pins. Finally, we learned how it might be included in a Python script for data collection and analysis needs. We also looked at the functions of each component in the circuit. However, I'll walk you through installing a Pi 4 Print Server in this guide. While installing the program is straightforward, setting it up so that a Windows network can locate the print server requires a little more effort. Rather than spending hundreds of dollars upgrading to a laser printer, you may easily upgrade your current USB printer to laser quality by installing a print server.
Because of this software, you no longer ha ...
Hi Folks! I welcome you on board. Today, I am sharing the 2nd
tutorial in the Raspberry Pi 4 learning series. In this post today,
we’ll cover What is Raspberry Pi 4?
Raspberry Pi 4 Pinout, Specs, Projects, Datasheet etc.
Raspberry
Pi 4 is a tiny dual-display single-board computer, developed by
Raspberry Pi Foundation. This foundation has introduced a series of
Raspberry Pi boards to teach computer basics in schools.
With Raspberry Pi 4, you can control two monitors at once. Moreover, it
is incorporated with a quad-core processor that is powerful and comes
with more speed compared to its predecessors.
I suggest you read this post till the end as I’ll cover Raspberry Pi 4
in detail.
Let’s get started.
What is Raspberry Pi 4?
Raspberry Pi 4
is a dua ...
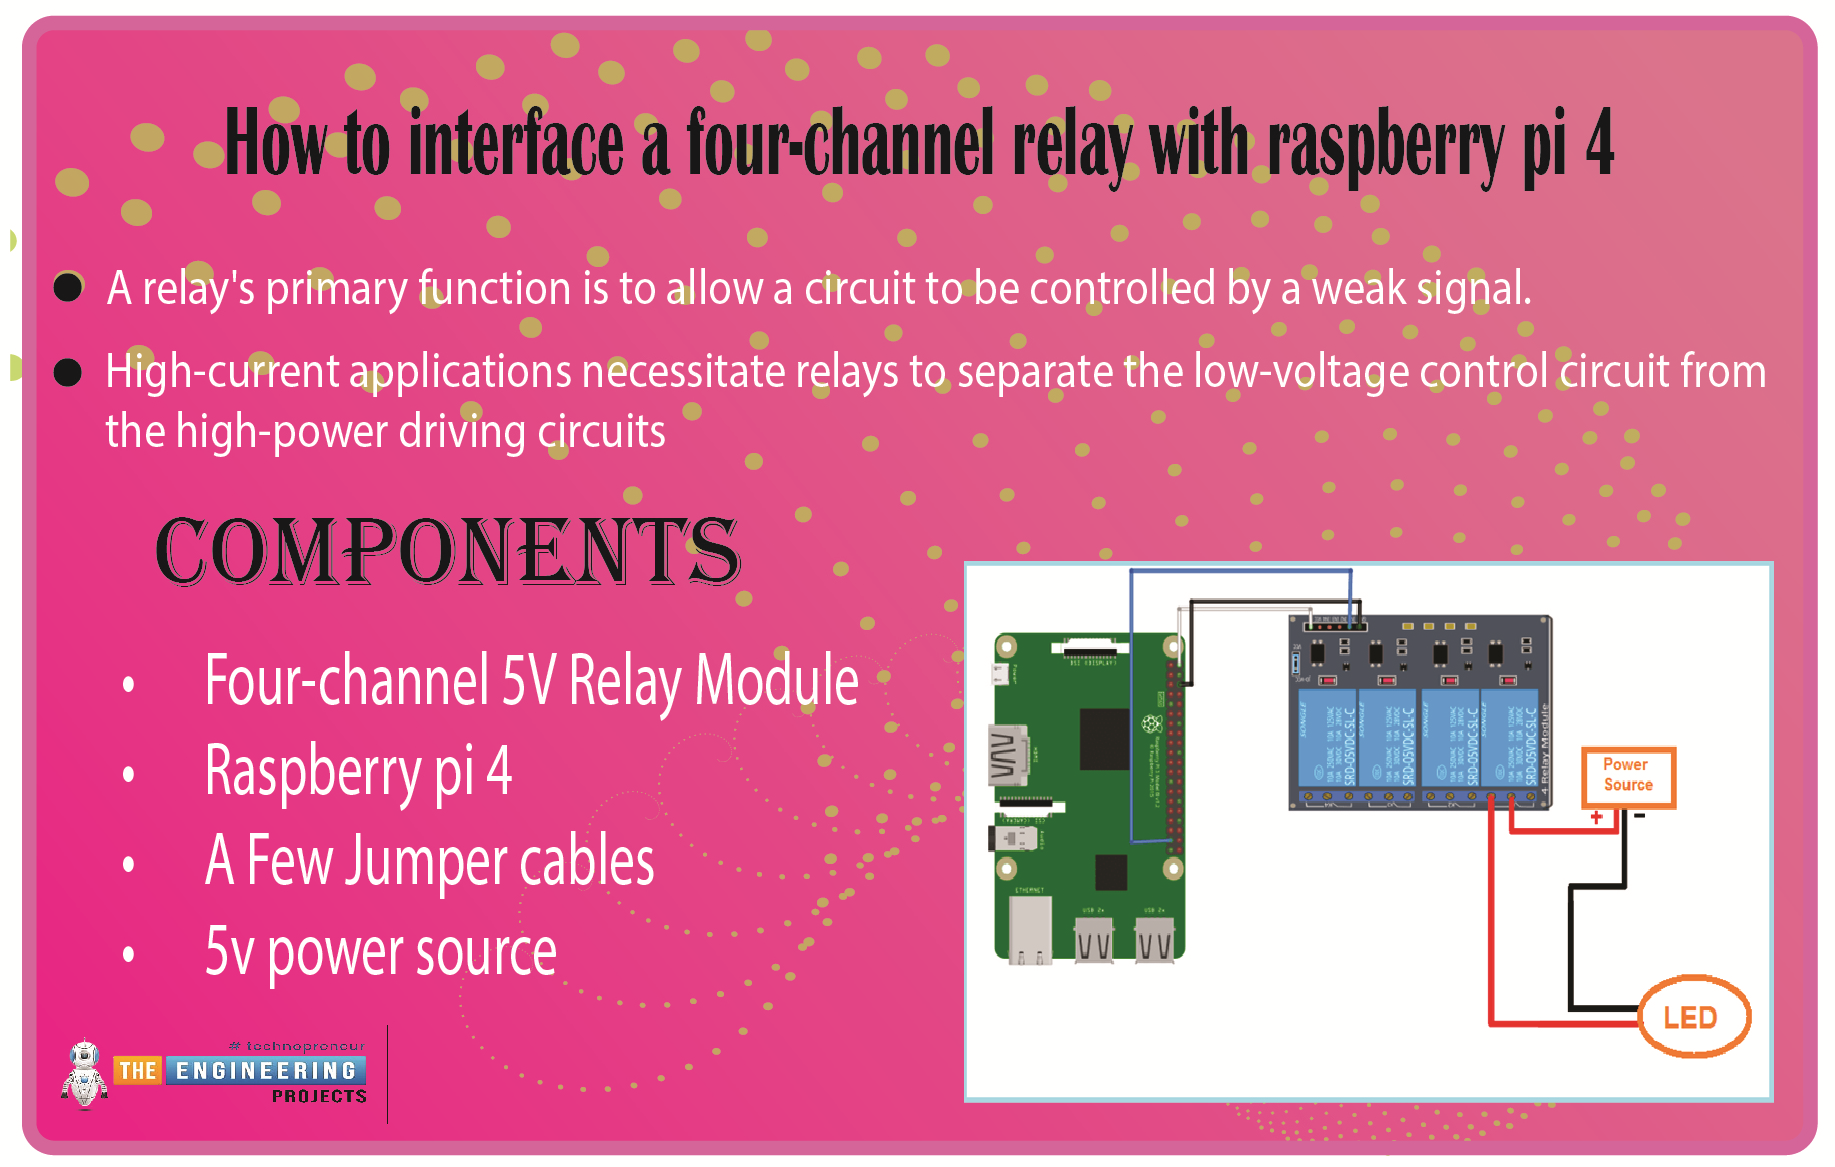
We learned in the previous tutorial how to connect a joystick to a Raspberry Pi 4 using an mcp3008 and an op-amp IC, the LM324A. For each of the interface methods we studied, we created a python script allowing us to interact with the circuit. This tutorial will show you how to connect a 4-channel relay module with a Raspberry Pi to carry out switching.
A relay's primary function is to allow a circuit to be controlled by a weak signal. High-current applications necessitate relays to separate the low-voltage control circuit from the high-power driving circuits. Because of this, understanding it is crucial for those interested in industrial or household automation.
If you've been tinkering with a raspberry pi for a while, consider the various ways ...