Introduction
Greetings, and welcome to the next section of our Raspberry Pi 4 tutorials. In the last section, we discovered how to set up and run our self-host bitwarden on our Raspberry Pi. We learned how to set up admin panels and perform a wide range of actions, such as limiting the creation of new accounts and users for security purposes. However, in this guide, we will discover how to configure a PS3 or PS4 joystick with our raspberry pi and set up and run Xbox cloud gaming on our Pi 4.
Components
Raspberry pi 4
SD card
Power supply
Ethernet cable or wifi
Xbox controller
Xbox game pass ultimate subscription
USB keyboard
USB mouse
HDMI cable
Through a service called Xbox Cloud Gaming, users may play a wide variety of games witho ...
Welcome to the next tutorial of our Raspberry Pi programming course. Our previous tutorial taught us how to use a raspberry pi as a DNS server. We also looked at the benefit of this DNS server. This tutorial will teach us to set up Raspberry pi as a VPN server.
This is an excellent method for increasing your network security and getting access to your local area network from the world wide web, but setting up your VPN server might be a challenge. Pi VPN uses a guided install to turn your Raspberry into a low-cost, high-performance VPN server.
What is Pi VPN?
It is an OpenVPN server optimized for all Raspberry platforms above pi 2. It allows you to access your home network over the internet safely and securely. Smart devices and your network can ...
Thank you for joining us for yet another session of this series on Raspberry Pi programming. In the preceding tutorial, we integrated a real-time clock with our raspberry pi four and used it to build a digital clock. However, In this tutorial, we will construct your personal Twitter bot using Tweepy, a Py framework for querying the Twitter application programming interface.
You will construct a Response to mentions robot that will post a response to everybody's tweet mentioning it with a certain keyword.
The response will be a photo we will make and put any text over it. This message is a quote you will acquire from a 3rd application programming interface. Finally, we will look at the benefits and drawbacks of bots.
This is what it looks like:
...
Welcome to the second chapter of our beginner's course on the Raspberry Pi. In the previous tutorial, we learned about the components of this little computer. We also considered its uses, as well as the most important advantages and disadvantages. Let's get started with setting up our little computer to run the Raspbian operating system in this lesson.
How to Install Raspbian using an imager
The next step is to make sure you have your board and SD card. The Raspberry Pi has an operating system because it is a full computer. For those who prefer a GUI desktop experience, a headless mode is still an option. Most people use Raspbian, a Debian-based operating system tailored specifically for the Raspberry Pi. However, there are other options. An exce ...
Welcome to the next tutorial of our Raspberry Pi programming course. Our previous tutorial taught us to make a button-controlled "music box" that plays different sounds depending on which buttons are pressed. In this lesson, we will configure our raspberry pi for voice control.
What will you learn?
Like the Amazon Echo, voice-activated gadgets are becoming increasingly popular, but you can also construct your own with a Raspberry, a cheap USB mic, and some appropriate software. Simply speaking to your Raspberry Pi will allow you to search YouTube, view websites, activate applications, and even answer inquiries.
What will you need?
Because the Raspberry Pi lacks a soundcard or audio port, this project requires a USB microphone or a camera with a ...
Welcome to the next tutorial in our Raspberry Pi 4 programming course. In the previous tutorial, we learned how to automate your home with a Raspberry Pi and Bluetooth Low Energy. We found that using a Raspberry Pi 4 and Bluetooth Low Energy (BLE), users may command their household appliances from their smartphone or a web interface, and the Pi 4 will carry out the commands. This allows for a versatile and adaptable method of managing lights, thermostats, and smart plugs.
However, this Internet of Things (IoT) project aims to create a real-time Raspberry Pi weather station that displays the current humidity, temperature, and pressure values via an LCD and an online server. With this arrangement, you can track the local climate from any location in the globe over the internet and see what ...
Hello friends, I hope you all are doing well. Today, I am going to share the 4th chapter of Section-III in our Raspberry Pi programming course. In the previous lecture, we studied the Interfacing of IR sensor with Raspberry Pi 4. In this guide, you'll learn how to interface a PIR sensor with Raspberry Pi to create a motion detector. A passive infrared (PIR) sensor is a straightforward yet effective tool for motion detection.
As a bonus, a piezo speaker will play an audio clip whenever motion is detected. GPIO pins are required for both of these accessories. This tutorial is a great starting point for those who have never worked with electronic components and circuits.
These sensors are used in traditional, old-generation security
systems. In con ...
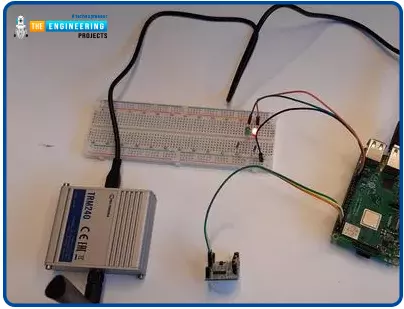
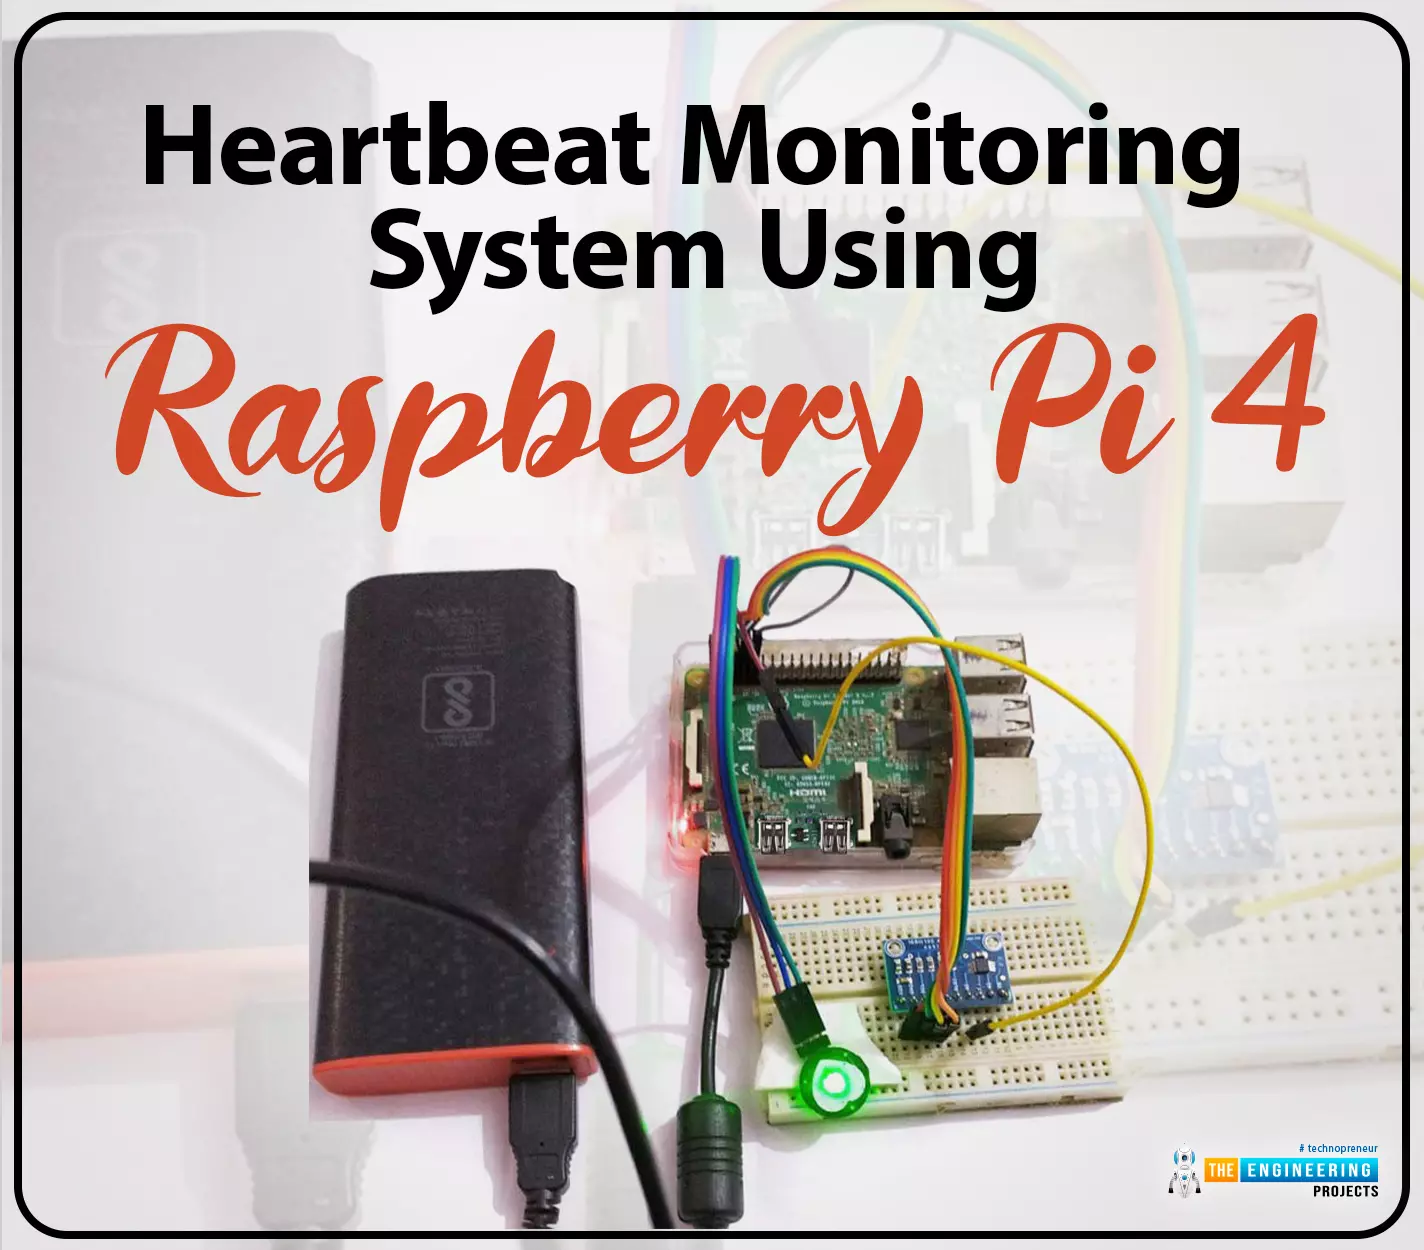
Hello friends, I hope you all are doing great. Welcome to the 11th lecture of Section-III in the Raspberry Pi 4 Programming Series. In the previous tutorial, we discussed the interfacing of the Fingerprint sensor with Raspberry Pi 4. Today, we are going to discuss another sensor named the Pulse rate sensor and will interface it with Raspberry Pi 4.The field of healthcare monitoring has long been seen as a potential use
case for IoT i.e. examining the health
instead of regular checkups and local doctors. Using sensors,
your vital signs can be monitored and transmitted in real time, allowing
a physician on the other side or even an AI to analyze the data and
provide an accurate diagnosis. That does seem somewhat futuristic.
However, we are making steady progress in that direction ...
Hello readers, I hope you all are doing great. In our previous tutorial, we discussed the implementation of pulse width modulation (PWM) in Raspberry Pi Pico using the MicroPyton programming example. We also implemented the LED brightness control program to demonstrate an application of the pulse width modulation technique.
In this tutorial, we are going to implement another application of pulse width modulation technique which is ‘Direction and position control of a servo motor’ with Raspberry Pi Pico module and MicroPython programming language.
Later in this tutorial, we will also discuss how to control the position of a servo motor with push buttons (to be used as control inputs) and also to use LEDs for indication purposes.
What is Servo Motor?
Before interfacing the servo motor with ...
Welcome to the next tutorial of our raspberry pi 4 tutorial. In the previous tutorial, we learnt how to interface a gas sensor with a pi 4. However, in this tutorial will cover how to automate your home with a Raspberry Pi and Bluetooth Low Energy. To automate a home means to mechanize its environment, including the appliances within it. To that end, we've designed an intelligent lamp whose functionality can be adjusted from afar via a companion mobile app.
Using your smartphone, you'll be able to manage a variety of household gadgets. The following code demonstrates using a mobile device as a remote controller for a Raspberry Pi's GPIO pins. (Or another BleuIO Dongle).
Instructions Requirements
The recently introduced Raspberry Pi 4 will serve ...