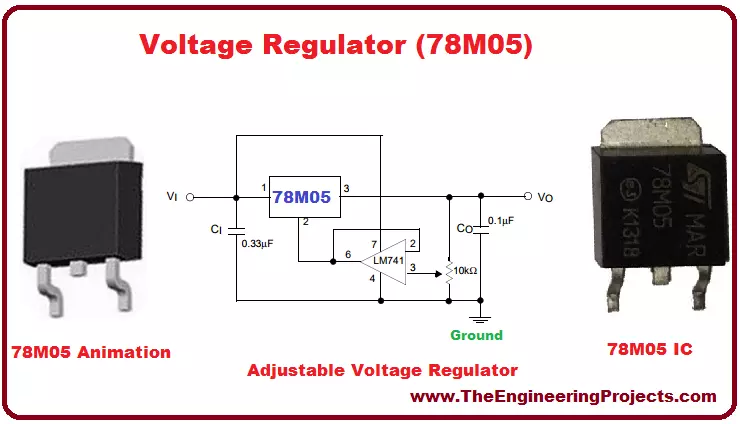
Hello everyone! I hope you will absolutely fine and having fun. Today, I am going to give you a detailed discussion on the topic Introduction to 78M05. I have already shared information about different IC's e.g. Introduction to UA741, MMBD914, LM224, LM386 and LM317. You must have a look at all these tutorials for the better understanding of this article. 78-M05 is basically a three (3) terminal. These terminals include input, output and the common terminal.
78-M05 is commonly available in TO-220 package having different fixed voltages at the output. Its construction process is based on planar epitaxial technology. These regulators are used for the employment of the process of internal limitation of the current. Safe area compensation as well a ...
Hello Pupils! I welcome you to the board. I hope you are fine. In today's tutorial, we will design a project Metal Detector using 555 Timer in Proteus ISIS. All of us perceive the situations when at the public places such as on airports or in shopping malls where sharp metallic objects such as a knife or illegal guns or even a nail cutter are not allowed, there are walkthrough gates at every entrance so that any person with the forbidden material when passes through the gate, the alarming buzzer automatically switched on. This happened because the walkthrough gates have the Metal Detector circuit in them that works immediately when such a situation occurs.
In this session, we'll learn:
What are Metal Detectors?
How does the 555 Timer collabor ...
Hello everyone! I hope you all will be absolutely fine and having fun. I am going to give you a detailed Introduction to CD4051 today. CD 4051 is an analog multiplexer and demultiplexer. It has very low OFF leakage current and low ON impedance. Over full voltage ranges, very low power is dissipated by CD-4051.
CD-4051 is an eight (8) channel multiplexer and has three control input named as A, B and C. These inputs connect only 1 out of 8 channels to the output in order to obtain the desired output. Channel I/O terminals became outputs and common O/I become input terminals when CD 4051 is used as a demultiplexer. CD-4051 has a lot of amazing features e.g. binary address decoding on chip, break before make switching eliminates channel overlapping, ...
Hey everyone! Hope you all are doing great. Today, I am going to give you the details on the Introduction to 2n4391. It is a simple N type JFET (Junction field effect transistor) which consists of three terminals called drain, source and gate and are denoted by D, S and G receptively. It is mostly used in analog switches and current limiters. I am going to give you a brief details on this transistor. Let's get started.
Introduction to 2n4391
2n4391 is a field effect transistor that consists of three terminals known as drain, source and gate.
It is called field effect transistors because static field performs as important part in the operation of this transistor.
Unlike normal transistors, it is a voltage controlled device as it doesn't requ ...
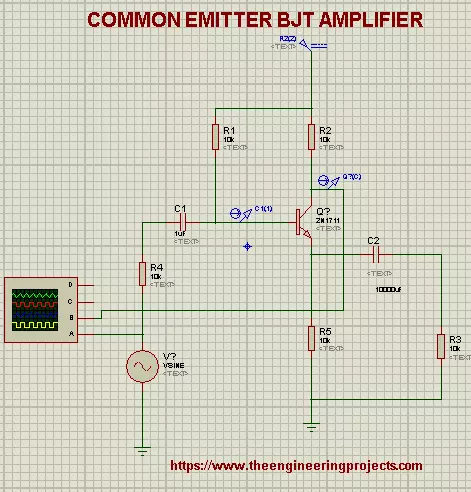
Hi Learners, I hope you are doing good. This lesson is about implementation of one of the types of Amplifiers i.e, Common Emitter BJT Amplifier. But, prior to this, we'll revise some basic concepts so that it will be easy for you to understand the roots of the Experiment.
We'll talk about:
What are Common Emitter Bi-Junction Transistors.
Concepts of Common Emitter Bi-Junction Transistors.
Implementation of Common Emitter BJT Amplifiers in Proteus ISIS.
Why we use Common Emitter BJT in Amplifiers.
What are Common Emitter Bi-Junction Transistors
There are three types of Configurations of a transistor named:
Common Emitter Configuration
Common Base Configuration
Common Collector Configuration
We chose the Common Emitter Configurati ...
Hello friends, hope you all are fine and having fun with your lives. Today, I am going to share a Traffic Signal Control using Arduino. Few days earlier, I have posted the same tutorial but it was Traffic Light Signal Using 555 Timer in Proteus ISIS and today we will do the same thing but using Arduino programming. Its quite a simple but good starting project on Arduino. So, if you are new to Arduino then must give it a try.
Traffic Signal Control is quite a usual thing. We see traffic signals daily on our roads and usually engineers are asked to design such projects in their initial semesters. If we look at the traffic signals then we can see they are simply turning ON and OFF lights at some fixed regular intervals. and the pattern is quite simpl ...
Hello readers, I hope you all are doing great. Today, we are going to start the second section of the ESP32 tutorial series and today's our first tutorial, where we will have a look at How to Create a Web Server with ESP32. In our previous tutorial, we introduced you to the basics of the ESP32 microcontroller. where we discuss How to set up Arduino IDE to program ESP32. In this tutorial, we will discuss creating a web server using the ESP32 module.One of the most interesting features of the ESP microcontroller series is its wireless connectivity via WiFi & Bluetooth. Wireless connectivity protocols supported by ESP32 are:
Wi-fi: 802.11b/g/n/e/i
Bluetooth : BLE(Bluetooth low energy) and V4.2
What is a Web server?
A web server is software or hardware that stores, processe ...
Update: I have updated the code and removed the bug. Thanks for informing. Now this code will work perfectly.
Buy This Project
Hello friends, hope you all are fine and having good health. Today, as the name suggests, I am gonna post on how to Receive SMS with AT Commands using Sim900 and Arduino. I have already posted a tutorial on How to Send SMS with Arduino UNO and Sim900, so now we are gonna check the opposite. Sending SMS is quite easy, you just need to write some AT commands and write the message you wanna send and hit the Cntrl + Z and it will be sent. But receiving a text message on your SIM900 shield is a bit difficult because now you need to place a check when user will send a message. So, ideally whenever anyone send a message to yo ...
Hello friends, I hope you all are doing great. In today's tutorial, we are gonna have a look at detailed Introduction to ACS712. ACS712 is an AC or DC current sensor, which is used to measure AC or DC current. You should also have a look at Difference between AC & DC Power, that will help. The maximum value of AC and DC which can be measured is 30A, its output current signal can be read via analog I/O port of Arduino. It is also available in 5A and 20A version which provides precise and economical solutions for AC or DC current sensing in industrial and commercial systems.
ACS712 consists of a precise and low offset linear Hall sensor circuit with a copper conduction path located near the surface of the die. ACS712 is used in different industrial projects and commercial electr ...
Hi Guys! I welcome you on board. Thank you for clicking this read. In this post today, I’ll detail the Introduction to Arduino Nano Every.
Arduino Nano Every is a tiny powerful board that is based on the ATMega4809 AVR processor. It comes with a clock speed of around 20MHz and flash memory of around 48KB. It carries two 15 pin connectors on each side of the board that are pin-pin compatible with the Arduino Nano Every.
The low price and small size make this board an ideal pick for the range of electrical projects like electronic musical instruments, low-cost robots, and general development of the small parts of the large projects.
Needless to say, Arduino has been a cornerstone of many electronic projects ranging from simple student projects to ...