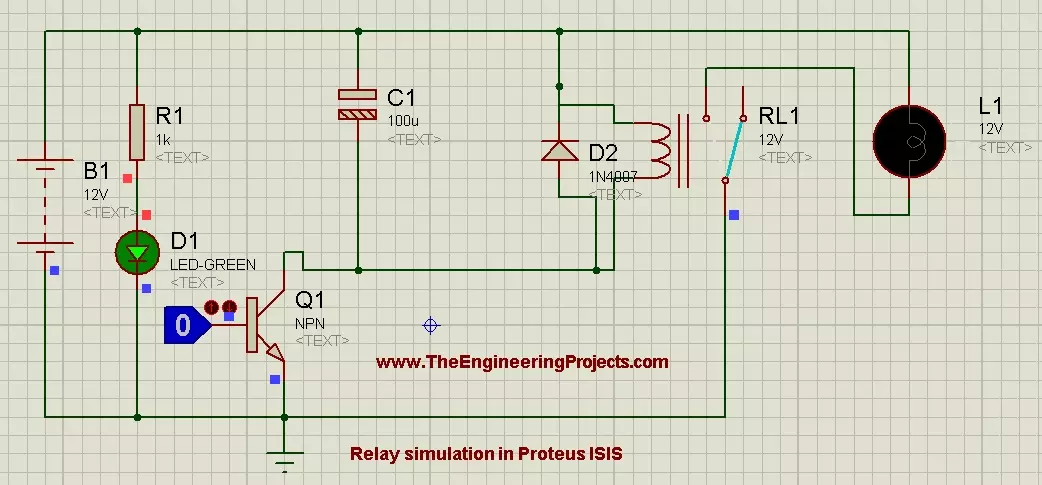
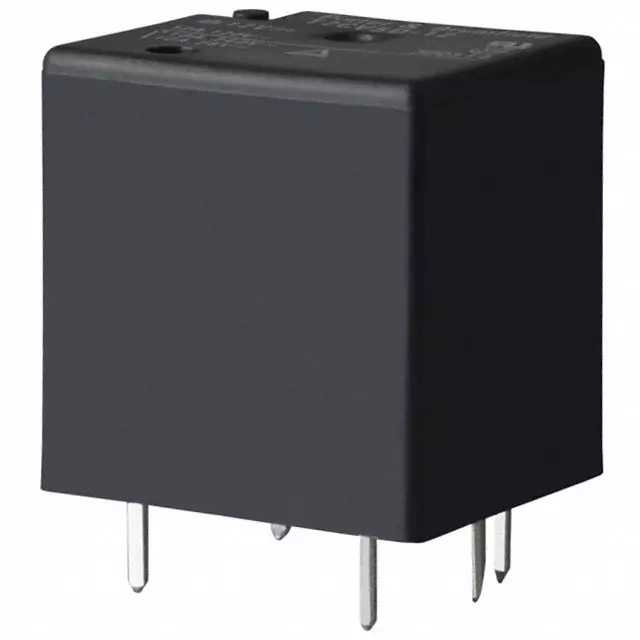
Hello friends! Today, we will learn how to control a relay in Proteus ISIS. We will begin with a simple circuit that energizes a relay coil and switches a lamp, then add a transistor so a low-voltage logic signal can control the coil. This follows naturally from our tutorials on DC motor control , stepper motor control and servo motor control . A relay is useful for switching a load on or off, but it is not the best choice for every motor-control task, particularly rapid speed control. We will keep the demonstration at low DC voltage and use a lamp as the load. The original screenshots remain below, while the connection tables explain the base resistor, protection diode and supply relationships that you should include when building a complete driver circuit. Figure: Relay control demonstra ...
Hello friends! If you are developing an embedded project and need help with its firmware, The Engineering Projects can discuss your microcontroller programming requirements with you. Your project may involve a new prototype, a circuit that is not responding correctly or an existing program that needs a clearly defined improvement. Useful programming work starts with understanding the hardware and the required behaviour. A sentence such as “control a motor with a sensor” describes an idea, but it does not yet define a complete system. We need to know which motor, which sensor, how quickly the controller must respond and what should happen when a signal disappears. This page explains the types of work you can discuss with us, the information to prepare and the deliverables to agree before de ...
Hello friends! Today we will control a servo motor with the PIC16F877A and observe its movement in Proteus ISIS. We will begin with the three servo connections, understand the command waveform, and then write a small program that selects positions using two pushbuttons. In the previous tutorials, we explored DC motor direction control and stepper motor sequencing . A positional hobby servo is different because the motor, gearbox, position sensor, and controller are already assembled together. Our PIC requests a position rather than switching the motor windings itself. We will keep the original PIC and button arrangement, but use a repeated control pulse with a sensible frame period. Along the way, we will separate what the simulated angle display tells us from what a physical servo must be ...
Hello friends! In the previous tutorial, we controlled the direction of a DC motor in Proteus . Now we will work with a stepper motor, where rotation depends on applying an ordered sequence to the windings. We will begin with the original six-wire simulation, inspect the sequence manually, and then explain how a microcontroller and driver can generate it. The original screenshots use Logic State sources to make individual winding states visible. They are useful for understanding the sequence, but they are not a physical driver circuit. We will preserve the images and add the missing distinction between simulated logic sources, microcontroller outputs, and the winding-current path. By the end, you should understand unipolar and bipolar wiring, wave drive and half stepping, direction reversa ...
Hello friends! In this tutorial, we will design a DC motor control demonstration in Proteus ISIS and then connect its control logic to a PIC16F877A. We will begin by observing how voltage polarity changes the direction of a simulated motor, then explain the driver stage needed between a microcontroller and a physical motor. The original article used Logic State sources and a simplified direct connection to illustrate direction changes. We will preserve those screenshots, but label their purpose clearly. Logic sources and PIC output pins are not substitutes for a motor power driver. The updated practical interface uses an L293D bridge example, with separate logic and motor supplies. We will also correct the relationship between the original schematic and code, add explicit stopping behavior ...
Hello friends! In this tutorial, we will explore the components and instruments available in Proteus ISIS and learn how to choose the right item for a circuit. Finding a familiar part name is only the beginning. We also need to know whether it has a simulation model, which properties must be configured, and whether the item belongs to the schematic, the measurement setup, or a later PCB design. This article continues our practical Proteus series after designing an LCD circuit with a PIC microcontroller . We will cover ordinary components, displays, motors, serial tools, and shift registers, then connect each topic to the more detailed tutorials already available in the series. My aim is to help you build a sensible test circuit instead of placing unfamiliar parts and hoping that the simula ...
Hello friends! In this guide, we will learn how to use Proteus ISIS and ARES, starting with a simple circuit and gradually moving toward microcontroller simulations and PCB design. I have kept the original tutorial collection so that you can follow a lesson in detail whenever you reach that stage. Our goal is to understand the complete development process. We will draw a circuit, calculate what it should do, simulate its behavior, examine signals with instruments and then prepare a physical board layout. Each stage answers a different question, so a successful simulation is one step in the process rather than the final proof of a finished product. If you are new to Proteus, follow the sections in order. If you already use it, choose the topic you need from the linked lessons. Some screensh ...
Hello friends, I hope you are doing well. In the previous tutorial, we studied the working principle of a relay . Today, we will connect a 12 V relay to a PIC18F4550 microcontroller through a ULN2003A driver. A relay coil needs more voltage and current than a microcontroller pin should provide. It is also an inductive load, so it produces a voltage transient when switched off. The ULN2003A solves these interface problems by providing seven low-side Darlington drivers and seven internal clamp diodes in one package. The key point is that the ULN2003A does not convert a 5 V logic signal into a 12 V output. The 12 V energy comes from a separate 12 V supply. A logic high merely turns on one internal driver, which connects the low side of the relay coil to ground. We will examine that current pa ...