Hello friends, I hope you all are doing great. Today, we are going to start a new section in our Raspberry Pi Programming Course. In this section-VIII, we will implement advance protocols in the RPi4 board. Today's our first lecture in this section and we are going to interface a USB Bar Code Scanner with Raspberry Pi 4.If you have visited any big grocery store, you must have seen, it's
quite important as well as difficult to maintain the products in stock
at all times. To ease the job, barcode technology is used because it can
easily maintain an organized database of your items, costs, and
inventory levels in one convenient location. Price changes can be
implemented whenever you desire without requiring new labels for
previously packaged goods. You can tell exactly when your s ...
Hello friends, I hope you all are doing well. Today, I am going to share the 5th tutorial of Section-III in our Raspberry Pi Programming Course. In our previous tutorial, we have seen the interfacing of a PIR Sensor with Raspberry Pi 4. In today's tutorial, we will interface an Ultrasonic sensor with Raspberry Pi and will use Python to perform its calculations. So, let's get started:
Components:Here's the list of components, we are going to use in today's project:
Raspberry Pi 4
Ultrasonic sensor
Male-to-female jumper wires
Breadboard1k ohm resistor
2k ohm resistor
What are Ultrasonic Sensors?
An Ultrasonic Sensor consists of a transmitter and a receiver, the transmitter emits the ultrasonic wave, which after hitting some ob ...
Welcome to the next tutorial of our raspberry pi four programming course. Before, we saw how to connect a Raspberry Pi 4 to a relay with four independent channels. To complement the relay circuit, we programmed a python script to turn on and off a single bulb. However, in this tutorial, we'll show you how to connect a GPS module to a Raspberry Pi 4.
Raspberry Pi 4, one of the most popular embedded platforms, has made it simple for developers to obtain location data via a GPS module, allowing them to create devices with a greater reliance on precise positioning. Because of the Raspberry Pi's impressive processing capabilities, this essay focuses on the exciting prospect of creating GPS-based projects using the same inexpensive GPS chips.
Since thi ...
Introduction
Greetings, and welcome to the next section of our Raspberry Pi 4 tutorials. In the last section, we discovered how to set up and run our self-host bitwarden on our Raspberry Pi. We learned how to set up admin panels and perform a wide range of actions, such as limiting the creation of new accounts and users for security purposes. However, in this guide, we will discover how to configure a PS3 or PS4 joystick with our raspberry pi and set up and run Xbox cloud gaming on our Pi 4.
Components
Raspberry pi 4
SD card
Power supply
Ethernet cable or wifi
Xbox controller
Xbox game pass ultimate subscription
USB keyboard
USB mouse
HDMI cable
Through a service called Xbox Cloud Gaming, users may play a wide variety of games witho ...
Thank you for joining us today for our in-depth Raspberry Pi programming tutorial. The previous guide covered the steps necessary to connect a fingerprint scanner to a Raspberry Pi 4. In addition, we developed a python script to complement the sensor's ability to identify fingerprints. Yet, in this guide, we'll discover how to interface a ws2812 RGB to a Raspberry Pi 4.
Bright, colorful lights are the best, and this tutorial shows you how to set up Fully Configurable WS2812B led strips to run on a Pi 4 computer as quickly and flexibly as possible. In that manner, you can have the ambiance of your home reflect your tastes.
In most cases, when people talk about a "WS2812B Strip," they mean a long piece of extensible PCB with a bunch of different RG ...
Hi Folks! I welcome you on board. Today, I am sharing the 2nd
tutorial in the Raspberry Pi 4 learning series. In this post today,
we’ll cover What is Raspberry Pi 4?
Raspberry Pi 4 Pinout, Specs, Projects, Datasheet etc.
Raspberry
Pi 4 is a tiny dual-display single-board computer, developed by
Raspberry Pi Foundation. This foundation has introduced a series of
Raspberry Pi boards to teach computer basics in schools.
With Raspberry Pi 4, you can control two monitors at once. Moreover, it
is incorporated with a quad-core processor that is powerful and comes
with more speed compared to its predecessors.
I suggest you read this post till the end as I’ll cover Raspberry Pi 4
in detail.
Let’s get started.
What is Raspberry Pi 4?
Raspberry Pi 4
is a dua ...
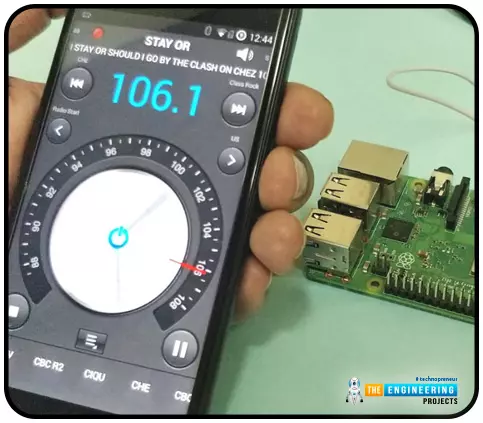
Throughout our lives, we've relied on Radio and tv stations to keep us engaged. While we're on the subject of contradictions, it's also fair to say that these Stations can become tedious at times due to the RJ rambling on about nothing or annoying advertisements, and this may have left you wondering why you can't own a Radio station to broadcast your data over short distances.
Almost any electronics technician uses coils and other hardware to make an FM transmitter, although the tuning process is time-consuming and difficult. Setting up your FM station and going live in your neighborhood shouldn't take more than 30 minutes using an RPi. If you use the right antenna, you must be able to transmit to your school or community within 50 meters. Wow, th ...
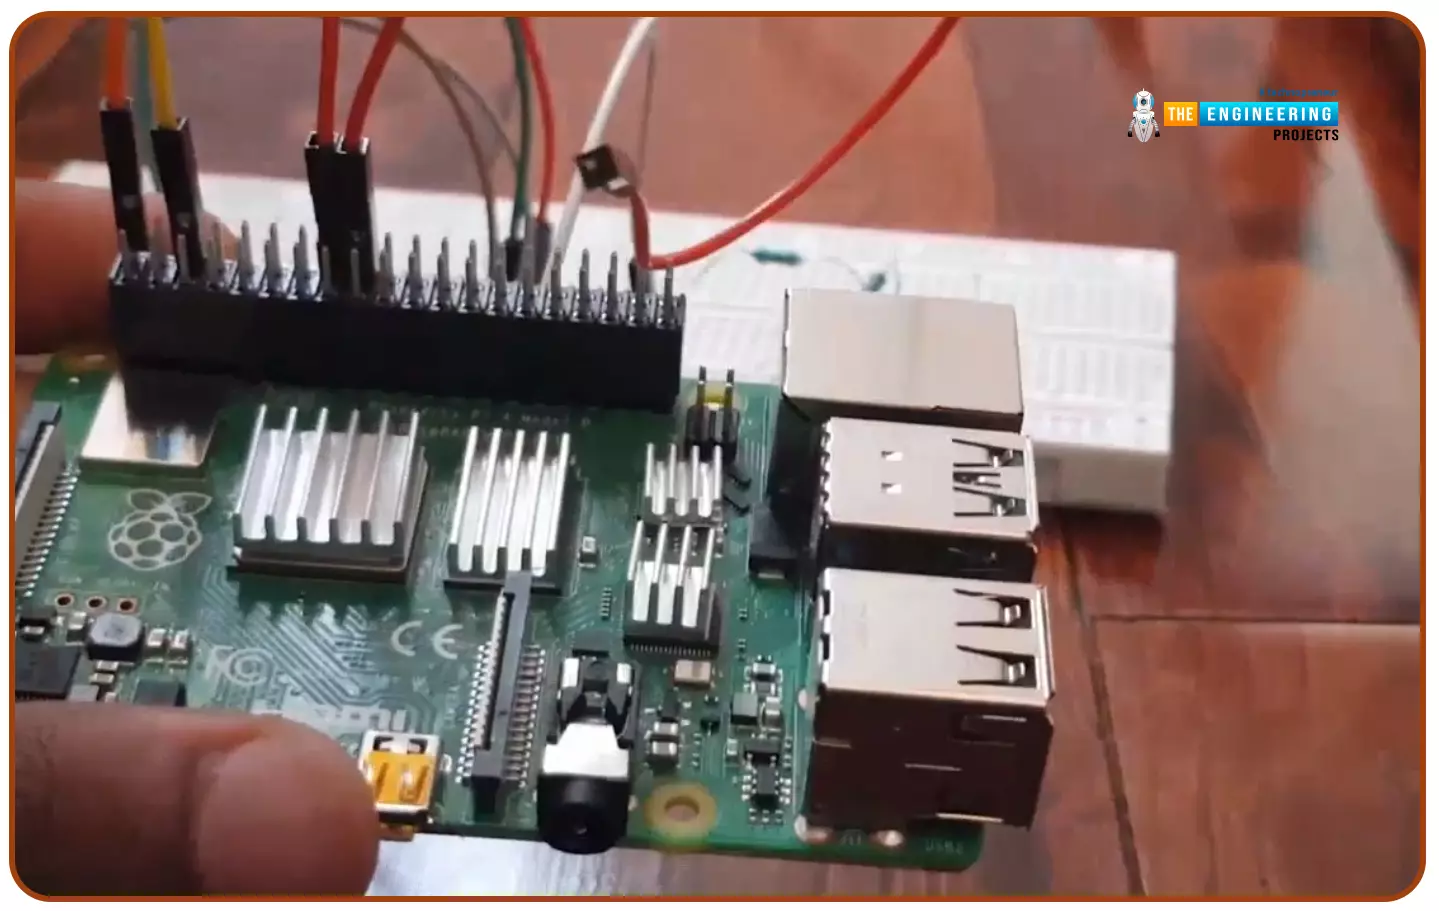
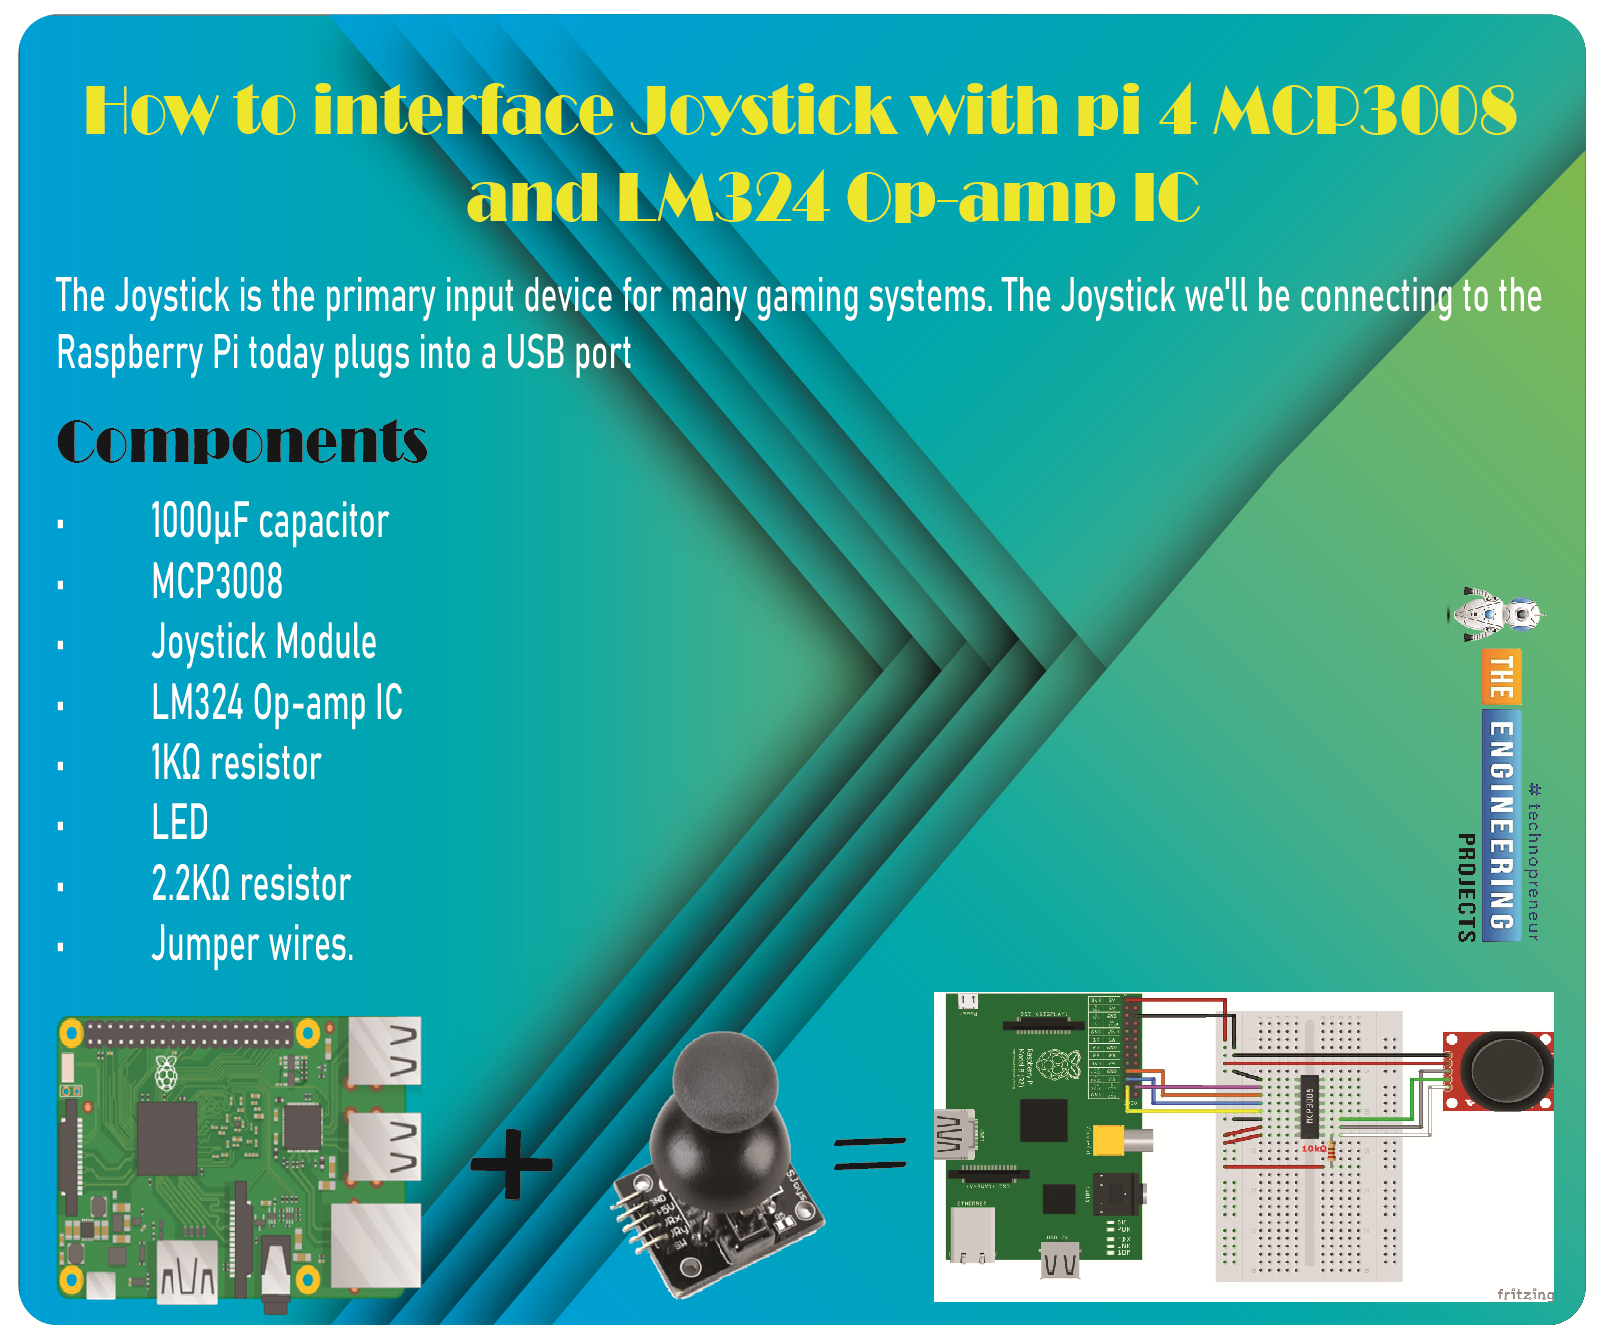
Greetings, and welcome to the next tutorial in our series on programming for the Raspberry Pi 4. The previous tutorial showed us how to connect a 4x4 keypad to a Raspberry Pi 4. In the previous tutorial, we examined the inner workings of the 4-by-4 keyboard; in this one, we'll use the MCP3008 and the LM324 Op-amp IC to connect a joystick to the Raspberry Pi 4. The Joystick is the primary input device for many gaming systems. The Joystick we'll be connecting to the Raspberry Pi today plugs into a USB port, but there are plenty of situations when having access to the Pi's GPIO pins would be useful. We'll review the steps for preparing the circuit for each interface technique and creating a corresponding python script.
So let’s dive in!
Components ...
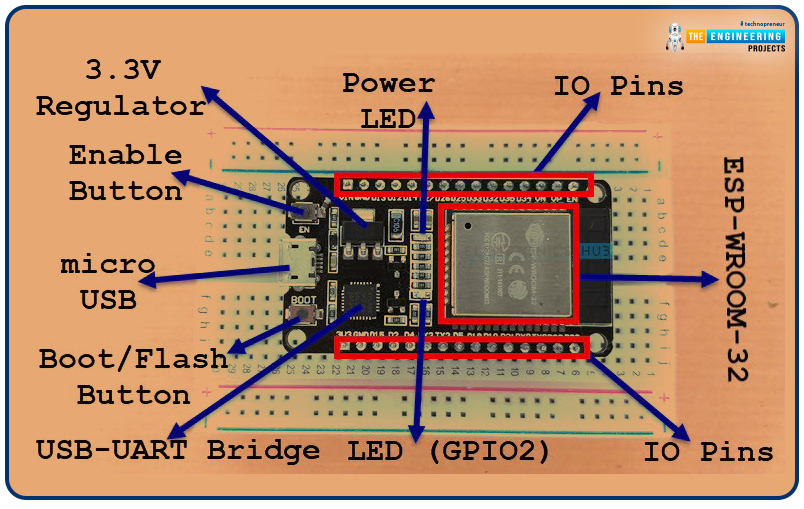
Welcome to the next tutorial of our raspberry pi 4 programming course. A previous article covered connecting a Remote Control Radio Frequency Module (433 MHz) to a Raspberry Pi 4. To turn things on and off wirelessly, we programmed a Raspberry Pi 4 to act as a radio-frequency (RF) remote control. However, this guide will study how to wirelessly pair a Raspberry Pi 4 and an ESP32. After reading this article, you'll get a good grounding in the fundamentals of Bluetooth module operation between two ESP32 and Pi 4 communication.
When it comes to sharing data over short distances using Ultra High-Frequency Radio Waves, Bluetooth is one of the most reliable and effective short-range wireless communication solutions. Since Bluetooth Technology was initially conceived as a cable substitution tech ...
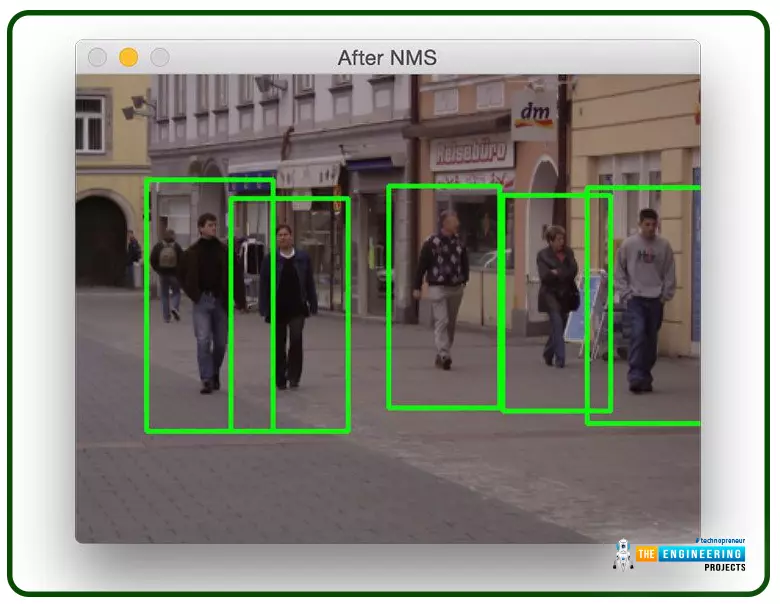
Welcome to the next tutorial on our raspberry pi four python programming. In the previous article, we built a system that recognizes when two people are in physical contact using OpenCV and a Raspberry Pi 4. We used the weights from the YOLO version 3 Object Recognition Algorithm to implement the Deep Neural Networks part. Regarding image processing, the Raspberry Pi consistently comes out on top compared to other controllers. A facial recognition program was among the earlier attempts to use Raspberry Pi for sophisticated picture processing. In today's world of cutting-edge technology, digital image processing has expanded rapidly to become an integral feature of many portable electronic gadgets.
Digital image processing is widely used for such t ...