


Project Files of xG24 Dev Kit Library for Proteus: BLE Parcel Monitor Simulation
 Libraries
 Code
 Projects
 Simulation
6dca0576fe3948e59e9ce0f623f5fb12.zip
xG24 Dev Kit Library for Proteus V1.0
xG24 Dev Kit Library for Proteus V1.0 comes as a ZIP archive of 288 files (3.2 MB, 7.1 MB unpacked) holding Proteus library files, simulation model DLLs, a Proteus simulation, an Arduino sketch, an Arduino library, compiled HEX firmware and source code.
- LIBProteus library
- DLLProteus model
- DSNProteus simulation
- INOArduino sketch
- LIBArduino library
- HEXHEX firmware
- SRCSource code
Description
xG24-Dev-Kit-Library-for-Proteus-v1.0.zip with the Silicon Labs xG24 Dev Kit in Proteus (your sketch with D0 .. D6, A0 .. A4, the RGB LED, BTN0 / BTN1, the sensors through the Arduino sensor libraries, Bluetooth LE to a phone and a serial monitor; TEPXG24DK.LIB, TEPNET.DLL and the TEP Boards for Proteus add-on 1.65.0), the phone library, the parcel monitor demo with its sketch and a README.

File Structure
 File Structure
1.1 KB7.7 KB11 KB8.5 KB1.5 KB1.7 KB1.9 KB5.7 KB4.9 KB1.1 KB5.8 KB9.6 KB7.2 KB2.5 KB2.1 KB1.9 KB2.1 KB4.4 KB1.1 KB3 KB3 KB1.8 KB2.5 KB3.5 KB149 B2.7 KB2 KB6.4 KB3.2 KB1.3 KB963 B8.6 KB5.9 KB6 KB12 KB1.6 KB1.3 KB14.7 KB4.3 KB6.1 KB20.1 KB8.2 KB2 KB4.5 KB311 B12.8 KB6.7 KB6.1 KB2.2 KB3.4 KB5.9 KB1.5 KB1.6 KB16.6 KB9.7 KB6.9 KB2.1 KB533 B5.7 KB7.4 KB514 B1.7 KB896 B481 B1.4 KB1012 B482 B936 B559 B467 B3.6 KB3.8 KB504 B956 B575 B455 B8.3 KB10.9 KB522 B79 B5.5 KB3.1 KB79 B442 B918 B1.4 KB1.8 KB1 KB1.3 KB1.4 KB1.8 KB1.4 KB5.7 KB502 B463 B5 KB6.5 KB3.4 KB3.4 KB500 B1.6 KB368 B406 B466 B404 B444 B460 B477 B739 B448 B1.3 KB350 B5.7 KB4 KB562 B1.5 KB2 KB550 B7.2 KB4.1 KB371 B4.5 KB3.5 KB492 B390 B478 B6.6 KB2.4 KB479 B5.1 KB1.9 KB1.3 KB1.3 KB750 B1.3 KB490 B2.2 KB1.9 KB498 B1.2 KB1.2 KB487 B5.1 KB4.6 KB371 B1.5 KB1.2 KB478 B6.2 KB3 KB1.5 KB1.7 KB469 B1 KB1.7 KB433 B294 B358 B1.3 KB2.5 KB13.2 KB3.8 KB659 B510 B4.4 KB1.9 KB5.8 KB11 KB835 B518 B6.4 KB2.3 KB29 B436 B9.2 KB4.9 KB439 B4.2 KB1.5 KB9.3 KB7.1 KB4.7 KB2.4 KB388 B5.1 KB893 B667 B1.3 KB5.5 KB2.3 KB1.8 KB468 B882 B530 B791 B487 B894 B2 KB730 B646 B2.6 KB977 B702 B20.6 KB1.8 KB11.8 KB3.2 KB596 B406 B6.3 KB5.7 KB9.3 KB7.7 KB7.7 KB5.8 KB5.9 KB6.4 KB6.4 KB5.3 KB5.6 KB5.7 KB7.9 KB7.7 KB6.5 KB6.3 KB6.2 KB10.3 KB8.5 KB6.6 KB7.6 KB6.7 KB6.1 KB6.7 KB8.3 KB6.2 KB7.2 KB5.9 KB5.6 KB5.7 KB6.7 KB5.9 KB6.2 KB6 KB6 KB6.1 KB6.3 KB6 KB6.1 KB6.2 KB6 KB5.8 KB6.4 KB6.4 KB6.9 KB6 KB6.8 KB7 KB6.5 KB6.6 KB6.5 KB5.6 KB7.5 KB3.8 KB7.7 KB7.1 KB5.8 KB5.9 KB5.9 KB6.9 KB5.7 KB5.5 KB5.5 KB7.1 KB5.2 KB31.7 KB25.9 KB1.3 KB8.5 KB35.1 KB8 KB39.5 KB13.1 KB28.7 KB2.9 MB2.9 MB16.6 KB47.8 KB12.3 KBGallery12 images from the tutorialOpen the tutorial
 Gallery12 images from the tutorial
The circuit, the board and the results as they appear in xG24 Dev Kit Library for Proteus: BLE Parcel Monitor Simulation. Open an image for its full size.
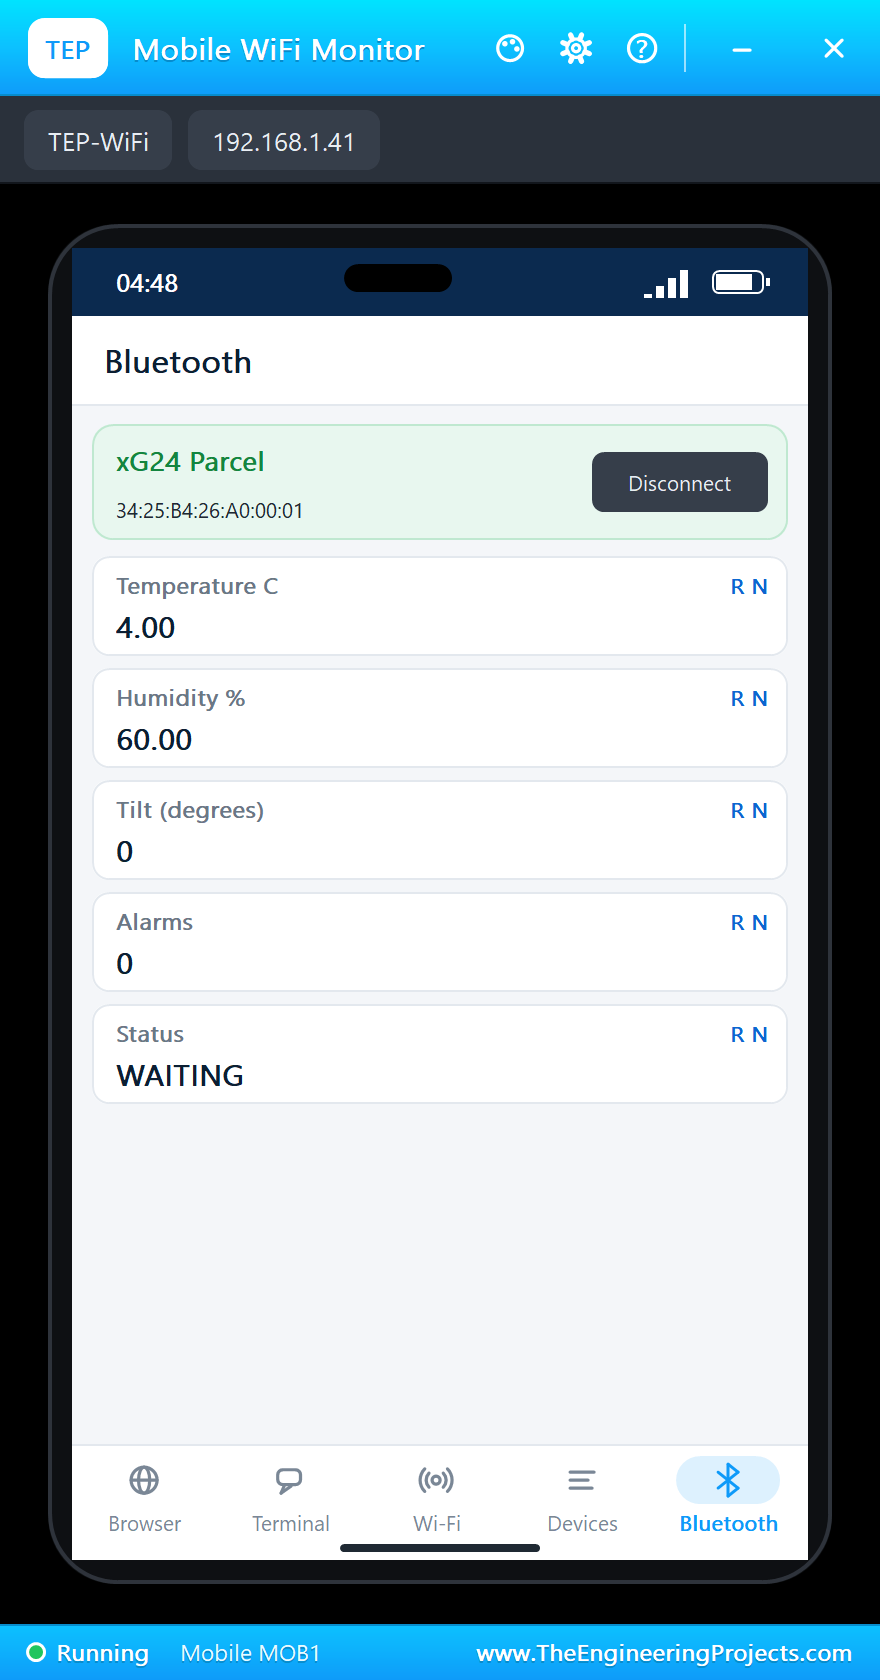
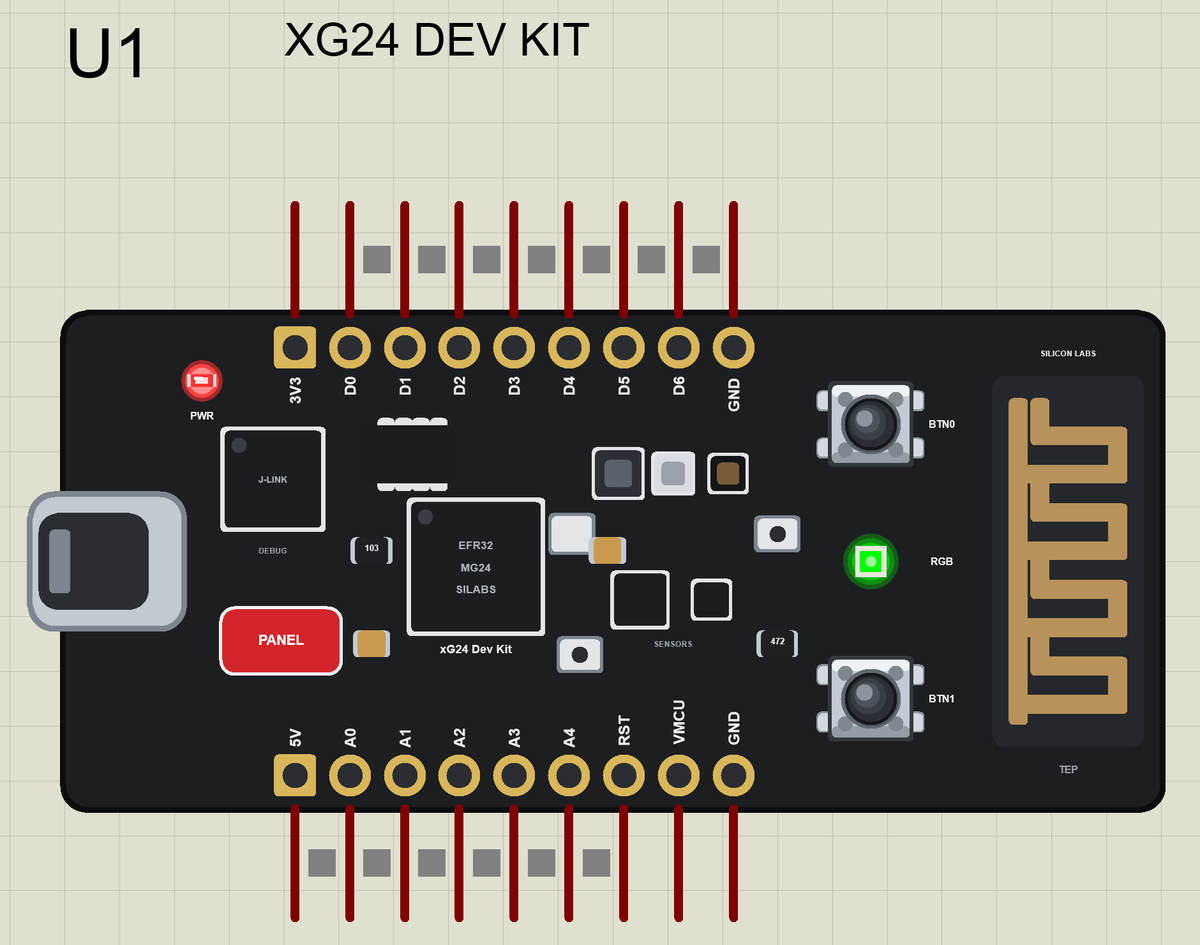
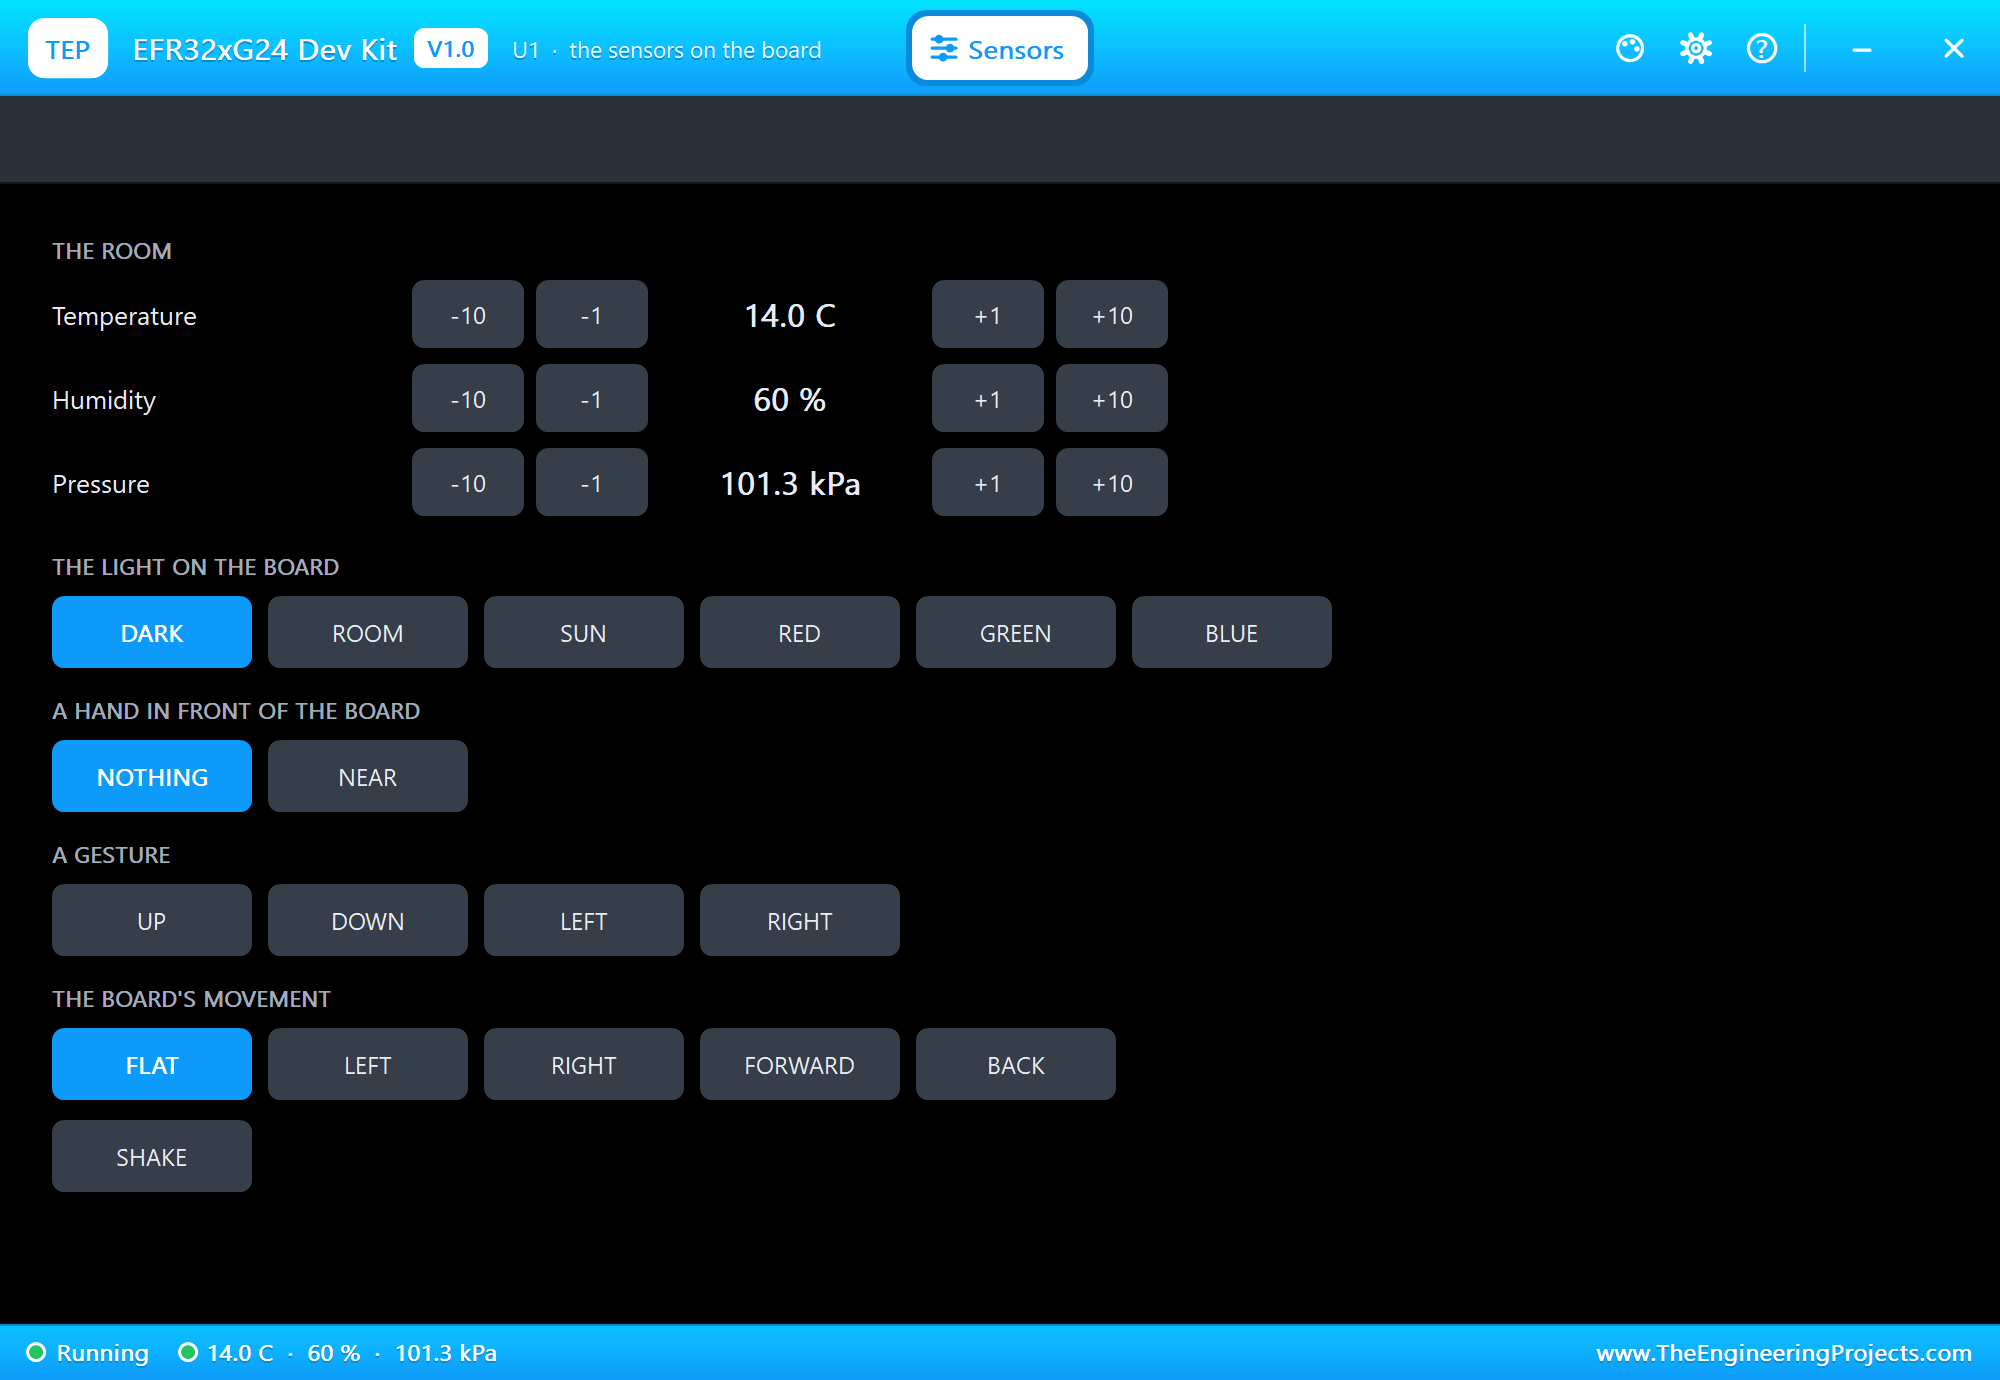
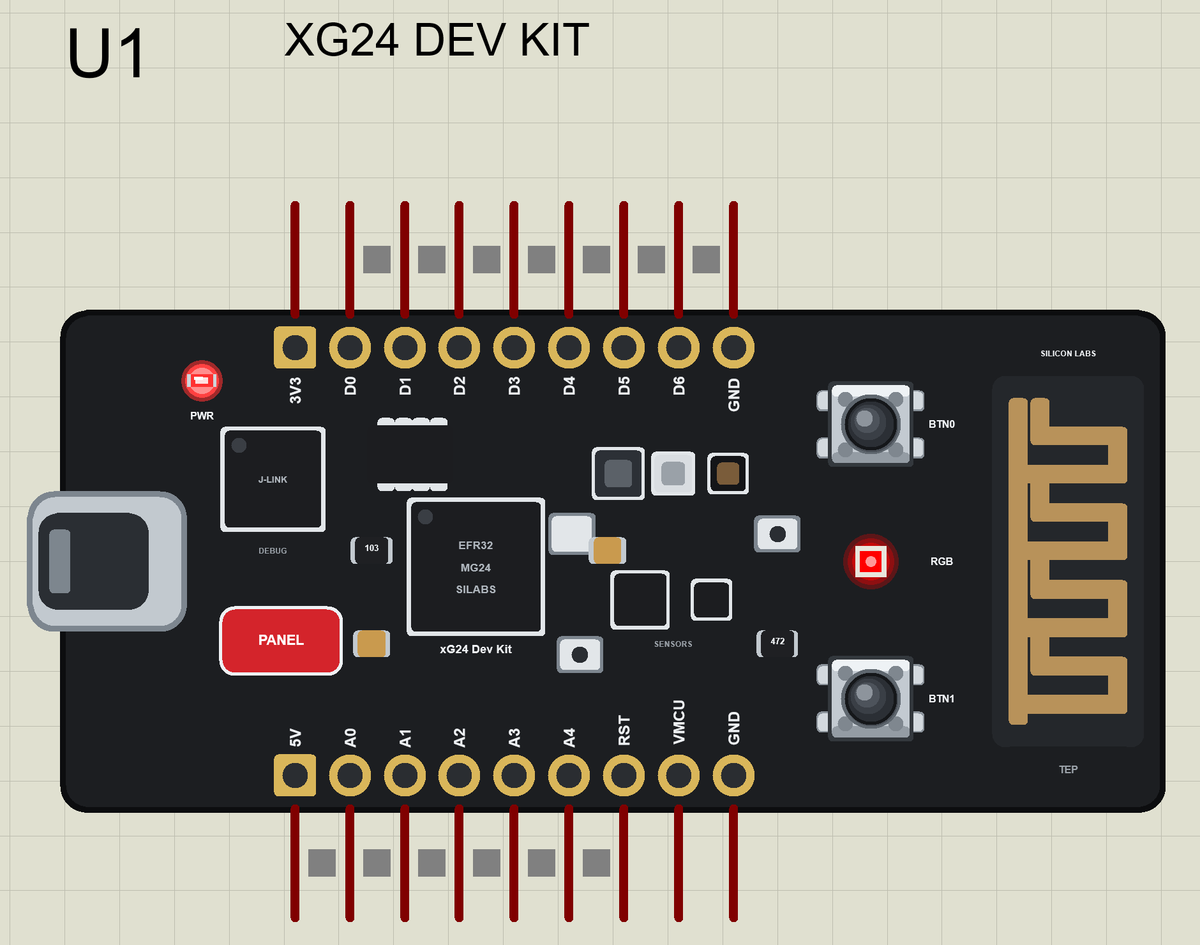
README
 README
XG24 DEV KIT LIBRARY FOR PROTEUS - V1.0 (YOUR ARDUINO SKETCH, BLUETOOTH LE, THE SENSORS, THE RGB LED AND TWO BUTTONS)
Designed by The Engineering Projects
www.TheEngineeringProjects.com

IMPORTANT LINKS
Article (read it first - pictures, step by step, every feature explained):
  https://www.theengineeringprojects.com/2026/11/xg24-dev-kit-library-for-proteus.html
Report a bug or suggest a feature (our forum):
  https://www.theengineeringprojects.com/forum
The demo's phone is our Mobile WiFi Monitor (included) - its article:
  https://www.theengineeringprojects.com/2026/10/mobile-wifi-monitor-library-for-proteus.html
Support us (the libraries are free):
  https://www.theengineeringprojects.com/donate

FILE STRUCTURE
xG24-Dev-Kit-TEP-v1.0/
|-- Proteus Library Files/
|   |-- TEPLAPTOP.LIB                                    39.5 KB   the laptop (demo), to LIBRARY
|   |-- TEPMOBILE.LIB                                    13.1 KB   the phone (demo), to LIBRARY
|   |-- TEPXG24DK.LIB                                    28.7 KB   the xG24 Dev Kit, to LIBRARY
|-- Proteus Model Files/
|   |-- TEPNET.DLL                                       2.91 MB   the board + monitors + network, to MODELS
|-- Arduino Code/
|   |-- xG24_Parcel_Monitor/xG24_Parcel_Monitor.ino       8.0 KB   the demo sketch
|   |-- TEP Boards for Proteus/hardware/                 1.14 MB   the Arduino IDE add-on 1.65.0 (279 files)
|-- Proteus Simulation/
|   |-- TEPNET.DLL                                       2.91 MB   copy of the model
|   |-- xG24_Parcel_Monitor.hex                          47.8 KB   the demo sketch (U1)
|   |-- xG24-BLE-Parcel-Monitor.pdsprj                   16.6 KB   the demo: a Bluetooth LE cold-chain parcel monitor
|-- README.txt                                          ~12.1 KB   this file
Total: 7.13 MB (unzipped). The source code of the models is not included.

WHAT IS IT?
Proteus 8 has no EFR32MG24 model and no model of the kit's sensors, so this is NOT a real EFR32MG24. Our team has put a
lot of effort into building this board ourselves: it is Silicon Labs' EFR32xG24 Dev Kit (xG24-DK2601B, board BRD2601B) -
the small black board with the EFR32MG24 wireless SoC (an Arm Cortex-M33 with 1536 kB of flash, 256 kB of RAM and an
AI/ML accelerator; Bluetooth LE, Thread, Zigbee and Matter), the on-board J-Link debugger with its USB-C port, the
sensors (temperature and humidity, pressure, ambient light, a 6-axis IMU, a Hall-effect sensor, two microphones), an RGB
LED, two push buttons and the printed 2.4 GHz antenna - drawn compact, and it runs YOUR Arduino sketch in Proteus:
  * You write a normal sketch with the pin names of the Silicon Labs Arduino core (D0 .. D6, A0 .. A4, LEDR / LEDG /
    LEDB, BTN0 / BTN1) and compile it in the Arduino IDE with our board package "TEP Boards for Proteus" 1.65.0 (in
    Arduino Code - see INSTALLATION).
  * The sensors work through the board package's sensor libraries: Arduino_HS300x (temperature and humidity),
    Arduino_LPS22HB (air pressure), Arduino_APDS9960 (light) and Arduino_BMI270_BMM150 (acceleration, rotation, magnetic
    field). On the real kit these are the Si7021, the BMP384, the VEML6035 and the ICM-20689; the simulation answers the
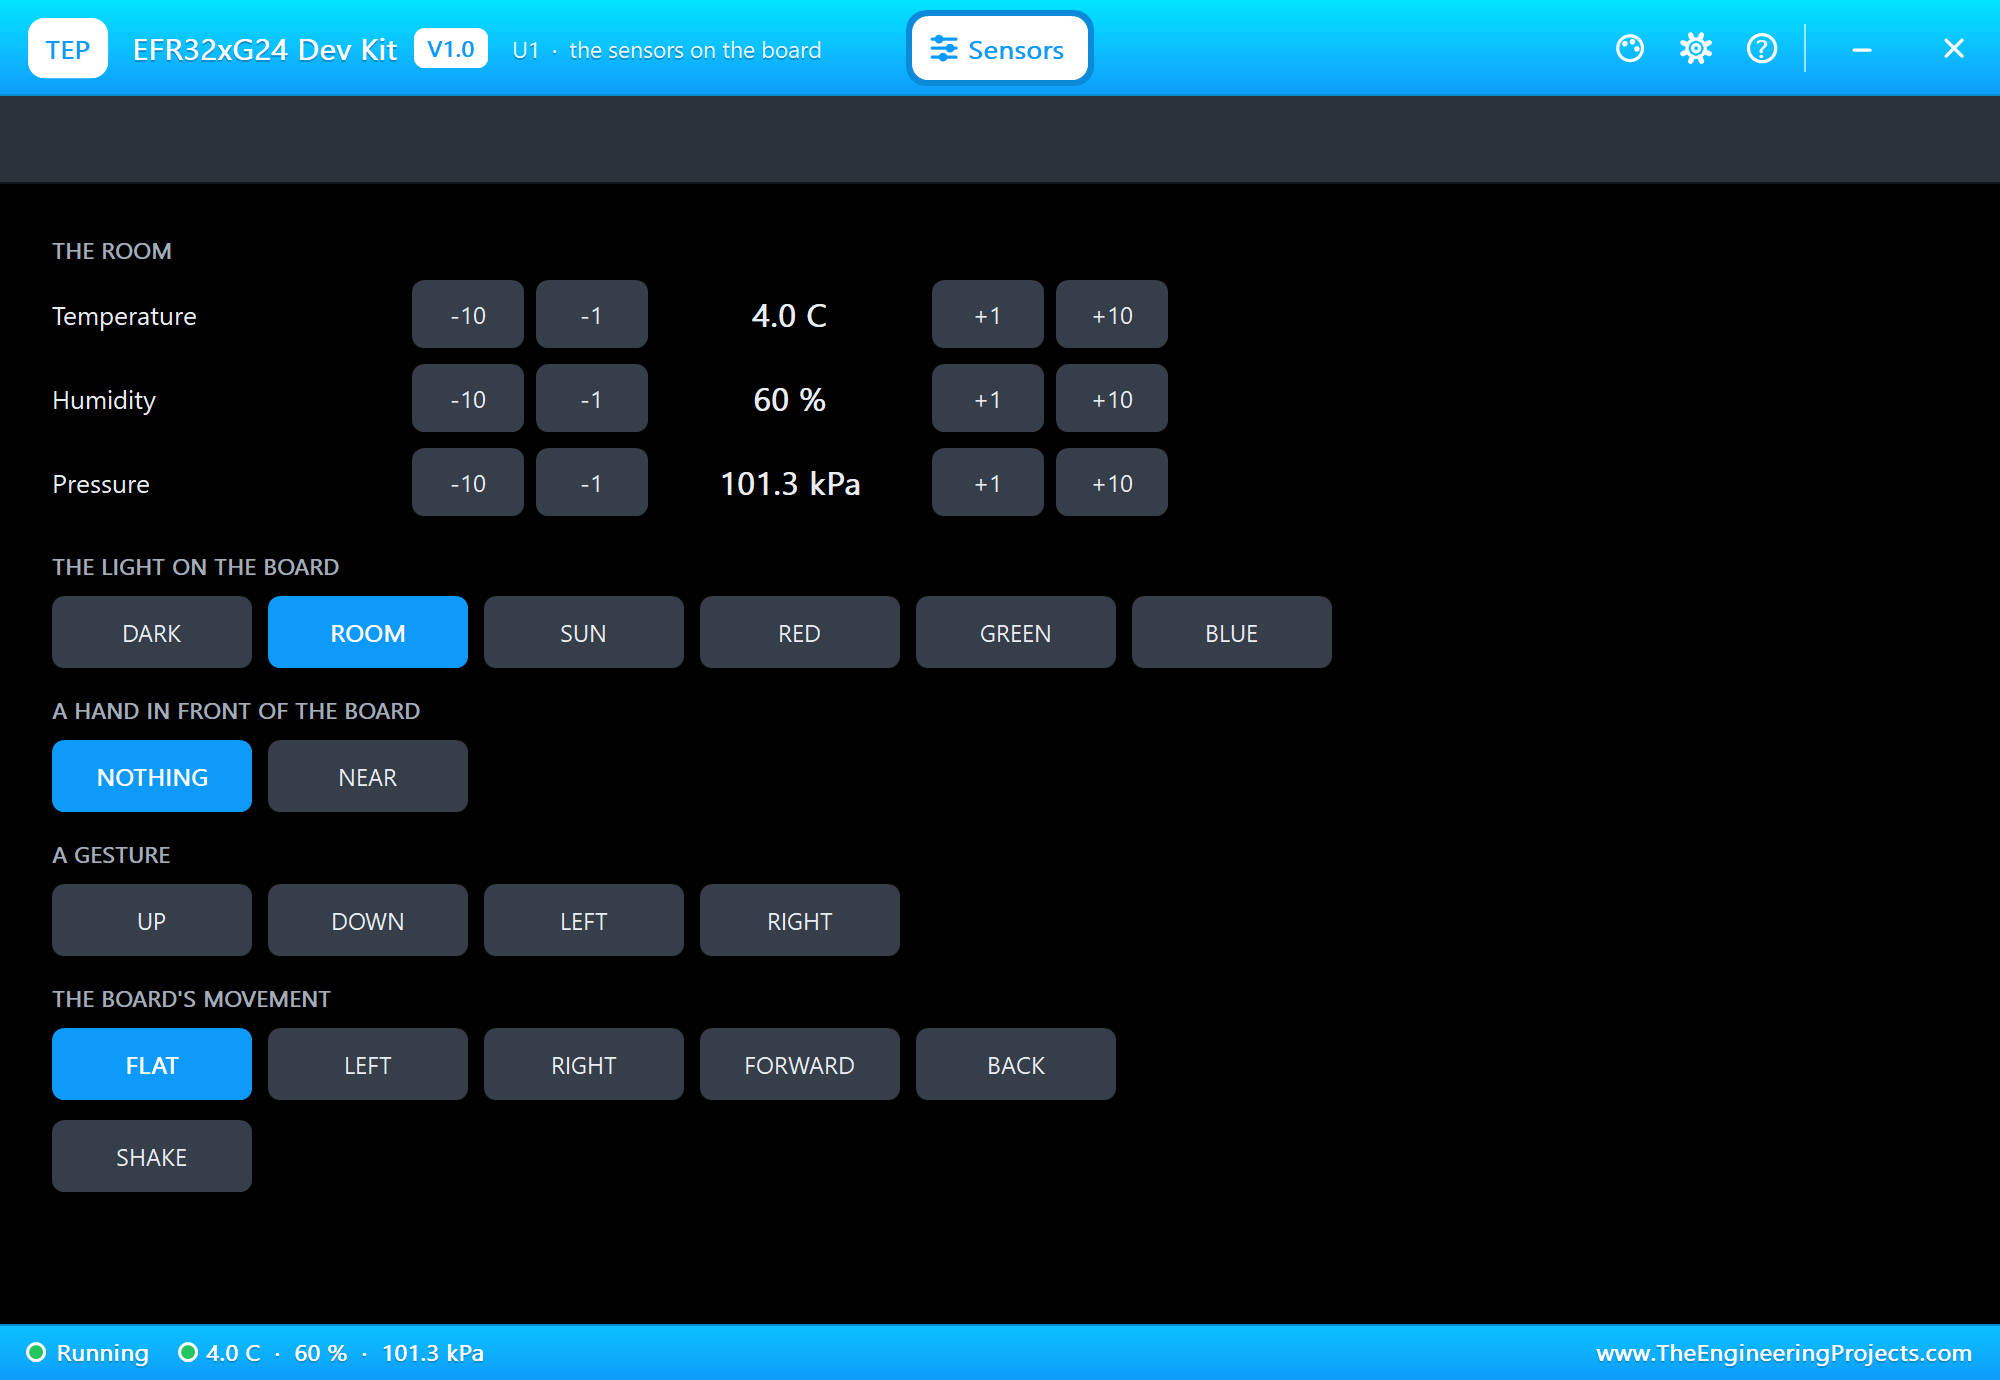
    same calls. The board's Sensors window (the PANEL pad) sets what they read: the temperature, the humidity, the
    pressure, the light, a tilt and a SHAKE.
  * Bluetooth LE works through ArduinoBLE (the board as a peripheral, the phone of our Mobile WiFi Monitor as the
    central: it scans, connects, reads, writes and gets notifications).
  * LEDR / LEDG / LEDB are the RGB LED, lit when LOW, as on the real kit (LED_BUILTIN is LEDR). BTN0 / BTN1 read LOW
    while you hold them: click a button on the board in the running simulation.
TEP additions: the USB-C port opens the serial monitor (the same window as our TEP Serial Monitor Advance).
Limits (say them before you start): Bluetooth LE: the board is a peripheral only; Thread, Zigbee and Matter are not
modelled. The Hall-effect sensor, the microphones, the AI/ML accelerator, the SPI flash and the coin-cell power are
drawn, not modelled. Your sketch gets 8 KB of RAM in the simulation (the real one: 256 KB), about 256 KB of flash, and
int is 16 bits in the simulation (use long for big numbers). See MODEL SCOPE AND LIMITS.

ONE DEVICE (search "XG24" in Pick Devices):
  XG24 DEV KIT  "xG24 Dev Kit" V1.0 (Microprocessor ICs > Bluetooth Boards), prefix U, model TEPNET.DLL.
  Its TEP windows have no Windows title bar: the serial monitor (the USB-C port, 115200 baud: Monitor, Plotter and
  Board tabs) and the Sensors window (the PANEL pad).
The same TEPNET.DLL also runs our other sketch boards and the phone; it replaces any older TEPNET.DLL (keep only this
newest one in MODELS).

TEST STATUS
V1.0: verified in Proteus 8.5 on 17 Nov 2026 with the demo project as shipped. What the Proteus run showed:
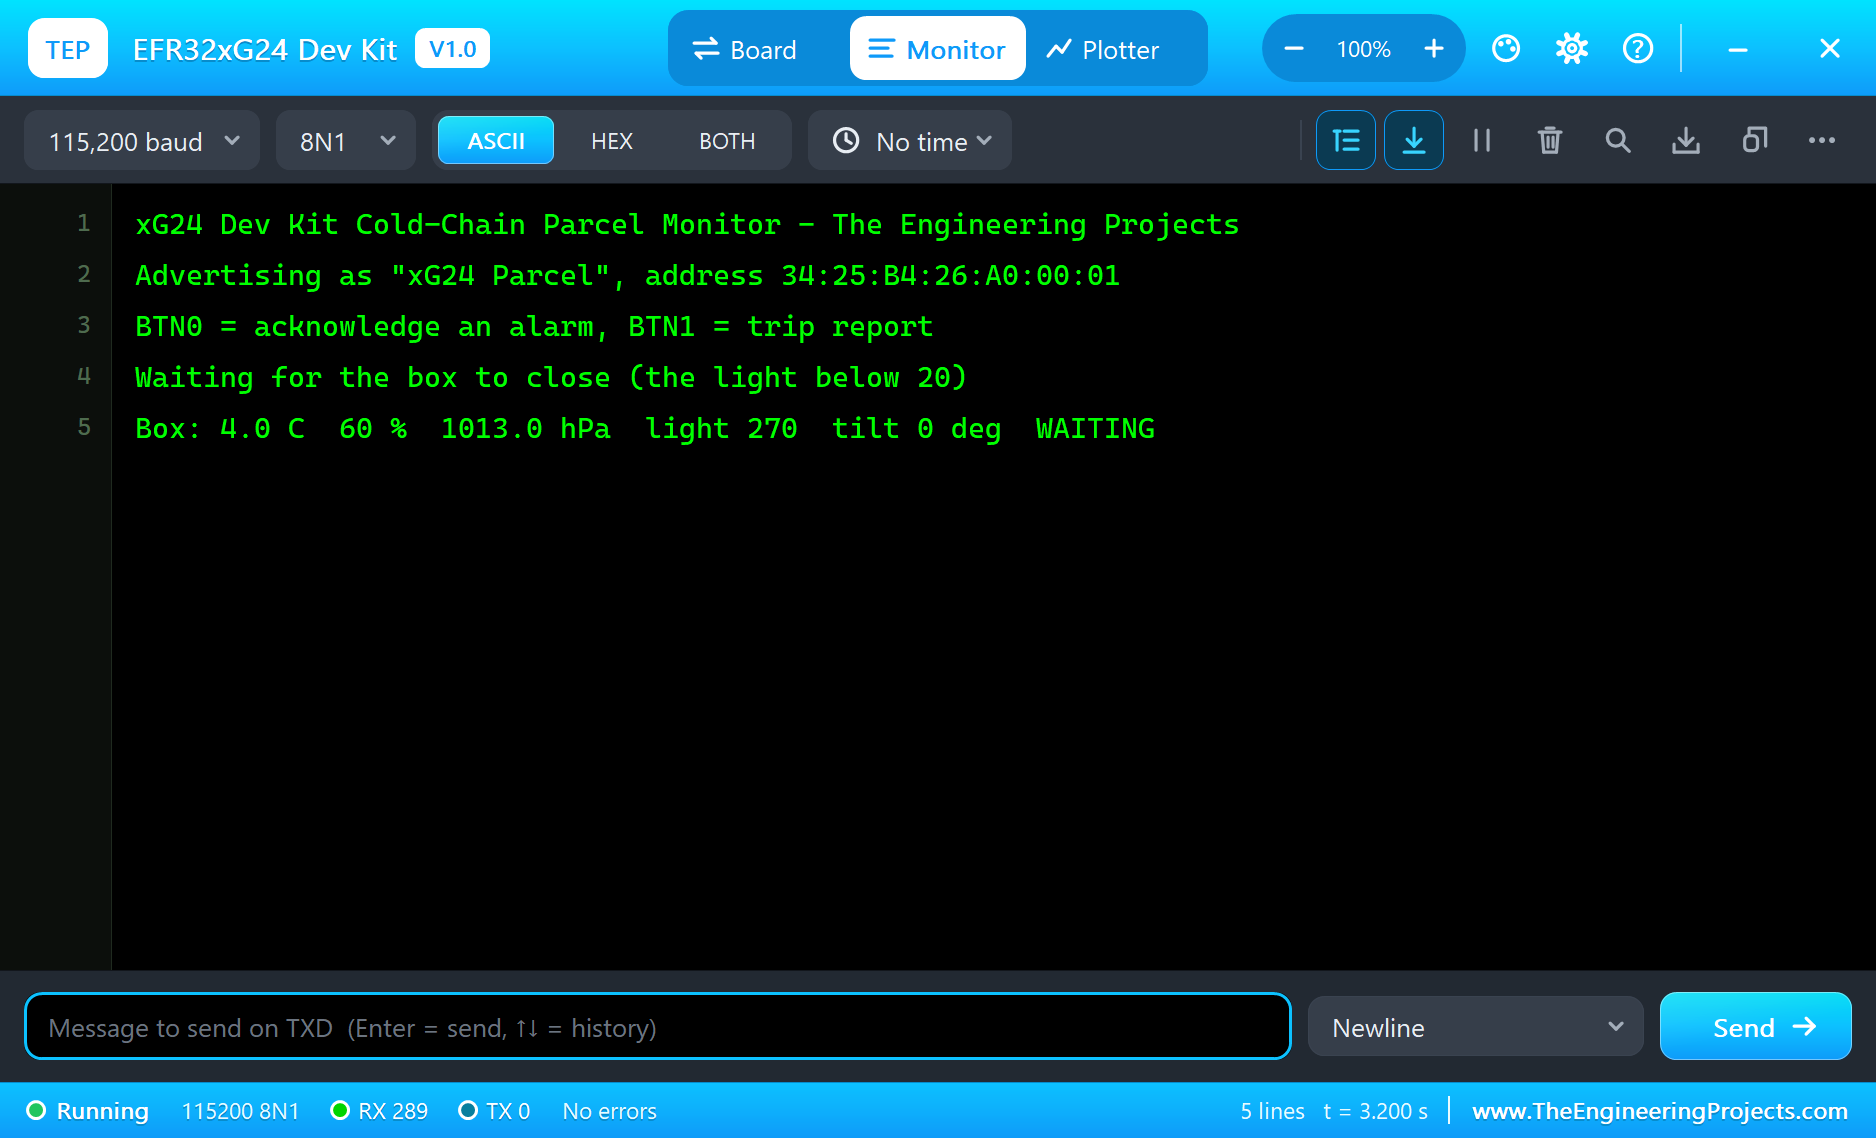
* xG24-BLE-Parcel-Monitor: "Advertising as "xG24 Parcel"", "Waiting for the box to close (the light below 20)", the RGB
  LED blue; a "Box:" line every 5 s (4.0 C, 60 %, 1013.0 hPa).
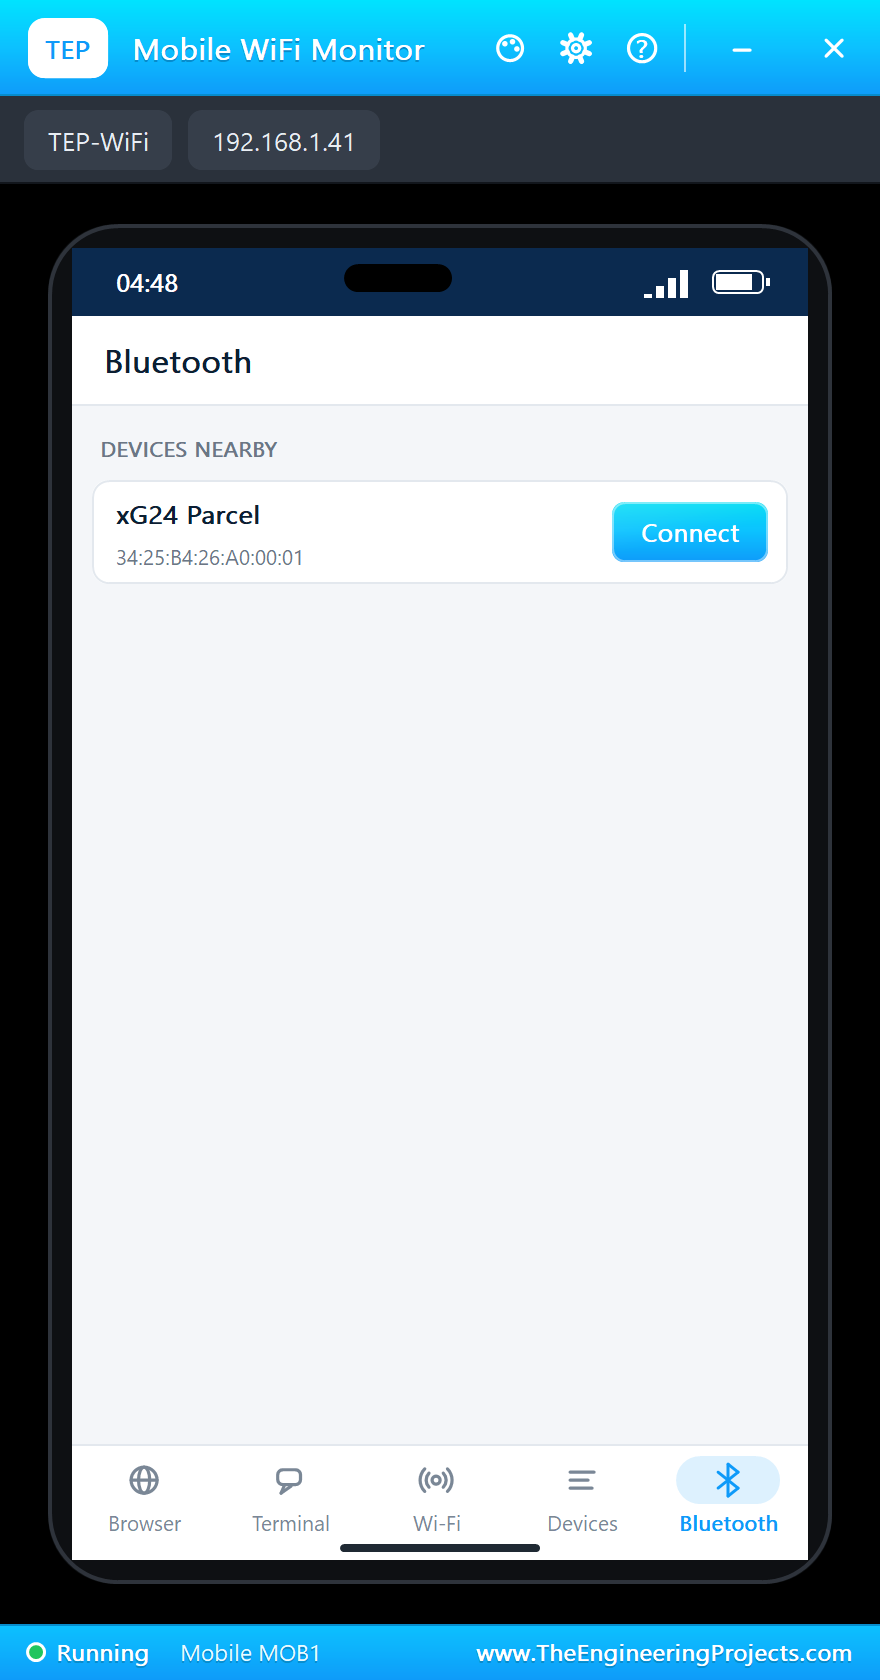
* The phone's Bluetooth app: SCAN found "xG24 Parcel", Connect: ">> Phone connected", the five values with their names.
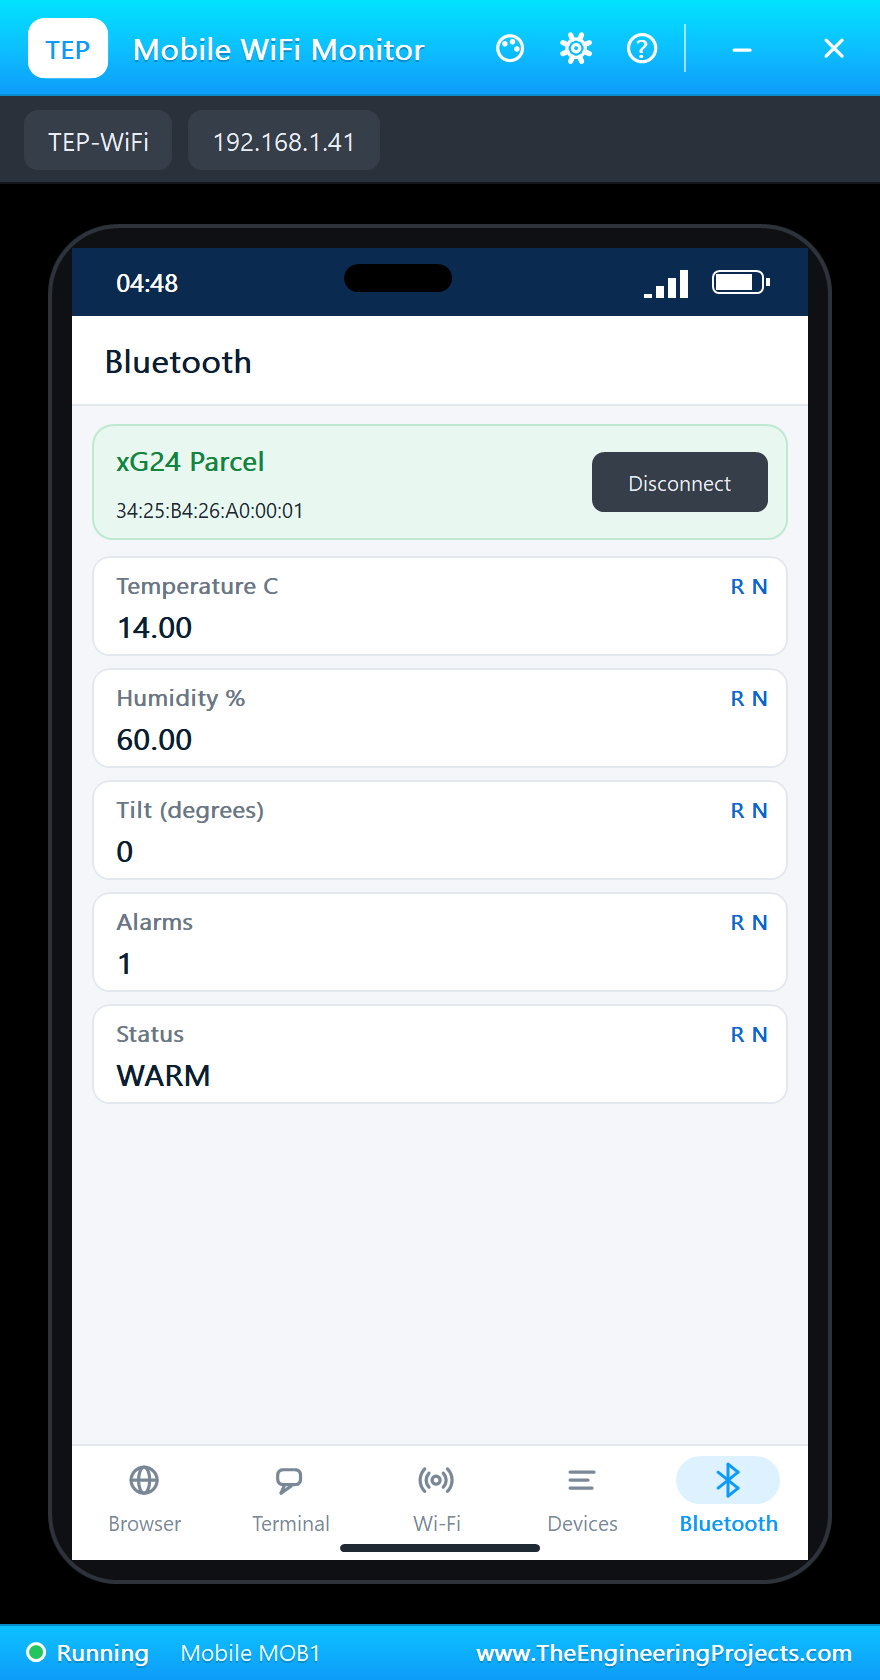
* The Sensors window, DARK: ">> Box closed - monitoring armed", green; temperature +10: "ALARM: WARM (14.0 C)", red, the
  phone showed WARM; BTN0: "alarm acknowledged (still not good)", yellow; -10: "Back to normal", green.
* LEFT: "ALARM: TIPPED (45 deg)"; FLAT: "Back to normal"; SHAKE: "ALARM: SHOCK (2.08 g)"; BTN0: "alarm acknowledged",
  green; ROOM light: "ALARM: BOX OPENED (light 270)", red; BTN1: "Trip report: min 4.0 C, max 14.0 C, alarms 4,
  shocks 1".
* about 82 s of simulation, no errors, with the Sensors window, the phone and the monitor open.

INSTALLATION (about 3 minutes)
1. Close Proteus. Extract the WHOLE ZIP to a normal folder (e.g. Desktop).
2. Copy everything in "Proteus Library Files" to the LIBRARY folder of Proteus, for example:
     C:\Program Files (x86)\Labcenter Electronics\Proteus 8 Professional\LIBRARY
   (on some PCs: C:\ProgramData\Labcenter Electronics\Proteus 8 Professional\LIBRARY). TEPXG24DK.LIB is the board;
   TEPMOBILE.LIB and TEPLAPTOP.LIB are the phone and the laptop.
3. Copy TEPNET.DLL from "Proteus Model Files" to the MODELS folder (...\Proteus 8 Professional\MODELS) - replace an
   older TEPNET.DLL (this one is the first that knows this board).
4. Delete TEPXG24DK.IDX from the LIBRARY folder if it is there.
5. The Arduino IDE (only to compile your own sketches - the demo has its HEX file): copy the folder
   "Arduino Code\TEP Boards for Proteus\hardware" into your sketchbook folder (normally Documents\Arduino), so that
   Documents\Arduino\hardware\tep\avr\boards.txt exists (replace an older copy); restart the IDE. The Arduino AVR Boards
   platform must be installed (it comes with IDE 1.8.x; in IDE 2.x install "Arduino AVR Boards" from the Boards
   Manager once).
   Tools > Board > TEP Boards for Proteus > Silicon Labs xG24 Dev Kit (TEP Proteus). ArduinoBLE and the four sensor
   libraries are in the board package: nothing to install.
6. Start Proteus. In Pick Devices (P) search "XG24".

RUN THE DEMO
Keep the .hex file and TEPNET.DLL beside the project in "Proteus Simulation".
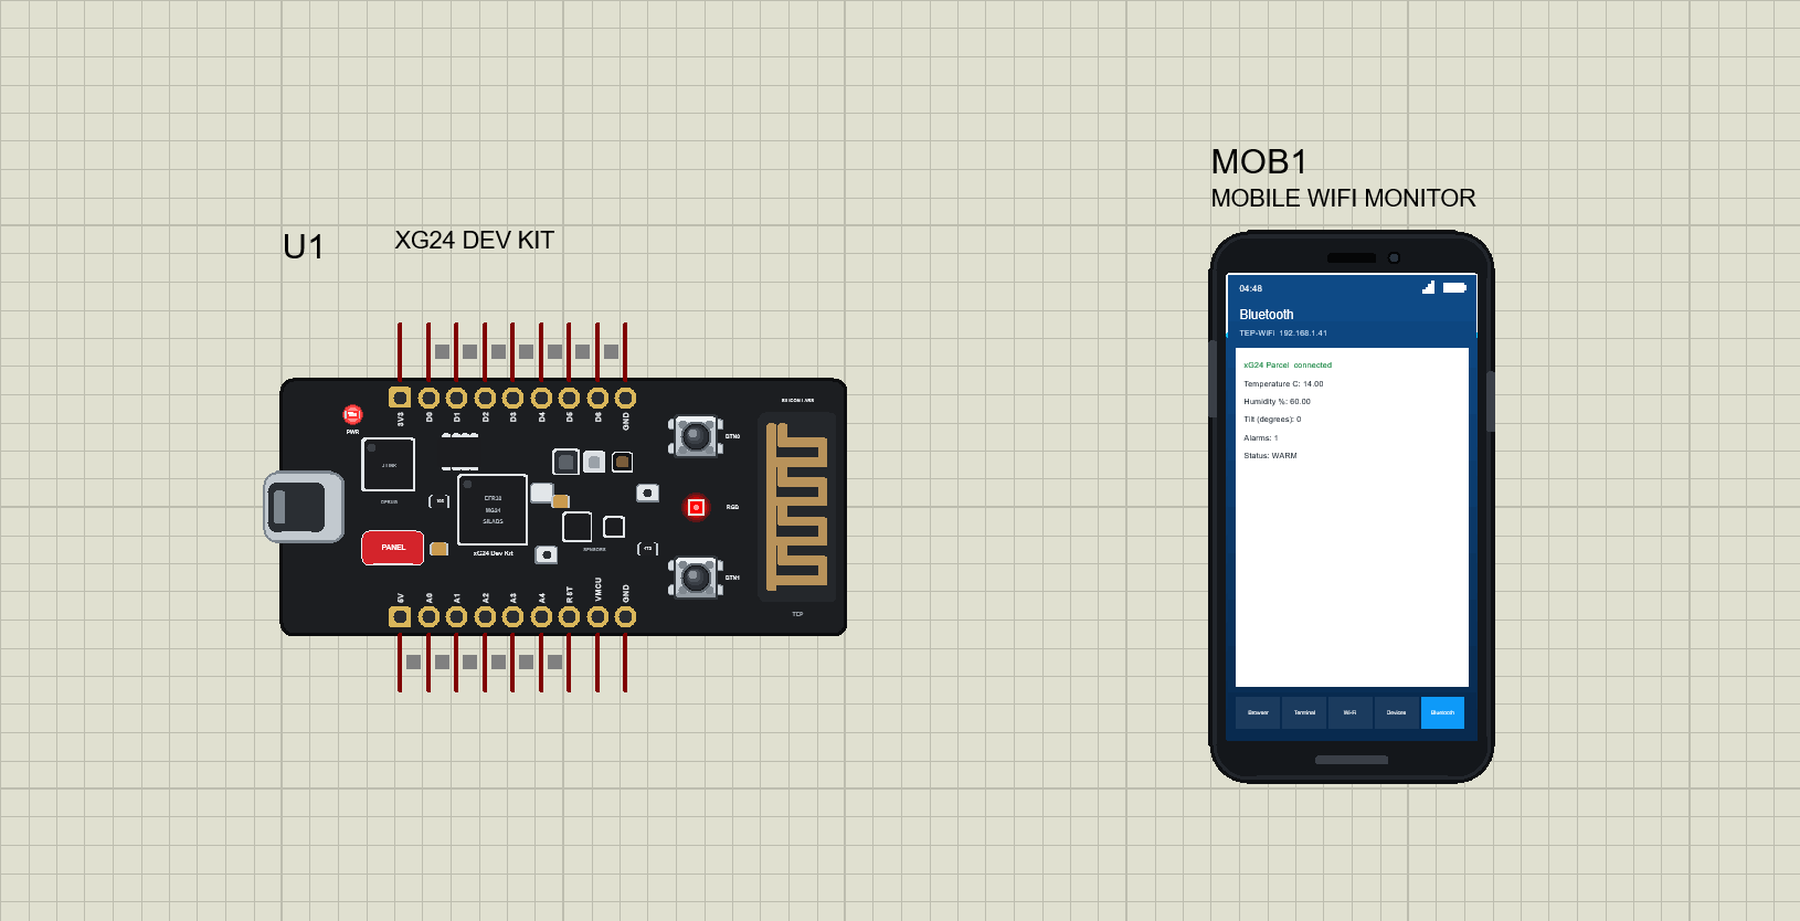
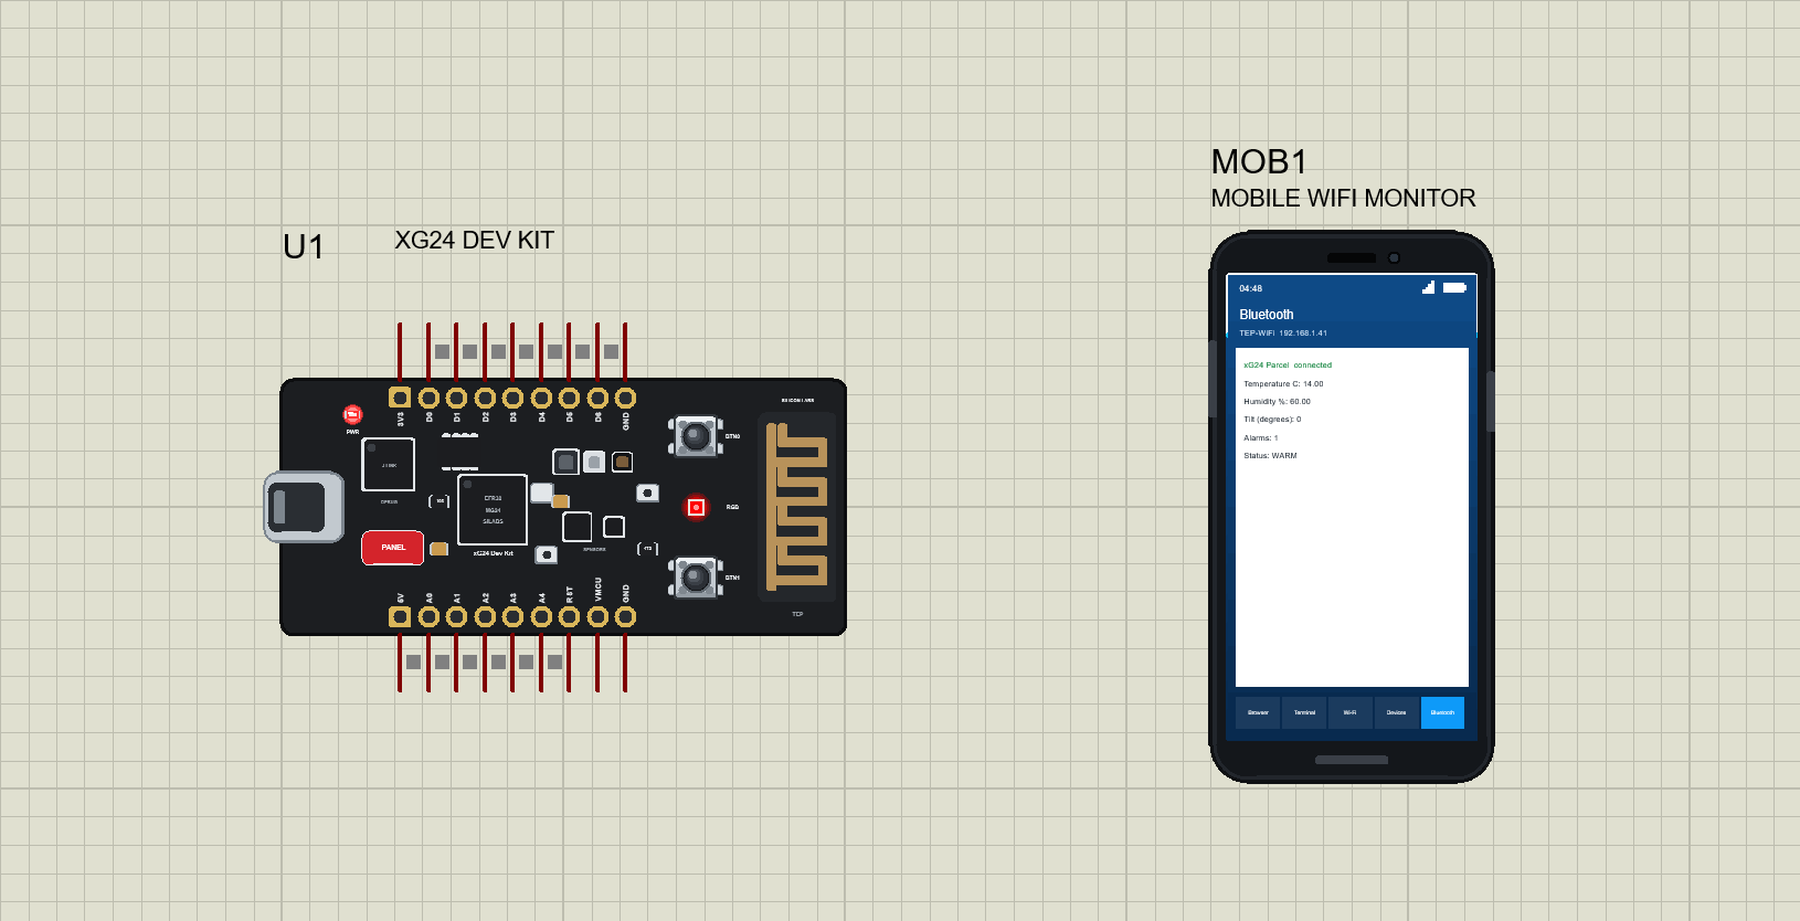
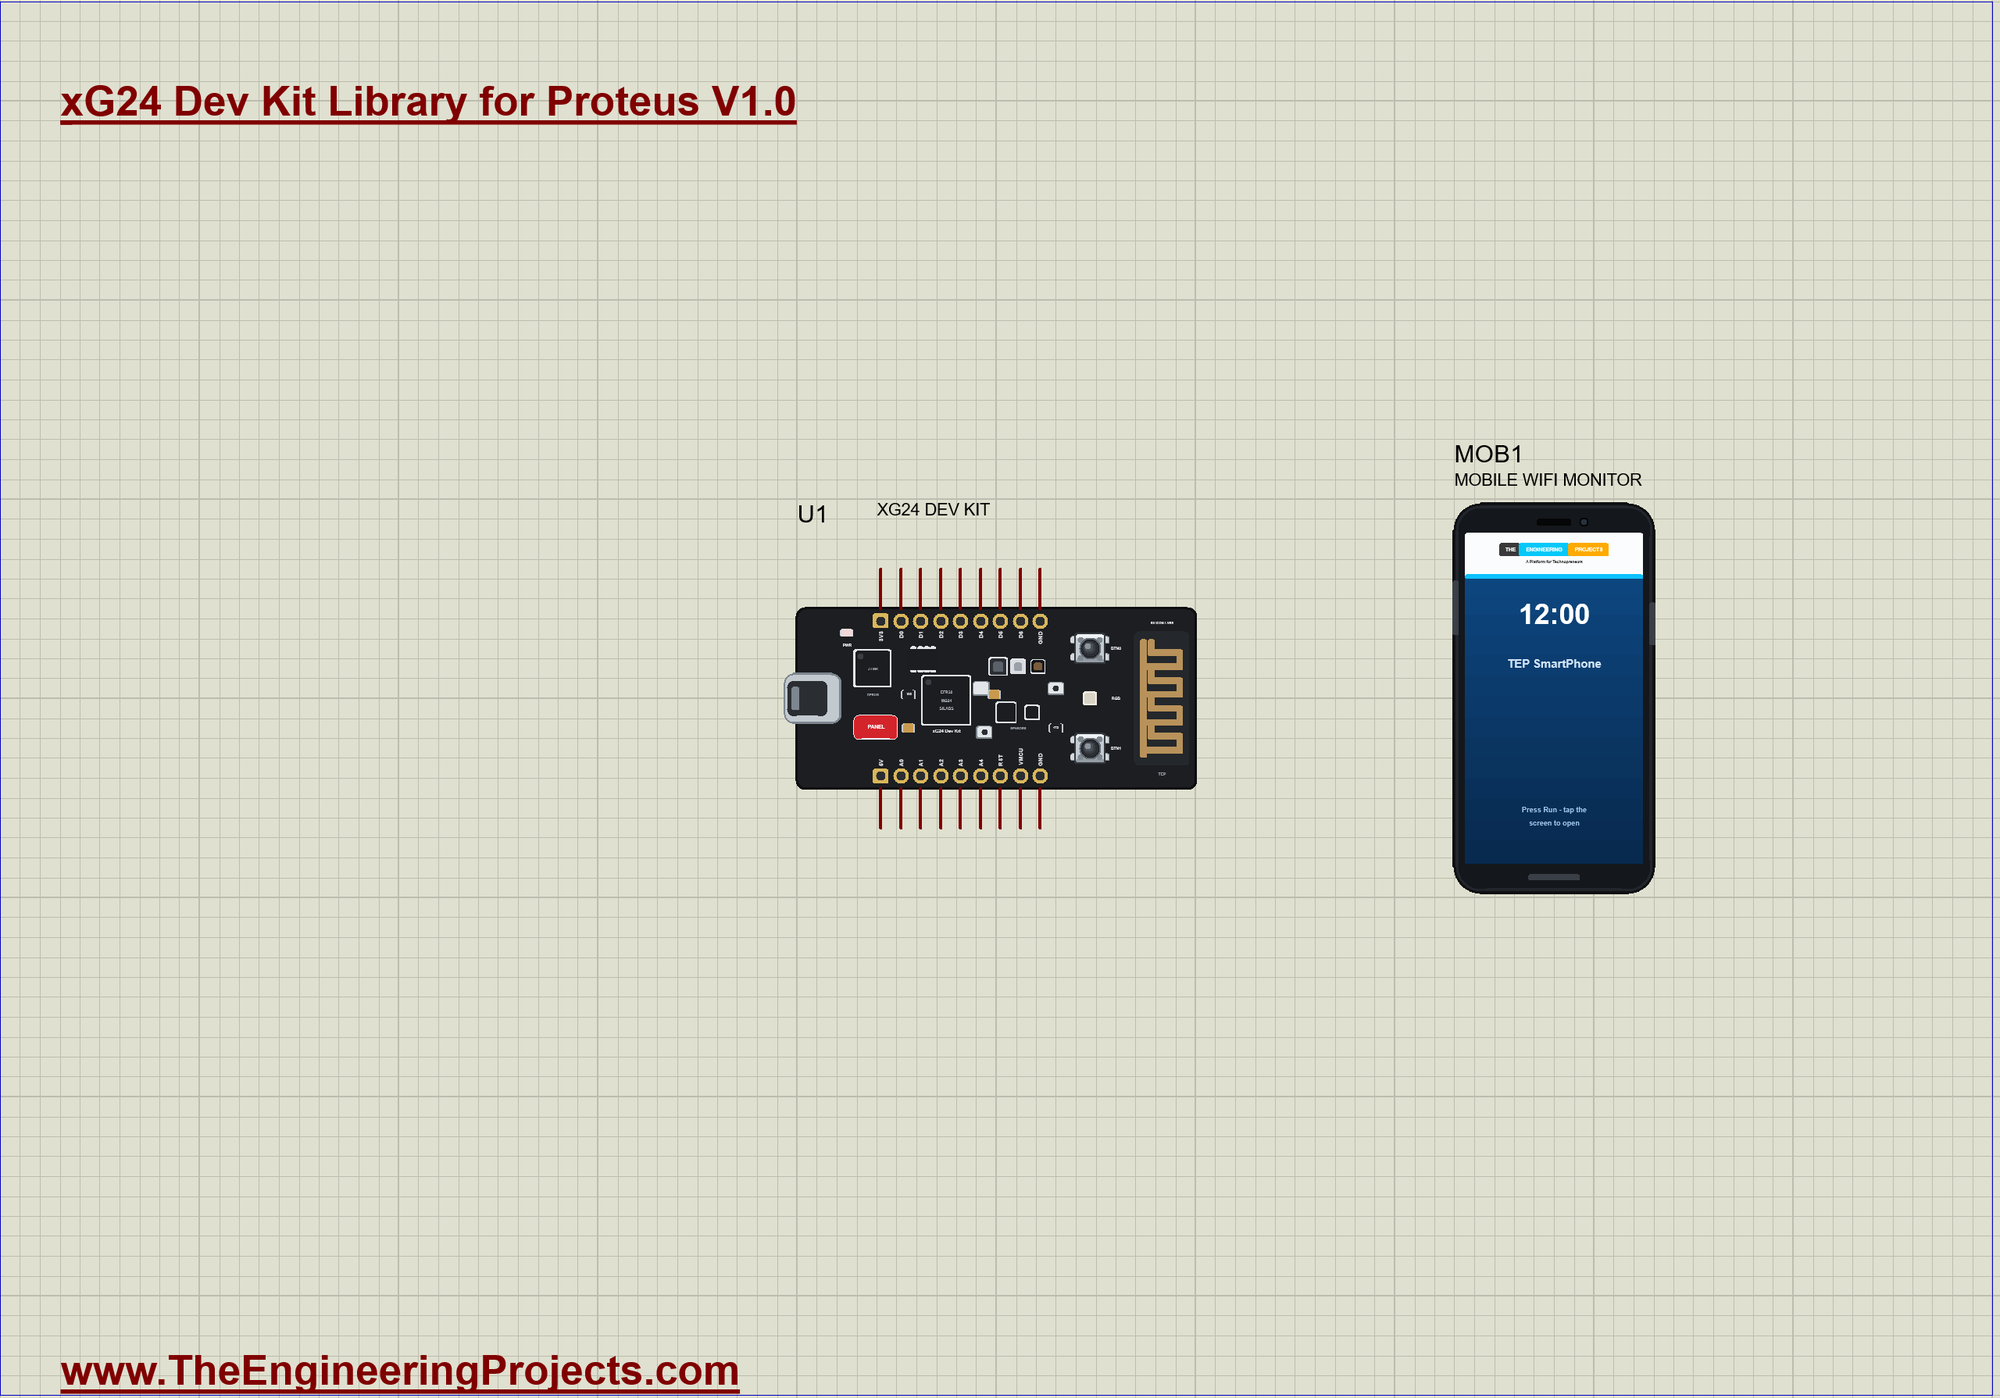
xG24-BLE-Parcel-Monitor.pdsprj - U1 the xG24 Dev Kit (xG24_Parcel_Monitor.hex) is a cold-chain parcel monitor that rides
inside a box of medicine; MOB1 = the phone (Mobile WiFi Monitor), whose Bluetooth app connects to it. No wires: the
sensors are on the board. The box starts at 4 C and 60 %.
Press Run. The monitor prints "Advertising as "xG24 Parcel"" and waits for the box to close: the RGB LED is blue. In the
phone's Bluetooth app press SCAN and connect to "xG24 Parcel". In the Sensors window click DARK (the box is closed):
"Box closed - monitoring armed", green. +10 C: "ALARM: WARM", red; BTN0 acknowledges it (yellow while it is still warm);
-10 C: "Back to normal", green. LEFT: "ALARM: TIPPED"; SHAKE: "ALARM: SHOCK"; ROOM light: "ALARM: BOX OPENED". BTN1
prints the trip report. A "Box:" line comes every 5 s.
Closed a window? The USB-C port opens the monitor, the PANEL pad the Sensors window, a click on the phone's screen the
phone.

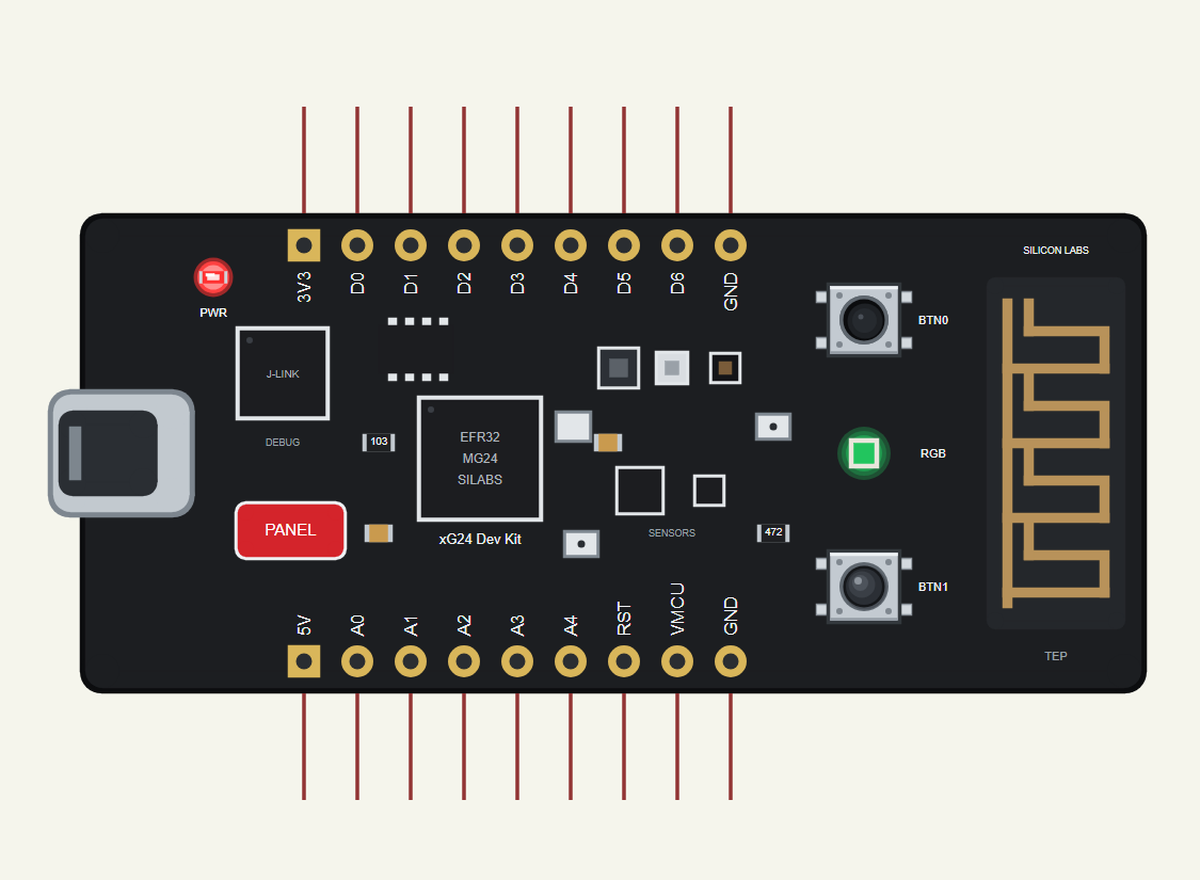
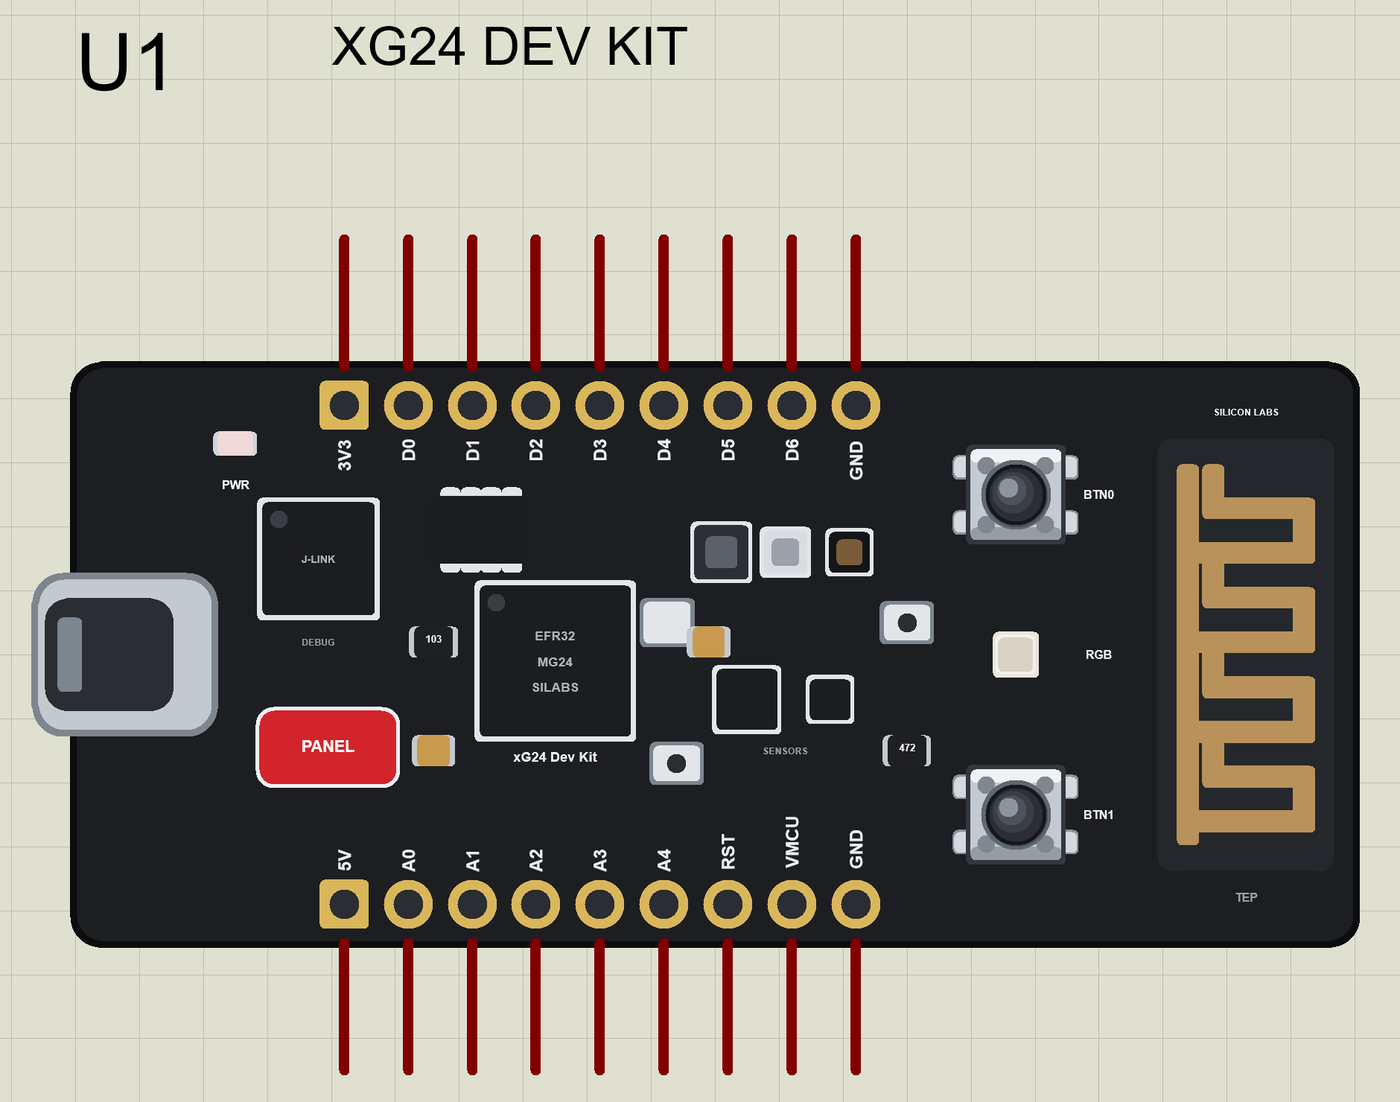
THE PINS (the label on the board, the core's number, what it can do in the simulation)
  D0 .. D6        0 .. 6     GPIO, PWM (analogWrite), interrupt; D0 MOSI, D1 MISO, D2 SCK, D3 SS (SPI), D4 / D5 Serial1
                             TX / RX, D6 SDA
  A0 .. A3        7 .. 10    analogRead 0 .. 1023 for 0 .. 3.3 V, or GPIO
  A4              11         SCL (Wire), or GPIO
  3V3, 5V, GND               3.3 V (the logic), 5 V, ground;   RST  the board's reset;   VMCU  drawn, not modelled
LEDR / LEDG / LEDB (12 / 13 / 14) are the RGB LED, lit when LOW; LED_BUILTIN is LEDR, with LED_BUILTIN_ACTIVE (LOW) and
LED_BUILTIN_INACTIVE. BTN0 / BTN1 (15 / 16) are the buttons, LOW when pressed (pinMode INPUT_PULLUP); BTN_BUILTIN is
BTN0 and BTN_BUILTIN_1 is BTN1. Serial is the USB-C port (the J-Link's virtual COM port): the board's built-in monitor.

PROPERTIES (double-click the part > Edit Properties)
  PROGRAM      the sketch's HEX (Arduino IDE: Sketch > Export Compiled Binary, board Silicon Labs xG24 Dev Kit
               (TEP Proteus))
  MONITOR      YES = the built-in serial monitor on Serial;  BAUD  its speed (115200, or AUTO)
  AUTOOPEN     YES = the monitor window opens at Run (the demo: YES)
  TEMPERATURE, HUMIDITY, PRESSURE   the room at Run (C, %, kPa; the demo: 4 C, 60 %, 101.3 kPa)

TROUBLESHOOTING
* The phone finds nothing: press SCAN after "Advertising as" is printed; the sketch must call BLE.advertise().
* A sensor reads 0: call its begin() first (HS300x.begin(), BARO.begin(), APDS.begin(), IMU.begin()).
* The demo stays blue: it waits for the box to close - click DARK in the Sensors window.
* A shock counts many times: wait a short time after each one before counting the next (the demo waits 1 s).
* The LED looks inverted: on this kit it lights when the pin is LOW.
* An integer goes wrong above 32767: int is 16 bits in the simulation - use long.

BUG REPORTS AND FEATURE REQUESTS
Please post them in our forum with a screenshot and the Serial Monitor text:
  https://www.theengineeringprojects.com/forum

LICENCES AND THIRD-PARTY NOTES
* The board model (TEPNET.DLL) and the symbols and artwork (TEPXG24DK.LIB) are made by The Engineering Projects. The
  source code of the models is not included.
* TEP Boards for Proteus (Arduino Code): its core, the variants and the EEPROM, SPI and Wire libraries are modified
  copies of the Arduino AVR core 1.8.6 - GNU Lesser General Public License 2.1 (LGPL 2.1, the text:
  LICENSE-LGPL-2.1.txt); its ArduinoBLE, the sensor libraries and the others and our core files are MIT
  (LICENSE-MIT.txt).
* Proteus is a product of Labcenter Electronics and is not included. EFR32, xG24 and Silicon Labs are names of Silicon
  Laboratories Inc., Arduino of Arduino; the sensors' names belong to their makers. The Bluetooth word mark belongs to
  Bluetooth SIG. This library is not made or endorsed by them or by Labcenter.

REBUILDING THE FIRMWARE (OPTIONAL)
The HEX file is supplied. Install TEP Boards for Proteus (INSTALLATION step 5), open Arduino Code\xG24_Parcel_Monitor,
select Silicon Labs xG24 Dev Kit (TEP Proteus) and use Sketch > Export Compiled Binary. For a real kit use the Silicon
Labs Arduino core (with its own sensor libraries) or Simplicity Studio. Its pins work at 3.3 V.

MODEL SCOPE AND LIMITS
Modelled: D0 .. D6 and A0 .. A4; digital I/O, analogRead 0 .. 1023, PWM (analogWrite), tone and attachInterrupt
through the board model; Serial (the board's monitor), Serial1, Wire and SPI; the RGB LED, the two buttons and RST;
temperature, humidity, pressure, light and the IMU through the sensor libraries, set from the Sensors window; Bluetooth
LE as a peripheral.
Not modelled: the EFR32MG24 itself, Thread, Zigbee and Matter, the AI/ML accelerator, the Hall-effect sensor, the
microphones, the SPI flash, the coin-cell power, the board as a Bluetooth central. The simulation runs below real time.

VERSION
TEP xG24 Dev Kit library V1.0 (Nov 2026). Device XG24 DEV KIT (TEPXG24DK.LIB / TEPNET.DLL), TEP Boards for Proteus
1.65.0 (adds this board: D0 .. D6, A0 .. A4, LEDR / LEDG / LEDB, BTN0 / BTN1, the sensors and Bluetooth LE).
Demo sketch xG24_Parcel_Monitor V1.0. Demo part: MOBILE WIFI MONITOR.Development1 release
 Development1 release
-
V1.0xG24 Dev Kit Library for Proteus V1.0this page
V1.0 is the only release in the Download Center so far. When a newer version is published, it appears above with its own download page.
Installation10 steps
 Installation10 steps
From the download to a working project, in order. The steps follow what the package contains.
You will need
- Proteus Design SuiteProteus 8 or newer (Labcenter), on Windows
- Arduino IDE1.8 or 2.x, with the board of the tutorial chosen under Tools → Board
- The compiler named in the tutorialto build the source files into firmware
- Any archive toolWindows, macOS and Linux extract ZIP files on their own

Steps
- 1
Extract the archive
Right-click 6dca0576fe3948e59e9ce0f623f5fb12.zip and choose Extract All (or open it with 7-Zip or WinRAR) into a folder you can find again. Keep its folder structure (xG24-Dev-Kit-TEP-v1.0) as it is.
- 2
Copy the library files into Proteus
Move TEPLAPTOP.LIB, TEPMOBILE.LIB and TEPXG24DK.LIB and the files into the LIBRARY folder of your Proteus installation: C:\Program Files (x86)\Labcenter Electronics\Proteus 8 Professional\LIBRARY for Proteus 8, or the matching Proteus 7 folder. Older versions keep it under ProgramData\Labcenter Electronics. If Proteus is open, close it first.
- 3
Add the simulation model
Copy TEPNET.DLL into the MODELS folder next to LIBRARY, so the component can run, not only be drawn.
- 4
Restart Proteus and place the component
Start Proteus, open a schematic, press P (Pick Devices) and search for the component by the name used in the tutorial. It appears with its pins ready to wire.
- 5
Install the Arduino library
In the Arduino IDE choose Sketch → Include Library → Add .ZIP Library and pick the library, or copy its folder into Documents\Arduino\libraries. Restart the IDE to see its examples.
- 6
Open the sketch in the Arduino IDE
Open xG24_Parcel_Monitor.ino, eeprom_clear.ino and eeprom_crc.ino and 17 more, select your board and port under Tools, then Verify. Sketch → Export Compiled Binary writes the HEX file a simulation needs.
- 7
Build the source code
Open abi.cpp, Arduino.h and binary.h and 52 more in the compiler named in the tutorial (MikroC, Keil, MPLAB, Code Composer or the Arduino IDE) and build it to get the firmware.
- 8
Load the HEX file
In Proteus double-click the microcontroller, set Program File to xG24_Parcel_Monitor.hex and run the simulation. For real hardware, flash the same file with your programmer.
- 9
Open the example simulation
Open xG24-BLE-Parcel-Monitor.pdsprj in Proteus to see the wiring exactly as in the tutorial. Check the controller's Program File path, then press Play.
- 10
Follow the tutorial
xG24 Dev Kit Library for Proteus: BLE Parcel Monitor Simulation explains every connection and setting in order; keep it open beside the files while you build.
FAQs9 questionsContact TEP
 FAQs9 questions
How do I download xG24 Dev Kit Library for Proteus V1.0?
Wait for the 30-second guest countdown on this page, then press the download button; the file comes straight from our storage. Members who are logged in skip the wait. If the browser opens the file instead of saving it, use its Save as option. The download link is made for you when the countdown ends and works for 15 minutes; a saved or shared link stops working, so share this page instead.
What is inside the archive?
xG24 Dev Kit Library for Proteus V1.0 comes as a ZIP archive of 288 files (3.2 MB, 7.1 MB unpacked) holding Proteus library files, simulation model DLLs, a Proteus simulation, an Arduino sketch, an Arduino library, compiled HEX firmware and source code. Open the File Structure tab for the full list of 288 files.
What should I do if the download does not start?
Check the browser's download list first; an ad blocker or a company firewall can also hold it back, so try another browser or network. If the file arrives incomplete, download it again. For an installation problem, read the Install tab or tell us in the comments with your software version and the exact error message.
Is this file free?
Yes. Every file in the TEP Download Center is free for learning, personal and student projects. If you share it, link back to this page or the tutorial so others find the latest version.
How do I check that the file arrived complete?
Compare its SHA-256 with the one on this page, d91596c7196b997bac44ba5812ae8d7d118c0f408762834cff913e300048a18f. In PowerShell run Get-FileHash "6dca0576fe3948e59e9ce0f623f5fb12.zip"; on macOS or Linux run shasum -a 256 "6dca0576fe3948e59e9ce0f623f5fb12.zip". The same value means the file is exactly the one in our storage; a different one means the download broke off, so download it again.
Do I need WinRAR to open the ZIP file?
No. Windows, macOS and Linux open ZIP archives on their own (Extract All, or double-click). WinRAR and 7-Zip work too. Extract the whole archive before using the files.
Where do I put the LIB and IDX files?
Both files go into the LIBRARY folder of your Proteus installation (Proteus 8: C:\Program Files (x86)\Labcenter Electronics\Proteus 8 Professional\LIBRARY; Proteus 7 has the same folder under its own name). Restart Proteus afterwards and search for the component with P.
Which Proteus version does the library need?
The tutorial names the Proteus version the library was made and tested with. Most TEP libraries work in Proteus 7 and Proteus 8; if the component does not appear after a restart, check that both the LIB and the IDX file were copied and that Proteus was fully closed while copying.
How do I get the HEX file into the simulation?
Compile the sketch in the Arduino IDE (Sketch → Export Compiled Binary gives you the HEX next to the sketch), then in Proteus double-click the board, set Program File to that HEX and run.
Members skip the wait. Log in or join TEP.

- 0Total downloads
- 4%Popularity
- ProteusCategory
- 0Comments
- ssyedzainnasirUploaded by
- 19 Nov 2026Uploaded at


 SHA-256
d91596c7196b997bac44ba5812ae8d7d118c0f408762834cff913e300048a18f


 Need help with this file?
 Tags
Related Proteus
All Proteus tutorials






Comments
0