


Nordic Thingy:53 Library for Proteus: BLE Sensor Beacon Simulation


Hello friends, I hope you all are doing great. Today, I am going to share the Nordic Thingy:53 Library for Proteus, so you can run a Bluetooth LE sensor simulation of Nordic Semiconductor's pocket-sized prototyping platform. The Thingy:53 packs the dual-core nRF5340, a radio front end, sensors for the air, light, motion and sound, an RGB LED and a big button into one small rubber case with a battery. With this library it runs your Arduino sketch in Proteus 8.5, reads its sensors from a Sensors window, talks Bluetooth LE to a phone, and its RGB LED and its button work with a click.
Nordic Thingy:53 Library for Proteus
Latest version: V1.0 (November 2026, this tutorial)
Helping Tools
- Laptop WiFi Monitor: a laptop on the Wi-Fi of your design: a browser, a TCP / UDP terminal and ping
- Mobile WiFi Monitor: a smartphone that opens the pages of your board and sends it commands
- Serial Monitor Advance: a serial terminal window for the UART of your board
For the demo we built a Bluetooth comfort and activity beacon. The Thingy watches the room's temperature and humidity, judges the comfort, shows it on its RGB LED in green, red or blue, counts every shake, and sends all of it to a phone app as Bluetooth LE notifications. The big button puts the LED into a quiet mode for the night.
NOTICE: Proteus has no nRF5340 model and no model of the Thingy's sensors, so our team has put a lot of effort into building this board ourselves: the RGB LED, the button, the sensors and Bluetooth LE are all our own model, and your sketch compiles with our free TEP Boards for Proteus add-on. Your feedback is the fuel that keeps us going, so please tell us what you think in the comments below. And if our free libraries help you, you can buy us a coffee. So, let's get started with the Nordic Thingy:53 Library for Proteus:
What is the Nordic Thingy:53?
The Nordic Thingy:53 is a ready-made IoT device for prototyping. Instead of a bare board with headers, it is a finished little product: a rubber case with a rechargeable Li-Po battery, a USB-C port, a power switch, an RGB LED behind a light pipe and one large button on top. Inside, the nRF5340 runs the application and Bluetooth LE on its two Arm Cortex-M33 cores, and the nRF21540 front end boosts one of its two 2.4 GHz antennas for a longer range. Research teams use it to test an idea on real sensor data the same day, without designing any hardware.
| Part | The real Thingy:53 | In the library |
|---|---|---|
| Processor | nRF5340: two Arm Cortex-M33 cores, Bluetooth LE | your Arduino sketch, ArduinoBLE |
| Environment | BME688: temperature, humidity, pressure, gas | temperature, humidity and pressure (Arduino_HS300x, Arduino_LPS22HB calls) |
| Colour and light | BH1749 colour sensor | colour and light (Arduino_APDS9960 calls) |
| Motion | BMI270 IMU, BMM150 magnetometer, ADXL362 accelerometer | acceleration, rotation, magnetic field (Arduino_BMI270_BMM150) |
| Sound | VM3011 digital microphone | drawn |
| On the case | RGB LED, one button, USB-C, power switch | all of them, animated |
| Memory | 1 MB flash, 512 KB RAM on the application core | about 256 KB of flash, 8 KB of RAM |
Why a Finished Device?
Most development kits are a bare board, and a team still has to add sensors, a battery and a case before it can test anything in the real world. The Thingy:53 skips that step. It can sit on a desk, ride in a pocket or be taped to a machine on the first day, and it already reports what it senses. That makes it popular for user studies, field trials and quick demos for a customer, where the question is whether the idea is useful at all, long before anybody designs a PCB.
The Thingy Family
The Thingy:53 is one of a small family of finished devices from Nordic. The Thingy:52 came first: a Bluetooth sensor cube on the nRF52832 that many universities still use in their labs. The Thingy:91 and the newer Thingy:91 X add a cellular modem and GNSS for trackers that work far away from any phone. The Thingy:53 sits between them: Bluetooth LE like the Thingy:52, but on the dual-core nRF5340, with more memory and processing power, a long-range radio front end and a microphone, so it can run small machine learning models on the device itself. All of them share one idea: a researcher should be able to switch the device on, connect a phone and see real data within minutes, and then replace the demo firmware with their own program when the idea is ready to be tested properly. That is exactly the way of working this simulation follows, only one step earlier, before any device is on the desk.
Where Is It Used?
The Thingy:53 is a favourite for embedded machine learning: its motion sensors and microphone feed models that recognise gestures, activities or sounds, and the nRF5340 runs them on the device. It is also used for indoor air-quality studies with the BME688, for Bluetooth mesh and Matter prototypes, and for power research, because the nPM1100 power chip and the battery make the real current of a sensor node easy to measure. A comfort beacon like our demo is a typical first project: a sensor, a decision, an indicator and a phone that follows along.
A simulation cannot measure microamps or train a model, but it lets you build and test the whole logic of such a device first: the sensor readings, the thresholds, the LED, the button and the Bluetooth service. When the logic works in the Proteus simulation, moving the idea to the real Thingy is much quicker.
How Bluetooth LE Notifications Work
A Bluetooth LE device offers services, and each service holds characteristics, small values with a number (a UUID) that a phone can read. Our beacon uses the standard Environmental Sensing service (0x181A) with the standard temperature, humidity and pressure characteristics, plus three of its own for the light, the shakes and the comfort. A phone does not have to ask again and again: it subscribes once, and the device sends a notification every time a value changes. Our Mobile WiFi Monitor is that phone in Proteus.
Features of the Nordic Thingy:53 Library for Proteus
- The device as it looks: the dark blue case, the big button, the RGB LED, the USB-C port, the power switch, RESET, the microphone and gas vent and the PANEL pad, drawn compact, with our small TEP signature.
- Your sketch: a .hex for "Nordic Thingy:53 (TEP Proteus)" with LEDR, LEDG, LEDB and BUTTON.
- The sensors: temperature, humidity, pressure, colour, light, proximity, gestures and motion through the board package's sensor libraries, set from the Sensors window.
- Bluetooth LE: ArduinoBLE, with our phone as the central: scan, connect, read, write and notifications.
- A real RGB LED and button: the LED lights when HIGH, as on the real Thingy, and glows in the mixed colour; the button is clicked on the case.
- A complete package: about 3.3 MB with the part, the add-on, the phone and the demo, without the source code of the models.
The Thingy:53 in Proteus Simulation
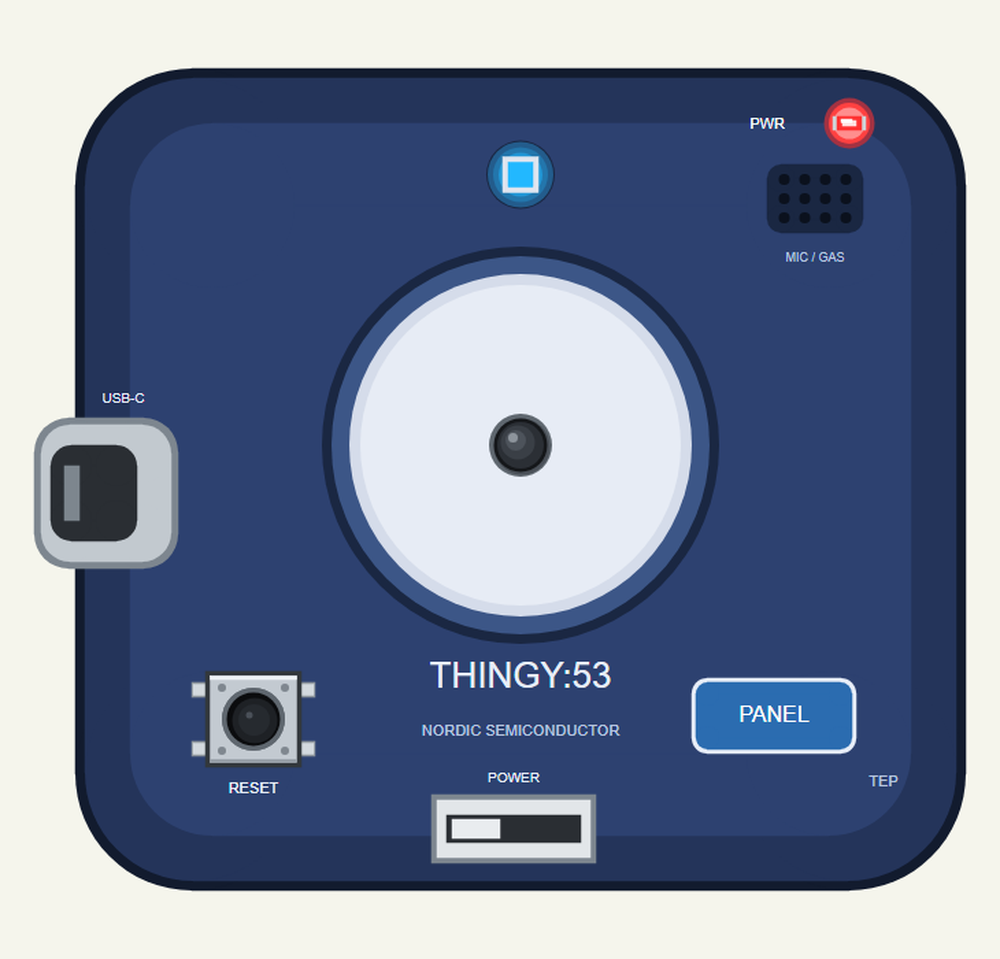
Search THINGY in Pick Devices; the device is in TEPTHINGY53.LIB (Microprocessor ICs, Bluetooth Boards), with the prefix U. The Thingy has no pins at all, just like the real one, so it needs no wiring: click the USB-C port for the serial monitor and the PANEL pad for the Sensors window. It shares its nRF5340 and its Bluetooth LE with our nRF5340 DK Library for Proteus, and its sensor calls with our Arduino Nano 33 BLE Sense Library for Proteus.
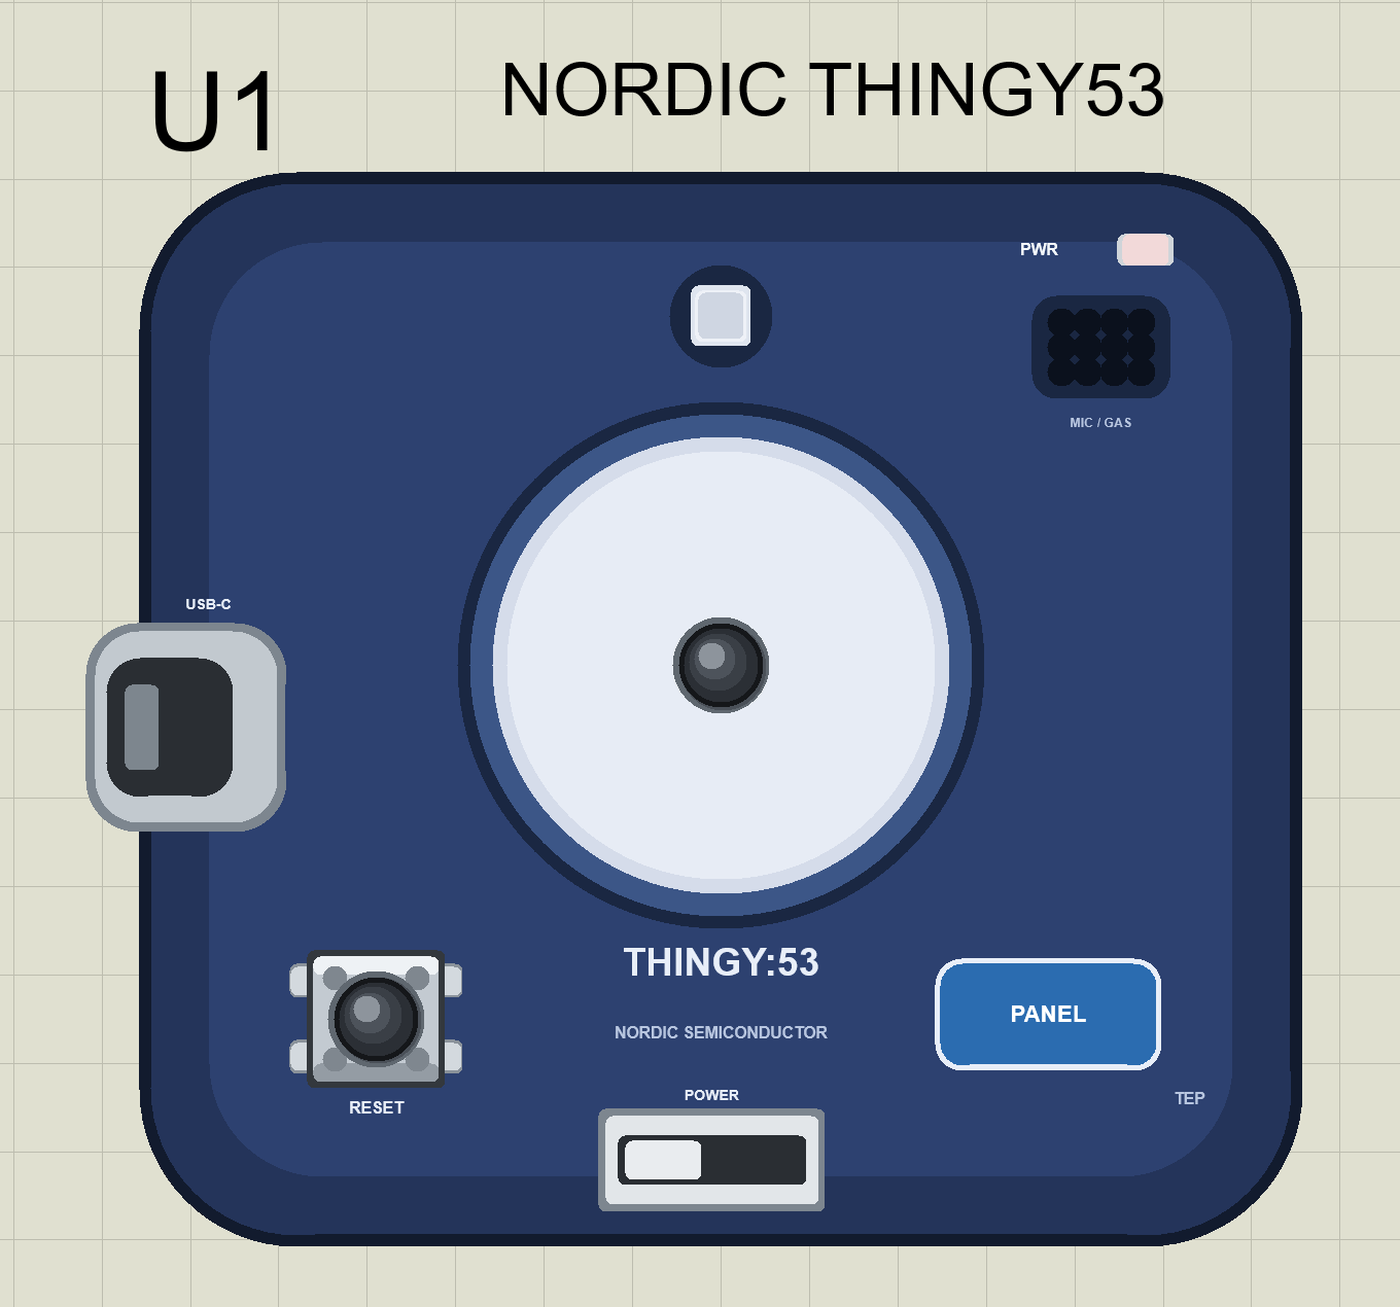
The Parts of the Thingy
| Name | What the library does with it |
|---|---|
| LEDR, LEDG, LEDB | the RGB LED (0, 1, 2), lit when HIGH; analogWrite mixes a colour |
| BUTTON | the big button (3), LOW when pressed; BTN_BUILTIN |
| Serial | the USB-C port: the built-in serial monitor |
| HS300x, BARO | temperature and humidity, air pressure |
| APDS | colour, light, proximity and gestures |
| IMU | acceleration, rotation and the magnetic field |
The Sensors Window
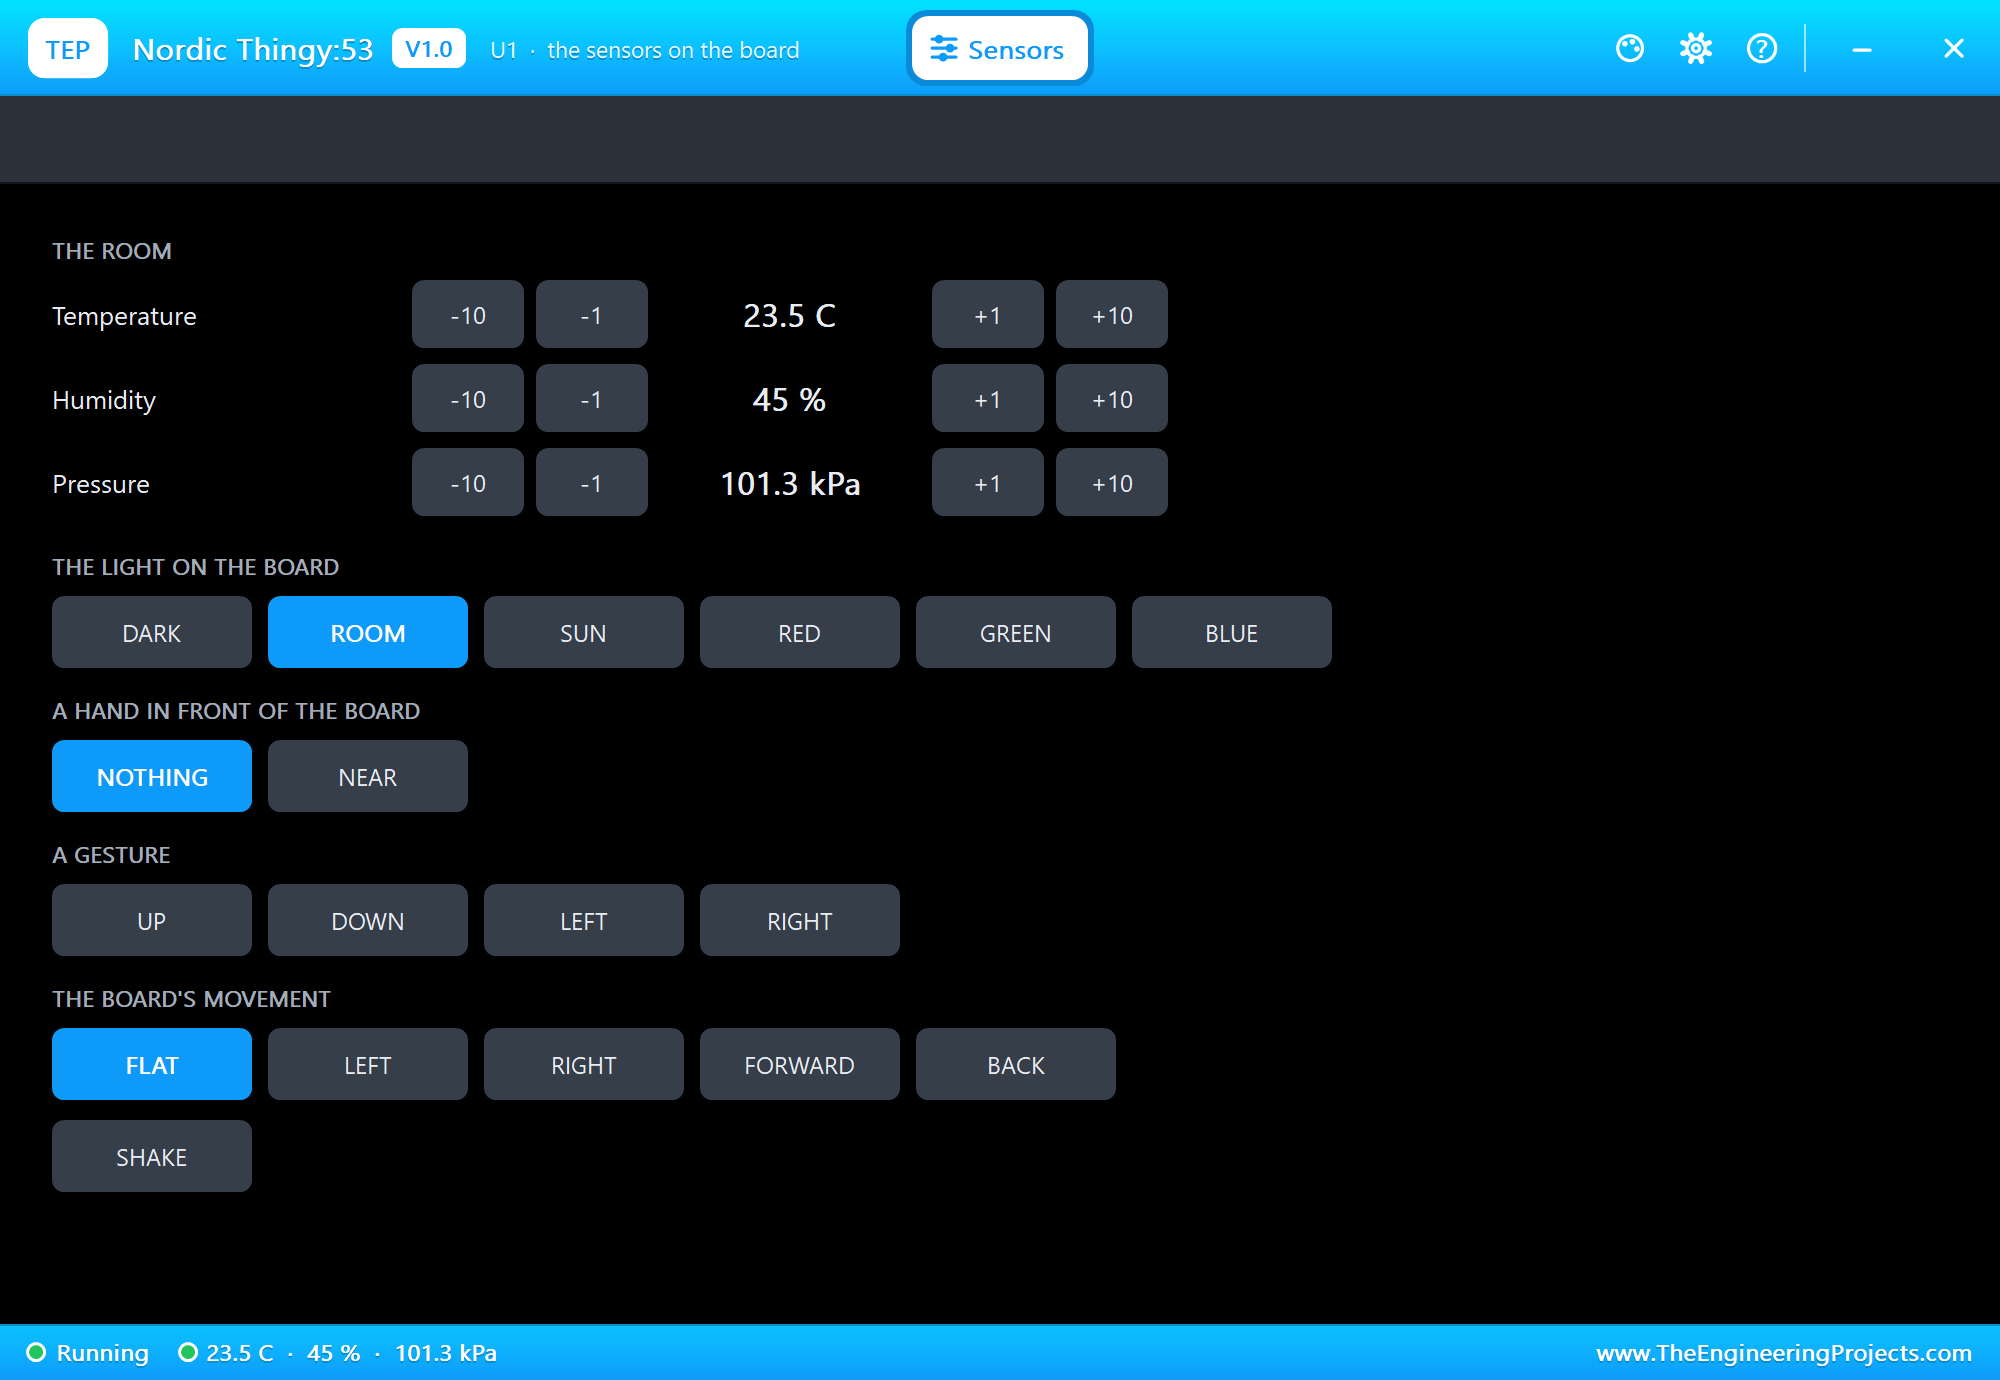
The PANEL pad opens the Sensors window, where you set the room while the simulation runs: the temperature, the humidity and the pressure with -10, -1, +1 and +10 buttons, the light (DARK, ROOM, SUN or a colour), a hand in front of the device, a gesture, a tilt and a SHAKE. The sketch reads the new values on its next call.
Download Nordic Thingy:53 Library for Proteus
Click the button below to download Nordic-Thingy53-Library-for-Proteus-v1.0.zip (about 3.3 MB, without the source code of the models):
Nordic Thingy:53 Library for Proteus V1.0- README.txt: installation, the demo, the parts, the properties, troubleshooting and the limits.
- Proteus Library Files:
TEPTHINGY53.LIBand the phone and laptop:TEPMOBILE.LIBandTEPLAPTOP.LIB. - Proteus Model Files:
TEPNET.DLL. - Arduino Code: the demo sketch and the TEP Boards for Proteus add-on 1.64.0, with ArduinoBLE and the four sensor libraries.
- Proteus Simulation: the demo project, its HEX file and a copy of the DLL.
No Proteus yet? Read How to Download and Install Proteus 7 and 8. New to libraries? Follow How to Install a New Library in Proteus.
How to Install Nordic Thingy:53 Library for Proteus
- Close Proteus and extract the whole zip file, for example to your Desktop.
- Copy the files from Proteus Library Files into the LIBRARY folder of Proteus.
- Copy
TEPNET.DLLfrom Proteus Model Files into the MODELS folder, replacing an older one. - Delete
TEPTHINGY53.IDXfrom the LIBRARY folder if it is there. - For your own sketches, copy Arduino Code\TEP Boards for Proteus\hardware into your Arduino sketchbook (Documents\Arduino) and restart the Arduino IDE; the board is Nordic Thingy:53 (TEP Proteus). ArduinoBLE and the sensor libraries are in the add-on: nothing else to install.
- Start Proteus, press P and search for THINGY.
Demo: a Bluetooth Comfort Beacon in Simulation
People feel best in a room at about 20 to 26 C with a humidity between 30 and 60 %. Offices, schools and hospitals use small beacons like this one to find the rooms that are too warm, too cold or too damp, and the same device can count how often it is moved. Ours shows the comfort on its LED at a glance and reports everything to a phone.
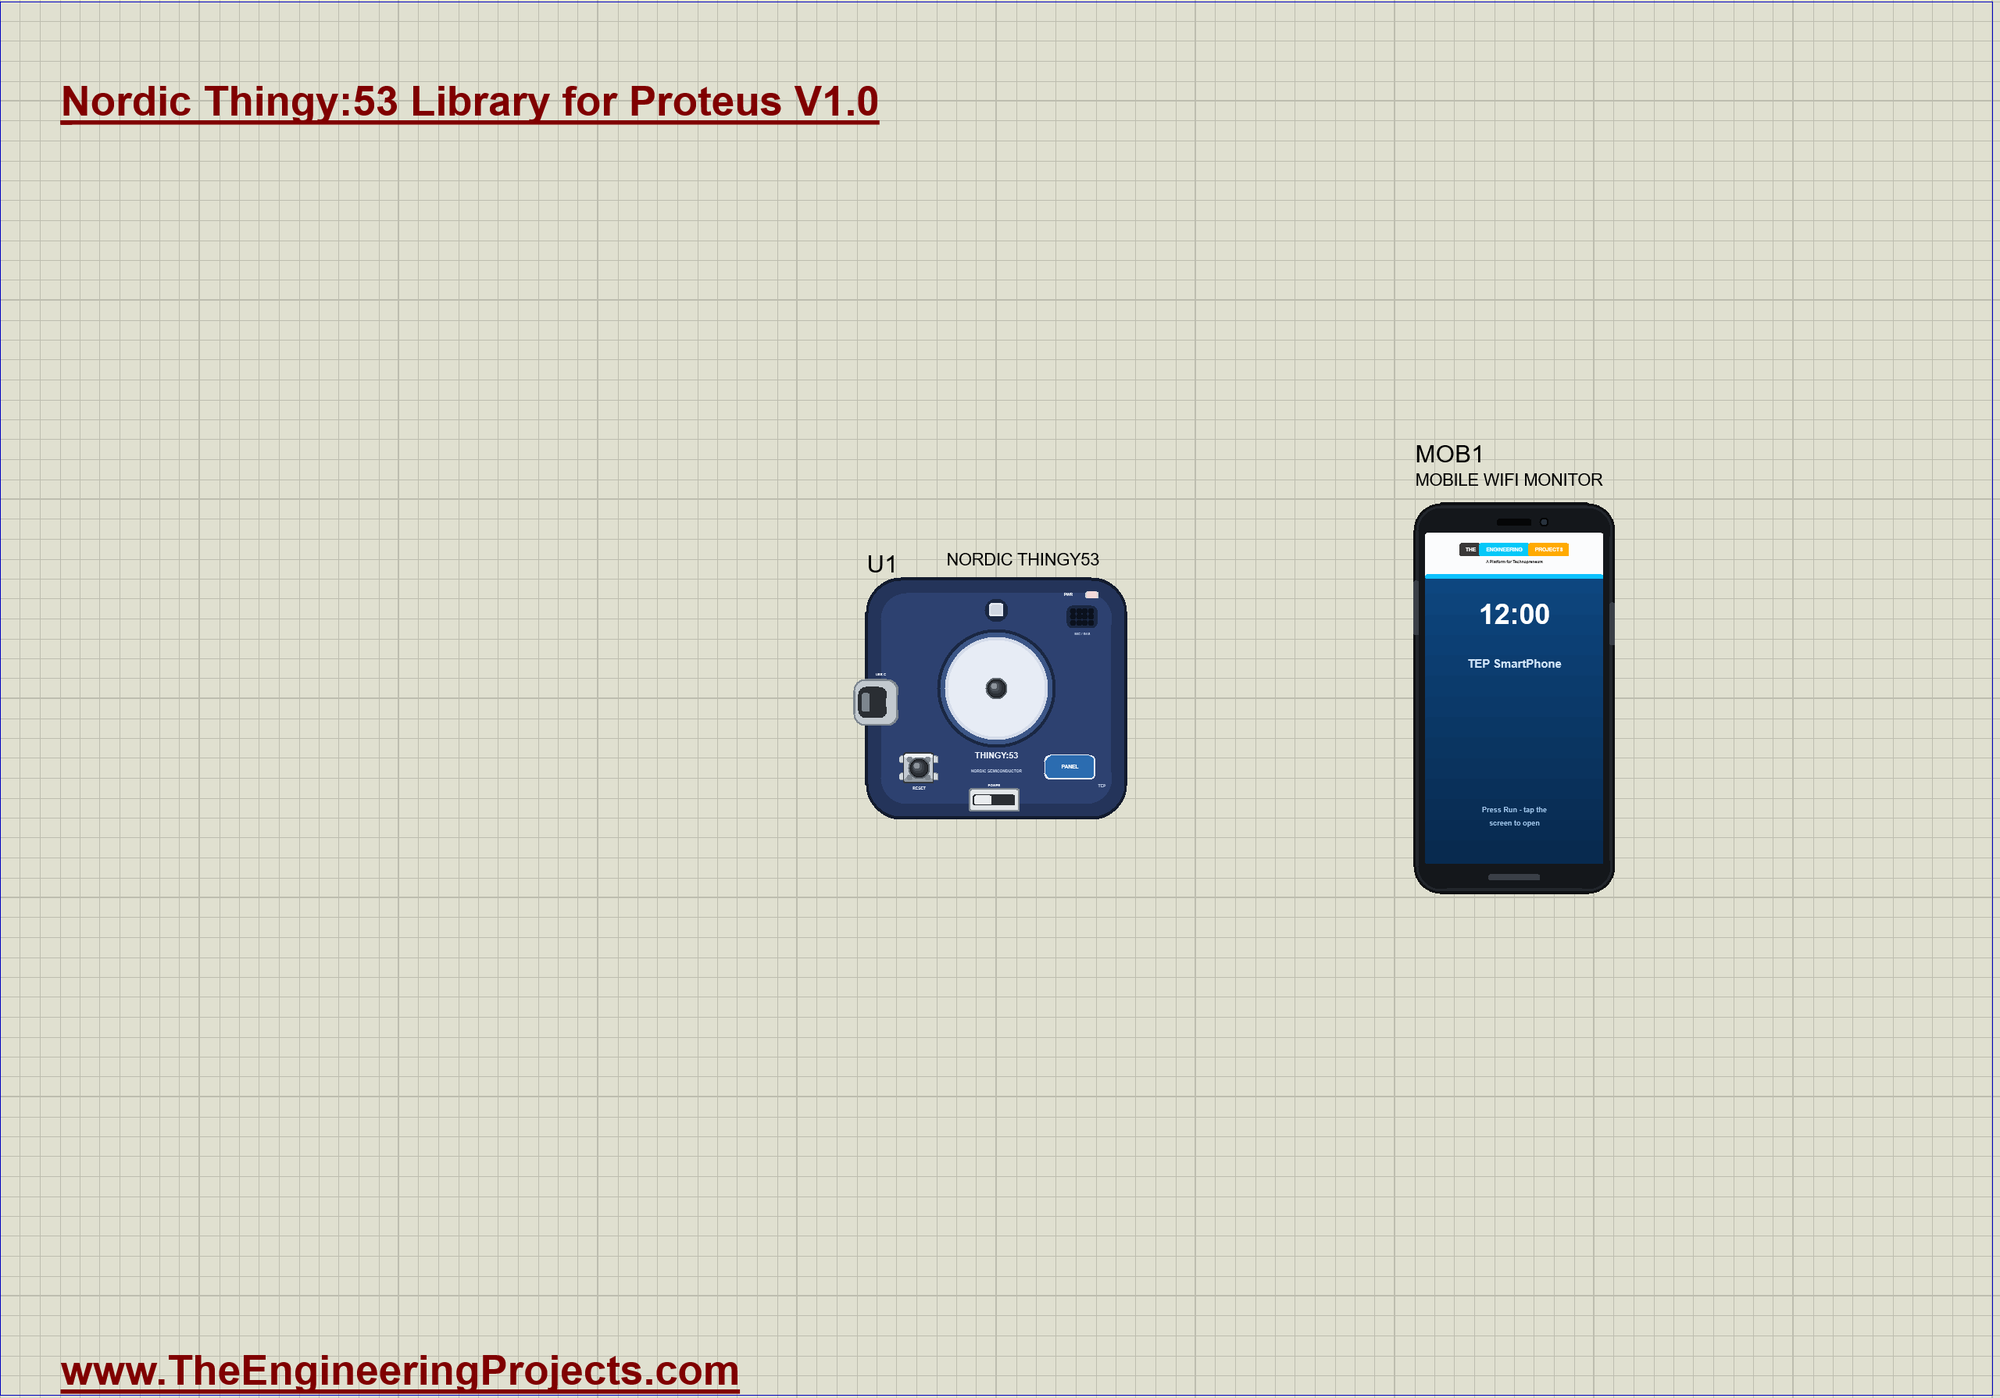
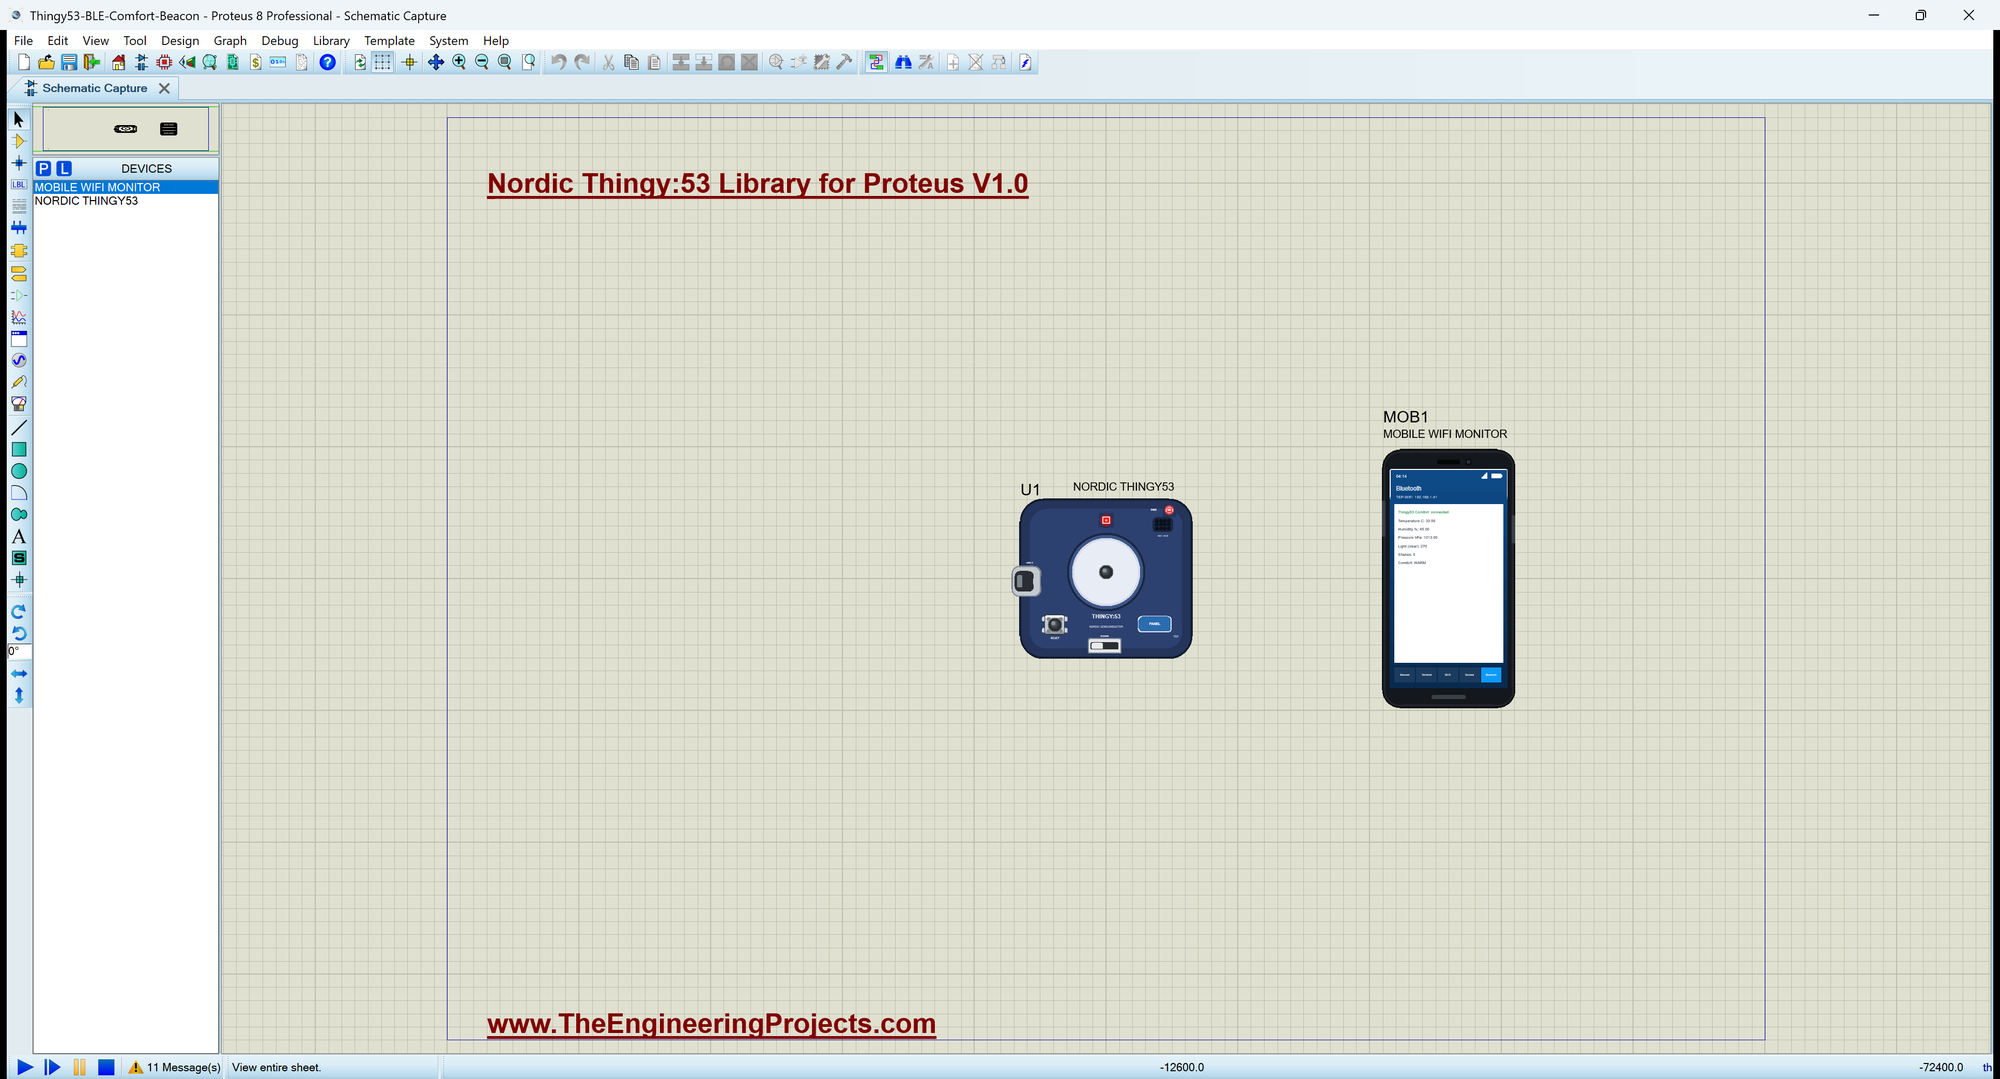
Open Thingy53-BLE-Comfort-Beacon.pdsprj. U1 runs Thingy53_Comfort_Beacon.hex, and MOB1 is the phone, whose Bluetooth app connects to the Thingy. There are no wires on this sheet. The serial monitor is the same window as our TEP Serial Monitor Advance for Proteus.
Judging the Comfort
judge() turns two numbers into one word. The temperature comes first, so a hot and damp room is WARM rather than HUMID:
String judge(float t, float h) {
  if (t > 26) return "WARM";
  if (t < 20) return "COLD";
  if (h > 60) return "HUMID";
  if (h < 30) return "DRY";
  return "GOOD";
}
The RGB LED
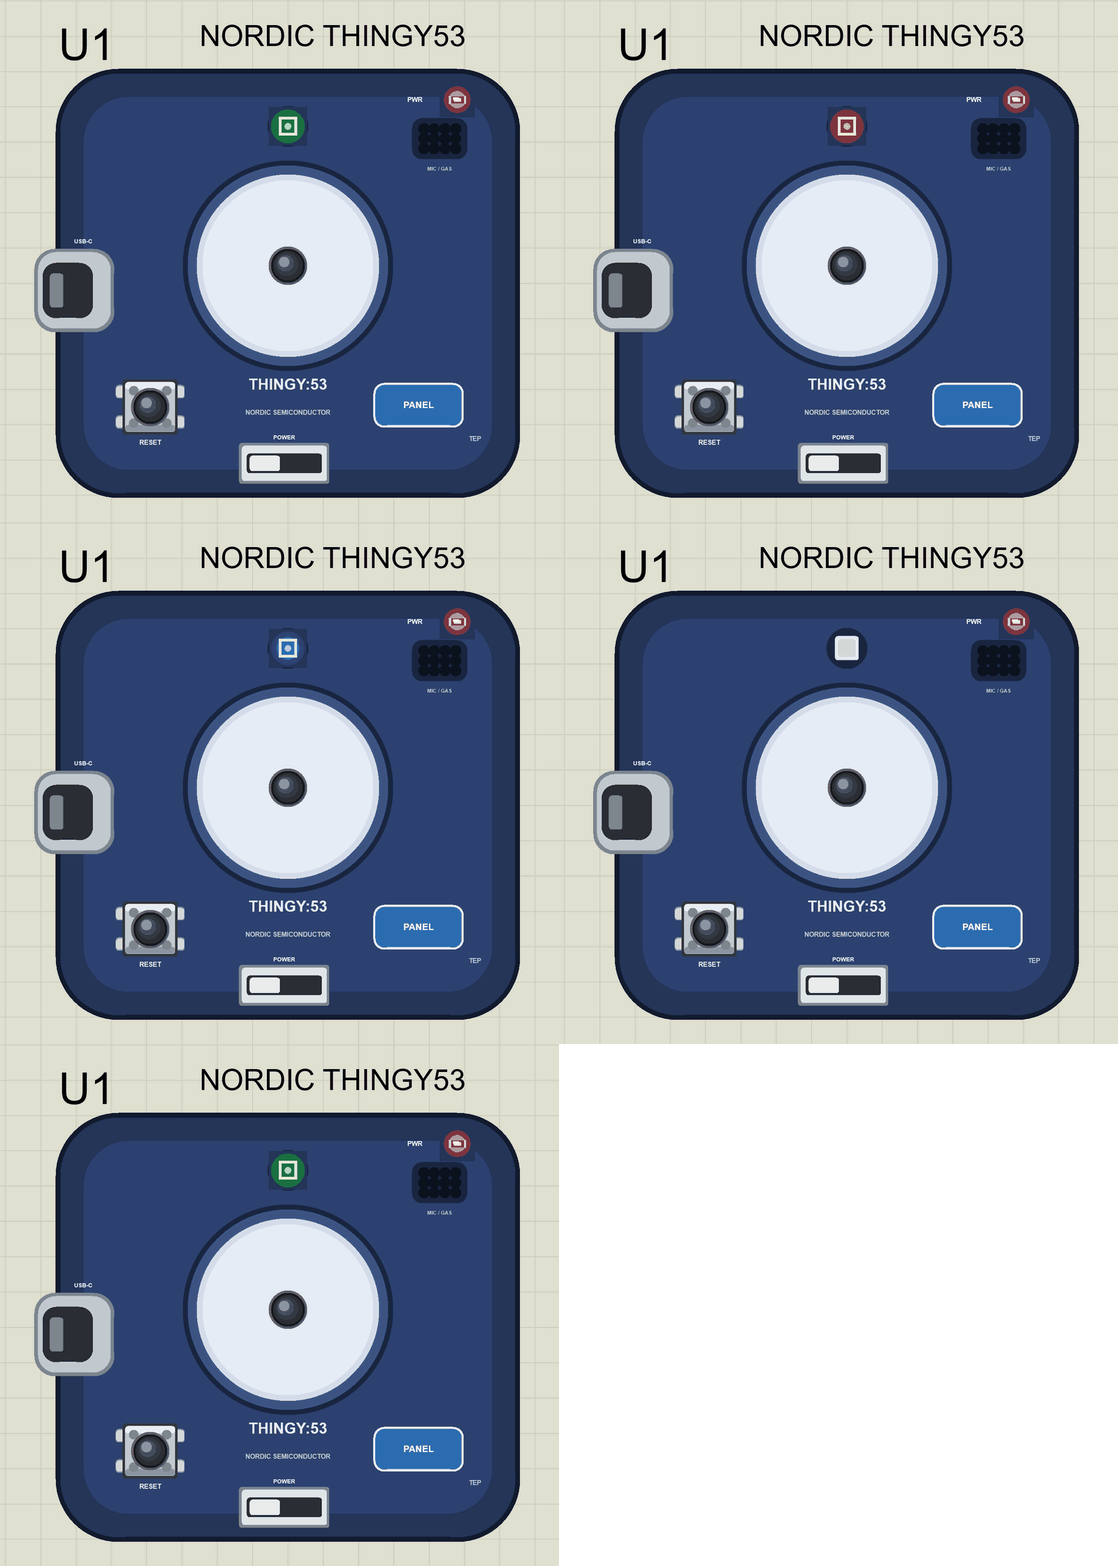
The Thingy's LED lights when the pin is HIGH. showComfort() picks the colour: green for GOOD, red for WARM or HUMID, blue for COLD or DRY, and nothing in quiet mode:
void showComfort() {
  if (quiet) rgb(false, false, false);
  else if (comfort == "GOOD") rgb(false, true, false);
  else if (comfort == "WARM" || comfort == "HUMID") rgb(true, false, false);
  else rgb(false, false, true);
}
Counting Shakes
At rest the accelerometer reads 1 g, the Earth's gravity. A shake adds hard, changing acceleration, so the sketch counts one when the total is above 1.5 g, then waits 0.6 s so that one shake is not counted many times:
void watchMotion() {
  if (!IMU.accelerationAvailable()) return;
  float x, y, z;
  IMU.readAcceleration(x, y, z);                            // in g
  const float g = sqrt(x * x + y * y + z * z);
  if (g > SHAKE_G && millis() >= calmUntil) {                // one shake, then 0.6 s of calm before the next one counts
    shakes++;
    calmUntil = millis() + CALM_MS;
    shakeChar.writeValue(shakes);
    Serial.print(F(">> Shake ")); Serial.print(shakes); Serial.print(F(" (")); Serial.print(g, 2); Serial.println(F(" g)"));
    if (!quiet) { rgb(true, true, true); flashUntil = millis() + FLASH_MS; }   // a white blink
  }
The Bluetooth Service
Each value is a characteristic with BLERead | BLENotify, so the phone can read it and subscribe to it. A descriptor 0x2901 gives each one a name the phone can show:
BLEService comfortService("181A");                          // the Environmental Sensing service
BLEFloatCharacteristic tempChar("2A6E", BLERead | BLENotify);
BLEFloatCharacteristic humChar("2A6F", BLERead | BLENotify);
BLEFloatCharacteristic pressChar("2A6D", BLERead | BLENotify);
BLEIntCharacteristic lightChar("19B10041-E8F2-537E-4F6C-D104768A1214", BLERead | BLENotify);
BLEIntCharacteristic shakeChar("19B10042-E8F2-537E-4F6C-D104768A1214", BLERead | BLENotify);
BLEStringCharacteristic comfortChar("19B10043-E8F2-537E-4F6C-D104768A1214", BLERead | BLENotify, 8);
Run the Simulation
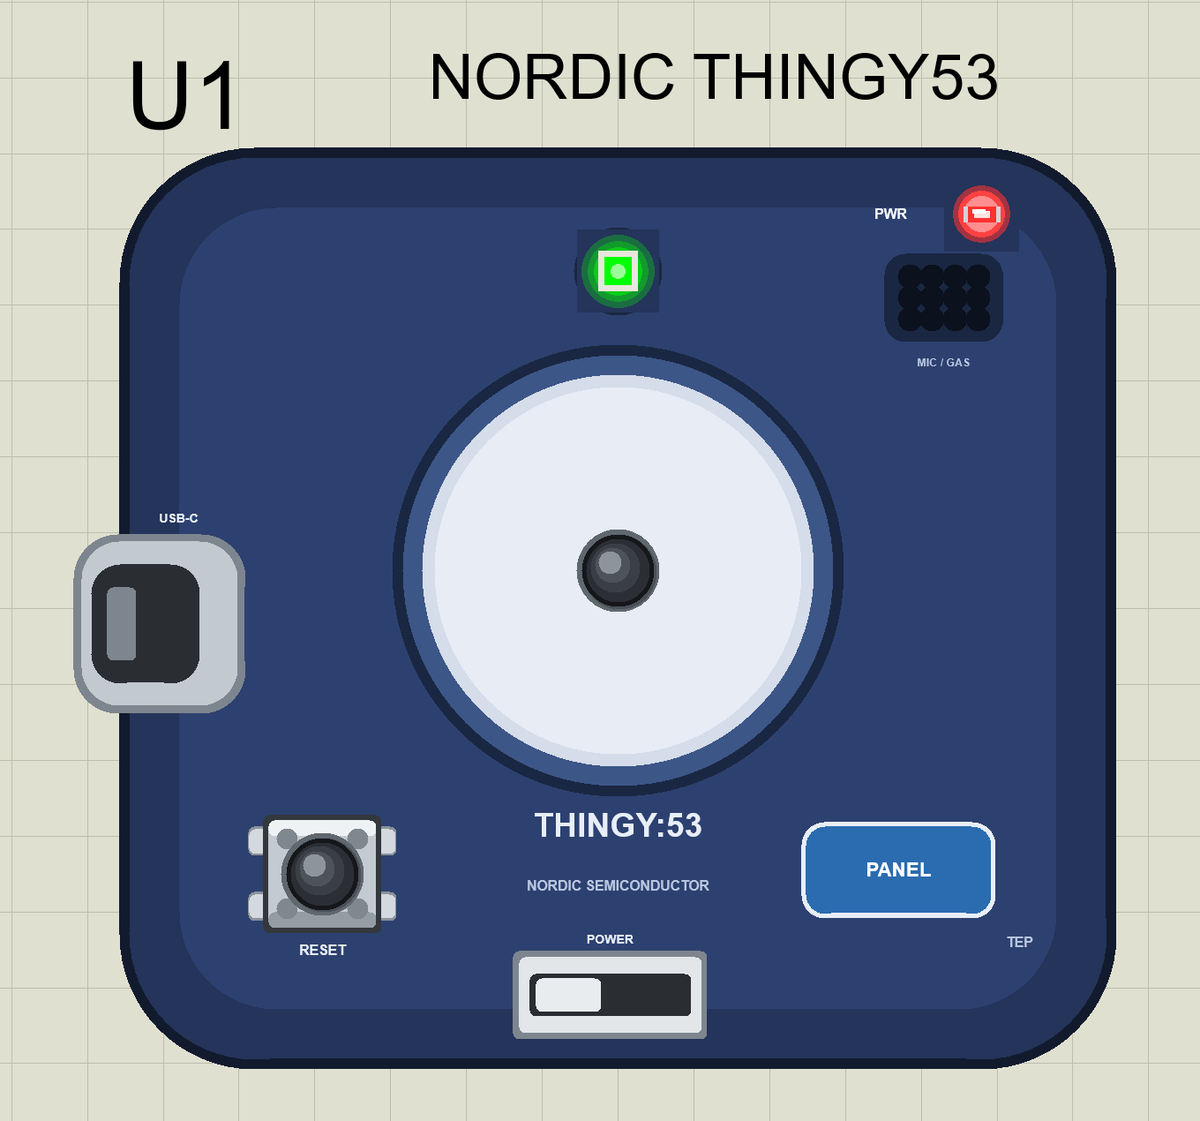
Press Run. The Thingy starts advertising as "Thingy53 Comfort", and the room starts at 23.5 C and 45 %, so the comfort is GOOD and the RGB LED is green:
Nordic Thingy:53 Bluetooth Comfort and Activity Beacon - The Engineering Projects
Advertising as "Thingy53 Comfort", address F4:CE:36:53:A0:00:01
The button = quiet mode; shake the Thingy (the IMU in the Sensors window) to count a shake
>> Comfort: GOOD
Room: 23.5 C  45 %  1013.0 hPa  light 270  shakes 0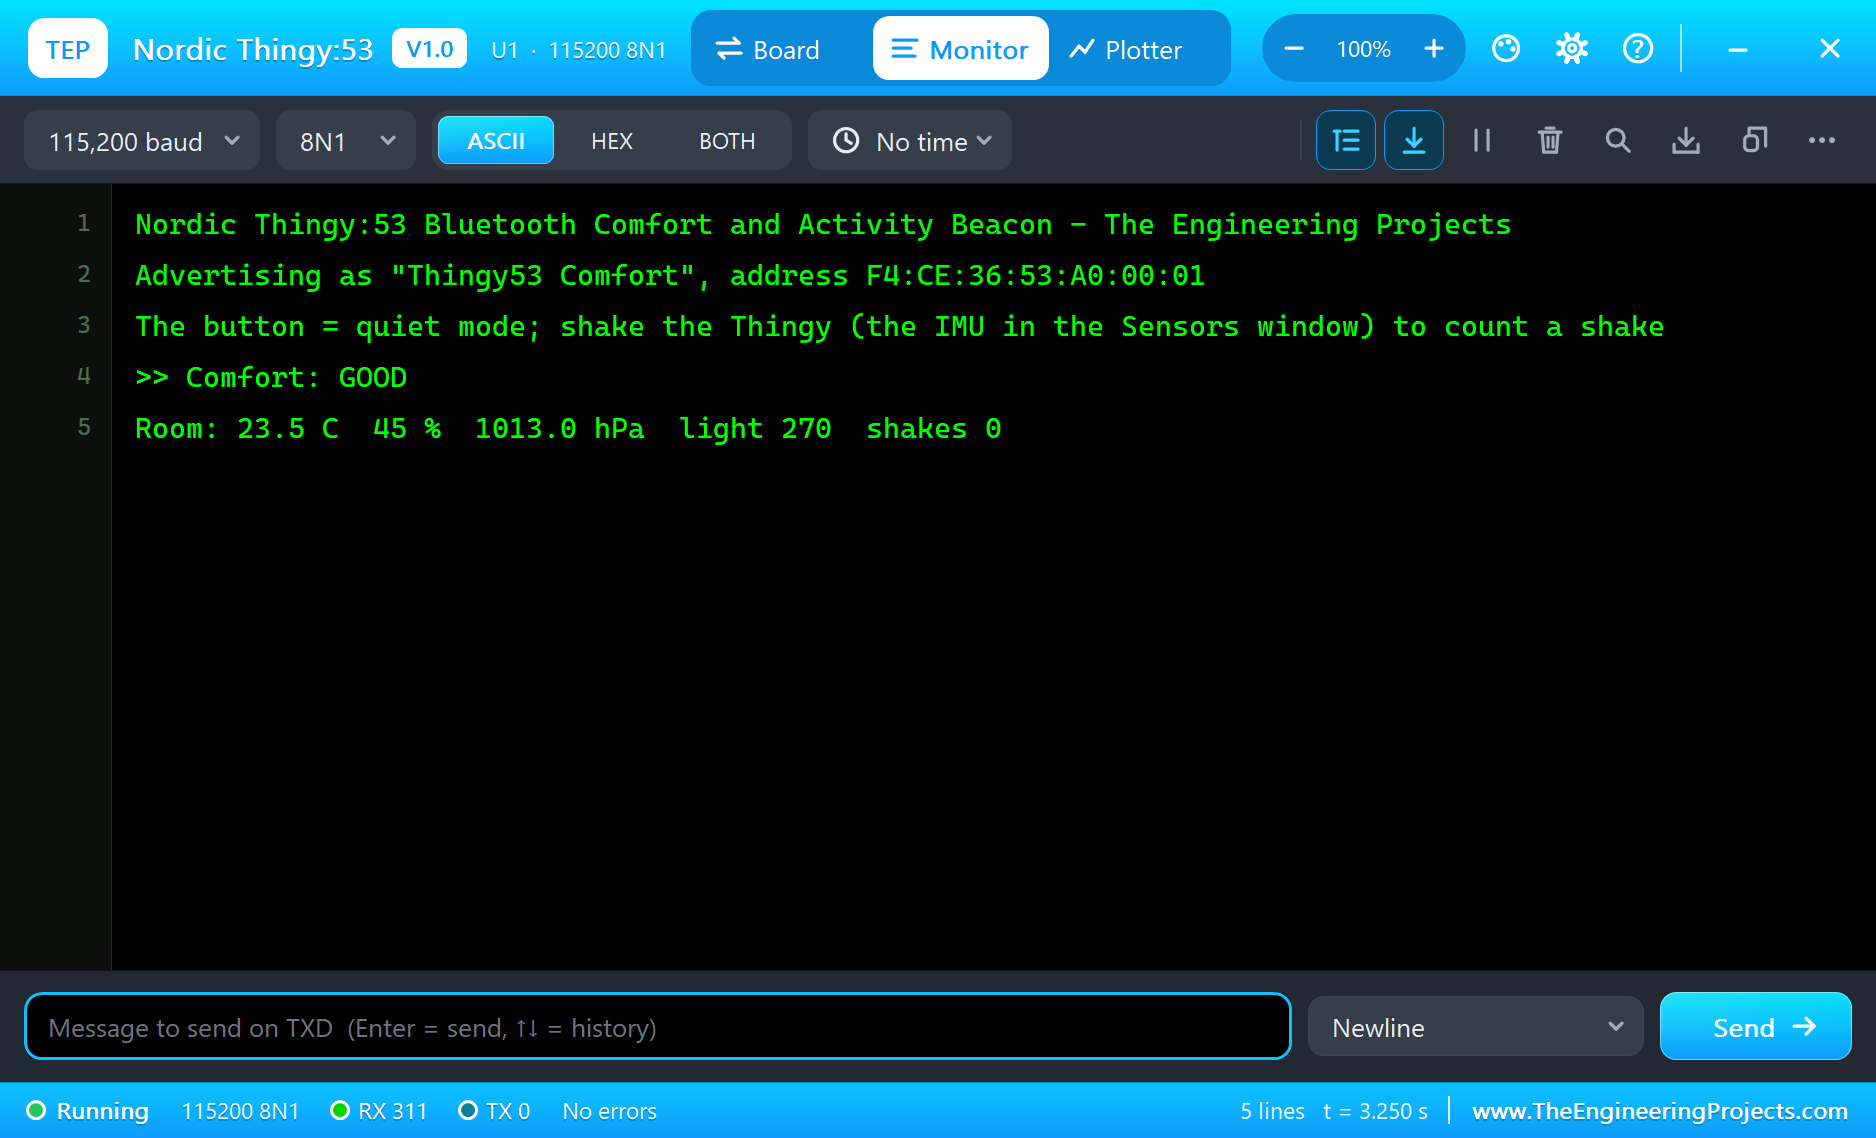
Connect the Phone
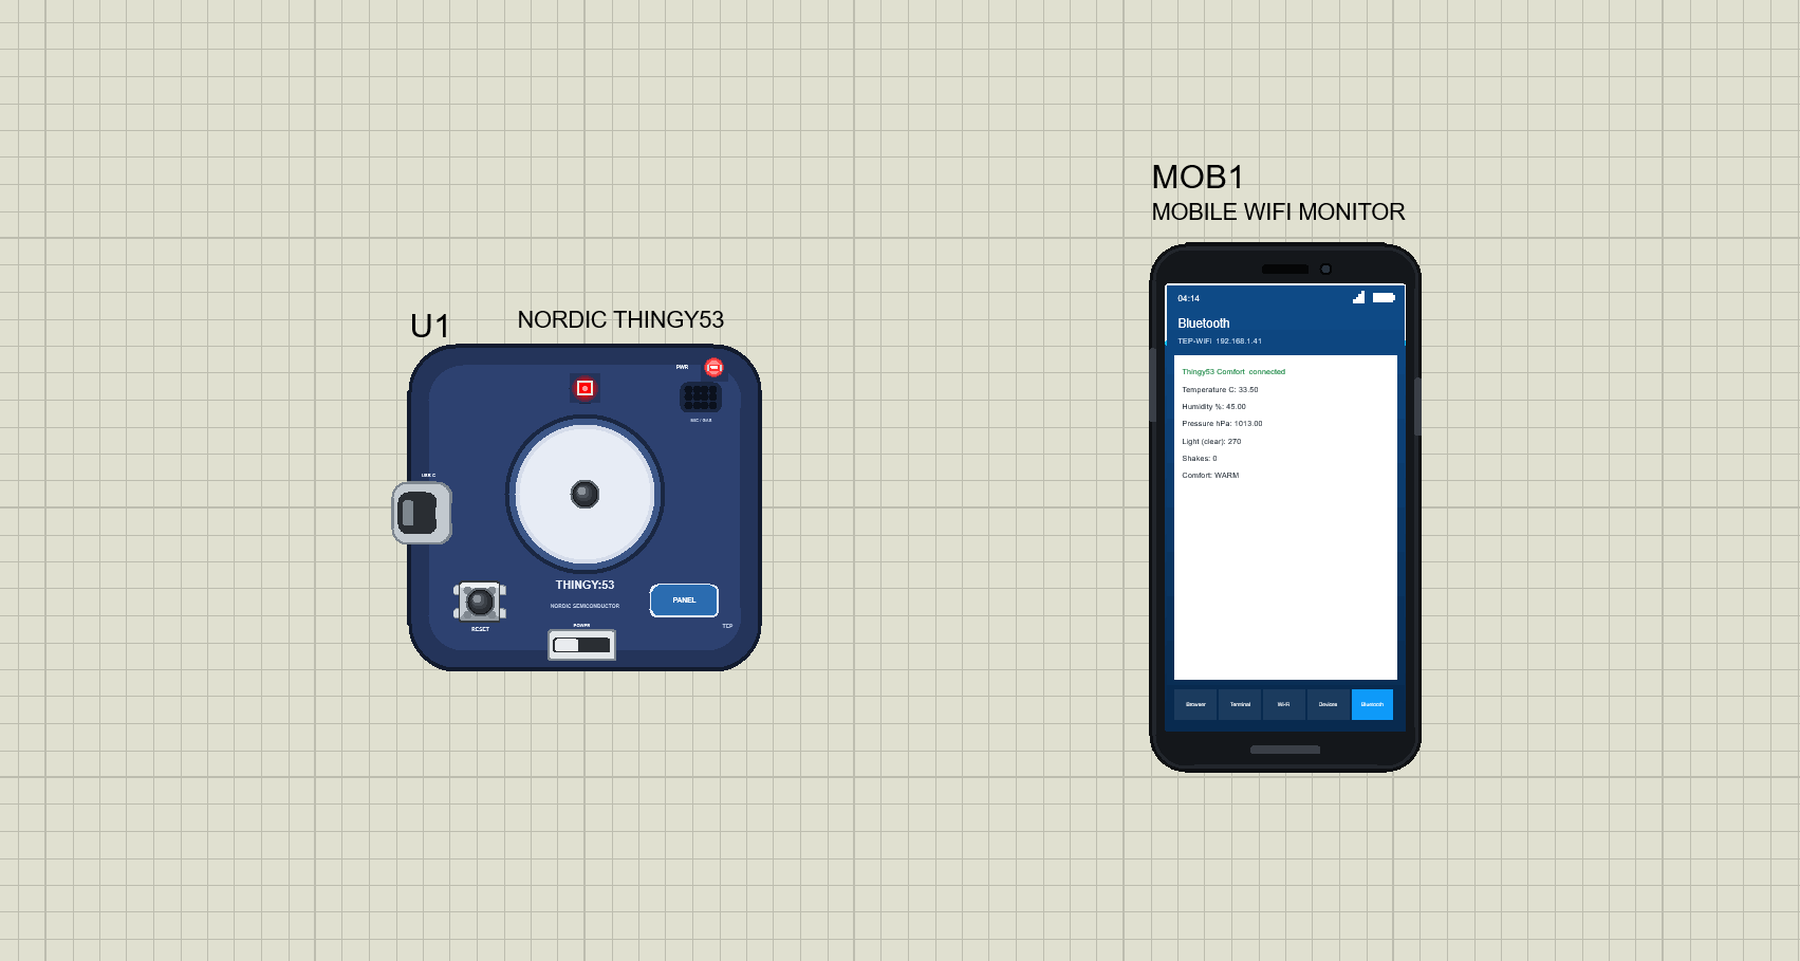
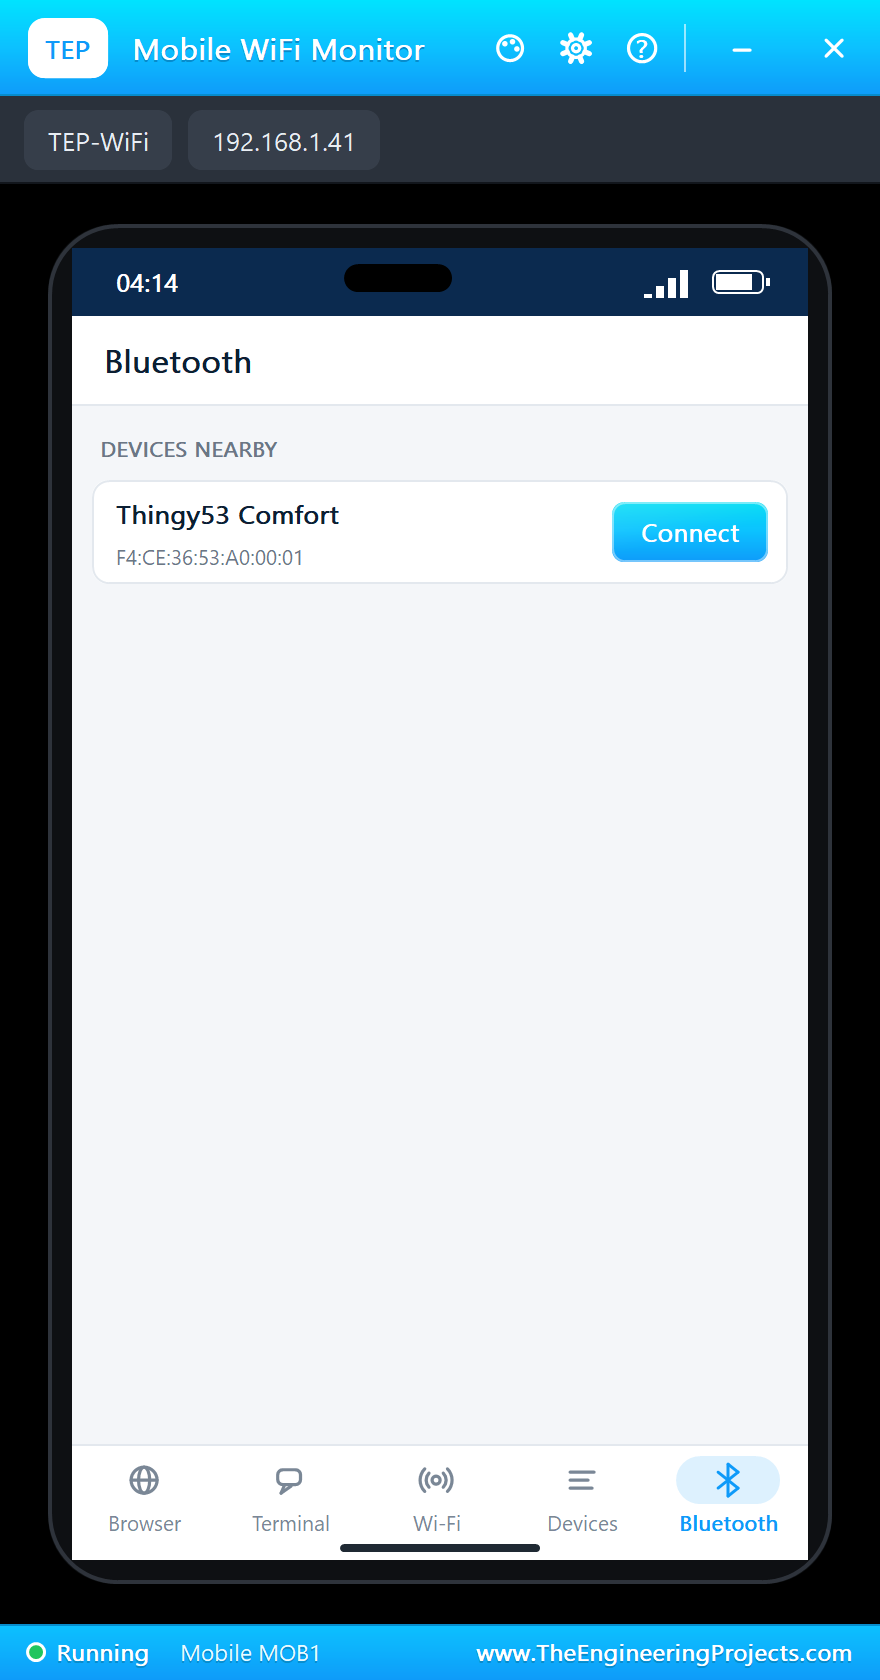
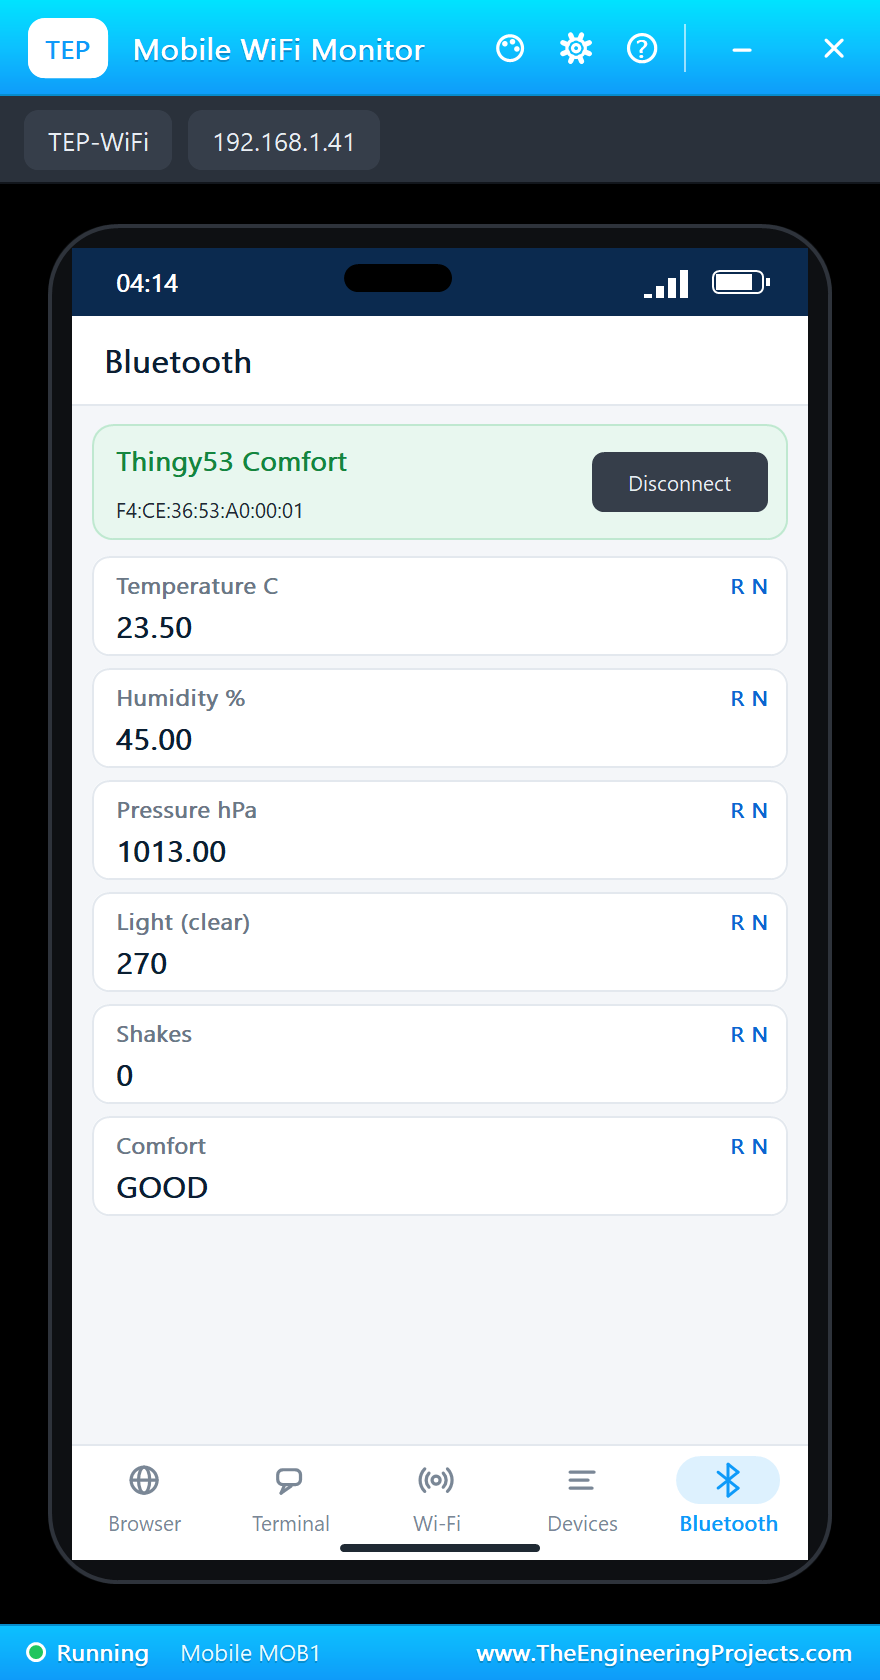
Click the phone, open its Bluetooth app and press SCAN. "Thingy53 Comfort" appears in the list; press Connect, and the app shows every characteristic with its name and value:
A Warm Room
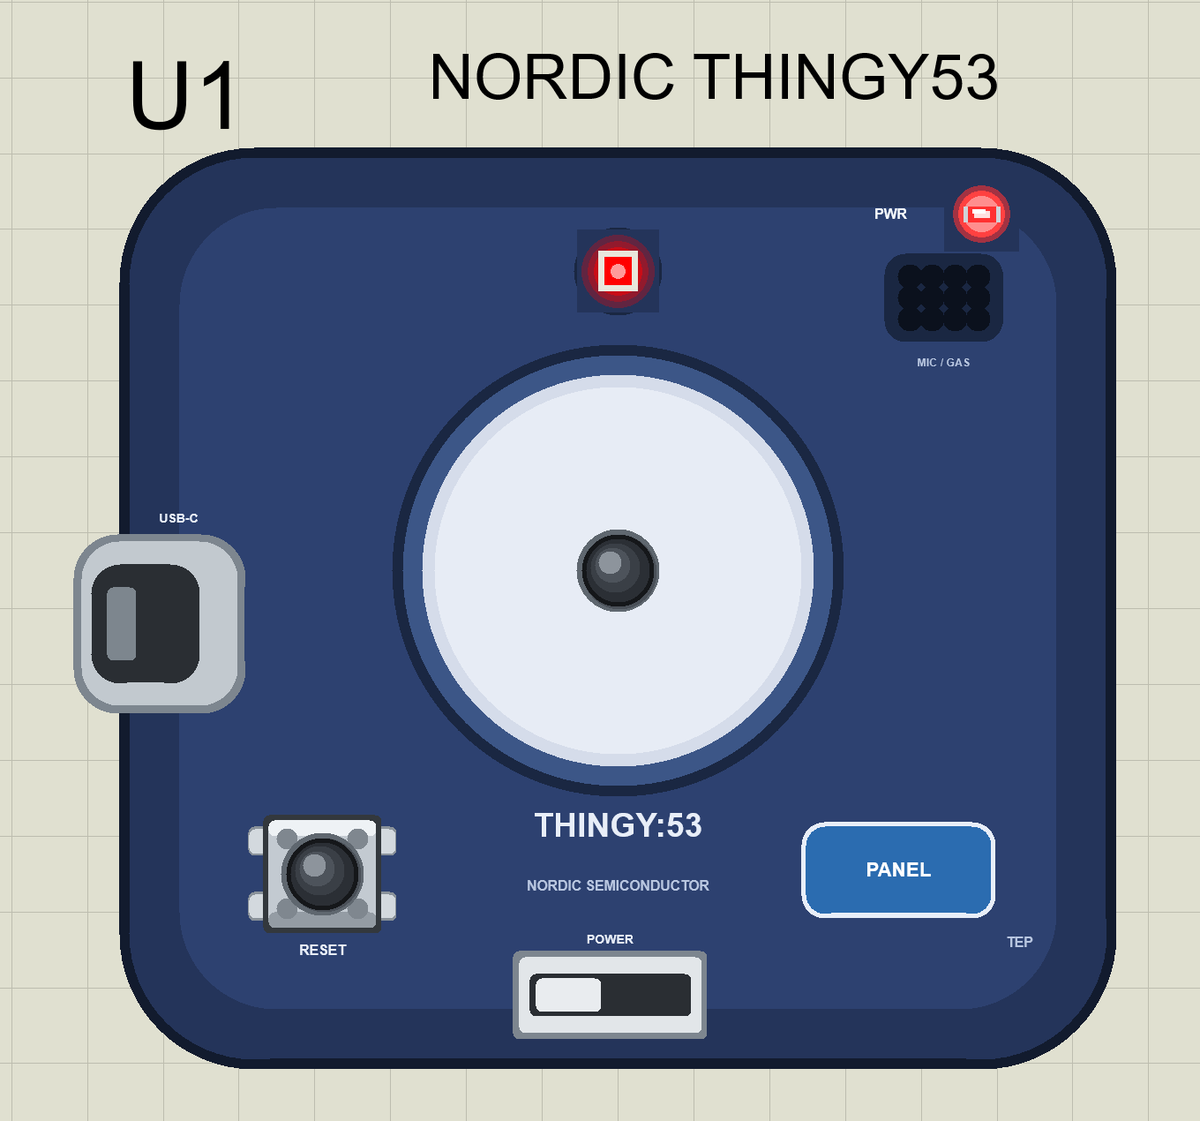
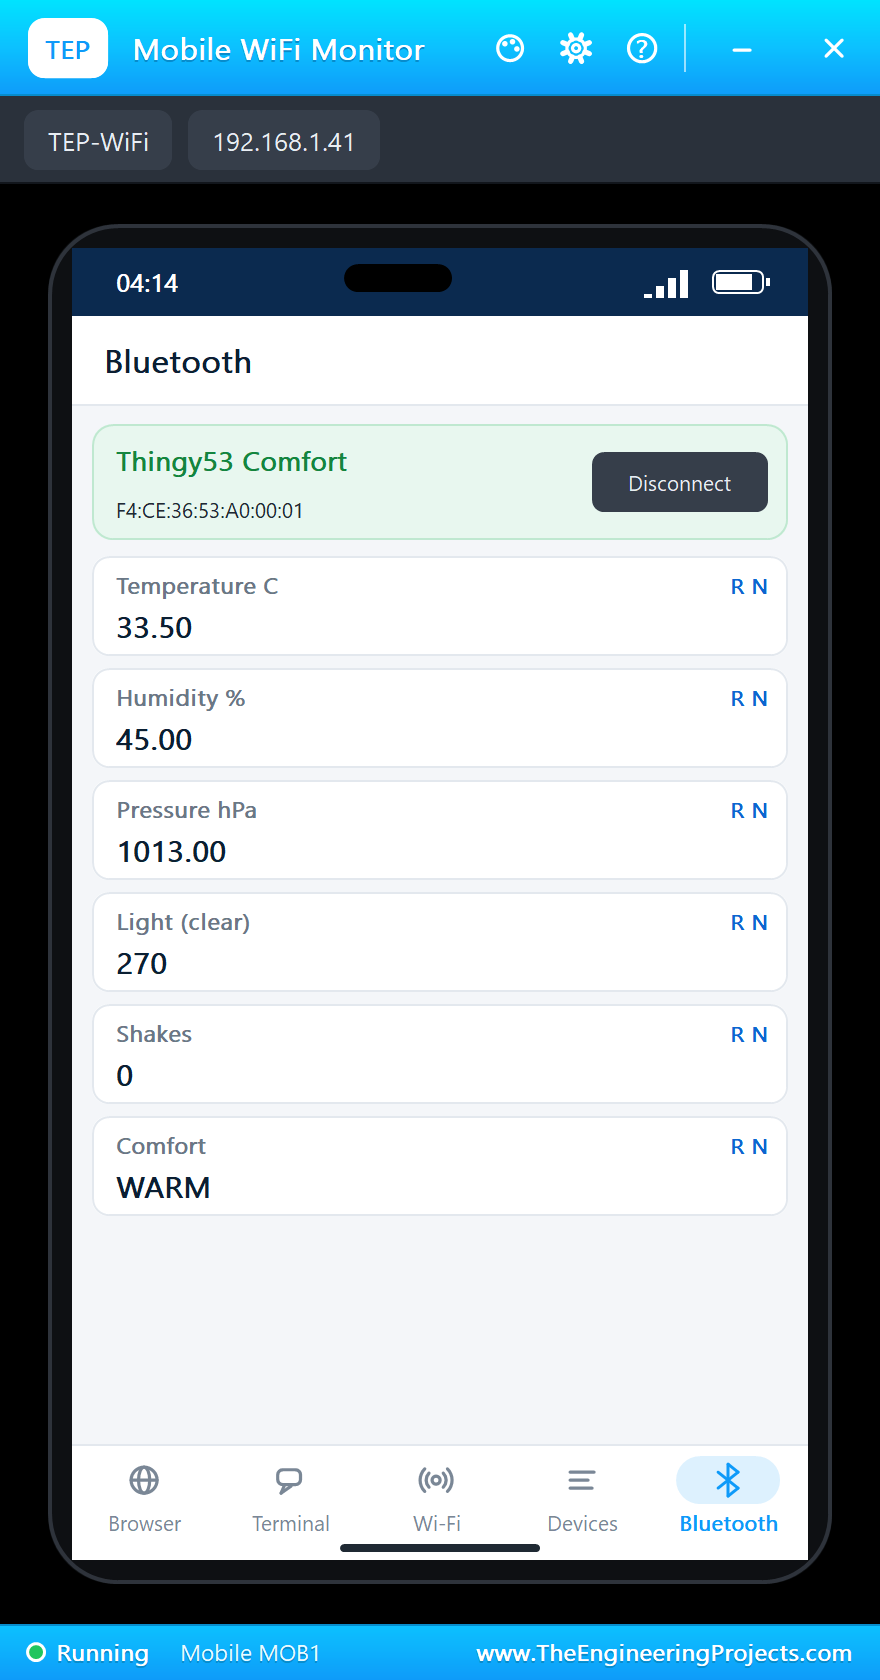
In the Sensors window click +10 next to the temperature. The room jumps to 33.5 C, the comfort becomes WARM, the LED turns red and the phone gets the new values at once:
>> Phone connected: a4:c3:f0:85:1b:01
Room: 23.5 C  45 %  1013.0 hPa  light 270  shakes 0
>> Comfort: WARM
Room: 33.5 C  45 %  1013.0 hPa  light 270  shakes 0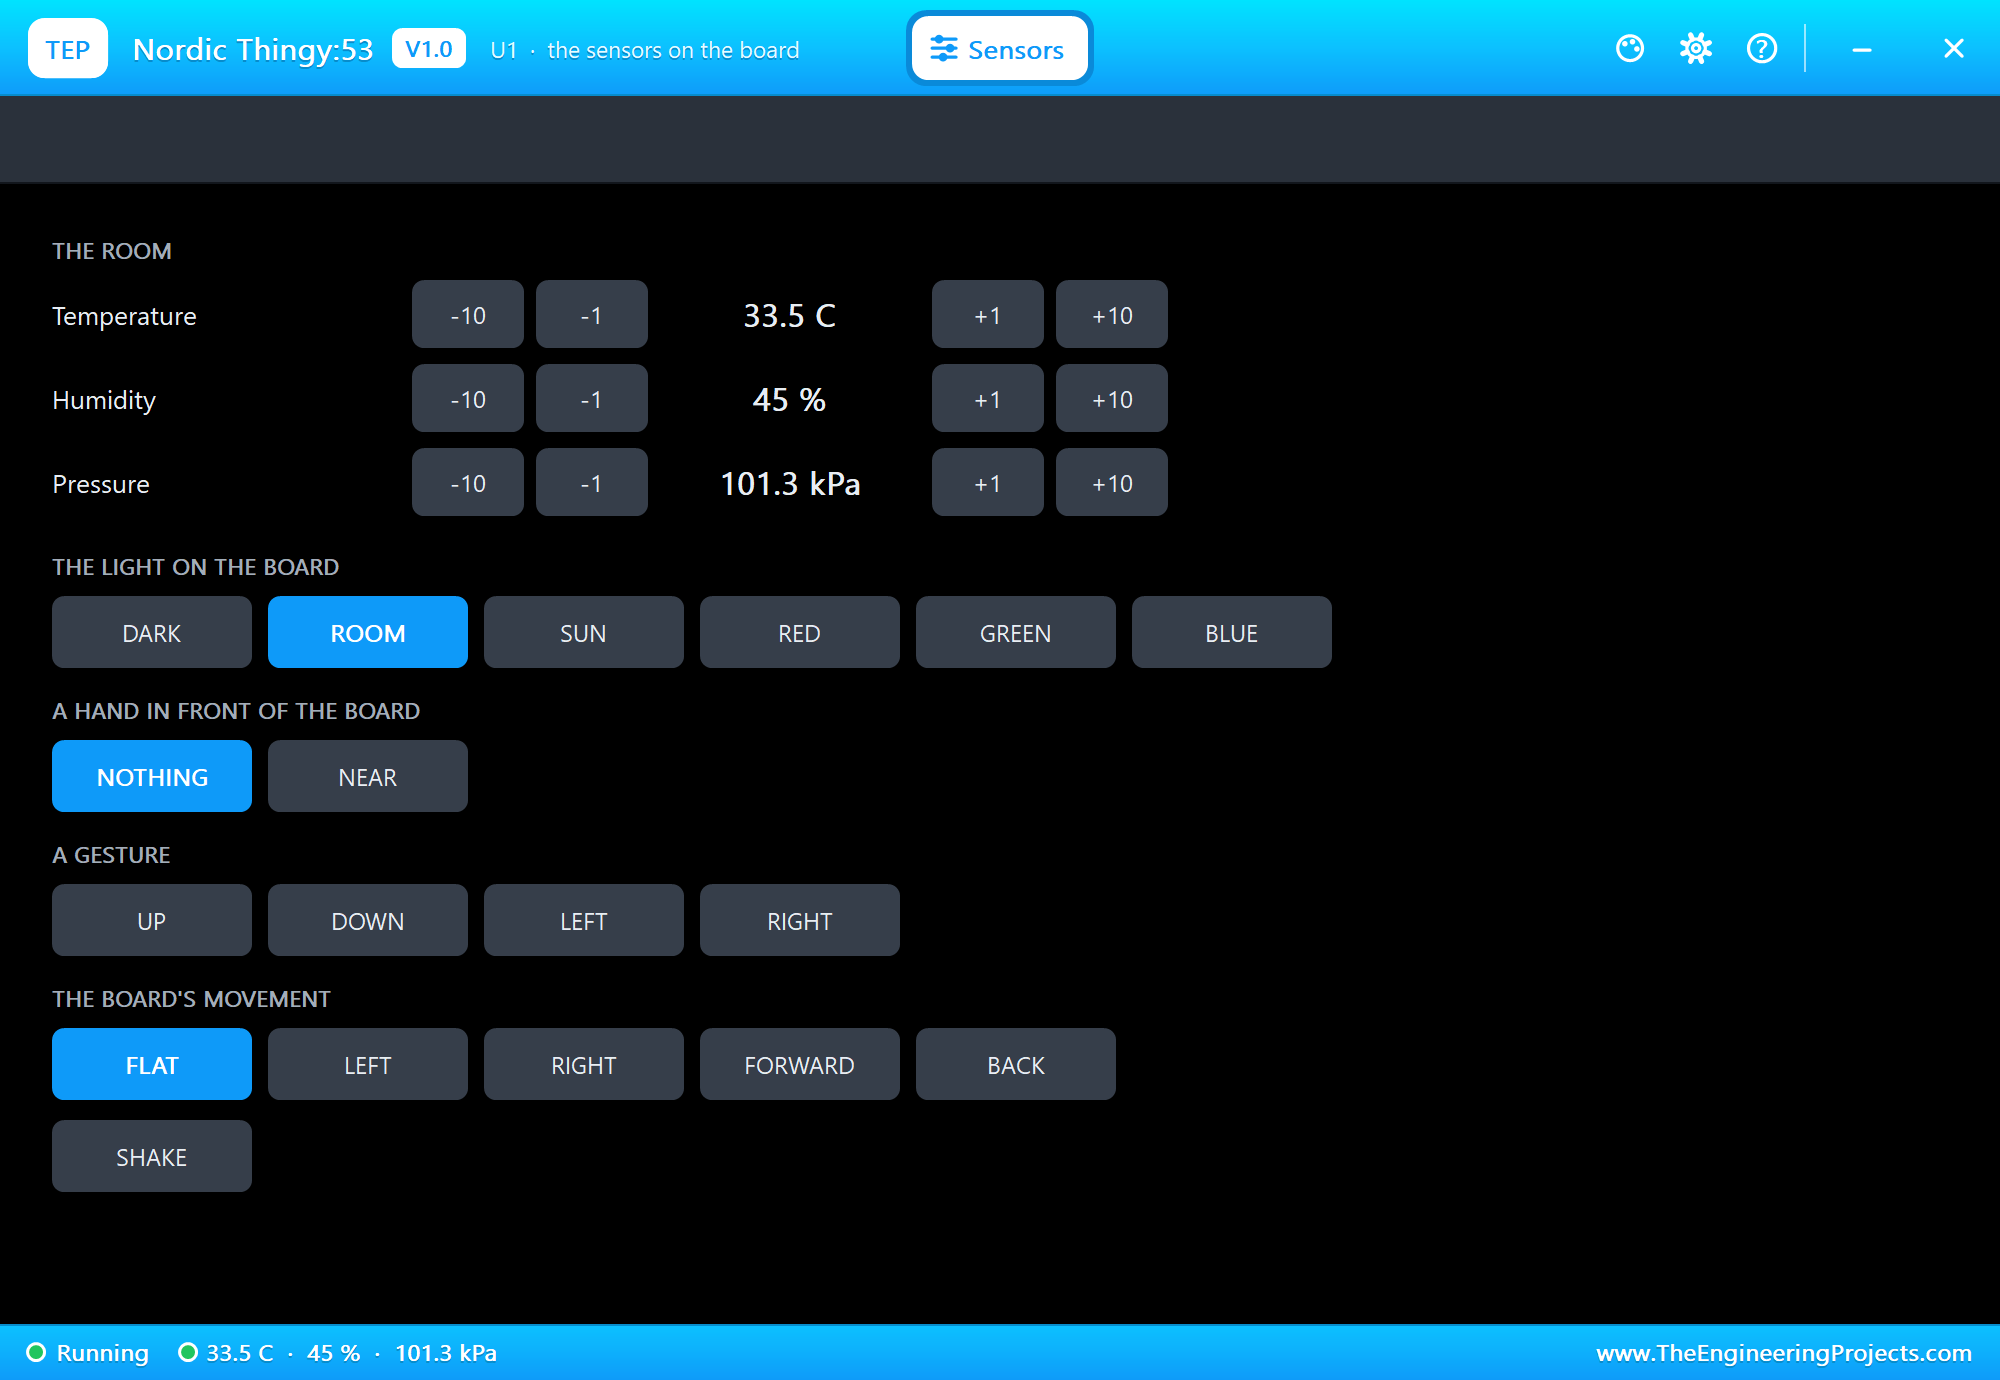
Here is the complete circuit while the simulation runs:
A Shake and a Cold Room
Click SHAKE: the counter goes up by one and the LED blinks white. Then click -10 twice. The room passes GOOD on the way down and ends at 13.5 C: COLD, and the LED turns blue:
>> Shake 1 (1.75 g)
Room: 33.5 C  45 %  1013.0 hPa  light 270  shakes 1
>> Comfort: GOOD
>> Comfort: COLD
Room: 13.5 C  45 %  1013.0 hPa  light 270  shakes 1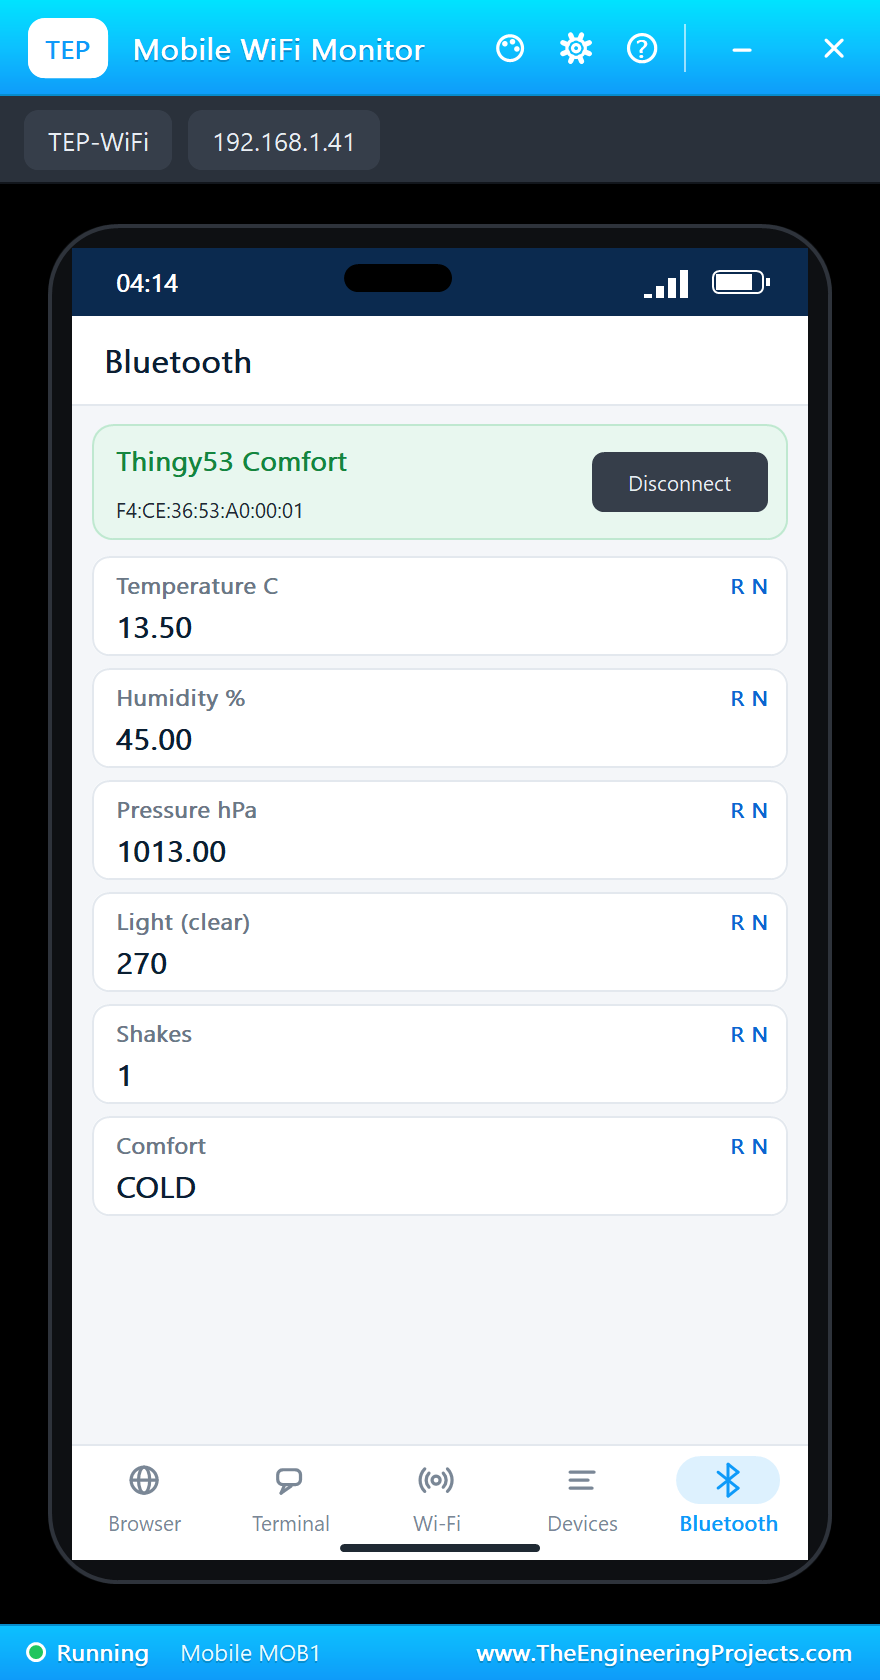
Quiet Mode
Click DARK in the Sensors window and the light reading drops from 270 to 6. Now click the big button on the Thingy: the LED goes off for the night, while the sensors and the phone keep working:
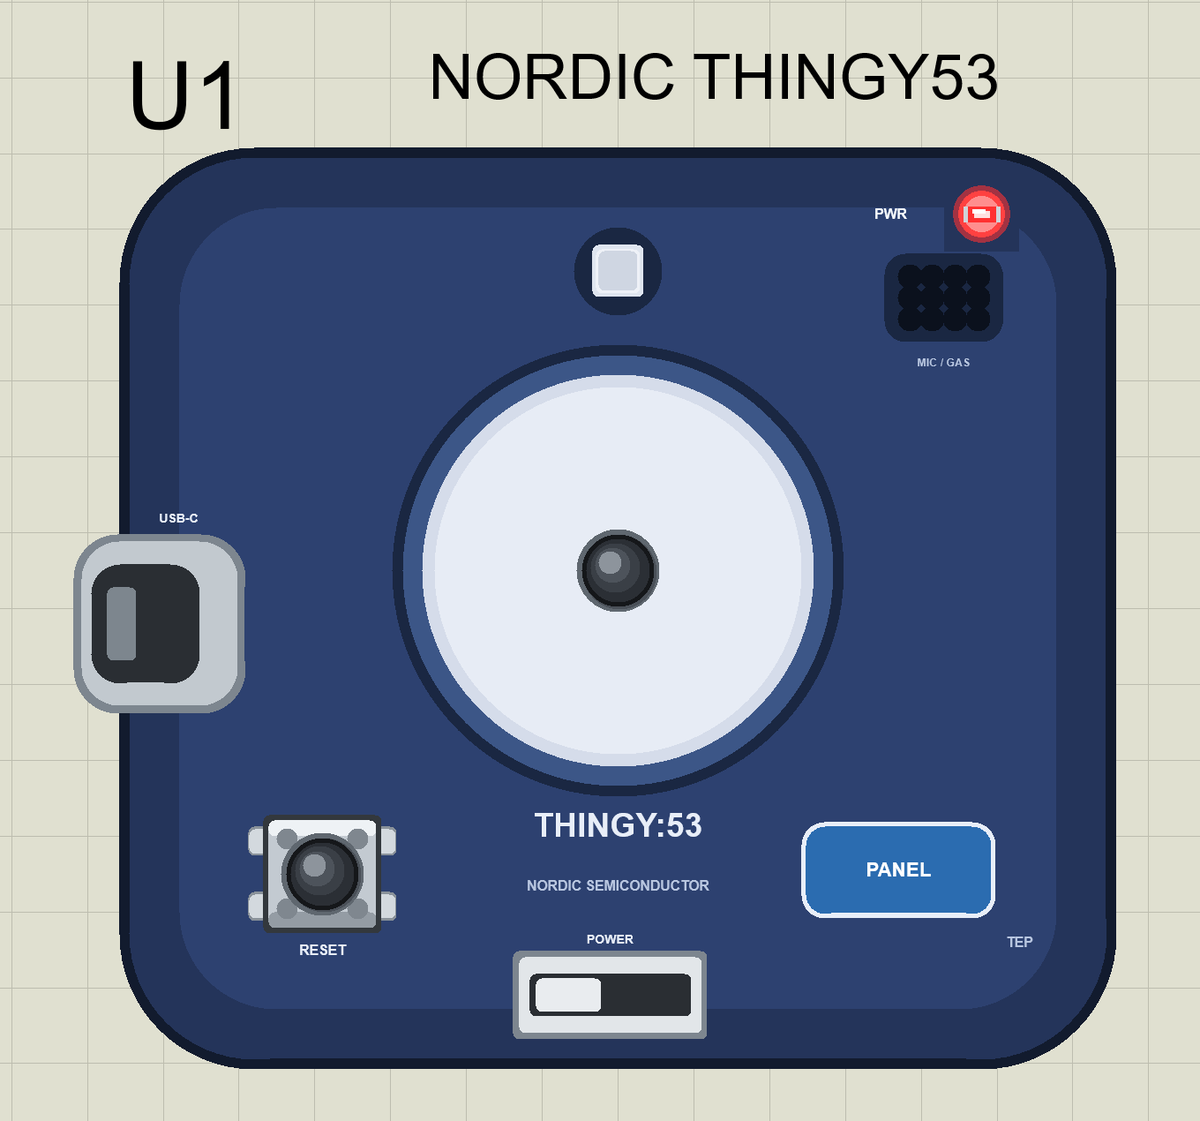
A second click turns it back on. Make the room good again with +10 and the LED is green; then press Disconnect on the phone, and the Thingy advertises again:
Room: 13.5 C  45 %  1013.0 hPa  light 6  shakes 1
>> BUTTON: quiet mode (LED off)
>> BUTTON: LED on
Room: 13.5 C  45 %  1013.0 hPa  light 270  shakes 1
>> Comfort: GOOD
>> Phone left - advertising again
Room: 23.5 C  45 %  1013.0 hPa  light 270  shakes 1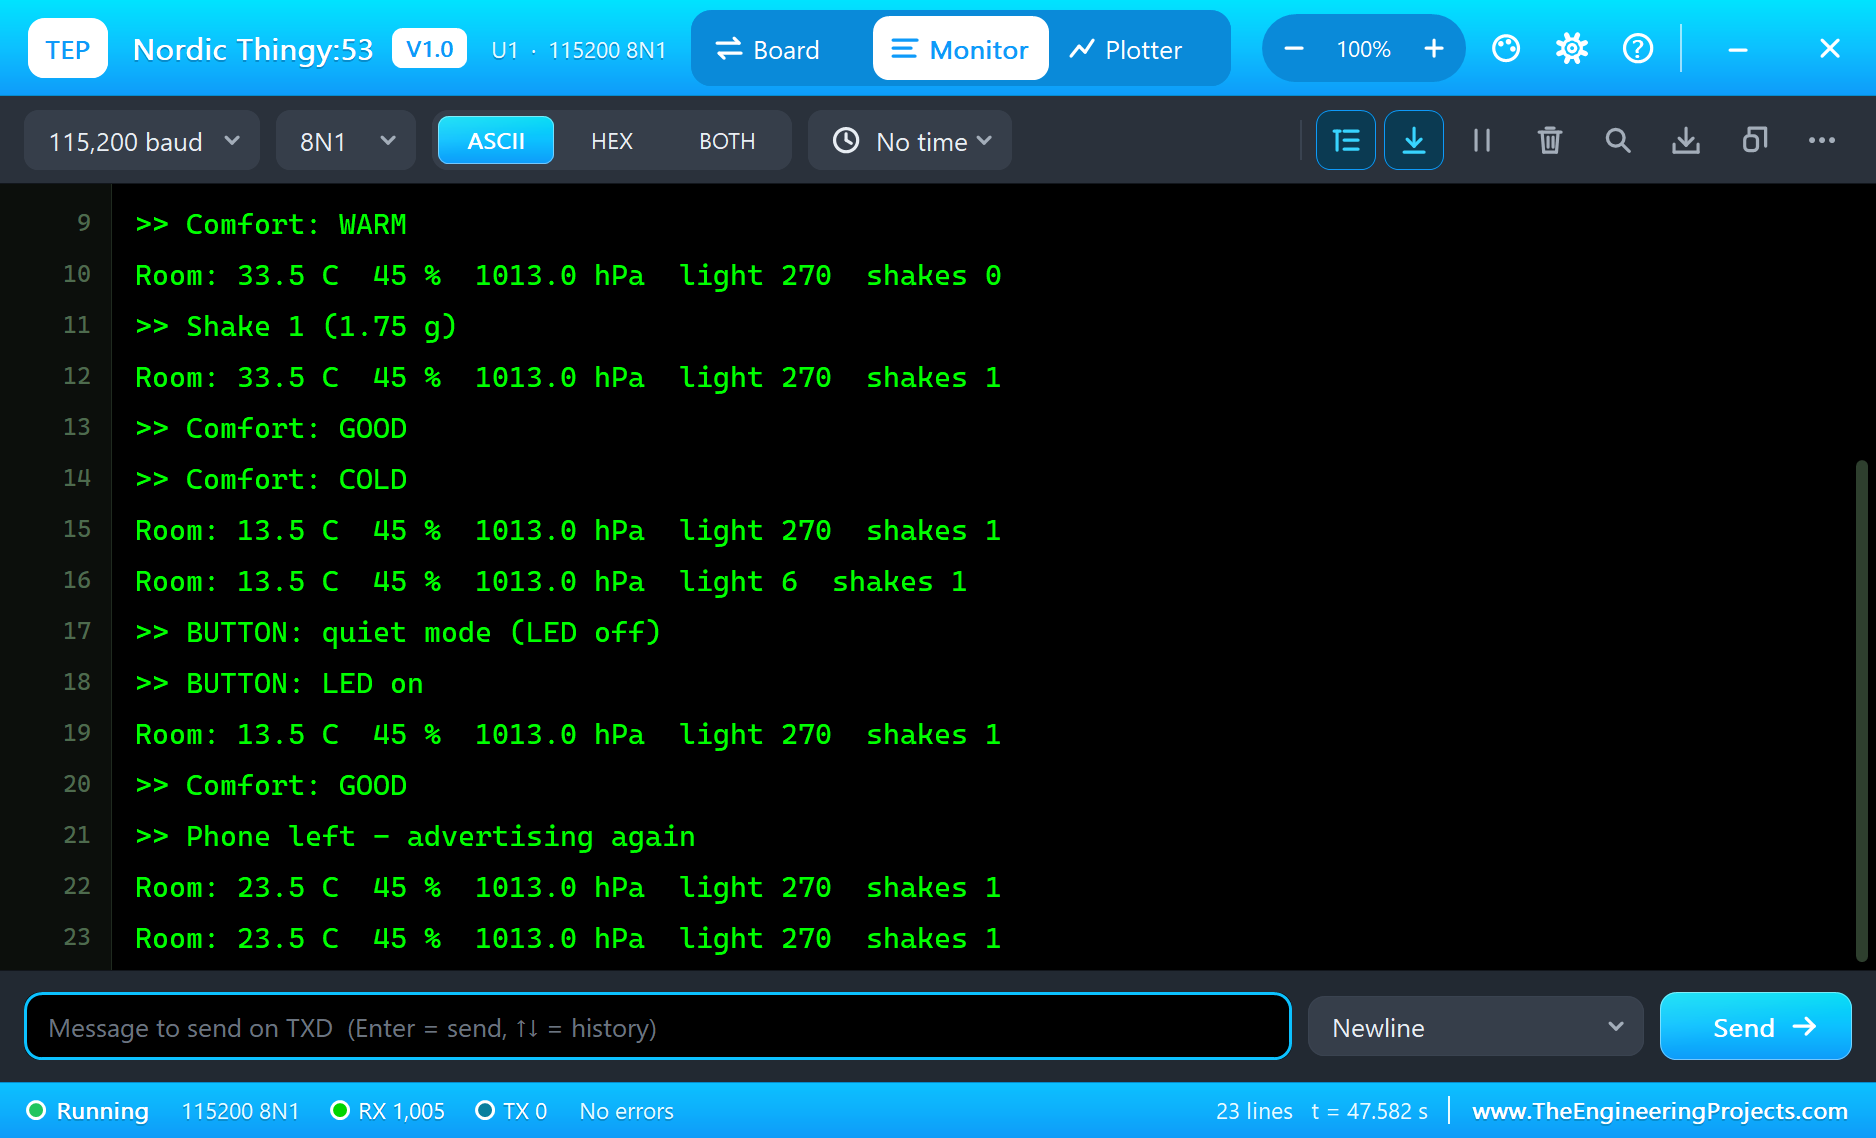
Try It Yourself
- Change the GOOD range to 21 to 24 C and see how often the LED changes.
- Use
analogWrite()on the LED pins to fade from green to red as the room warms up. - Turn the light value into a "lights left on" warning when the room is bright late at night.
- Add a writable characteristic so the phone can set the comfort limits.
Ideas to Extend the Beacon
- Count steps instead of shakes, with a smaller threshold and a rhythm check.
- Detect a fall: free fall near 0 g, then a hard impact (the Sensors window has a FALL button on some boards).
- Keep the last hour of readings and send them in one go when the phone connects.
- Use the pressure to notice a door or a window opening in a closed room.
Your Own Sketches
Write the sketch in the Arduino IDE with the board Nordic Thingy:53 (TEP Proteus), use Sketch > Export Compiled Binary and set the part's PROGRAM property to the .hex. The ArduinoBLE and sensor calls are the familiar Arduino ones. On a real Thingy:53, Nordic's nRF Connect SDK provides the sensor drivers and the Bluetooth stack; the structure of your program, read, decide, show, report, stays the same.
Things to Know Before Using a Real Thingy:53
- The battery: the Li-Po charges over USB-C; switch the Thingy off when you store it.
- Self-heating: the case warms the BME688 a little when the radio is busy, so calibrate the temperature.
- Sensor names: the real Thingy uses the BME688 and the BH1749, so its drivers differ from the Arduino libraries used in the simulation.
- Programming: the Thingy has a bootloader for USB updates, or a debug probe through its debug connector.
- Two antennas: one goes through the nRF21540 for the long range, so keep the case away from metal.
Properties of the Thingy:53
| Property | What it does |
|---|---|
| PROGRAM | the sketch: a .hex from TEP Boards for Proteus (board "Nordic Thingy:53") |
| MONITOR, BAUD, AUTOOPEN | the built-in serial monitor: on, its baud rate (115200), open at Run |
| TEMPERATURE, HUMIDITY, PRESSURE | the room at Run (the demo: 23.5 C, 45 %, 101.3 kPa) |
Troubleshooting
- The phone finds nothing: press SCAN after "Advertising as" is printed; the sketch must call
BLE.advertise(). - A sensor reads 0: call its
begin()first. - A shake counts many times: wait a short time after each one, as the demo does.
- The LED looks inverted: on the Thingy it lights when the pin is HIGH.
- A number goes wrong above 32767: int is 16 bits in the simulation - use long.
Limitations of the Simulation
- Bluetooth LE works as a peripheral only. Your sketch is one program: the nRF5340's two cores are not split.
- The gas reading, the microphone, the ADXL362, the battery and charger, NFC and the nRF21540's range are drawn, not modelled.
- Your sketch gets 8 KB of RAM in the simulation, and int is 16 bits there.
- Thingy:53, nRF5340, nRF21540 and Nordic Semiconductor are names of Nordic Semiconductor ASA, Arduino of Arduino, and the Bluetooth word mark belongs to Bluetooth SIG; this library is not made or endorsed by them or by Labcenter.
- Tested in Proteus 8.5 in November 2026 (the demo as shipped, about 48 s of simulation). Proteus 7 is not supported.
So, that was all about the Nordic Thingy:53 Library for Proteus. I hope it helps you try your Bluetooth sensor ideas in a simulation before you buy the device - the sensors, the LED, the button and the phone, all on one sheet. If you have any questions, ask in the comments and I will help you out. Till the next tutorial, take care and have fun!

Comments
0