I am sharing interfacing of this Flame Sensor with Arduino today, but soon I will also post a tutorial on Interfacing of Flame Sensor with PIC Microcontroller. If you guys have any questions then ask in comments. I have also given the Simulation file and the Programming code below to download. But I would recommend you to design this proejct on your own so that you make mistakes and then learn from them. So, let's get started with Interfacing of Flame Sensor with Arduino:
Interfacing of Flame Sensor with Arduino
- You can download the complete Proteus Simulation along with Arduino programming code from the below button:
- Now, let's design it in Proteus by ourselves.
- So, first of all, download the Flame Sensor Library for Proteus and also download the Arduino Library for Proteus.
- On more Library you will need is New LCD Library for Proteus.
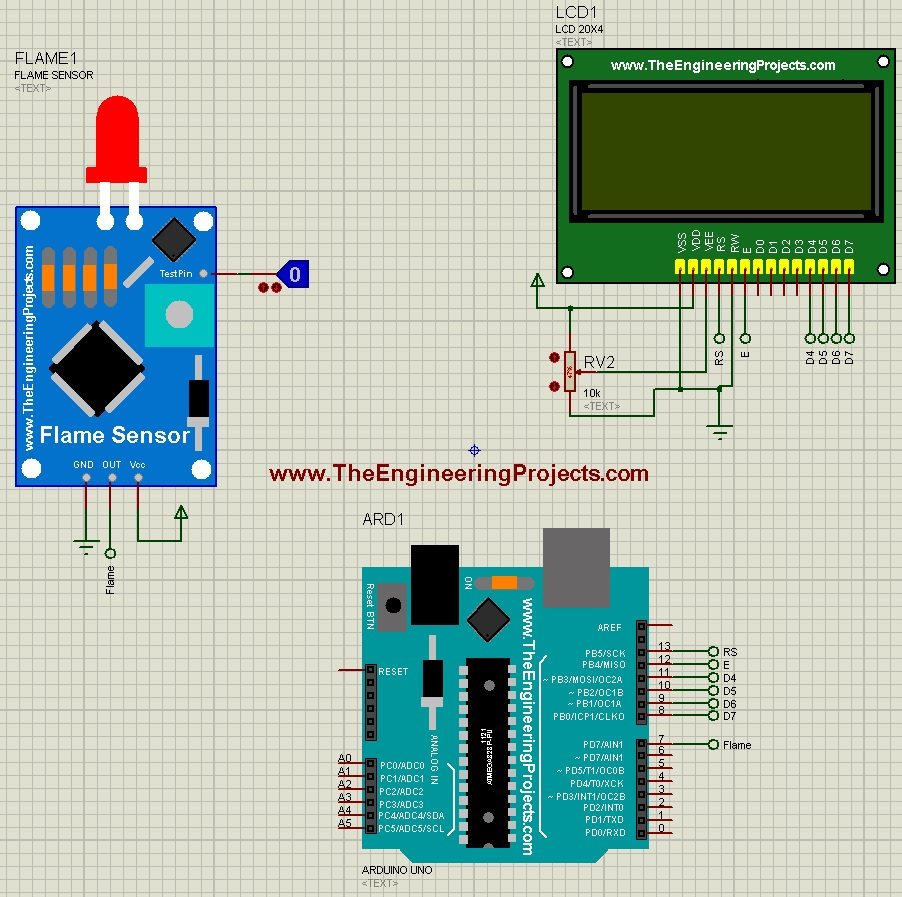
- Now design a small simulation as shown in the below figure:

- Now design a small Arduino code as given below:
#include <LiquidCrystal.h>

LiquidCrystal lcd(13, 12, 11, 10, 9, 8);

int Flame = 7;

void setup() {
  Serial.begin(9600);
  pinMode(Flame, INPUT_PULLUP);
  lcd.begin(20, 4);
  lcd.setCursor(0,0);
  lcd.print("Flame : ");
  lcd.setCursor(1,2);
  lcd.print("www.TheEngineering");
  lcd.setCursor(4,3);
  lcd.print("Projects.com");
}

void loop() {
  if(digitalRead(Flame) == HIGH){lcd.setCursor(8,0);lcd.print("Detected    ");}
  if(digitalRead(Flame) == LOW ){lcd.setCursor(8,0);lcd.print("Not Detected");}

}
- Add this code in your Arduino software and compile it to get the Hex File from Arduino Software.
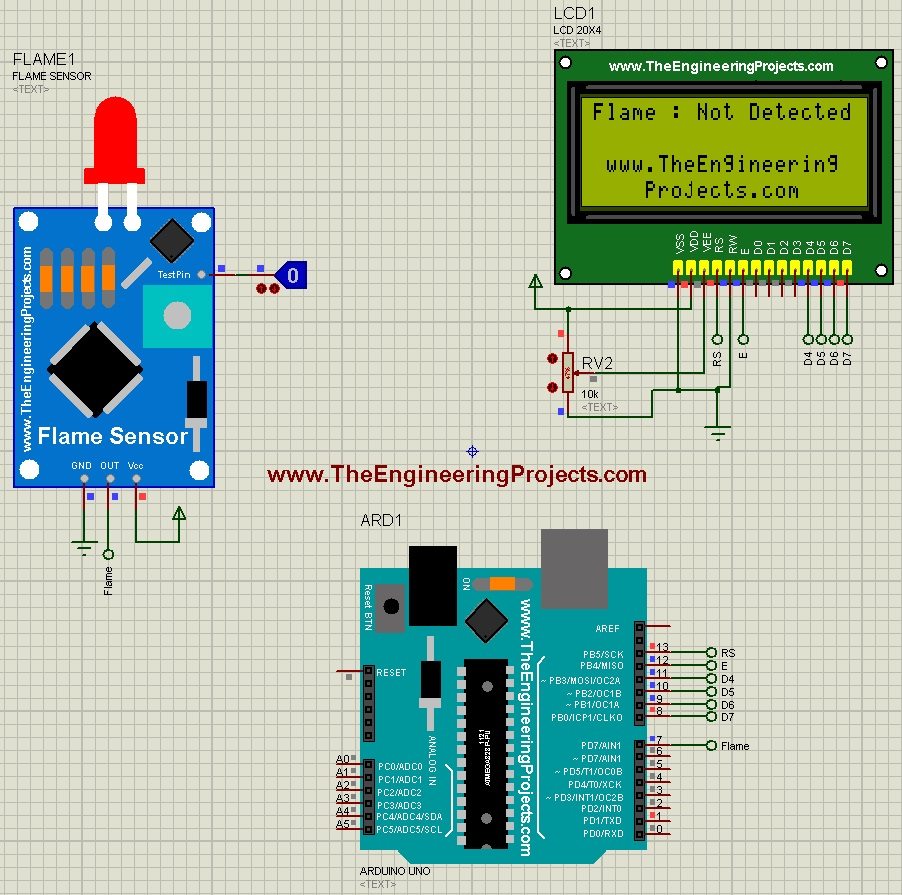
- Upload this hex file in your simulation and then run your simulation and if everything goes fine then you will get something as shown in below figure:

- In the above figure, you can see the sensor is off that's why in the LCD its written that no smoke detected.
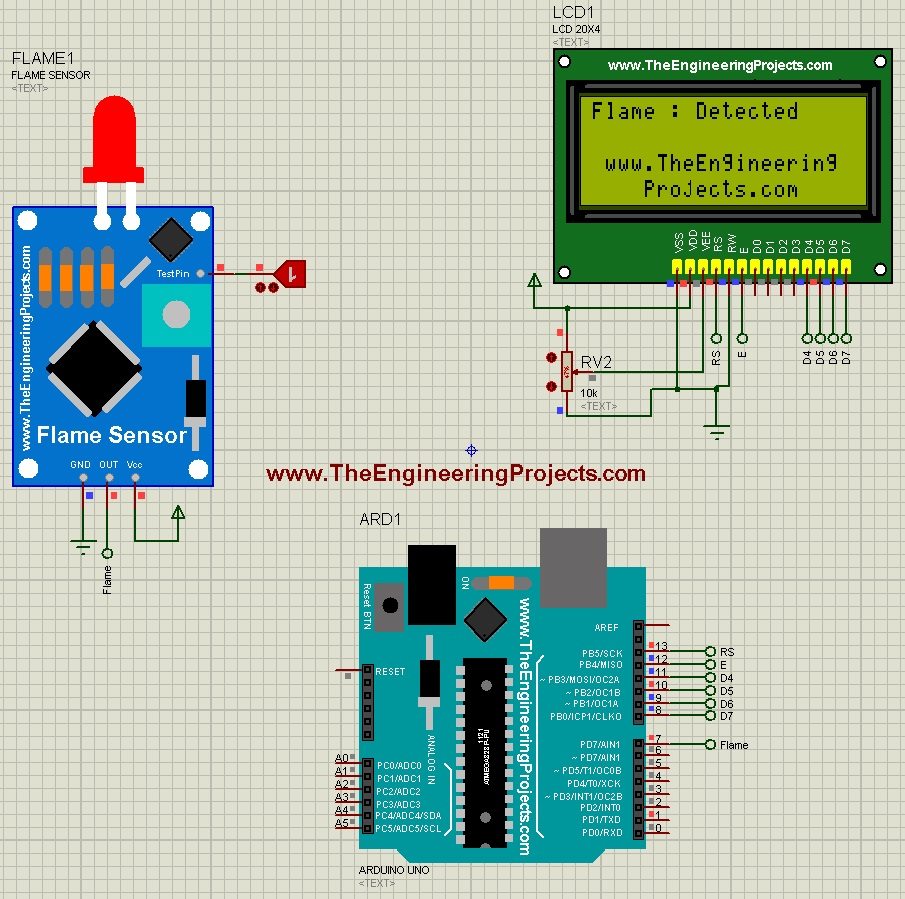
- Now, let's bring some Flame by clicking the Logic State on Flame Sensor and you will see the below results:

- Now you can see in the above figure that when the Flame is detected then the LCD indicated that Flame has detected.
- That's how we can easily simulate the Flame Sensor with Arduino.
- I have explained this project in detail in the below video:


 Arduino
 syedzainnasir
 1 Comments


 2.3k
2.3k
 953
953
 921
921
 2.1K
2.1K


