Temperature Sensor 18B20 is the most commonly used temperature sensor. Its a one wire sensor means it sends data through a single wire and we can connect multiple sensors with a single wire, that's why its quite efficient and easy to use as well. I have also posted a tutorial on How to Interface LM35 sensor with Arduino in Proteus ISIS which is another temperature sensor so give it a try as well and let me know which one you think is better. Anyways let's get started with temperature sensor 18B20 in Proteus ISIS.
How to use 18B20 in Proteus ISIS ???
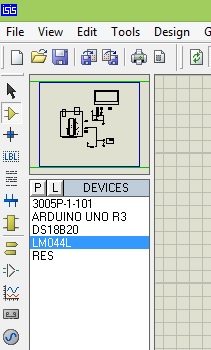
- First of all, get these components from Proteus components list as shown in below figure:

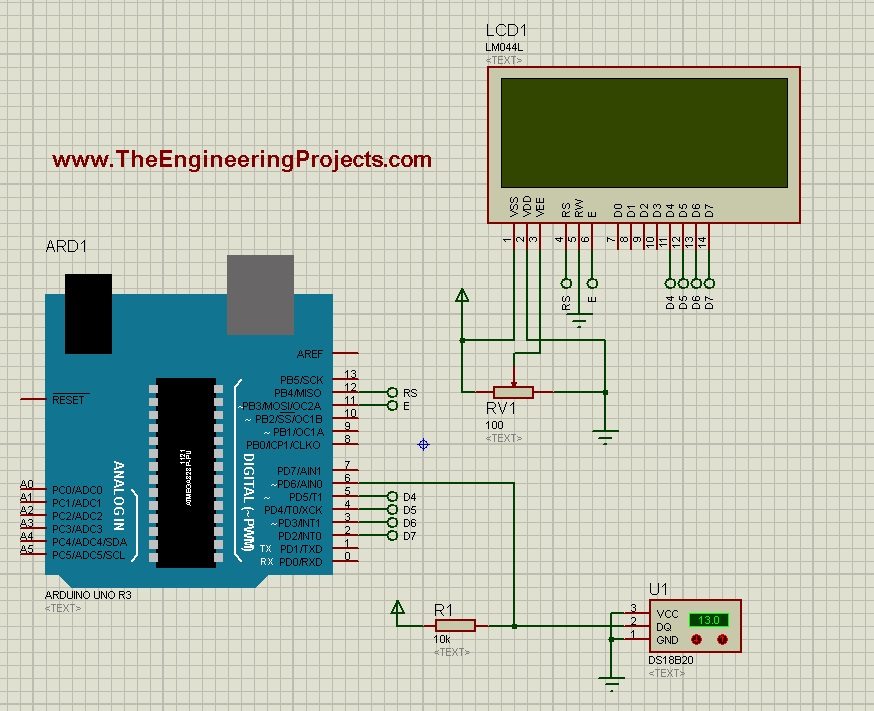
- Now design the circuit as shown in below figure:

- As you can see in above simulation, we have used Arduino UNO board along with LCD and 18B20 temperature sensor.
- 18B20 in Proteus can't detect the real temperature but we can change the temperature by pressing + and - buttons.
- So, now we have interfaced the temperature sensor and the LCD with Arduino. Next we are gonna design the code for Arduino and will upload it in Arduino baord.
- If you don't know How to use Arduino in Proteus then read Arduino Library for Proteus.
- You should also read How to get Hex File from Arduino, as Arduino software doesn't generate the hex file.
- Now download these three libraries, one is "one wire" library which is the protocol for 18B20 temperature sensor, next is the Dallas Temperature sensor library which is the actua library for temperature sensor 18B20 and uses one wire library. Third library is the Crystal LCD library which is used for displaying character on LCD.
- So, download all these three libraries by clicking on below buttons and then paste them in your libraries folder of Arduino software.
Download One Wire LibraryDownload Dallas Temperature LibraryDownlaod Liquid Crystal Library
- Now after adding these libraries, open your Arduino software and paste the below code into it.
    #include <OneWire.h>
    #include <DallasTemperature.h>
    #include <LiquidCrystal.h>

    #define ONE_WIRE_BUS 6
    OneWire oneWire(ONE_WIRE_BUS);
    DallasTemperature sensors(&oneWire);

    LiquidCrystal lcd(12, 11, 5, 4, 3, 2);

    void setup(void)
    {
    Serial.begin(9600);
    Serial.println("Welcome to TEP !!!");
    Serial.println("www.TheEngineeringProjects.com");
    Serial.println();
    sensors.begin();

    lcd.begin(20, 4);
    lcd.setCursor(5,0);
    lcd.print("Welcome to:");
    lcd.setCursor(1,2);
    lcd.print("www.TheEngineering");
    lcd.setCursor(4,3);
    lcd.print("Projects.com");
    delay(5000);
    }

    void loop(void)
    {
    sensors.requestTemperatures();
    Serial.print("Temperature : ");
    Serial.println(sensors.getTempCByIndex(0));
    //lcd.clear();
    lcd.setCursor(0,0);
    lcd.print("Temperature: ");
    lcd.print(sensors.getTempCByIndex(0));
    lcd.print("C");
    delay(1000);
    }
- Now get your hex file from Arduino and upload it to your Proteus Arduino board and hit the RUN button.
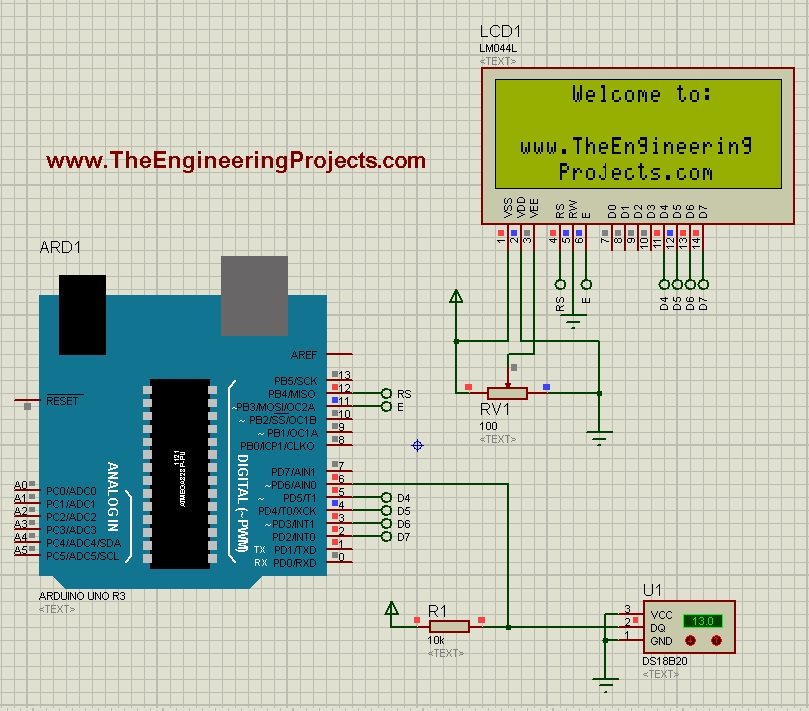
- If everything goes fine then you will something like this at the start:

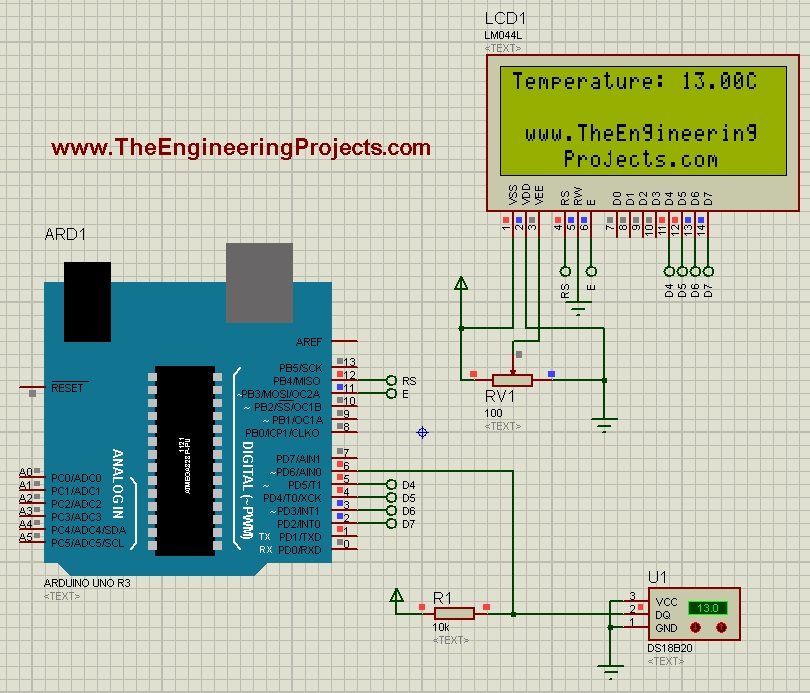
- After a delay of around 5 sec you will start receiving the Temperature sensor 18B20 values on your LCD as shown in below figure:

- Now you can see the value shown in the temperature sensor is the same as in LCD.
- So, now by clicking the + and - buttons on temperature sensor, you can increase and decrease the value of temperature and same will be changed in LCD.


 Arduino
 syedzainnasir
 8 Comments


 2.3k
2.3k
 953
953
 921
921
 2.1K
2.1K


