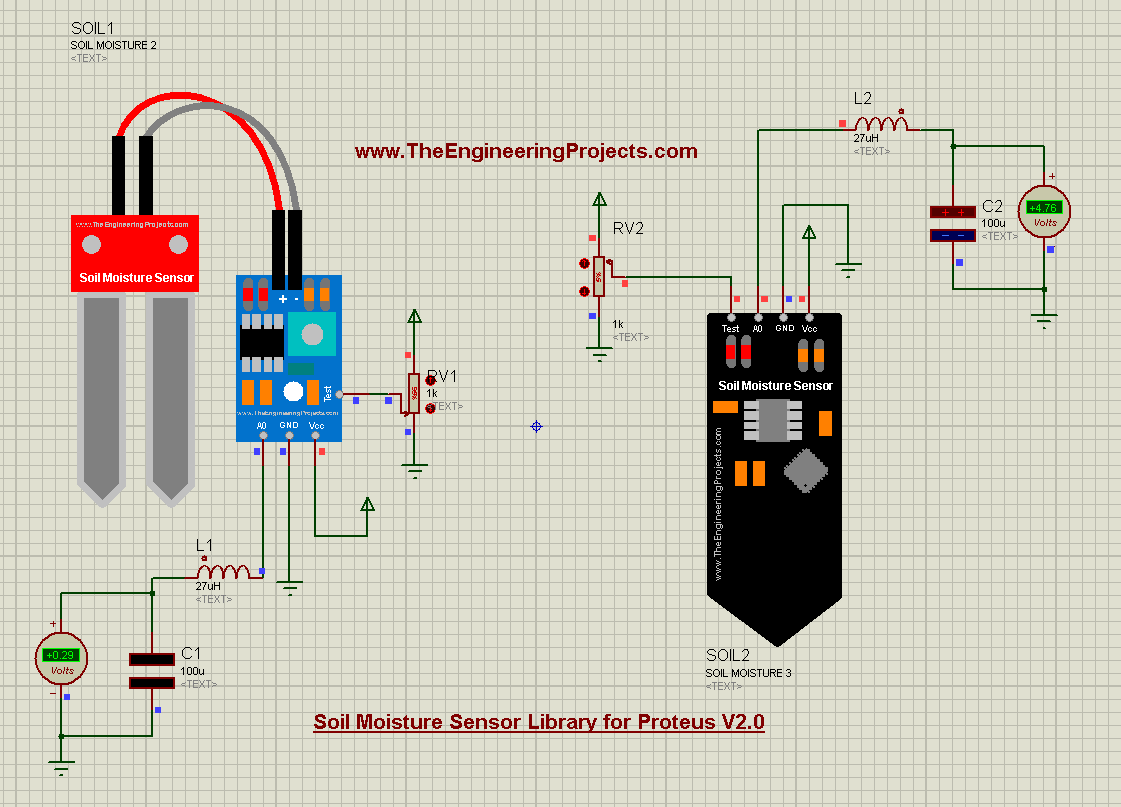
First, we will have a brief introduction of the Soil Moisture sensor, then we will download the zip file containing Proteus Library files of Soil Moisture Sensor and finally, we will design a small simulation using these new sensors. So, let's get started:
What is Soil Moisture Sensor?
- Soil Moisture sensor is an embedded sensor, used to measure the moisture level of the soil.
- It is normally used in agricultural automation projects, i.e. controlling the water flow based on the moisture level of the soil.
- Soil Moisture sensors are available with both analog and digital outputs.
- They normally have a potentiometer embedded in them, for controlling the sensitivity of the sensor.
Before downloading the sensor's library file, let's first have a look at what's new in version 2.
Difference b/w V1.0 & V2.0
- We received many complaints about the big size of the Soil Moisture sensor(V1.0), so we have reduced their sizes in this new library(V2.0).
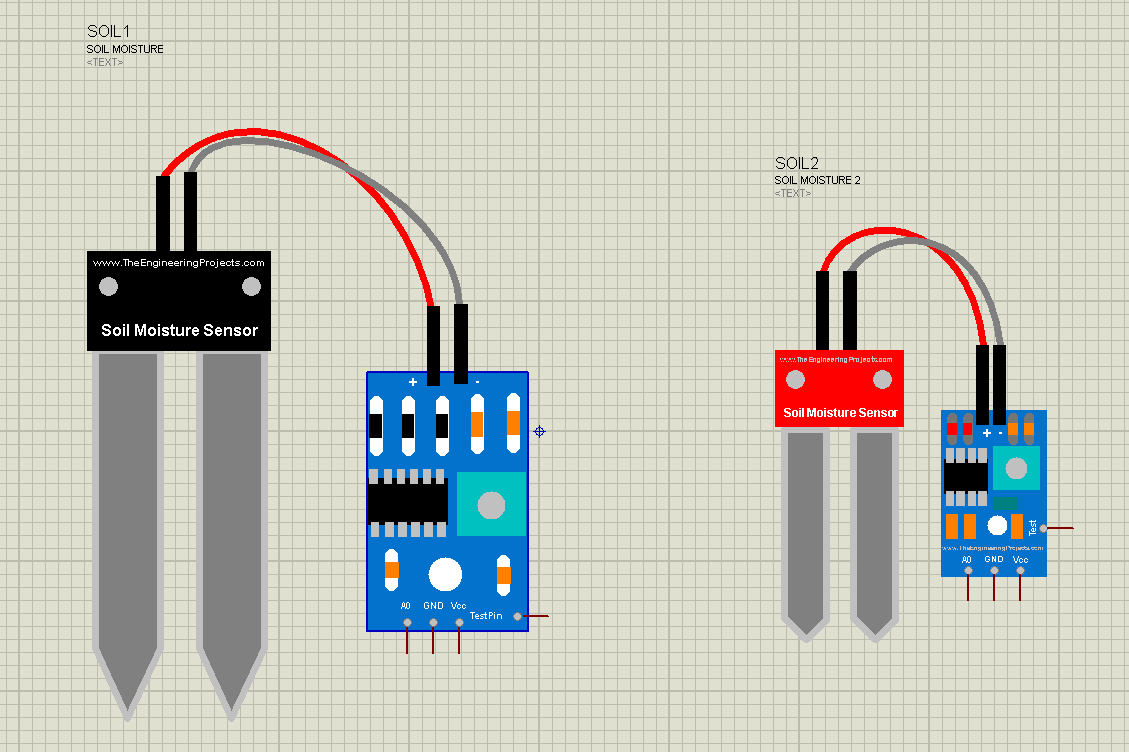
- The first version contains only 1 soil moisture sensor, while in V2.0 we have added three soil moisture sensors.
- The output of V1.0 was quite smooth, while in V2.0 we have made the output a bit fluctuating to make it more realistic.
Now, let's download the Proteus Library zip file for this sensor and simulate it in Proteus:
Soil Moisture Sensor Library for Proteus V2.0
- First, we need to download the Proteus Library zip file, by clicking the below button:
- After downloading the zip file, extract it and open the folder named Proteus Library Files.
- You will find three files in this folder, named as:
- SoilMoistureSensor2TEP.IDX
- SoilMoistureSensor2TEP.LIB
- SoilMoistureSensor2TEP.HEX
- Place these files in the library folder of your Proteus software.
- If you are facing problems with adding a library in Proteus 7 or 8 Professional, then have a look at How to add a new Library in Proteus 8 Professional.
- Now, open Proteus ISIS, and if you are already working on it, then restart it.
- In the components library, make a search for Soil Moisture Sensor, and you will get results as shown in the below figure:

- Let's place these three soil moisture sensors in the Proteus workspace:
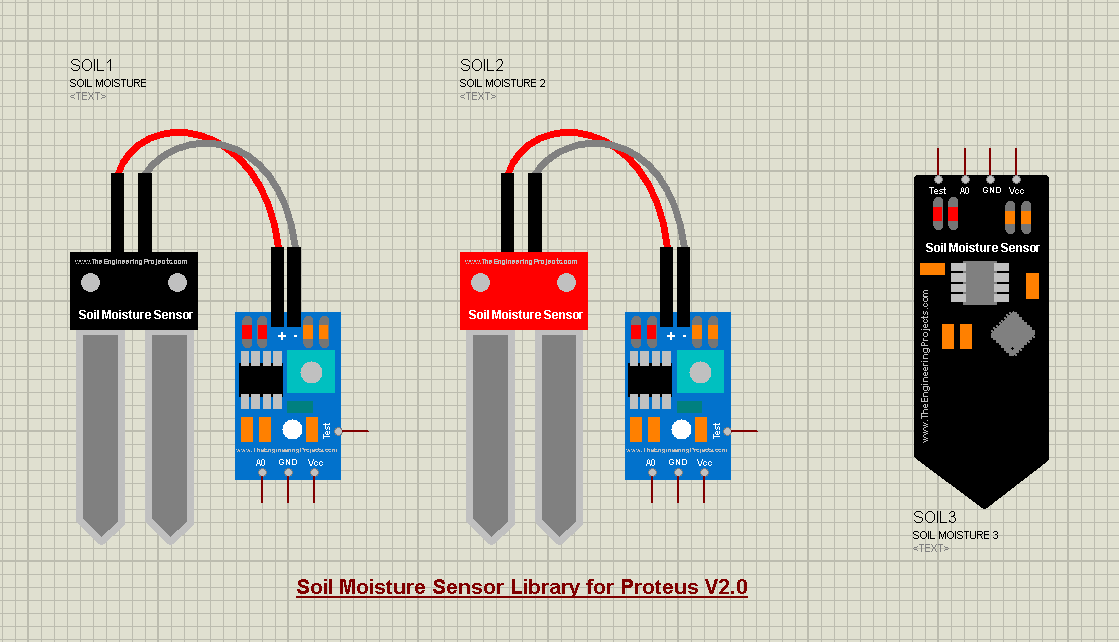
- Quite pretty, aren't they? :)
Now let's design a small simulation, to have a look at its working:
Proteus Simulation of Soil Moisture Sensor
- As you can see in the above figure, each of these sensors has 4 pins in total, which are:
- Vcc: We need to provide +5V here.
- GND: We need to connect it to Ground.
- A0: It's the analog output pin, its value will increase as the moisture level of the soil will increase.
- TestPin: The voltage level of TestPin will decide the moisture level of the soil.
Why Test Pin is used?
- As it's a simulation, so we can't actually probe the sensor in real soil, so we are using this TestPin for testing purposes.
- The value of Test Pin can vary from 0 to 5V, so as the value of this Test Pin will increase, the sensor will consider the moisture level of the soil in increasing and thus its output will also increase. In simple words:
- If TestPin is HIGH: Soil has maximum moisture level.
- If TestPin is LOW: Soil is completely dry.
- We will place a potentiometer at TestPin to provide variable voltage for testing.
Adding Hex File to the sensor
- We have placed three library files of soil moisture sensor in the Library folder of Proteus, and if you have noticed, one of them is the .hex file.
- In order to operate this sensor, we need to add that hex file to our sensor.
- So, double click on the Soil Moisture sensor to open its Properties Panel.
- In the properties panel, we have a section named "Program File", here upload the hex file which we have downloaded, as shown in the below figure:
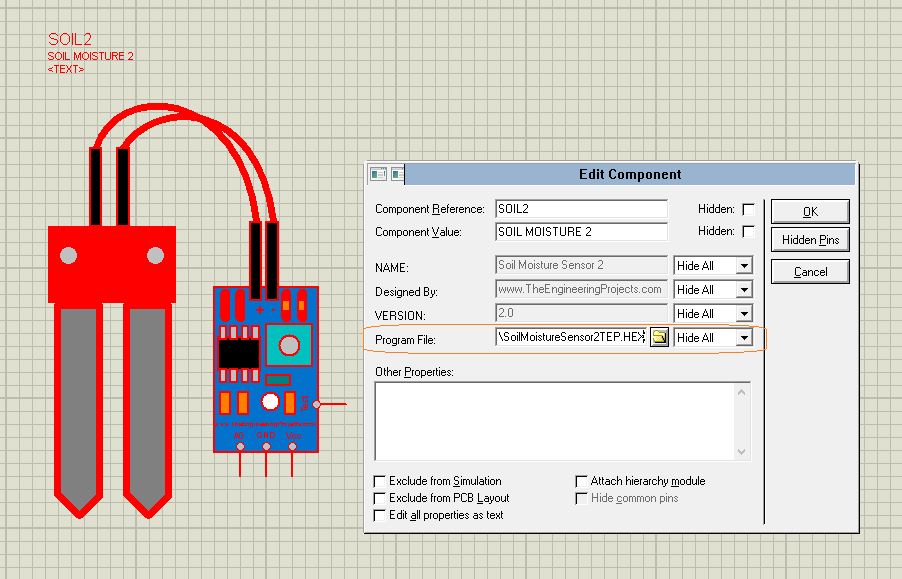
- After adding the hex file, click Ok to close the properties panel.
- Now, design a small simulation, as shown in the below figure:(I have added this simulation in the Proteus Library zip file)
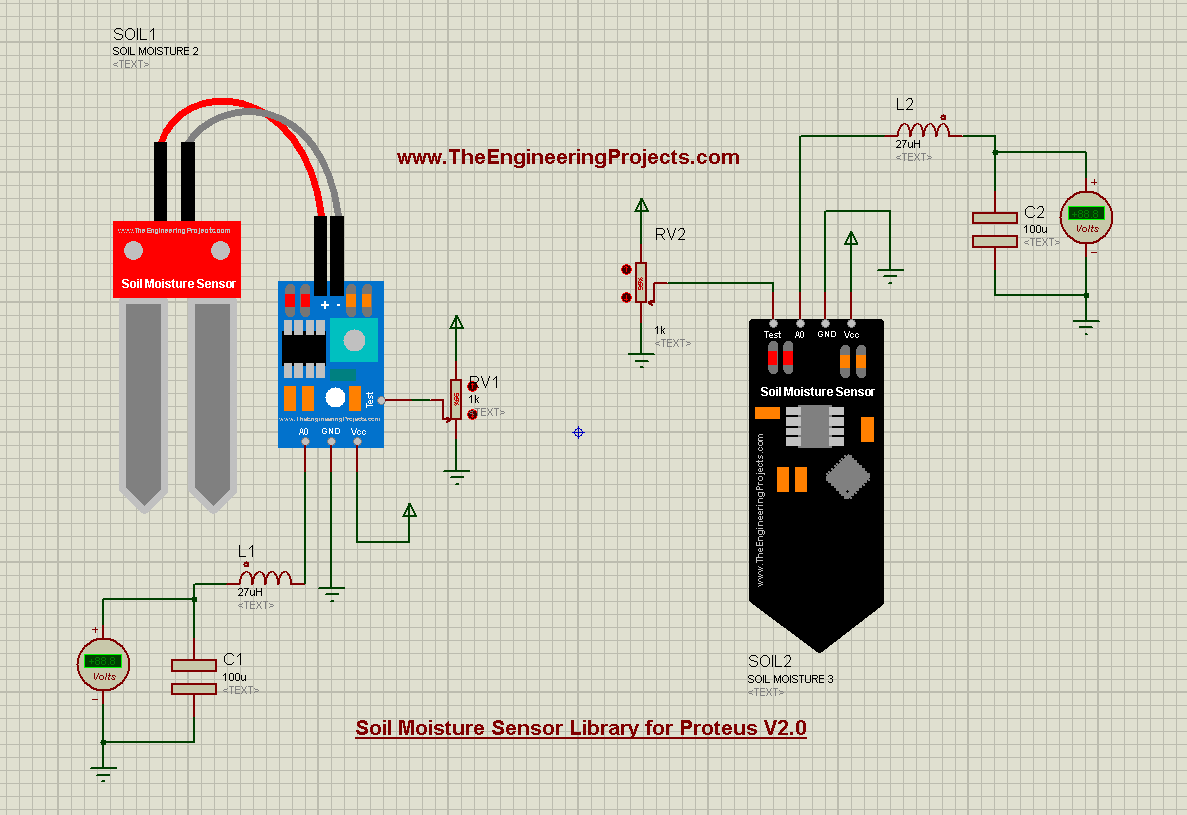
- I have added the hex file in both of these soil moisture sensors.
- Now, let's run the Proteus Simulation and have a look at the output:

- As we change the value of the potentiometer(attached to Test Pin), the output of the sensor will change accordingly.
So, that was all for today. I hope this library will help embedded students in their engineering projects. If you have any suggestions/comments, please use the below comment form. Thanks for reading. Take care. Bye !!! :)


 Proteus
 syedzainnasir
 1 Comments


 2.3k
2.3k
 953
953
 921
921
 2.1K
2.1K


