Hello everyone, I hope you all are doing great. In today's tutorial, I am going to share a new version of Heart Beat Sensor Library for Proteus i.e. version 2.0. I have already posted the First Version of the Heart Beat Sensor Library for Proteus in which you can use the TestPin and if it's HIGH then a single heartbeat pattern will start. So, if you use that library, you will always get the same result for your heartbeat. But in this 2nd version, I have added variable heartbeat depending on the value of TestPin. I will show you in detail, how to do it.
I have also posted a project Heart Beat Counter using Arduino in which I have shown you How you can use this sensor and count your Heart Beat. So, let me show you How you can use this new Heart Beat Sensor Library for Proteus.
Heart Beat Sensor Library V2.0 for Proteus
- First of all, you should check the First Version of the Heart Beat Sensor Library for Proteus.
- Now click on the below button to download Library files for Heart Beat Sensor Library V2.0 for Proteus.
- Now when you download and extract this file then you will find three files in it named:
- HeartBeatSensorTEP.LIB
- HeartBeatSensorTEP.IDX
- HeartBeatSensorTEP.HEX
- HeartBeatSensorTEP2.HEX
- Place all these three files in the library folder of your Proteus software and if you have installed the previous heartbeat Library then simply replace those files and they will be updated.
- Now open your Proteus software or restart it if it's already opened.
- In the components section, search for Heart Beat and you will find two results as shown in the below figure:

- The first heartbeat sensor is the old one, while the new one is Heart Beat Sensor 2.
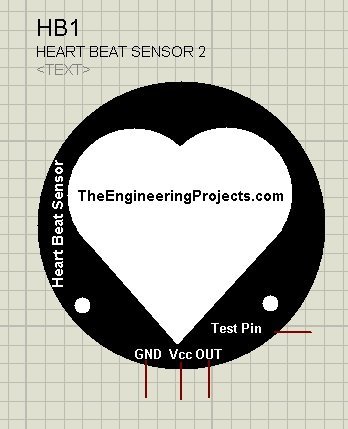
- Now place it in your Proteus workspace and it will look exactly like the old one, as shown in below figure:

- As you can see, we have four pins on it.
- In the old version, we have to make TestPin either HIGH or LOW and if it's HIGH then the same pattern of heart beat starts.
- But in this version, we can change How fast or slow the heart is beating by changing the voltage at TestPin.
- TestPin voltage must vary between 0 to 5.
- So, when you apply like 1V then Heart Beat will be Fast and when will you apply 4V then it will be very slow.
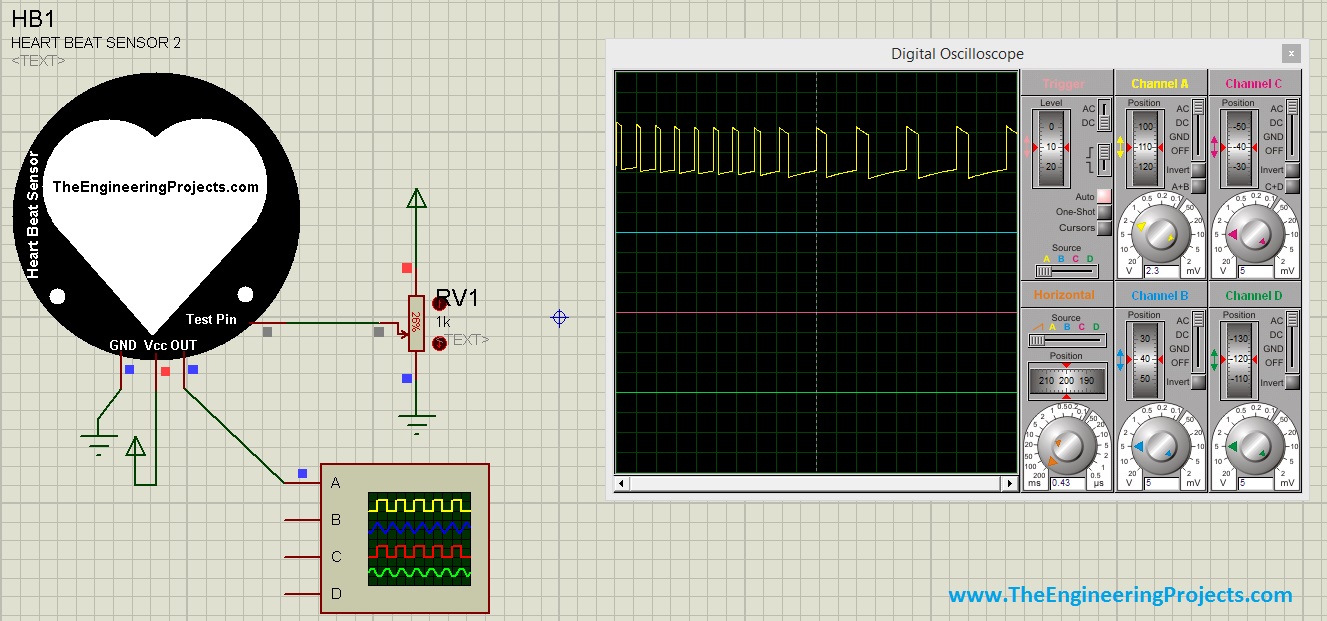
- OUT Pin will give us the Heart Beats, so when there's a beat OUT will be HIGH otherwise LOW.
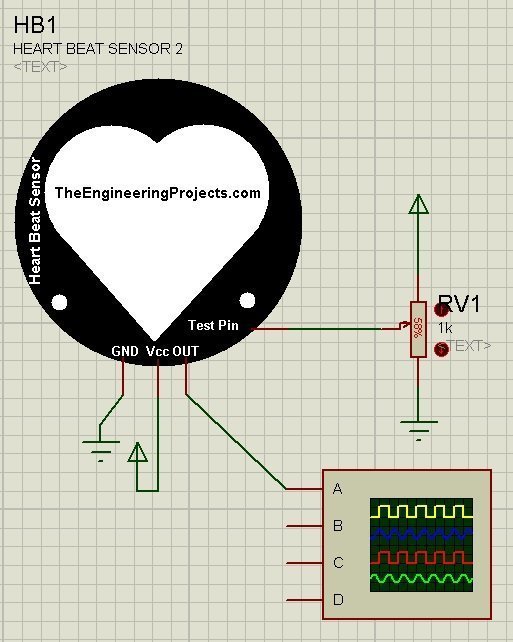
- Now design a simple circuit as shown in the below figure:

- By changing the value of this resistance, I can easily vary the voltage at TestPin.
- So, using this variable resistance, you can easily change the heart beat, can make it slow or fast as you want.
- Now double click your Heart Beat Sensor and upload this file HeartBeatSensorTEP2.HEX in the Program File Section, we have placed this file in the Library folder of Proteus software.
- So, now let me run this simulation and show you the results on our Proteus Oscilloscope:

- I have changed the value of variable resistance in between so that we could have a change in HB OUT Pin as you can see in the oscilloscope.
- I have also added this simulation in the above Library file, play with it you will like it. :)
- Here's a video in which I have explained How to use this Heart Beat Sensor Library V2.0 for Proteus:
So, that was all about Heart Beat Sensor Library V2.0 for Proteus. I hope you will enjoy it. Will meet you guys in the next tutorial. Till then take care and have fun !!! :)


 Proteus
 syedzainnasir
 7 Comments


