Update: Here's the latest version of this library: Arduino UNO Library for Proteus(V3.0).
Hello friends! I hope you’re well today. I welcome you on board. Today, I am going to share an update to our previously designed Proteus Library for Arduino UNO. You should also have a look at its previous version i.e. Arduino UNO Library for Proteus(V1.0). We have been receiving many suggestions & bug reports from engineers(mostly students) about our Proteus libraries, so we have thought to upgrade them for better performance. It's the first one getting upgraded and this month, we will be sharing a lot more. It is the more advanced, small-sized and refined version of the previous model.
I’ve given the link below to download this library and shared details on How to use it in your Proteus software to simulate Arduino Uno. If you don’t have Proteus installed on your PC, check this article detailing how to download and install Proteus software.
Before we move further, let’s have a brief look at what is Arduino UNO:
What is Arduino UNO?
- Introduced by Arduino.cc, Arduino Uno is a microcontroller board based on the Atmega328 microcontroller and is used in embedded projects.
- Apart from USB, the board can be powered up using a battery or AC to DC adapter.
- The current version of Arduino UNO comes with a USB interface, 6 analog input pins, and 14 I/O digital ports that are employed to develop connections with external electronic circuits.
- Out of 14 I/O ports, 6 pins can be used for PWM output.
This was a little insight into Arduino Uno. Let’s now have a look at how to download the Arduino Uno library and use it in your Proteus software. Let’s jump right in.
Arduino Library for Proteus V2.0
- Initially, you need to download the Arduino UNO Library for Proteus V2.0 by clicking the below button:
- Extract this zip file and open the folder named "Proteus Library Files".
- Inside this folder, you will find these two files:
- ArduinoUNO2TEP.dll
- ArduinoUNO2TEP.idx
Place these files in the libraries folder of your Proteus software.
Note:- If you are having problems with adding a library in Proteus 7 or 8 Professional, then you should read How to add new Library in Proteus 8 Professional.
- If you haven’t bought your Arduino UNO yet, then you can buy it from this reliable source:
- If you want to read its technical specifications, features and pinout then you should have a look at Introduction to Arduino UNO.
- Now open the Proteus software and search for the Arduino Uno, as shown in the below figure:
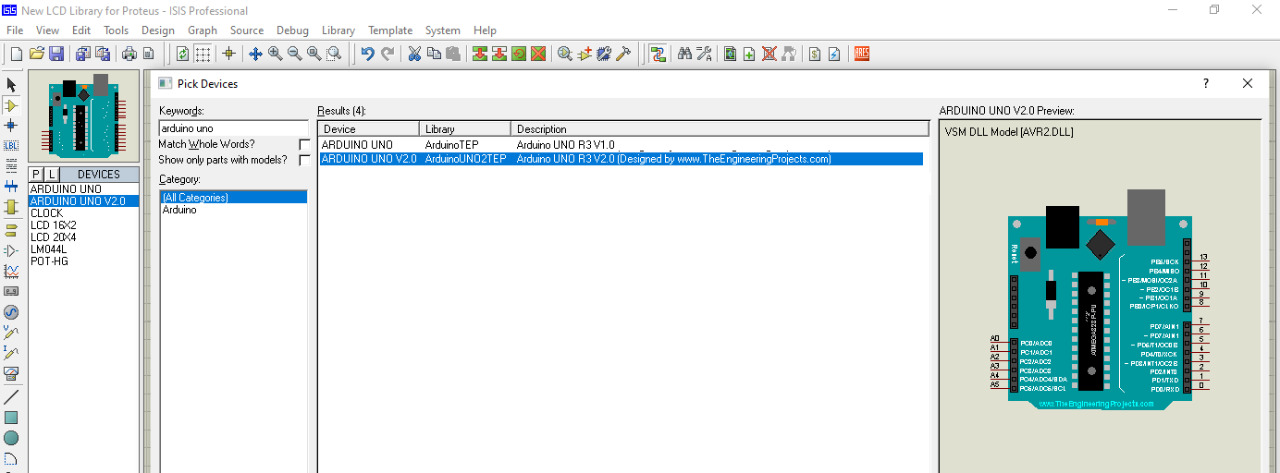
- Select Arduino Uno V2.0 and click OK, it will be added in your components box.
- Now place Arduino UNO anywhere on your proteus workspace and it will appear as shown in the below figure:
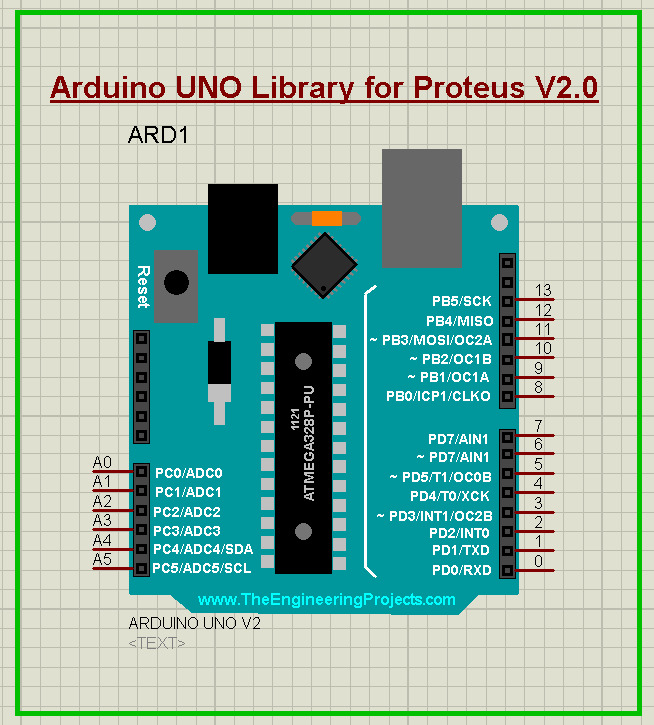
- You’ve successfully placed the Arduino Uno board in the proteus workspace.
- Now, we have to upload the hex file to run our board.
- To upload the hex file, double-click on the Arduino Uno board.
- As you double-click, it will open the Edit Properties Panel, as shown in the following image:
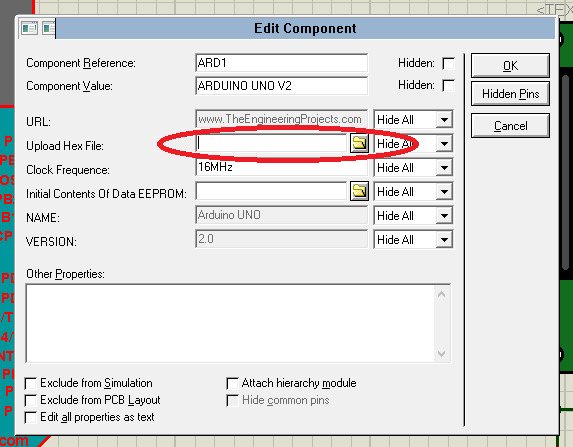
- In this panel, you can see different properties of the Uno board.
- You need to click on the textbox named “Upload Hex File” to upload the hex file of your Arduino code.
- You should have a look at how to get hex file from Arduino software, if you don't know already.
- Upload the hex file of your code and click OK.
- The clock frequency of the Arduino board is 16MHz by default, as shown in the Properties Panel.
Comparison with Old Proteus Library (V2.0 vs V1.0)
- The following figure shows the comparison between version 1 Arduino Uno Board (V1) and version 2 Arduino Uno Board (V2).
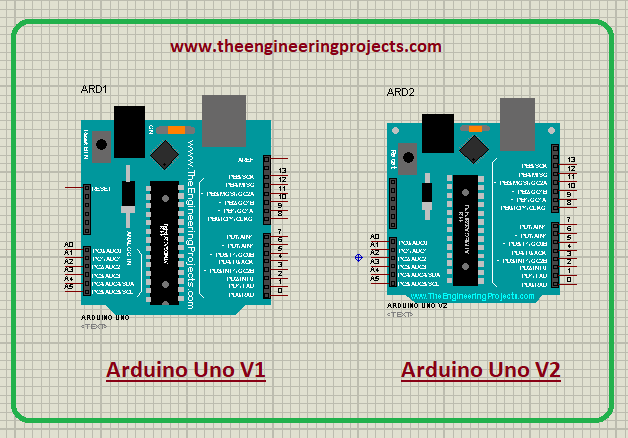
- You can see in the above figure that the V2 Arduino Uno board is more compact and small-sized as compared to the V1 Arduino Uno board.
Arduino UNO LCD Interfacing
- I have added this simulation file and its Arduino Code in the zip file, which you downloaded at the start.
- You can run that simulation but I would suggest you design it on your own, as you will make mistakes during the process & obviously will learn better.
- Now, I will interface a 20x4 LCD with the Arduino Uno board.
- To interface this LCD display, design the circuit as shown below:
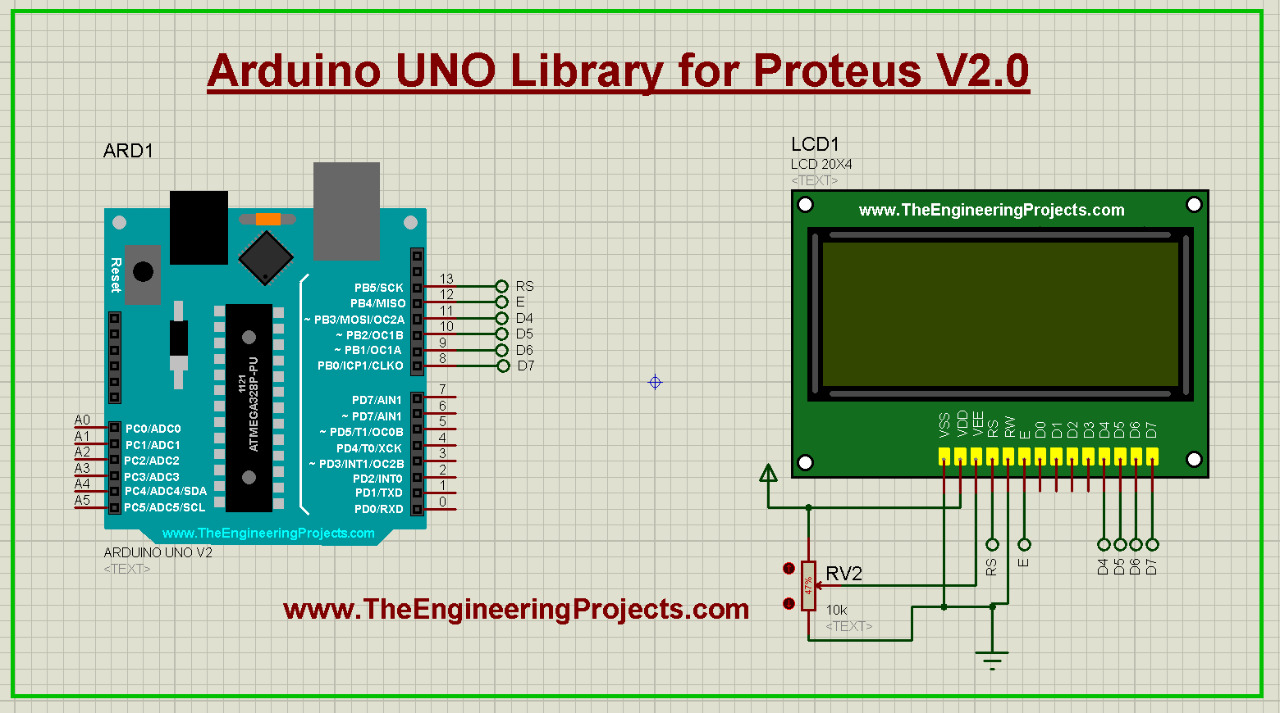
- I’ve connected the data pins of LCD with 8,9,10 & 11 pins of Arduino Uno, while Enable & Reset are connected to Pin 12 & 13 respectively.
- Next, we need to upload the code to compile the Arduino code present in the zip file and get the Hex File.
- Upload that Hex File in your Arduino UNO Properties panel, as we did in the previous section.
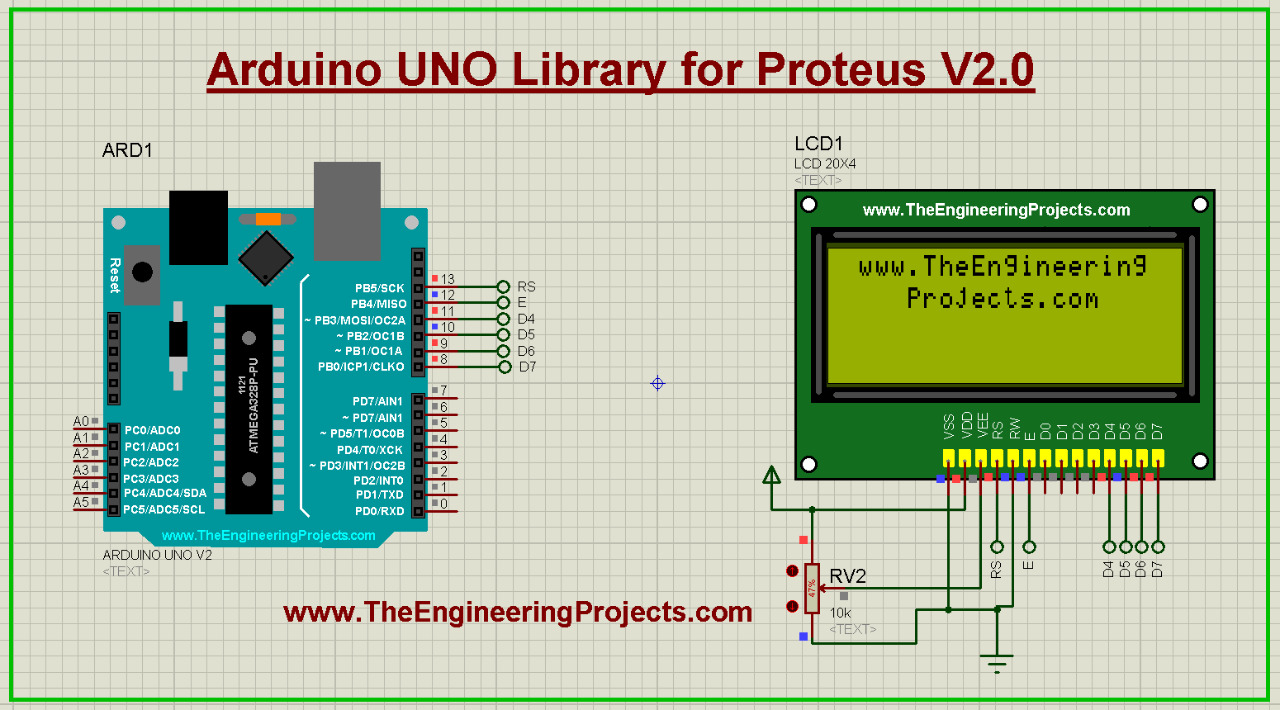
- Now, click on the RUN button and if everything's fine, you will get results as shown in below figure:
Summary
- Download Arduino UNO Library Files.
- Place Files from "Proteus Library Files"(Folder) in the Library folder of Proteus software.
- Search for Arduino UNO in Proteus.
- Place it in the workspace.
- Open the Properties panel & upload the HEX File.
- Design your circuit & run the simulation.
That’s all for today. Hope you’ve enjoyed reading this article. If you have any questions, you can approach me in the section below. I’m happy and willing to help you the best way I can. Feel free to share your valuable feedback and suggestions around the content we share so we keep coming back with quality content tailored to your needs and requirements. Thank you for reading the article.


 Proteus
 andrewshaw
 3 Comments


