GPS Library for Proteus


Other bloggers are welcome to share this library and its my humble request that do mention our blog in credits. :) The GPS module, I have designed for Proteus is a simple GPS which has TX and RX pins and when you start the simulation, this module starts sending the NMEA data on its TX pin, which you can easily check using Virtual Terminal. I am gonna show you how to check it in today's post. Another important thing, obviously in Proteus Simulation we can't get the actual values of longitude,latitude etc, so in our model, I have used the dummy values for all these data. The benefit of this module is that you can easily design your code for GPS and can test it in your simulation. Plus, its design is cool as well. ;)
Note:- Other Proteus Libraries are as follows:
- You should also check Interfacing of GPS Module with Arduino in Proteus ISIS, in which I have shared How to use this GPS Module with Arduino board.
GPS Library for Proteus
- First of all, click on the below button and download GPS Library for Proteus.
- After downloading, you will get a zip file containing three files in it.
- Now extract all these three files named as:
- GpsTEP.LIB
- GpsTEP.IDX
- GpsTEP.HEX
- Place these files in Libraries folder of your Proteus software.
- If you are having trouble in adding library to your Proteus 7 or 8 Professional, then you should have a look at How to add new Library in Proteus 8.
- Now open your Proteus software, if you have already opened it then restart your Proteus software.
- Now in components list search for GPS Module and place it in your workspace.
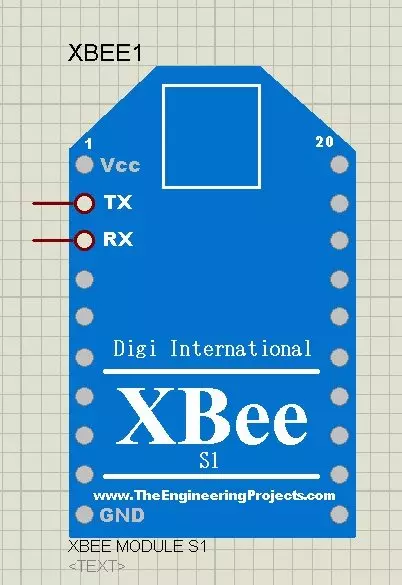
- If everything's fine then you will get your module as shown in below figure:
- As you can see in the above figure, it has two pins in total which are TX and RX.
- Now double click this GPS module and you will get to its properties as shown in below figure:

- Now, one last thing you need to do is to upload the GpsTEP.HEX file, which you got in the downloaded zip file, in the Program File section.
- This GpsTEP.HEX file is essential for this model as its adding the functionality of GPS in this model.
- So, after adding the link of GpsTEP.HEX file in the Program File section, now your Gps module is ready to use in your circuit.
- So, now let's add a Virtual terminal and check the output of this GPS Module. If you haven't worked on Virtual Terminal before then you should read How to use Virtual Terminal in Proteus ISIS.
- Design a small circuit as shown in below figure:

- The baud rate of this GPS Module is 9600.
- The data sent by this GPS module is dummy as we can't get these values in simulation.
- Now let's run the simulation and check the Virtual Terminal and if everything goes fine then you will get results as shown in below figure:

- The first line is just the intro for this module and after that you will start receiving data which is in NMEA format.
- NMEA data will remain constant but will keep on coming.
- Now, instead of using this Virtual Terminal, you can use any microcontroller here like Arduino, PIC Microcontroller or 8051 Microcontroller etc. and can write your code easily and test it.
- In my coming tutorials, I am gonna share examples for this GPS module in which I will interface it with different Microcontroller.
- In the below video, I have explained this tutorial again so if you got any trouble then watch it as well.