Hi Friends! Hope you are doing well. I am back to give you a daily dose of useful information so you can excel and improve as per your technical needs and requirements. Today, I'll uncover the details on the Introduction to ATmega8. It is an 8-bit AVR microcontroller that is based on RISC CMOS technology and comes with a 28-pin interface for the PDIP package. The Program memory is 8K Flash while RAM and EEPROM are 1K and 512 bytes respectively.
Microchip has been the main source for producing PIC and AVR microcontrollers that are mainly used in embedded and industrial automation systems. These modules can perform a number of functions on a tiny chip, preventing you from spending too much and purchasing external components for laying out automation ...
Hello friends, I hope you all are doing great. In today's tutorial, we are gonna have a look at a detailed Introduction to MSP430. MSP430 is a microcontroller portfolio that offers different varieties of sixteen-bit Microcontrollers. These microcontrollers are integrated with ultra-low power and digital and analog peripherals devices for sensing and measurement applications. MSP430 microcontrollers with non-volatile FRAM (ferroelectric random access memory) provide the lowest stand-by power (350nA with RTC), 100 µA/MHz active power and have the capability to recover system state after sudden power failures.
MSP430 is used in different applications such as sensor systems which receive analog signals and convert them into digital values and after processing send these values to host syst ...
Hello friends, I hope you all are fine and having fun with your lives. Today, I am going to share a very basic and introductory tutorial named How to use Arduino Serial Read. I am sharing this tutorial because I am getting a lot of emails in which users normally ask about basic Arduino tutorials as they are very new to them. So, I thought of sharing this very basic Arduino tutorial in which we are going to have a look at how we can use the Arduino Serial Read command.
I selected this tutorial as my first tutorial in this list of Arduino basic tutorials because learning to use Serial port is very necessary as it's one of the best troubleshooting tools for your code. I have also given a Proteus Simulation in which I have received the incoming data f ...
In today's post we are gonna see how to connect Arduino YUN with Putty and access the files on Linux OS in Arduino YUN. In my last post Getting Started With Arduino YUN, I have explained in detail about basics of Arduino YUN. I am recall few important things here. Arduino YUN is a very powerful board with two processors on it. One is Arduino microcontroller used to control the output / input pins. The other processor is named as Atheros and it has Linus operating system on it, so one can easily run python scripts on it and can do any server or client side coding in it.
So, today we are gonna see ow to access this Linux operating system of Arduino YUN using Putty software in Windows. Putty is a third party software used for accessing serial termina ...
Hi Friends! Welcome you onboard. I have been writing these Arduino tutorial for beginners for quite a while now and today we are having the next episode. Today, I'll discuss How to use analogRead in Arduino. The analogRead is mainly used to program and address analog pins on the board. In our previous tutorial, we have seen How to use digitalWrite Arduino Command, which deals with digital pins of Arduino but today's one deals with analog pins.
There are many types of boards available in the market ranging from Arduino UNO, Arduino Mega2560, Arduino Micro and many more, which you can use based on your technical requirements. Arduino Programming is made simple by the Arduino.cc - the manufacturer of Arduino Boards, providing an open source software ...
Hi Friends! Hope you are doing well. We always strive to give you valuable information as per your needs and requirements so you keep coming back for what we have to offer. Today, I'll uncover the details on the Introduction to ATmega168. It is an 8-bit AVR microcontroller that comes with 32-pin interface and is mainly based on RISC CMOS technology. The Program memory is 16K, based on Flash, and incorporates read-write capabilities.
The module comes with a wide temperature range from -40 to 85 ºC while operating voltage ranges from 1.8 to 5.5 V. If you are working on project that is related to automation and embedded systems, you can not write off the importance of this module that comes with an ability of performing a number of functions at once ...
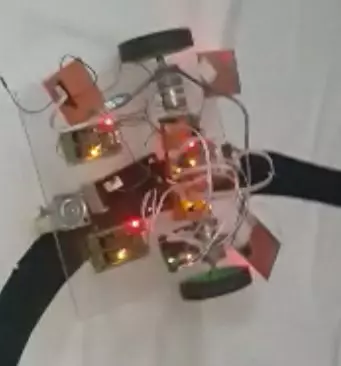
Hello everyone, I hope you all are fine and having fun with your lives. Today, I am going to share a very basic project named as Line Following Robot using Arduino. I have designed a three wheeler robot and have placed IR sensors beneath it to detect the black line and then I have made it move over this Black Line.
This Line Following Robot is not doing any extra feature i.e. turning or rotating back. It will just simply move in the straight line. I have also posted a short video at the botton of this tutorials which will give you better idea of how this robot moves. You should first read this tutorial and design the basic robot and once you are successful in designing the basic Line Following Robot then you should have a look at my recent Project ...
Hello friends, I hope you all are fine and having fun with your lives. Today, I am going to share a complete Arduino Tutorial for Beginners because I was having a lot of requests about it. Reader were asking the same question that they are new to Arduino and how should they start so if you are beginner to Arduino and you don't have any idea How to learn it then you should read the below tutorials.
I have posted all the basic Arduino Tutorial for Beginners already so in today's tutorial I am just gonna arrange them and must ask you to read them one by one from top to bottom and at then end you will really be able to design any kind of project on Arduino. So, let's get started with Arduino Tutorial for Beginners:
Arduino Tutorial for Beginners
Befor ...
In this tutorial, we will walk through the process of interfacing a pH sensor with an Arduino UNO in Proteus. To make the project more practical and user-friendly, an LCD is included so that both the sensor’s voltage output and the calculated pH value can be displayed clearly in real time. This allows the user to easily monitor the readings without needing additional software or serial monitoring tools.
The term pH, short for “potential of Hydrogen,” indicates the concentration of hydrogen ions (H⁺) in a solution and is used to determine whether it is acidic, neutral, or alkaline. A pH of 7 represents neutrality, values below 7 indicate acidity, and values above 7 represent alkalinity. Monitoring pH is essential in several fields—such as water quality testing, agriculture, food processing ...
Hello friends, hope you all are fine and having fun with your lives. In today's post we are gonna have a look at How to use Temperature Sensor 18B20 in Proteus ISIS. I will use Arduino board as a microcontroller and will connect the temperature sensor with it and then will display the code on LCD. I have already posted the same tutorial in which I have done Interfacing of Temperature Sensor 18B20 with Arduino but in that project I have used the real components and designed the hardware. But today, I will just show you the simulation so that you could test the simulation first and then design it in hardware.
Temperature Sensor 18B20 is the most commonly used temperature sensor. Its a one wire sensor means it sends data through a single wire and we ...