Hi Friends! Hope you are doing great. Today, I am going to give you a detailed Introduction to Arduino Uno. It is a microcontroller board developed by Arduino.cc and is based on Atmega328 Microcontroller. The first Arduino project was started in Interaction Design Institute Ivrea in 2003 by David Cuartielles and Massimo Banzi with the intention of providing a cheap and flexible way for students and professionals to learn embedded programming.
Arduino UNO is a very valuable addition in electronics that consists of a USB interface, 14 digital I/O pins(of which 6 Pins are used for PWM), 6 analog pins and an Atmega328 microcontroller. It also supports 3 communication protocols named Serial, I2C and SPI protocol. You should also have a look at this vid ...
Hello everyone! I hope you all will be absolutely fine and having fun. Today, I am going to give you detailed discussion on Introduction to LM2904. LM 2904 consists of two builtin amplifiers. These amplifiers have high gain and they are internally frequency compensated. These amplifiers are designed for the operation from a single power supply for a large range of voltages. We can also operate them from multiply power supplies as well.
LM-2904 operates on 3.3V power supply, it is the most common power supply in digital systems. LM 2904 is also available in small sizes i.e. they are available in the latest technology DSBGA. LM-2904 has a lot unique features in comparison to the other standard amplifiers. These features include large DC voltage ga ...
Hello friends, hope you all are fine and having fun with your lives. Today, I am going to share on How to measure Frequency using Arduino board. Its quite a simple tutorial but is an essential one especially when you are working on some power related project. Because in Power projects, you have to measure the frequency of AC voltages. I was working on a project in which I have to do dimming of AC Lamp so in that project I have to measure the frequency of AC signal.
I have designed this project using Arduino UNO and have simulated in the Proteus software, which you all know is my favorite simulating software. :) The code is also quite simple which I have given below for download. The simulation is also included in download package but again I sugge ...
Hello friends, I hope you all are doing great. In today's tutorial, we are gonna have a look at detailed Introduction to MCP23008. MCP23008 provides an 8-bit parallel input/output expansion for I2C bus and SPI applications. It has 8-bit configuration registers for input, output and polarity changing. The master device can enable input and output pins of MCP23008 by writing the Input/output configuration bits. A polarity of the input port register can be inverted with the polarity of the inversion register and all registers can be read by the system master.
MCP23008 is used in different industrial and class projects where I2C and SPI interfacing is required simultaneously. In today's post, we will have a look at its pinout, features, specifications ...
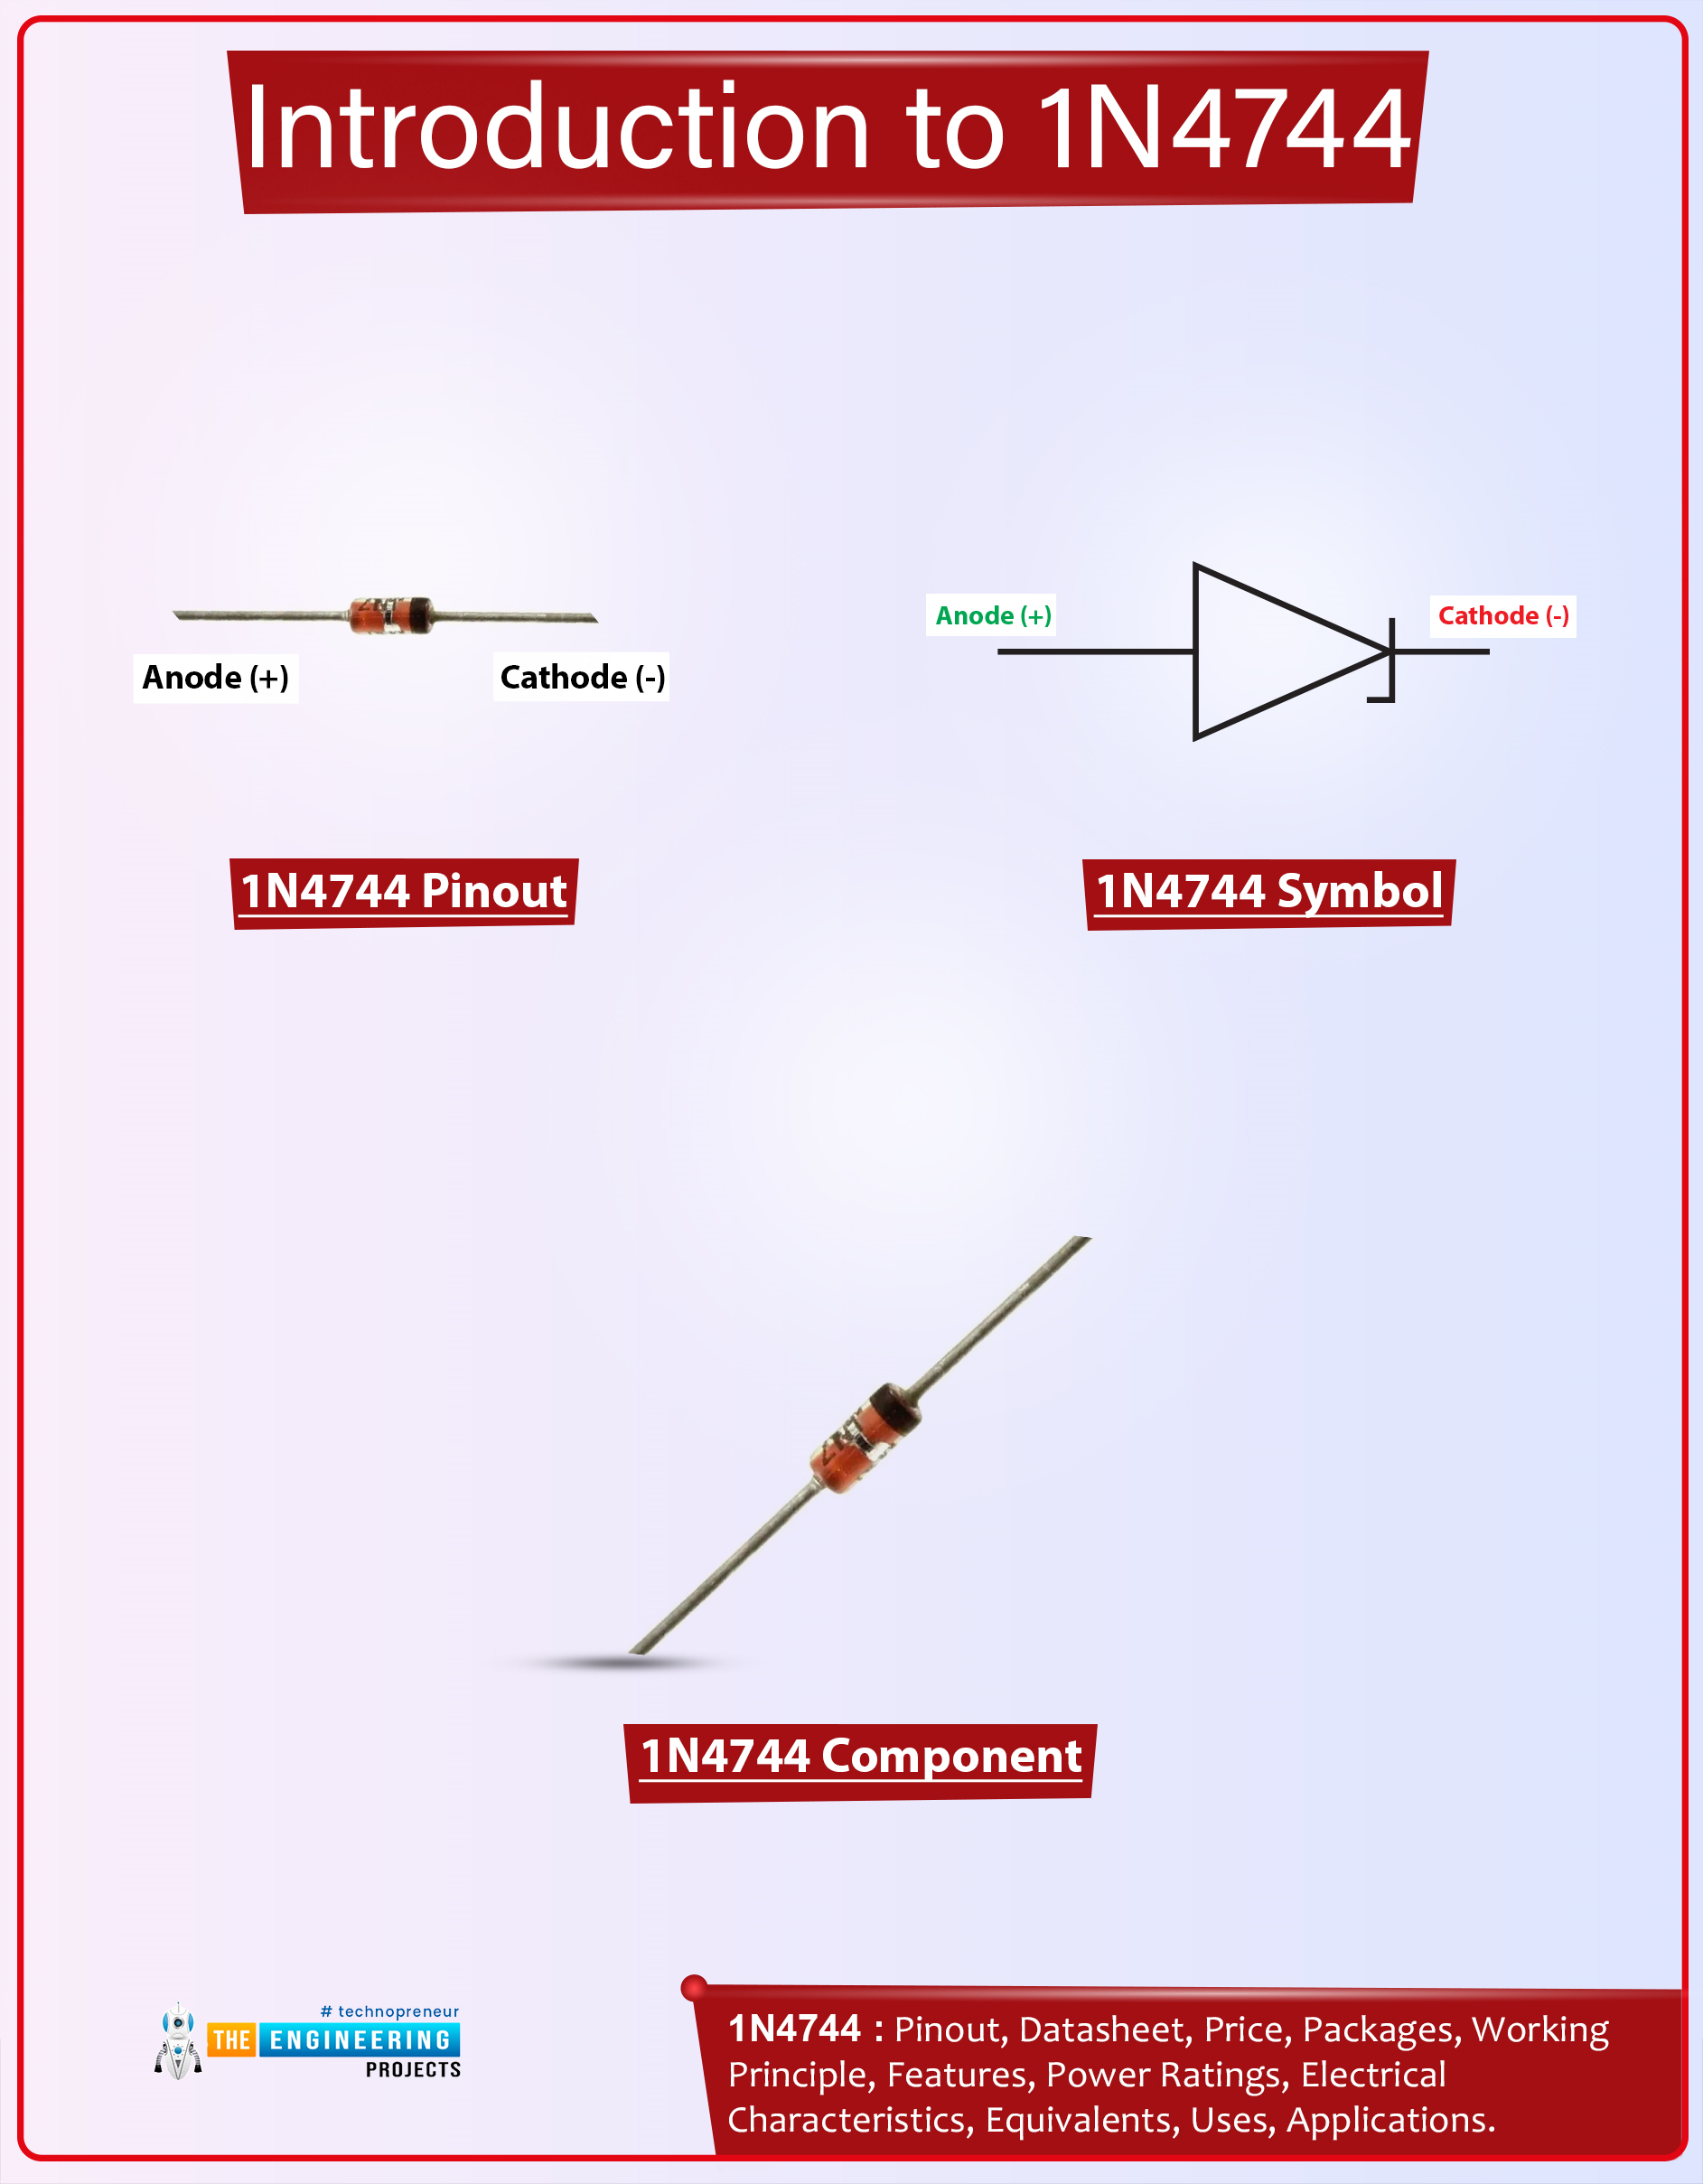
Hello Guys! I welcome you on board. In this post today, I’ll document the detailed Introduction to 1n4744.
The 1n4744 is a Zener diode that comes with a total power dissipation of 1W. It is used in high-power rating circuits for clipping purposes. This component is composed of silicon material and comes with a forward voltage drop of 1.2V. This Zener diode is a bit different than a regular diode in terms of current conduction. The 1n4744 conducts in both directions i.e. forward-biased and reverse-biased conditions. While the regular diode conducts in forward-biased condition only. Zener diodes are also employed to prevent the electrical circuits from overvoltage.
Read the entire post as I’ll detail the datasheet, pinout, features, and applications of 1n4744. Keep reading.
Introduc ...
Hello friends, hope you all are fine and having fun with life. Today, I am going to share DC Motor Direction Control with Arduino. I have designed a complete simulation in Proteus, which will help you in understanding the controlling of DC motor. I would recommend you to first read How to Control relay in Proteus ISIS which will help you in understanding the functionality of relays because in today's tutorial, I have used relays to do the DC Motor Direction Control. I have already posted a tutorial on DC Motor Drive Circuit in Proteus ISIS.
So, for DC Motor Direction Control, I have used Arduino UNO baord, so you should also download this Arduino Library for Proteus so that you can use Arduino boards in Proteus software. I have also provide the si ...
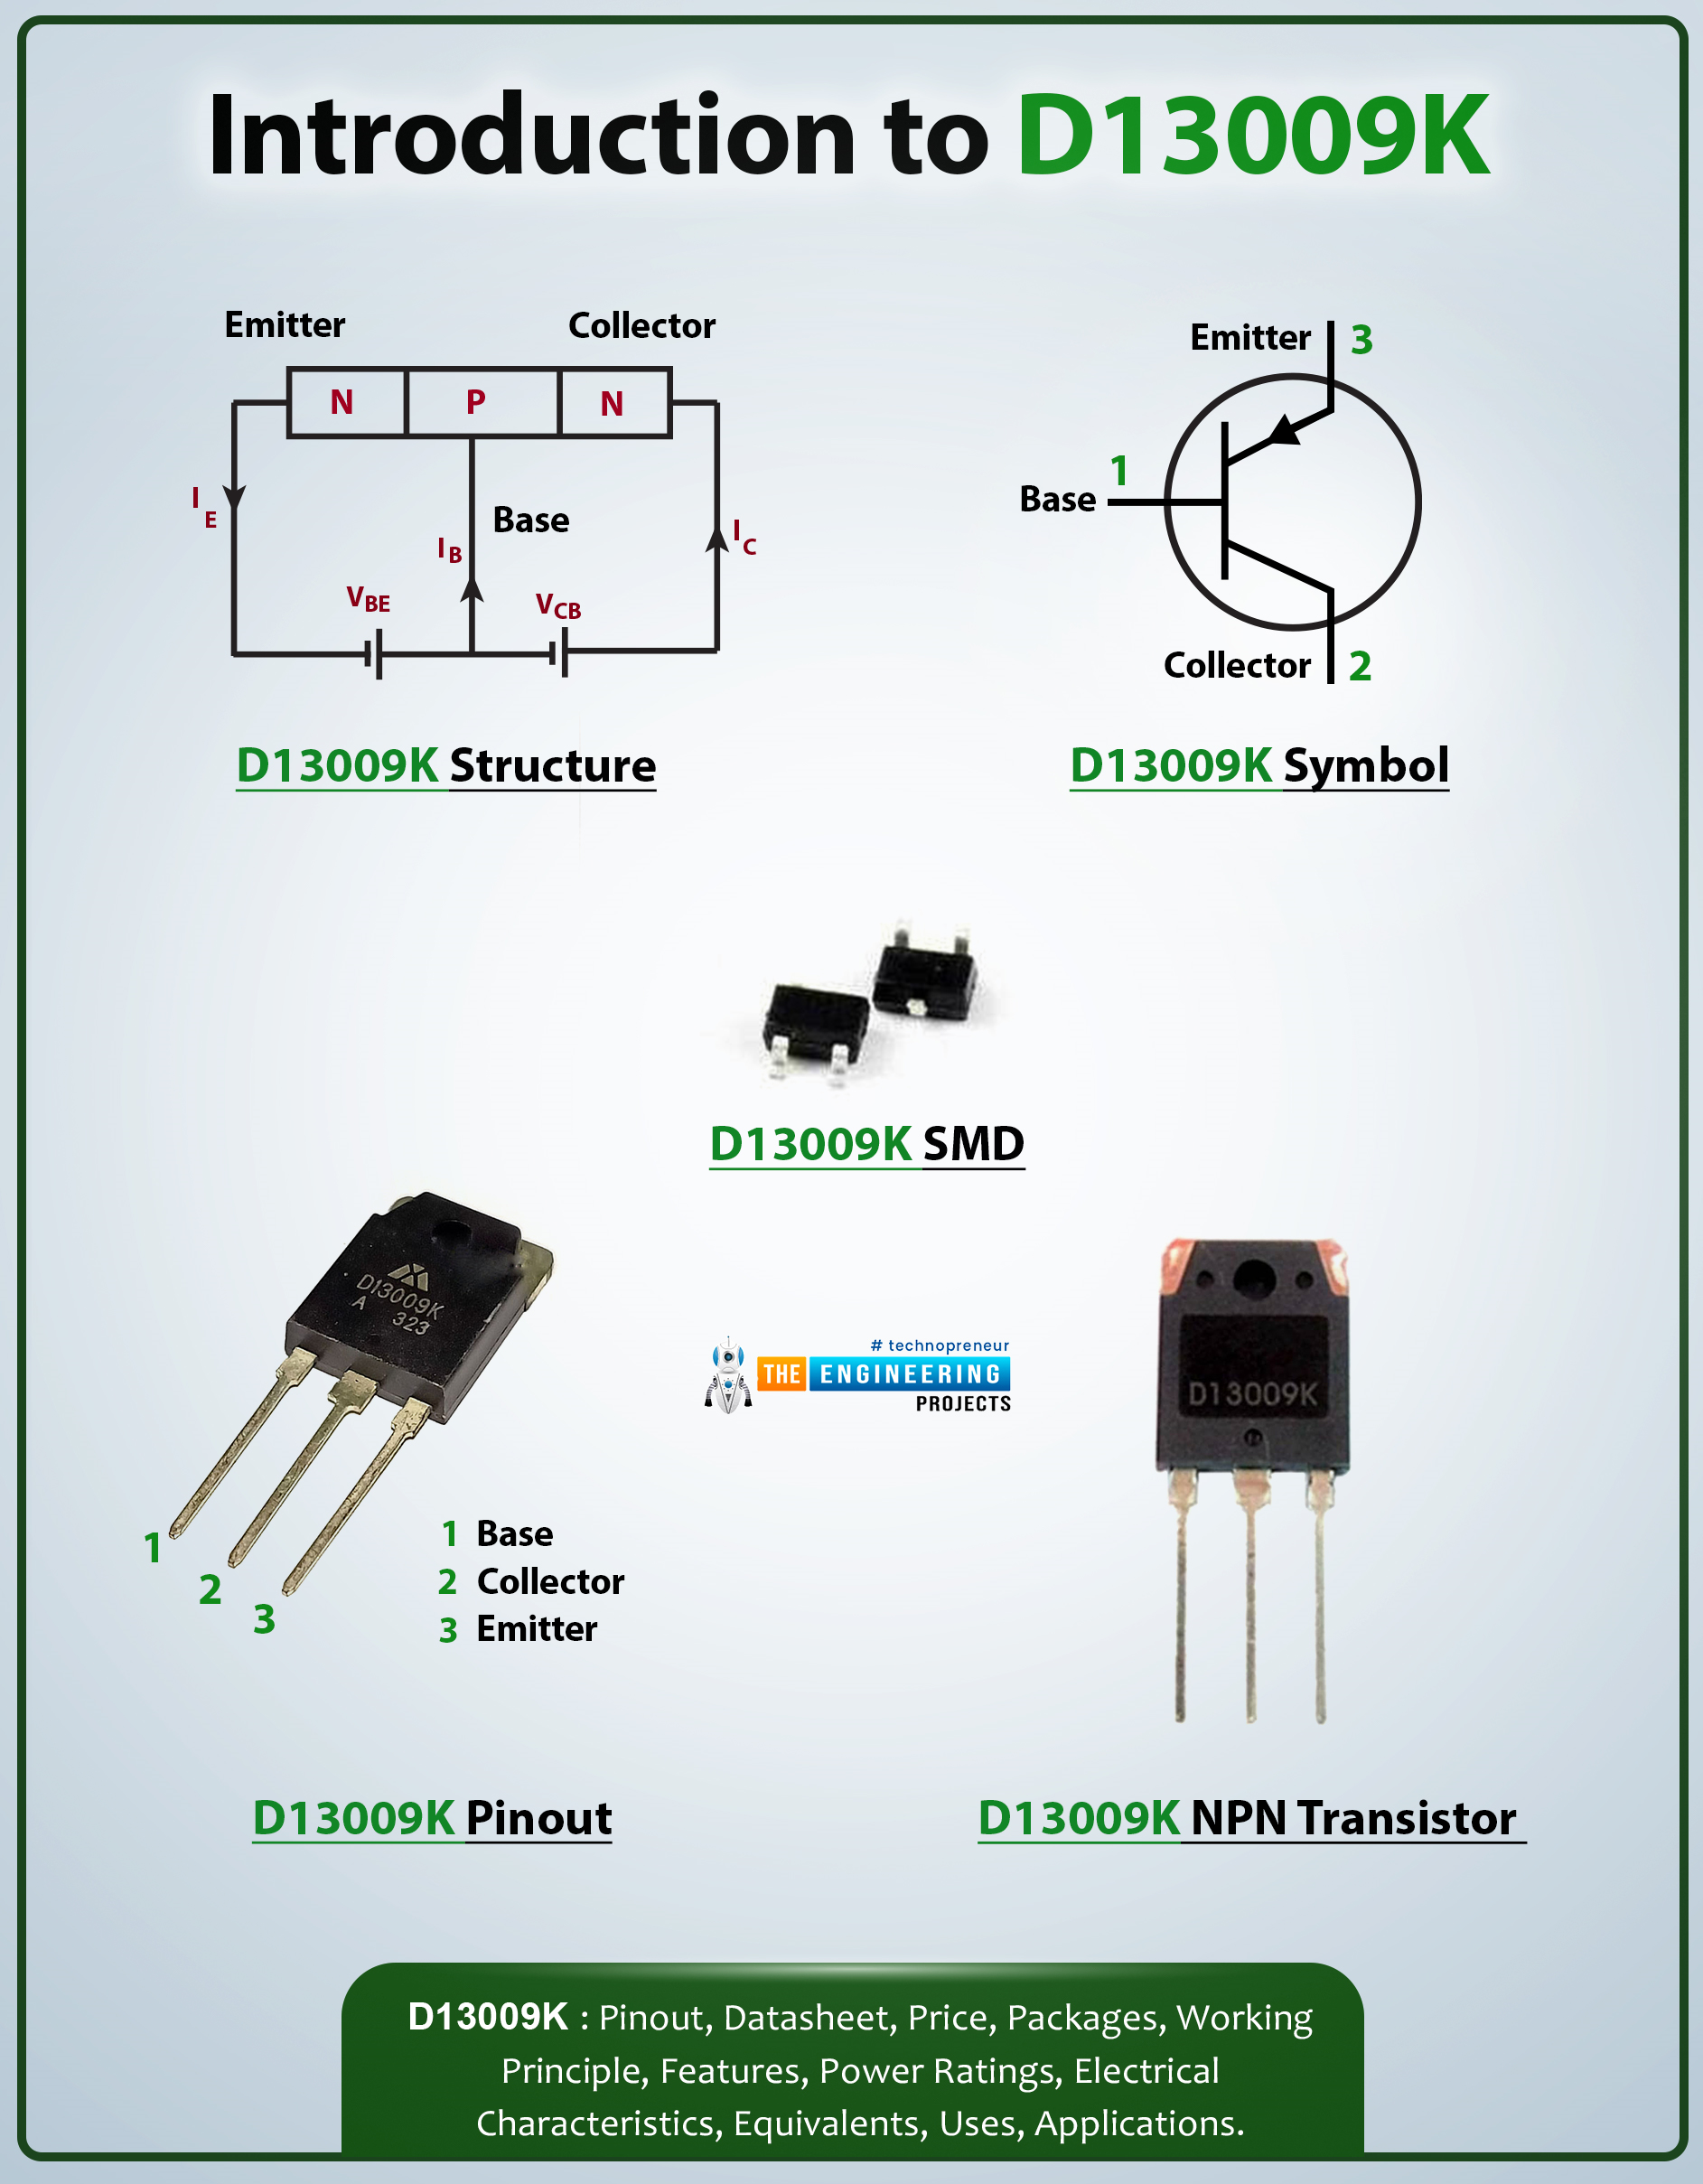
Hello Folks! I welcome you on board. Happy to see you around. In this post today, I’ll walk you through the Introduction to D13009K.
D13009K is a high voltage fast switching power transistor that falls under the category of NPN transistors. The collector current of this device is 12A which projects it can endure load under 12A. This chip is mainly used in amplification and switching applications. The small current change at one pair of terminals is used to produce a large current change across the remaining terminals. The power dissipation is 100W which features the amount of power this chip dissipates during the working of this integrated chip.
I recommend you check out this post all the way through as I’ll demonstrate the complete Introduction to D13009K covering datasheet, pin ...
Hello everyone, I hope you all are doing great. In today's post, I am going to share a Final Year Project in detail, named as Real Time Security Control System using XBee and GSM. I will give you all the details so that you can easily design it on your own. I've given the Proteus Simulation to download below. In that zip file, you will get both the Arduino codes and Proteus Simulations.
I have divided this whole project design into four parts. If you got into any trouble in your project, then ask in comments and I will try my best to resolve them. So, today we are gonna have a look at the basics of this Security project. There are a lot of systems introduced in the market these days that are used to transfer sensor data from one node to another ei ...
Hi Guys! Hope you’re well today. Happy to see you around. Today, I’ll walk you through the Introduction to IRF520.The IRF520 is an N-channel power MOSFET mainly used for switching and amplification purposes. It comes with a breakdown voltage of around 100V and a low gate threshold voltage is 4V, making it an ideal pick for microcontroller applications.
I suggest you read this post all the way through as I’ll detail the complete Introduction to IRF520 covering datasheet, pinout, features, and applications.
Let’s get started.
Introduction to IRF520 MOSFET
The IRF520 is an N-channel power MOSFET mainly used for switching and amplification purposes.
It comes with three terminals named: gate, source, and drain and is available in the TO-220 package.
It is important to note t ...
Hello friends, I hope you all are doing great. In today's tutorial, we are gonna have a look at detailed Introduction to TIP122. It is a Darlington braces NPN transistor. It works like an ordinary NPN transistor, but as it consists of a Darlington pair it has a decent collector current assessment of nearby 5 amperes and it's gain is around 1000. This transistor can bear 100 volts around collector and emitter terminals due to this feature it can be used for high loads.
This is a common purpose transistor it used in different industrial projects. It manufactured for less time taking switching submissions. In today’s post, we will have a look at its protection, wreck, distinction, entitlements, etc. I will also share some links where I have connecte ...