Security systems are widely suggested for homes as well as other locations. Everybody wants to take necessary steps to prevent infiltration at home, thus this security is necessary. Intruders nowadays may take advantage of almost any illegal activity and wreak havoc on a property's security. The security of one's home is a critical concern that everyone faces in the current day.
While there are certain devices on the market that may considerably help protect your house, some of them are excessively costly and need constant maintenance. Many devices regarding smart home security systems are available in the market but these are not user friendly according to the budget, the device we designed provides the user with a better interface with the help ...
Hello friends, I hope you all are doing great. In today's tutorial, I am going to show you How to Structure Your Essay like a Pro . You’ll find essays in all stages of life. From elementary school all the way to work, especially if you end up in the business world. Although in the latter it’s called a report, but what is an essay?
In a simple description, an essay is a piece of writing which puts across some information including the writer’s stand on the issue.
Writing an essay can be simple, but there’re those who struggle to put the words on paper despite a raging flow of thoughts. This is where great planning comes in, but even more important are the guiding steps listed in this article which will go a long way in improving your essay.
...
Hello friends, I hope you all are fine and having fun with your lives. In today's tutorial, we are gonna have a look at How to use C# String Variables in your C# Projects. In the previous tutorials, we have a look at How to use C# Int Variables and also have seen How to use C# Double Variable. So, now today we are gonna see how to use C# String Variable.
We have already discussed the variables in detail so I hope that you must have the idea of what variables are and if you don't then you must read the previous tutorials first. The code is also given below in the tutorial. So, let's get started with How to use C# String Variables:
How to use C# String Variables ???
C# also supports string variable, a string variable can save anything in it in t ...
By using CNC-machined parts for your next engineering project, you can ensure precision, quality, and speed. So, let us take a look at three options for creating custom parts.
What Is CNC Machining?
Before we look at the three options available to you, it is worth briefly explaining what CNC machining is. CNC machining is short for Computer Numerical Control. It is a modern manufacturing method that involves the use of computer-controlled machinery to make custom parts.
The process begins with creating a CAD design
of the part you want to make. The design is then translated into g-code
and fed into the item of CNC machinery.
The machine then simply gets to work at creating your design with the utmost precision and consistency. The types of CNC machines
range widely – from mil ...
Hello friends, hope you all are fine and having fun with your lives. In today's post, I am gonna design a Convolution Calculator in MATLAB. We all know about convolution but if you don't know then here's the wiki page for convolution which has a detailed description of Convolution. In simple words, convolution is a mathematical operation, which applies on two values say f and g and gives a third value as an output say v. In convolution, we do point to point multiplication of input functions and gets our output function.
Convolution is an important technique and is used in many simulating projects. It has a vital importance in image processing. So, today we are gonna do convolution in MATLAB and will check the output. You should also check Image Zo ...
Hello everyone! I hope you all will be absolutely fine and having fun. Today, I am going to share my knowledge about Introduction to TL072. TL 072 is basically a high speed Junction Field Effect Transistor (JFET). It is also known as the dual operational amplifier. It has a bipolar transistor and high voltage JFET in its case. TL-072's important features include low offset current, high slew rates, low input voltage, low offset temperature coefficient etc.
Some of the major features may include low power consumption, low noise, common mode input voltage range includes Vcc, latch-up free operation etc. TL 072 has a very wide range of applications including oscilloscope, solar inverters, AC inverters and VF drives, audio mixers, Un-interruptable Pow ...
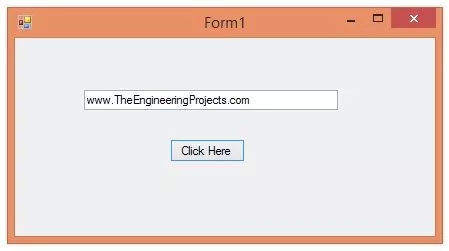
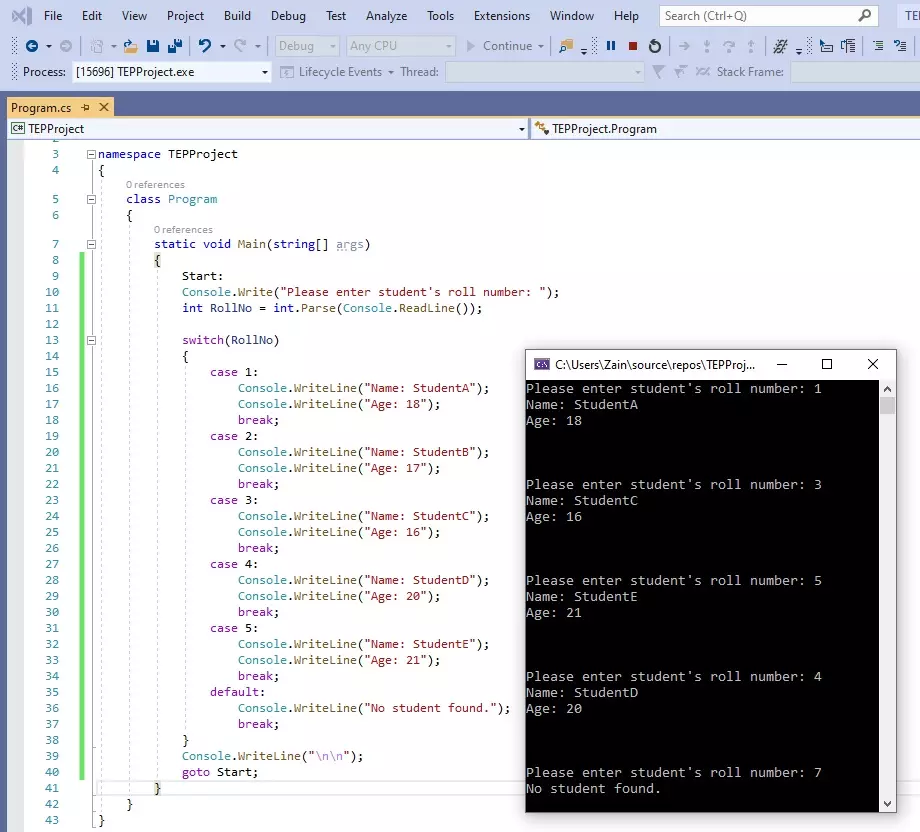
Hello friends, I hope you all are doing great. In today's tutorial, we are gonna have a look at How to use switch Statement in C# and its our 9th tutorial in C# series. In our previous tutorial, we have seen IF Loop in C# and this switch statement is also a loop but works slightly different than IF loop and it totally depends on your application, which one you want to use.
First we will have a look at How to use switch statement in C# and after that we will also study goto statement, because switch and goto statements are normally used together. So, let's get started with it:
How to use switch Statement in C#
Switch Statement is a loop in C# which takes a variable as a condition, and then creates its different cases and we can deal each case se ...
Hello friends, I hope you all are doing great. In today's tutorial, I am going to show you How to design a Logo that Stands Out. Designing a killer logo is no doubt a simple and easy task for the professional designer but a beginner cannot do the same without getting basic logo designing guidelines and tips. In this virtual world, logo designers are in a high demand because every small business owner or company wants to boost its online presence by having appealing and unique branding and logo as well.
Since a logo is the company's first introduction to the customers that can impact customer's brand acuity, purchase decisions and overall interest toward a specific product or service. That is the reason; a logo should be unique, compelling and plea ...
Graphic design is an exciting field. It may seem daunting as you begin to create your own images, but becoming a graphic designer is just like learning a new language - you start with simple words and phrases and gradually build your way up to more complex topics.
Studying graphic design can be a lot of work, especially if you haven’t had any prior experience in it before. It can be pretty overwhelming at times to handle, but don’t worry - we can ease your load a little bit! With this website, you can hire a professional paper writer to help you! You can get professional 24/7 help with any paper topic at an affordable price - and a free plagiarism report, too! Make sure to check them out and save your precious time for more important tasks!
1. Experiment with fonts
Fonts can make your ...
Hello friends, today's tutorial is about Introduction to multilevel inverters, which is quite a wide field so I am not gonna discuss everything here. I will post more about it in my coming tutorials. Today, I am going to through some light on the multilevel inverter, i.e. how they operate and will also discuss their types in detail. So, let's start it.
An inverter, also named a power inverter, is an electrical power device that is used to convert direct current (DC) into alternating current (AC). Using a few control circuits and switches, one can get AC at any required voltage and frequency. Inverter plays exactly the opposite role of rectifiers as rectifiers are used for converting alternating current (AC) into direct current (DC). There are diff ...