Hello friends, today's post as the name suggests is about how to send SMS with Arduino UNO and SIM900D using AT Commands. There are different types of SIM900D modules available in the market, so it doesn't matter which module you are using. All SIM900D modules work at AT commands basically so today I am going to show you how to send an SMS via AT commands without using any Arduino library. You should first read the AT commands manual which will give you an idea about AT commands. AT commands are special sets of commands which are used for communicating with SIM900 module. Using these AT commands we let our GSM work for us. Like if you want to send SMS then there's a specific AT command for sending the SMS similarly if you want to change the PIN code for your GSM module then you have a diff ...
Hello everyone, I hope you all are doing great. In today's tutorial, I am going to give you a detailed Introduction to Arduino YUN , and we will also have a look at its basic functionalities. Arduino YUN is a latest microcontroller board, manufactured by Arduino. It's the most advanced and highly stylish arduino board. The beauty of Arduino YUN lies in having two on board processors, which I haven't seen yet in any other Microcontroller board. One of them is simple Arduino processor which is similar to that of Arduino Leonardo while the second processor is Atheros AR9331. Atheros supports Linux server, which is the new thing in Arduino YUN. Because of these two processors, one now can do anything in the world of automation as well as web servers. You can say it's kind of a replica to Raspb ...
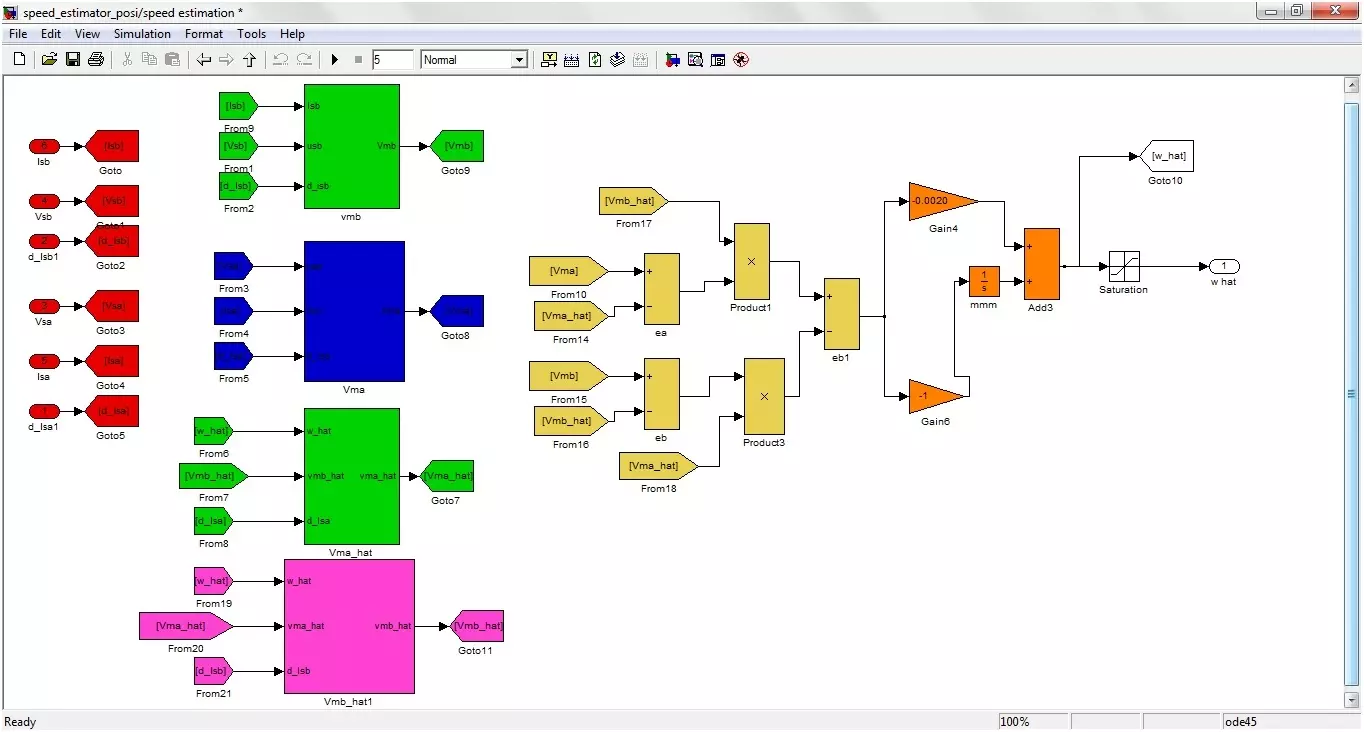
Buy This Project Today I am going to show you Sensorless Speed Estimation of Induction Motor in MATLAB . In order to control and estimate the speed of Induction motor, there are many methods proposed by different scientists. The method I have selected in my project is Adaptive method. Using this method, I have controlled the speed of Induction motor using MATLAB software. Matlab software is used for simulation design. The simulation is designed in simulink and the MATLAB version used for designing this project is MATLAB 2010. It is also tested on MATLAB 2012 and 2013. All the details of this project are mentioned below. If someone wants to buy this project then click on the button shown on right side. Its quite difficult to implement and is designed because of the efforts of our team that' ...
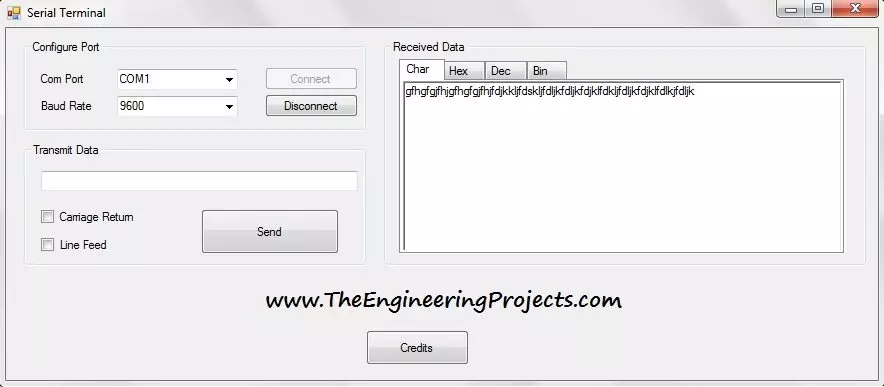
Hello everyone, I hope you all are doing great and having fun. In today's tutorial, I am going to share a new software which I have named Serial Terminal. I have designed this Serial terminal in vb2010. You can download this software from below button. I have already posted a complete tutorial on How to use Serial Port in Visual Studio 2010 in which I have explained how to send and receive data via serial port. It was quite a basic software, which just transmit and receive data from a serial port but today I am gonna provide you a complete serial terminal, which will not only transmit and receive data but will also display that data in different formats. As shown in the below figure, first of all you need to select the COM Port from which you want to receive the data and then select the Ba ...
Hello friends, hope you all are enjoying good health and having good time. Today's tutorial is not too big and is simple about how to add a delay in visual studio 2010. Before starting this tutorial, let me first tell you that I got an excellent feedback about the last tutorial on How To Use Proteus ISIS & ARES & also got few queries and suggestions. One of them was to post a similar tutorial on the Eagle software as well which I will hopefully start in the coming week. Today's post is a very small trick but yet very effective one. In a recent project of mine, it helped me a lot and yet its quite a small thing but it took me around half an hour to find it online and that's the reason I decided to share it with you guys. I have to design a software in which I was using a database in visual ...
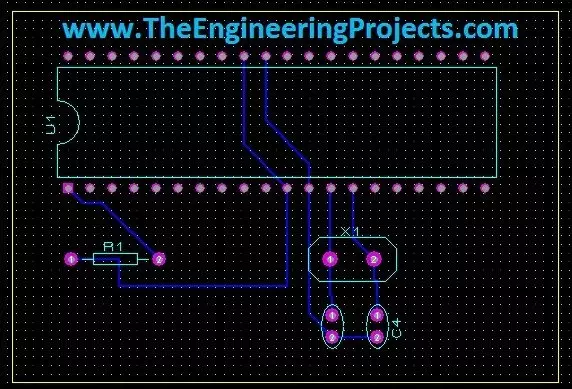
Hello friends, today's the last post of this Proteus tutorial. I have tried my best to explain everything but knowledge is limitless so explore this software, play with it and you will know many new things. Today's topic is about the PCB designing in Proteus. When you install Proteus, you have seen that along with ISIS there's also another package named as Proteus ARES. This Proteus ARES is used for PCB designing. You should also check the Arduino UNO PCB Design for Proteus ARES . In order to design the PCB in Proteus ARES, first you need to make the circuit of that PCB in Proteus ISIS. You can also make PCB directly but I recommend that use Proteus ISIS first, its quite the easy approach as you don't need to do anything in it and the software intelligence helps you throughout the designin ...
Hello friends, hope you all are having fun in your life. Today's tutorial is about the component designing in Proteus ISIS. This tutorial actually deals with the presentation of your project. Usually when students give presentation of their projects, then it is asked that add the circuit diagram of their project. Now when students open Proteus in order to design their circuit, they found out that the components they have used in their project are not available in the Proteus Directory. Now what to do ? In that case, there's a need to design your own component in Proteus and place it in the circuit. Although, this new designed component won't work as the real component but for presenting the circuit, it will be enough. ofr example, we don't have Arduino boards in Proteus software. so, I hav ...
Hello friends, hope you all are healthy, wealthy and wise. First of all, I am quite sorry about not posting for a long time, actually the load of work has really increased and I don't even have time to comb my hair. Secondly, I have a really great news for you guys and the news is we have officially set up our office. Now, we will be more professional than ever and will respond to your queries quite fast now. I will update the photos of my new office soon INSHAHLLAH. Let's come back to our topic. Previously, I have discussed the DC Motor control in Proteus ISIS and Stepper Motor Control in Proteus ISIS . So, now we are left with only one motor which is Servo Motor. Today's topic, as the name suggests is about the Servo Motor Control using PIC Microcontroller. The microcontroller, I am goin ...
Hello friends, hope you all are healthy, wealthy and wise. Today's topic is about the control of stepper motor. In the last post we have seen How to control DC motor in Proteus , and now we are gonna see How to design a Stepper Motor Drive Circuit in Proteus ISIS. Stepper motors are usually of two types and the main difference between the two is in the number of wires used to control them. Mostly stepper motors use 6 wires to control them but few of them also have 4 wires to control them. Today we will have a look on the 6 wired stepper motor. In stepper motor, there are electromagnets which gets polarized when we supply voltage to them and depolarized when we remove the voltage. These electromagnets act as a stater and when one side get magnetize, it attracts the rotor towards it and then ...
Hello friends, hope you all are fine and enjoying good health. In the previous posts, we have seen How to design a 5V DC power supply in Proteus ISIS and after that we have also discussed How to design a variable DC Power supply using LM317 .So, now today we will check how to design a DC Motor Drive Circuit in Proteus ISIS. DC motor is present in Proteus and quite easy to use. First we will simple drive it by applying voltage on its both sides i.e. direct method and after that we will automate it and will drive the circuit using PIC Microcontroller. The microcontroller I am gonna use will be PIC16F877A and the compiler will be MikroC Pro For PIC. This tutorial is not a correct method of driving any DC motor. In this tutorial, I am just giving an overview of How to design a DC Motor Drive C ...