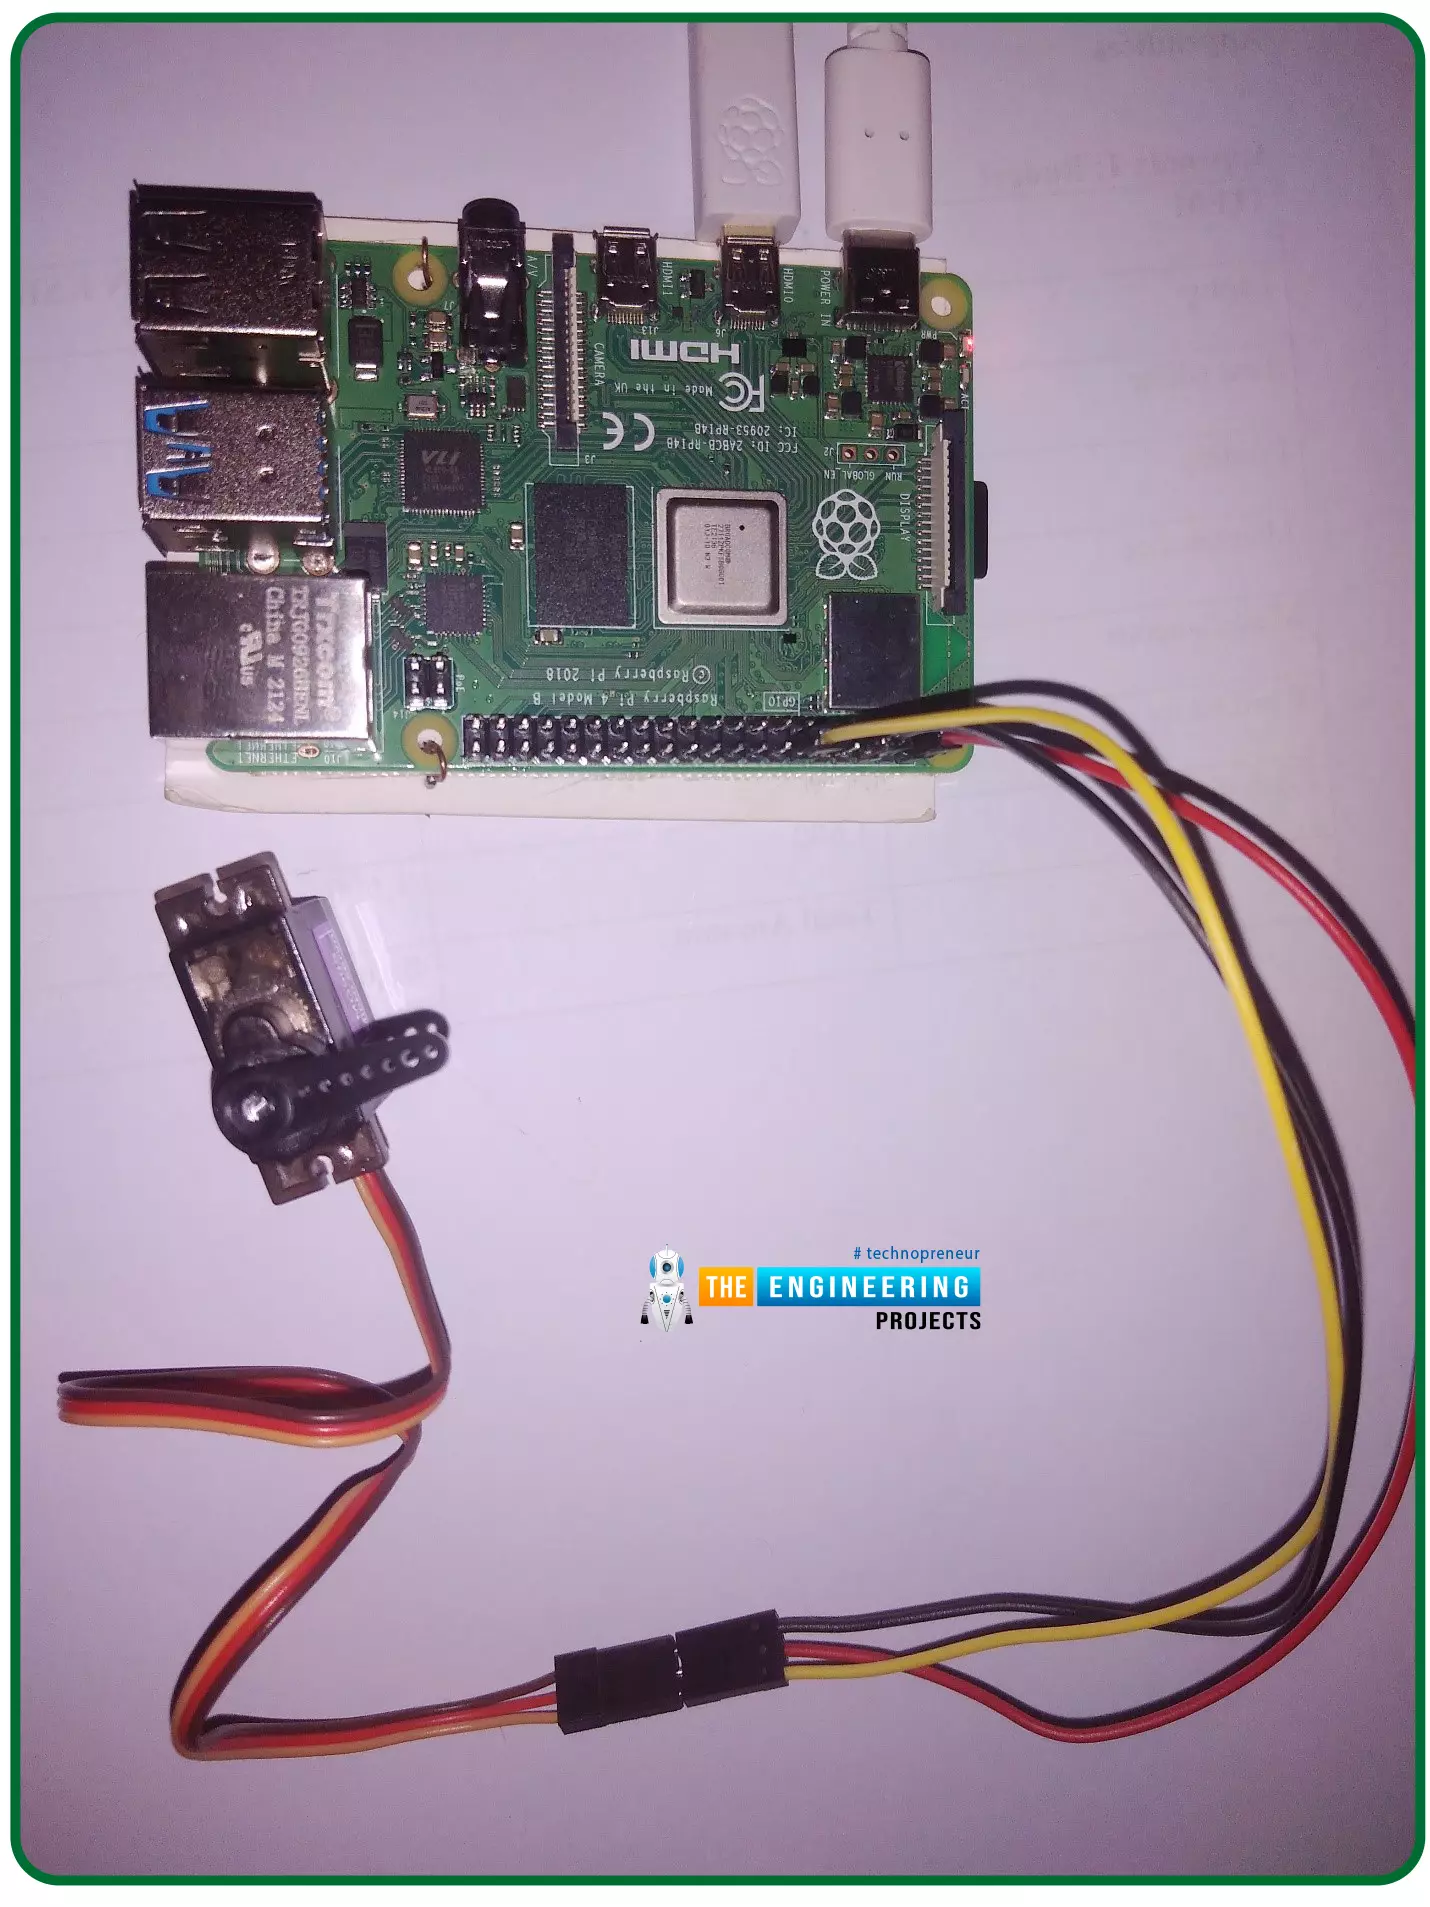
Hello friends, I hope you all are doing well. Welcome to the 11th tutorial of our Raspberry Pi programming course. In the previous chapter, we have seen how to regulate the speed of a Stepper motor with Raspberry Pi 4. Today, we'll work on the servo motor and will control it with RPi4. So, let's get started:
Components Required:We will need the following components to control Servo Motor with Raspberry Pi 4:
Raspberry Pi 4.
Servo Motor.
Male-to-female jumper wires.
What is a servo motor?
A Servo Motor is a simple DC motor with a position feedback Control System and a gearbox.A Servo Motor's primary advantage is its ability to maintain its shaft's angular position at any desired angle i.e. if we want to keep our shaft at 67 degre ...
Introduction
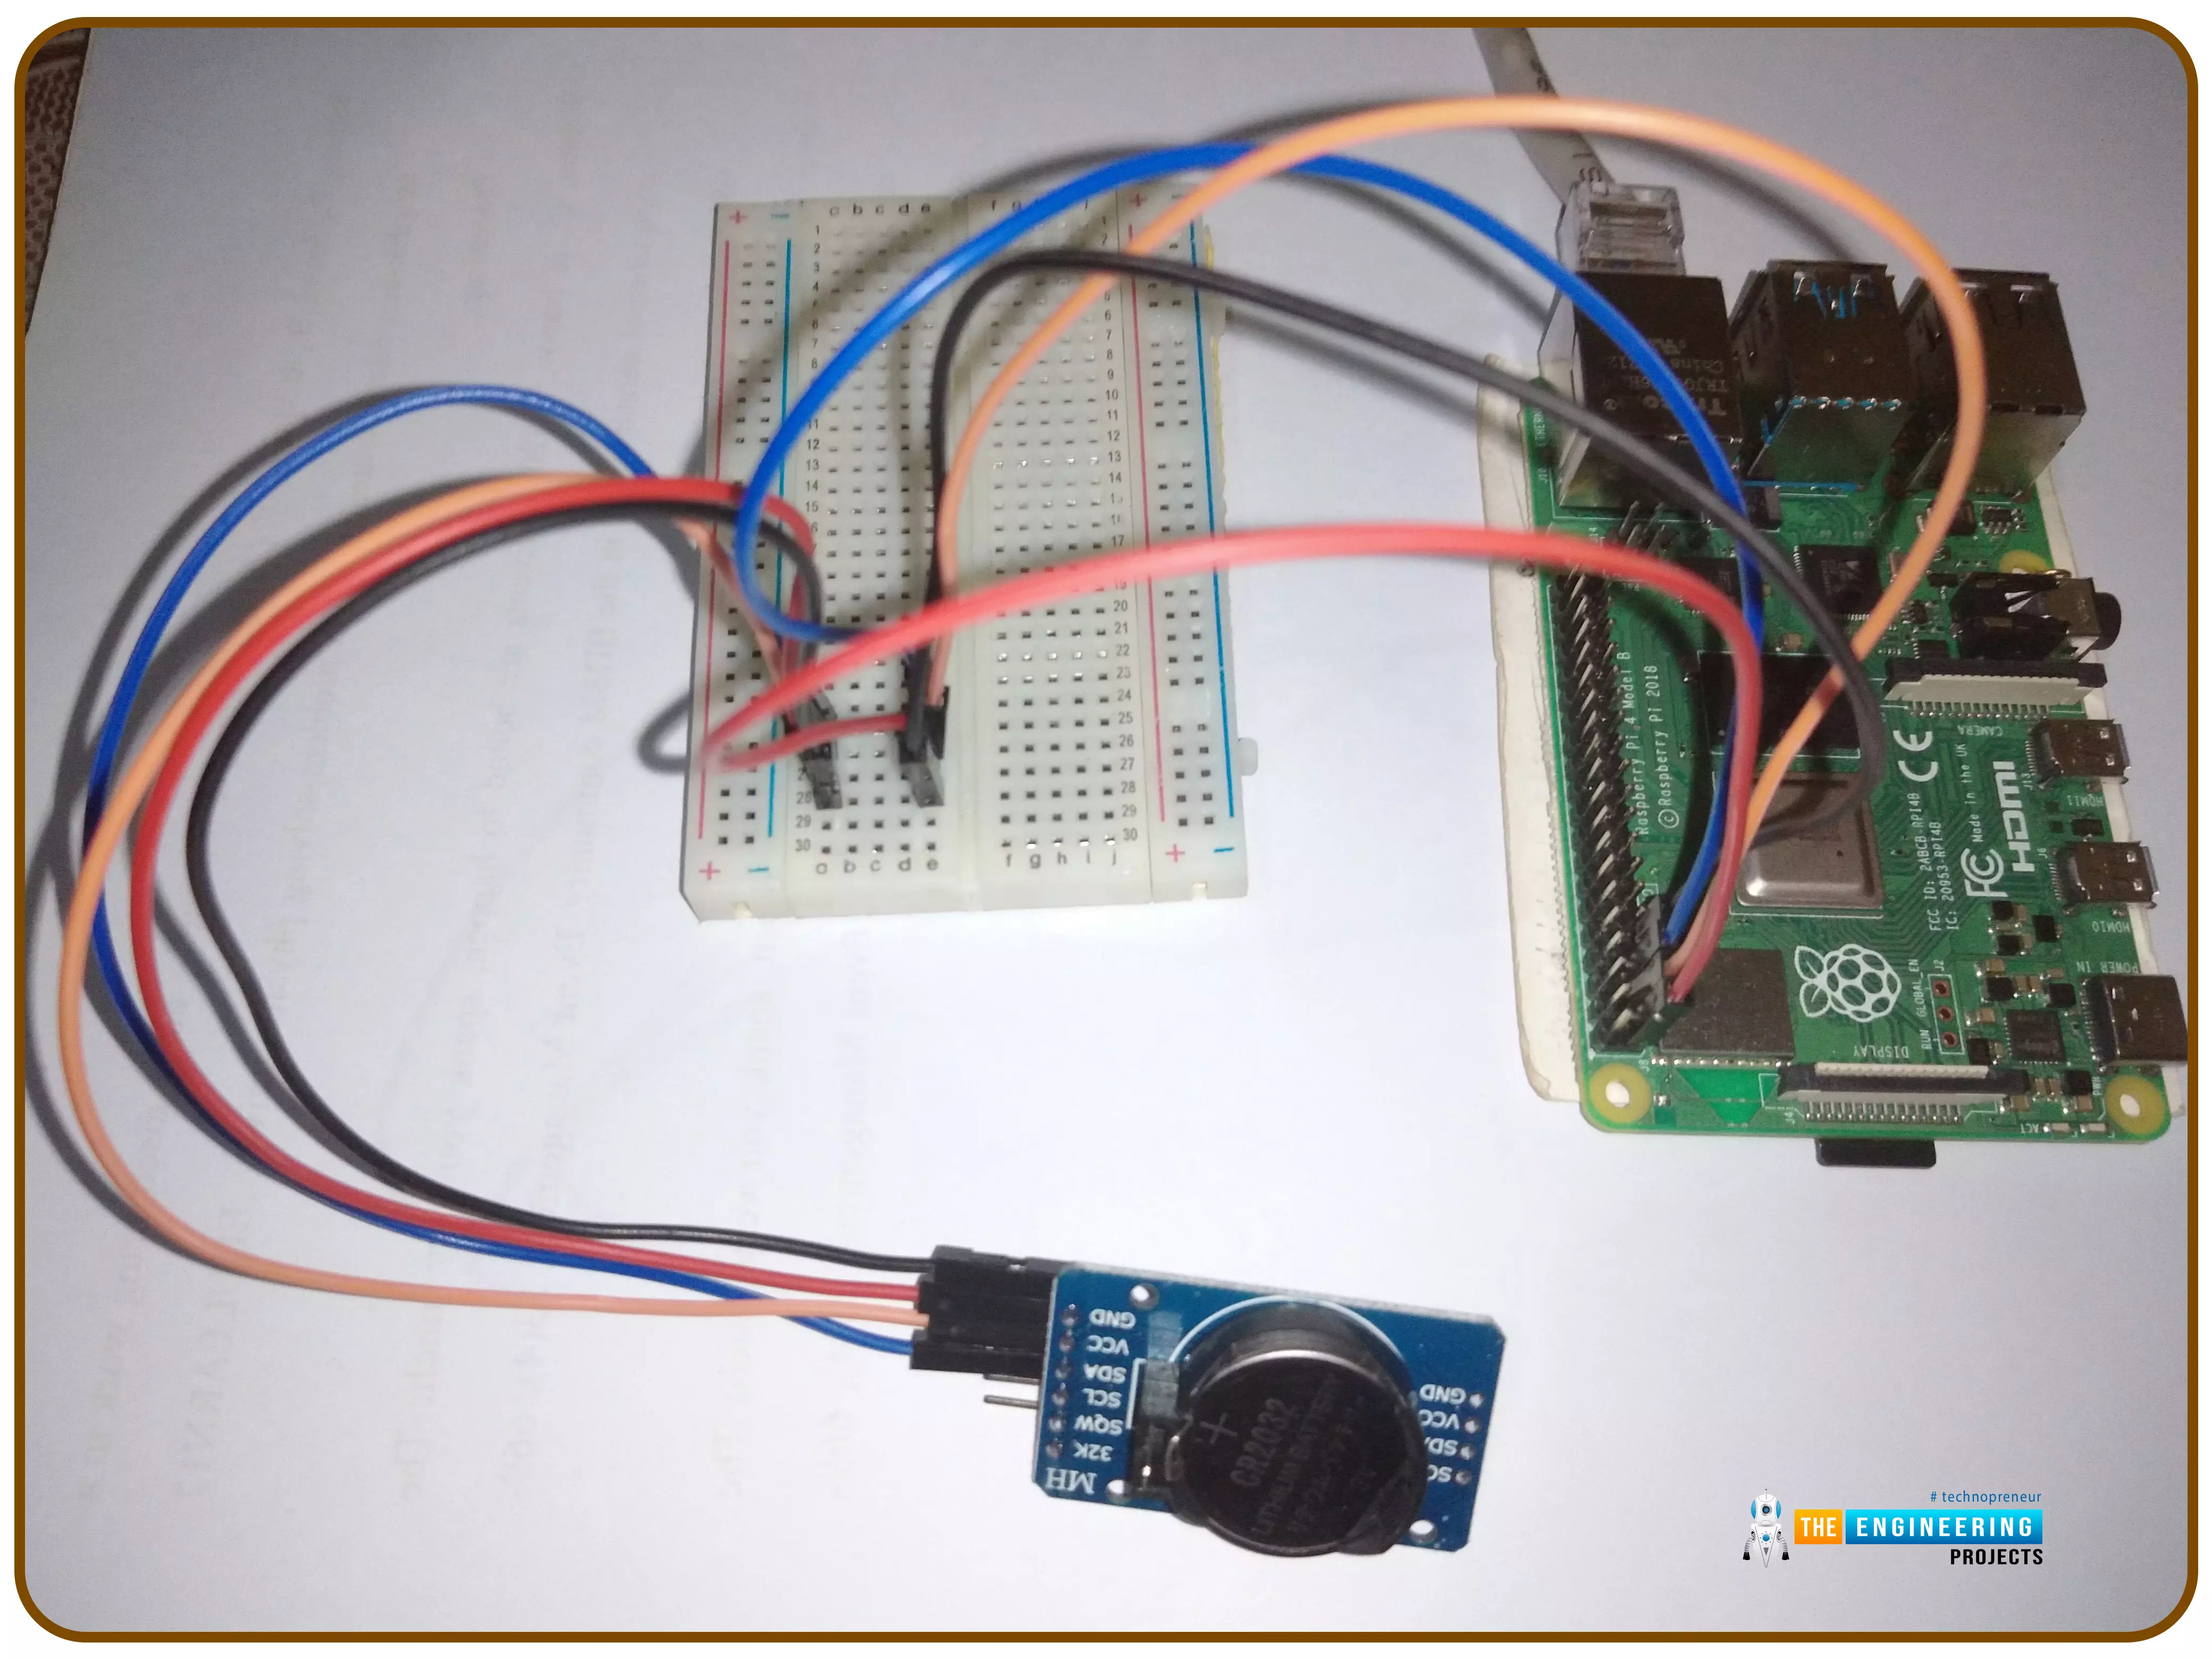
Thank you for joining us for yet another session of this series on Raspberry Pi programming. In the preceding tutorial, we implemented a speech recognition system using raspberry pi and used it in our game project. We also learned the fundamentals of speech recognition and later built a game that used the user's voice to play. However, this tutorial will integrate a real-time clock with our raspberry pi four and use it to build a digital clock. First, we will learn the fundamentals of the RTC module and how it works, then we will build a digital clock in python3. With the help of a library, we'll demonstrate how to integrate an RTC DS3231 chip with Pi 4 to keep time.
Real-Time Clocks: What Are They?
RTCs are clock units, as the name ...
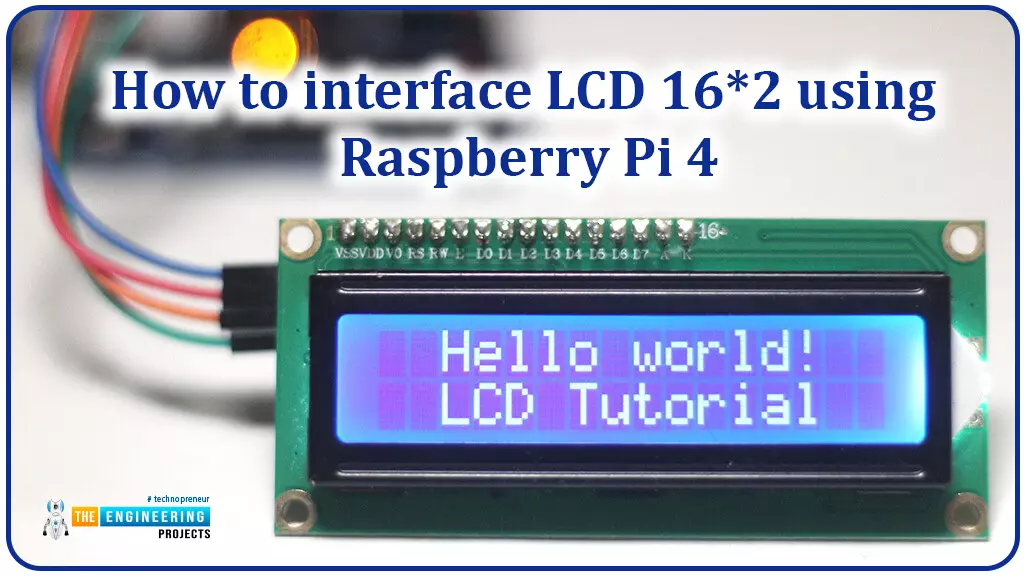
Hello friends, I hope you all are doing great. Today, I am going to share the 6th lecture in the Raspberry Pi 4 Programming series. We're glad you could join us for another lesson in our comprehensive Raspberry Pi programming guide. In today's guide, I'll show you how to interface a 16x2 LCD screen with Raspberry Pi 4.
So, let's get started:Interface LCD 16x2 with Raspberry Pi 4Today, we are going to interface a 16x2 LCD screen with Raspberry Pi 4. At first, we will print the "Hello World" text on the LCD, and in the last section, we will implement the scrolling and blinking of text on the LCD.Here's the video tutorial on LCD interfacing with Raspberry Pi 4:Components RequiredWe will need the following components for today's project:Raspberry Pi 4.M ...
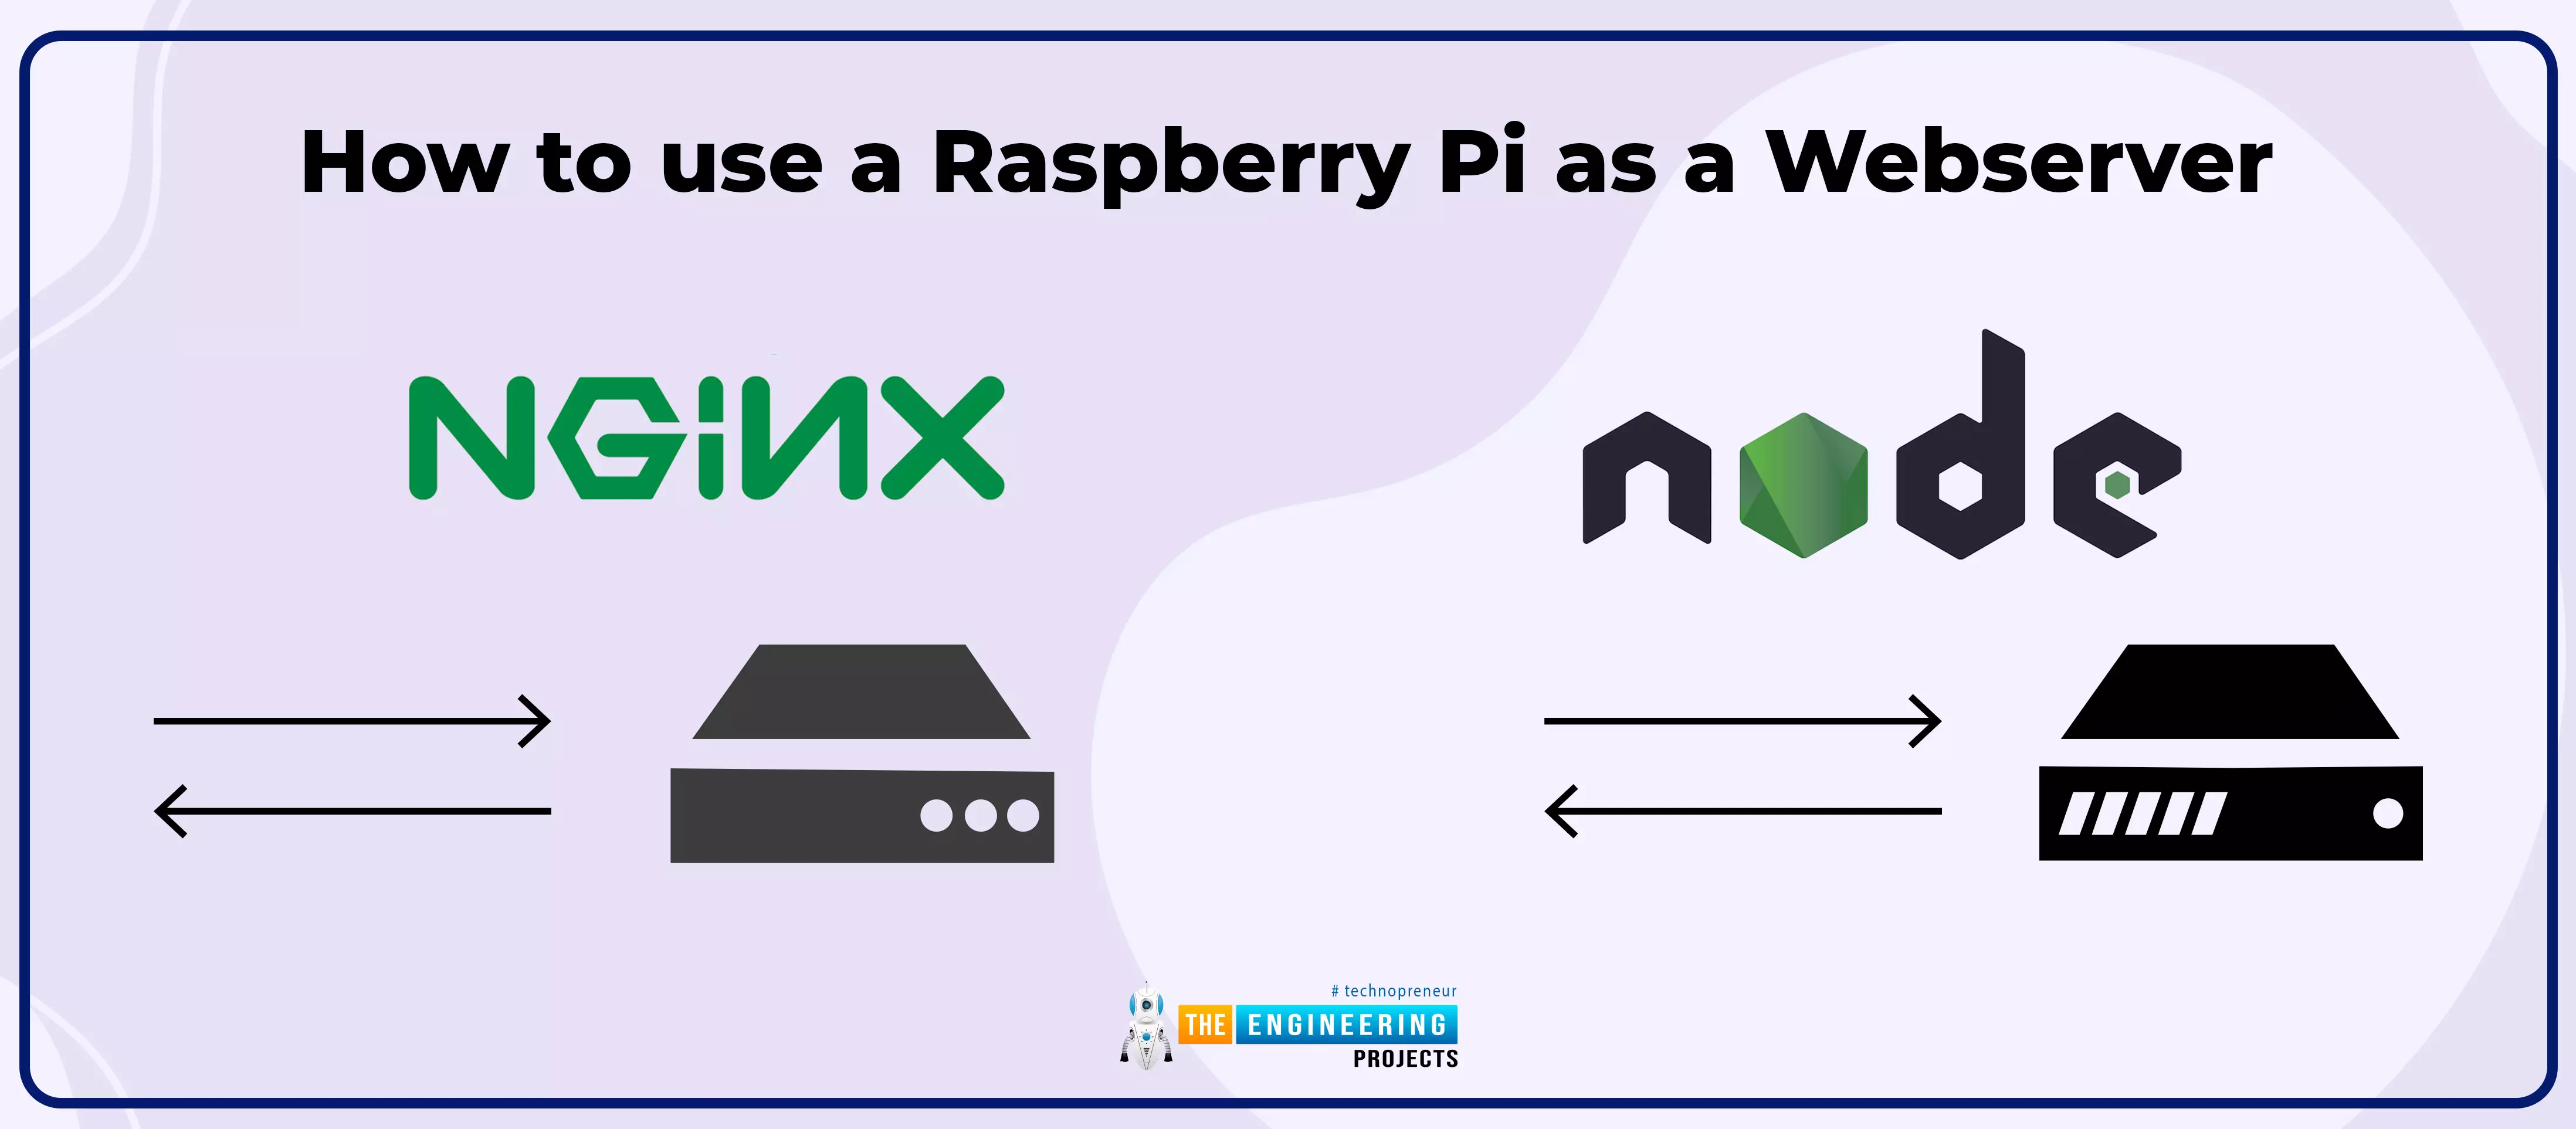
Hello friends, I hope you all are doing great. Today, we are going to share the 2nd tutorial of Section-VIII in the Raspberry Pi Programming Course. In the previous tutorial, we interfaced a Barcode Scanner with Raspberry Pi 4. In today's tutorial, we will discuss how to set up a web server in raspberry pi. So, let's get started:
Components Required
We are going to use the following components, in today's project:
Ethernet cable
MicroSD card
Keyboard
Mouse
HDMI cable
Monitor
Expand FileSystem
When configuring a Raspberry Pi, select the expand FileSystem option to ensure that all of the Micro SD storage is allocated for the operating system and modify the default Pi passwords to protect your server from attacker ...
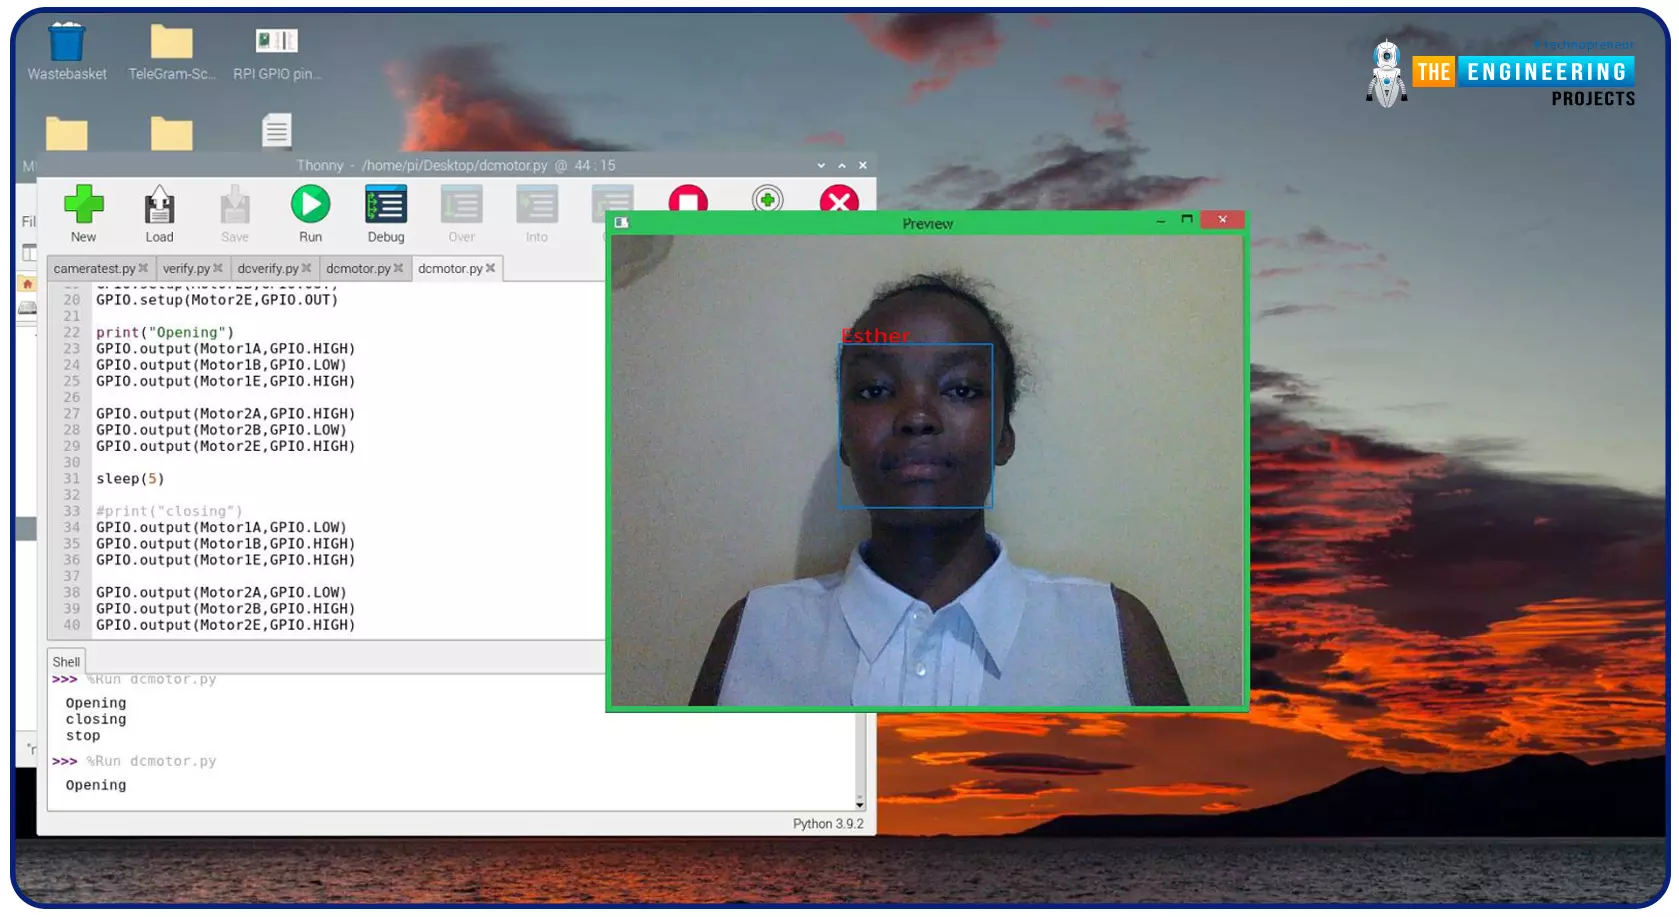
Greeting, and welcome to the next tutorial of our raspberry programming tutorial. In the previous tutorial, we learned how to build a smart attendance system using an RFID card reader, which we used to sign in students in attendance in a class. When it comes to building a face-recognition program on a Raspberry Pi, this tutorial will show you how. Two Python programs will be used in the lesson, one of which is a Training program that analyzes a collection of photographs of a certain individual and generates a dataset. (YML File). The Recognizer application uses the YML script to detect a face and afterward utters the person's name when the face is detected.
Components
Raspberry Pi
Breadboard
L293 or SN755410 motor driver chip
Jumper wir ...
Greetings! This is the complete project of our Raspberry Pi 4 tutorials. In our previous tutorial, we learned to set up our raspberry pi as a virtual private network server. In this tutorial, we will design a smart attendance system using an RFID card reader, which we will use to sign in students in attendance in a class.
First, we will design a database for our website, then we will design the RFID circuit for scanning the student cards and displaying present students on the webpage, and finally, we will design the website that we will use to display the attendees of a class.
Components
RFID card kit
Breadboard
Jumper wires
Raspberry pi 4
I2C LCD screen
Design a database in MySQL server
Additionally, the Database server offers a DBMS ...
Hello friends, I hope you all are doing well. Today, I am going to share the 4th chapter of Section-III in our Raspberry Pi programming course. In the previous lecture, we studied the Interfacing of IR sensor with Raspberry Pi 4. In this guide, you'll learn how to interface a PIR sensor with Raspberry Pi to create a motion detector. A passive infrared (PIR) sensor is a straightforward yet effective tool for motion detection.
As a bonus, a piezo speaker will play an audio clip whenever motion is detected. GPIO pins are required for both of these accessories. This tutorial is a great starting point for those who have never worked with electronic components and circuits.
These sensors are used in traditional, old-generation security
systems. In con ...
Welcome to the next tutorial of our Raspberry Pi programming course. Our previous tutorial taught us how to use a raspberry pi as a DNS server. We also looked at the benefit of this DNS server. This tutorial will teach us to set up Raspberry pi as a VPN server.
This is an excellent method for increasing your network security and getting access to your local area network from the world wide web, but setting up your VPN server might be a challenge. Pi VPN uses a guided install to turn your Raspberry into a low-cost, high-performance VPN server.
What is Pi VPN?
It is an OpenVPN server optimized for all Raspberry platforms above pi 2. It allows you to access your home network over the internet safely and securely. Smart devices and your network can ...
Thank you for being here for today's tutorial of our in-depth Raspberry Pi programming tutorial. The previous tutorial taught us how to install a PIR sensor on a Raspberry Pi 4 to create a motion detector. However, this tutorial will teach you how to connect a single seven-segment display to a Raspberry Pi 4. In the following sections, we will show you how to connect a Raspberry Pi to a 4-digit Seven-Segment Display Module so that the time can be shown on it.
Seven-segment displays are a simple type of Display that use eight light-emitting diodes to show off decimal numbers. It's common to find it in gadgets like digital clocks, calculators, and electronic meters that show numbers. Raspberry Pi, built around an ARM chip, is widely acknowledged as ...
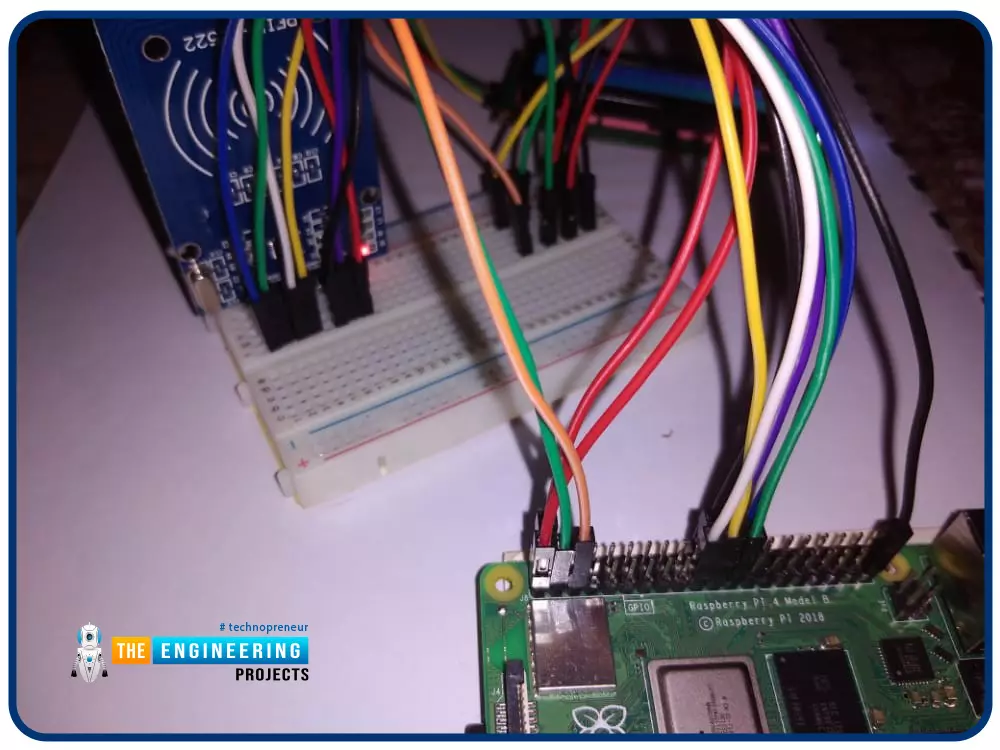
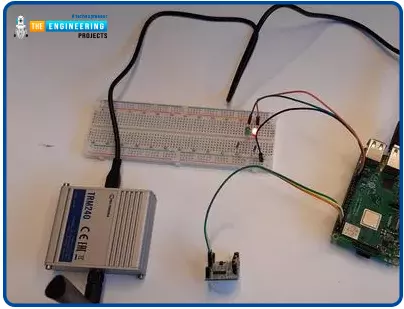
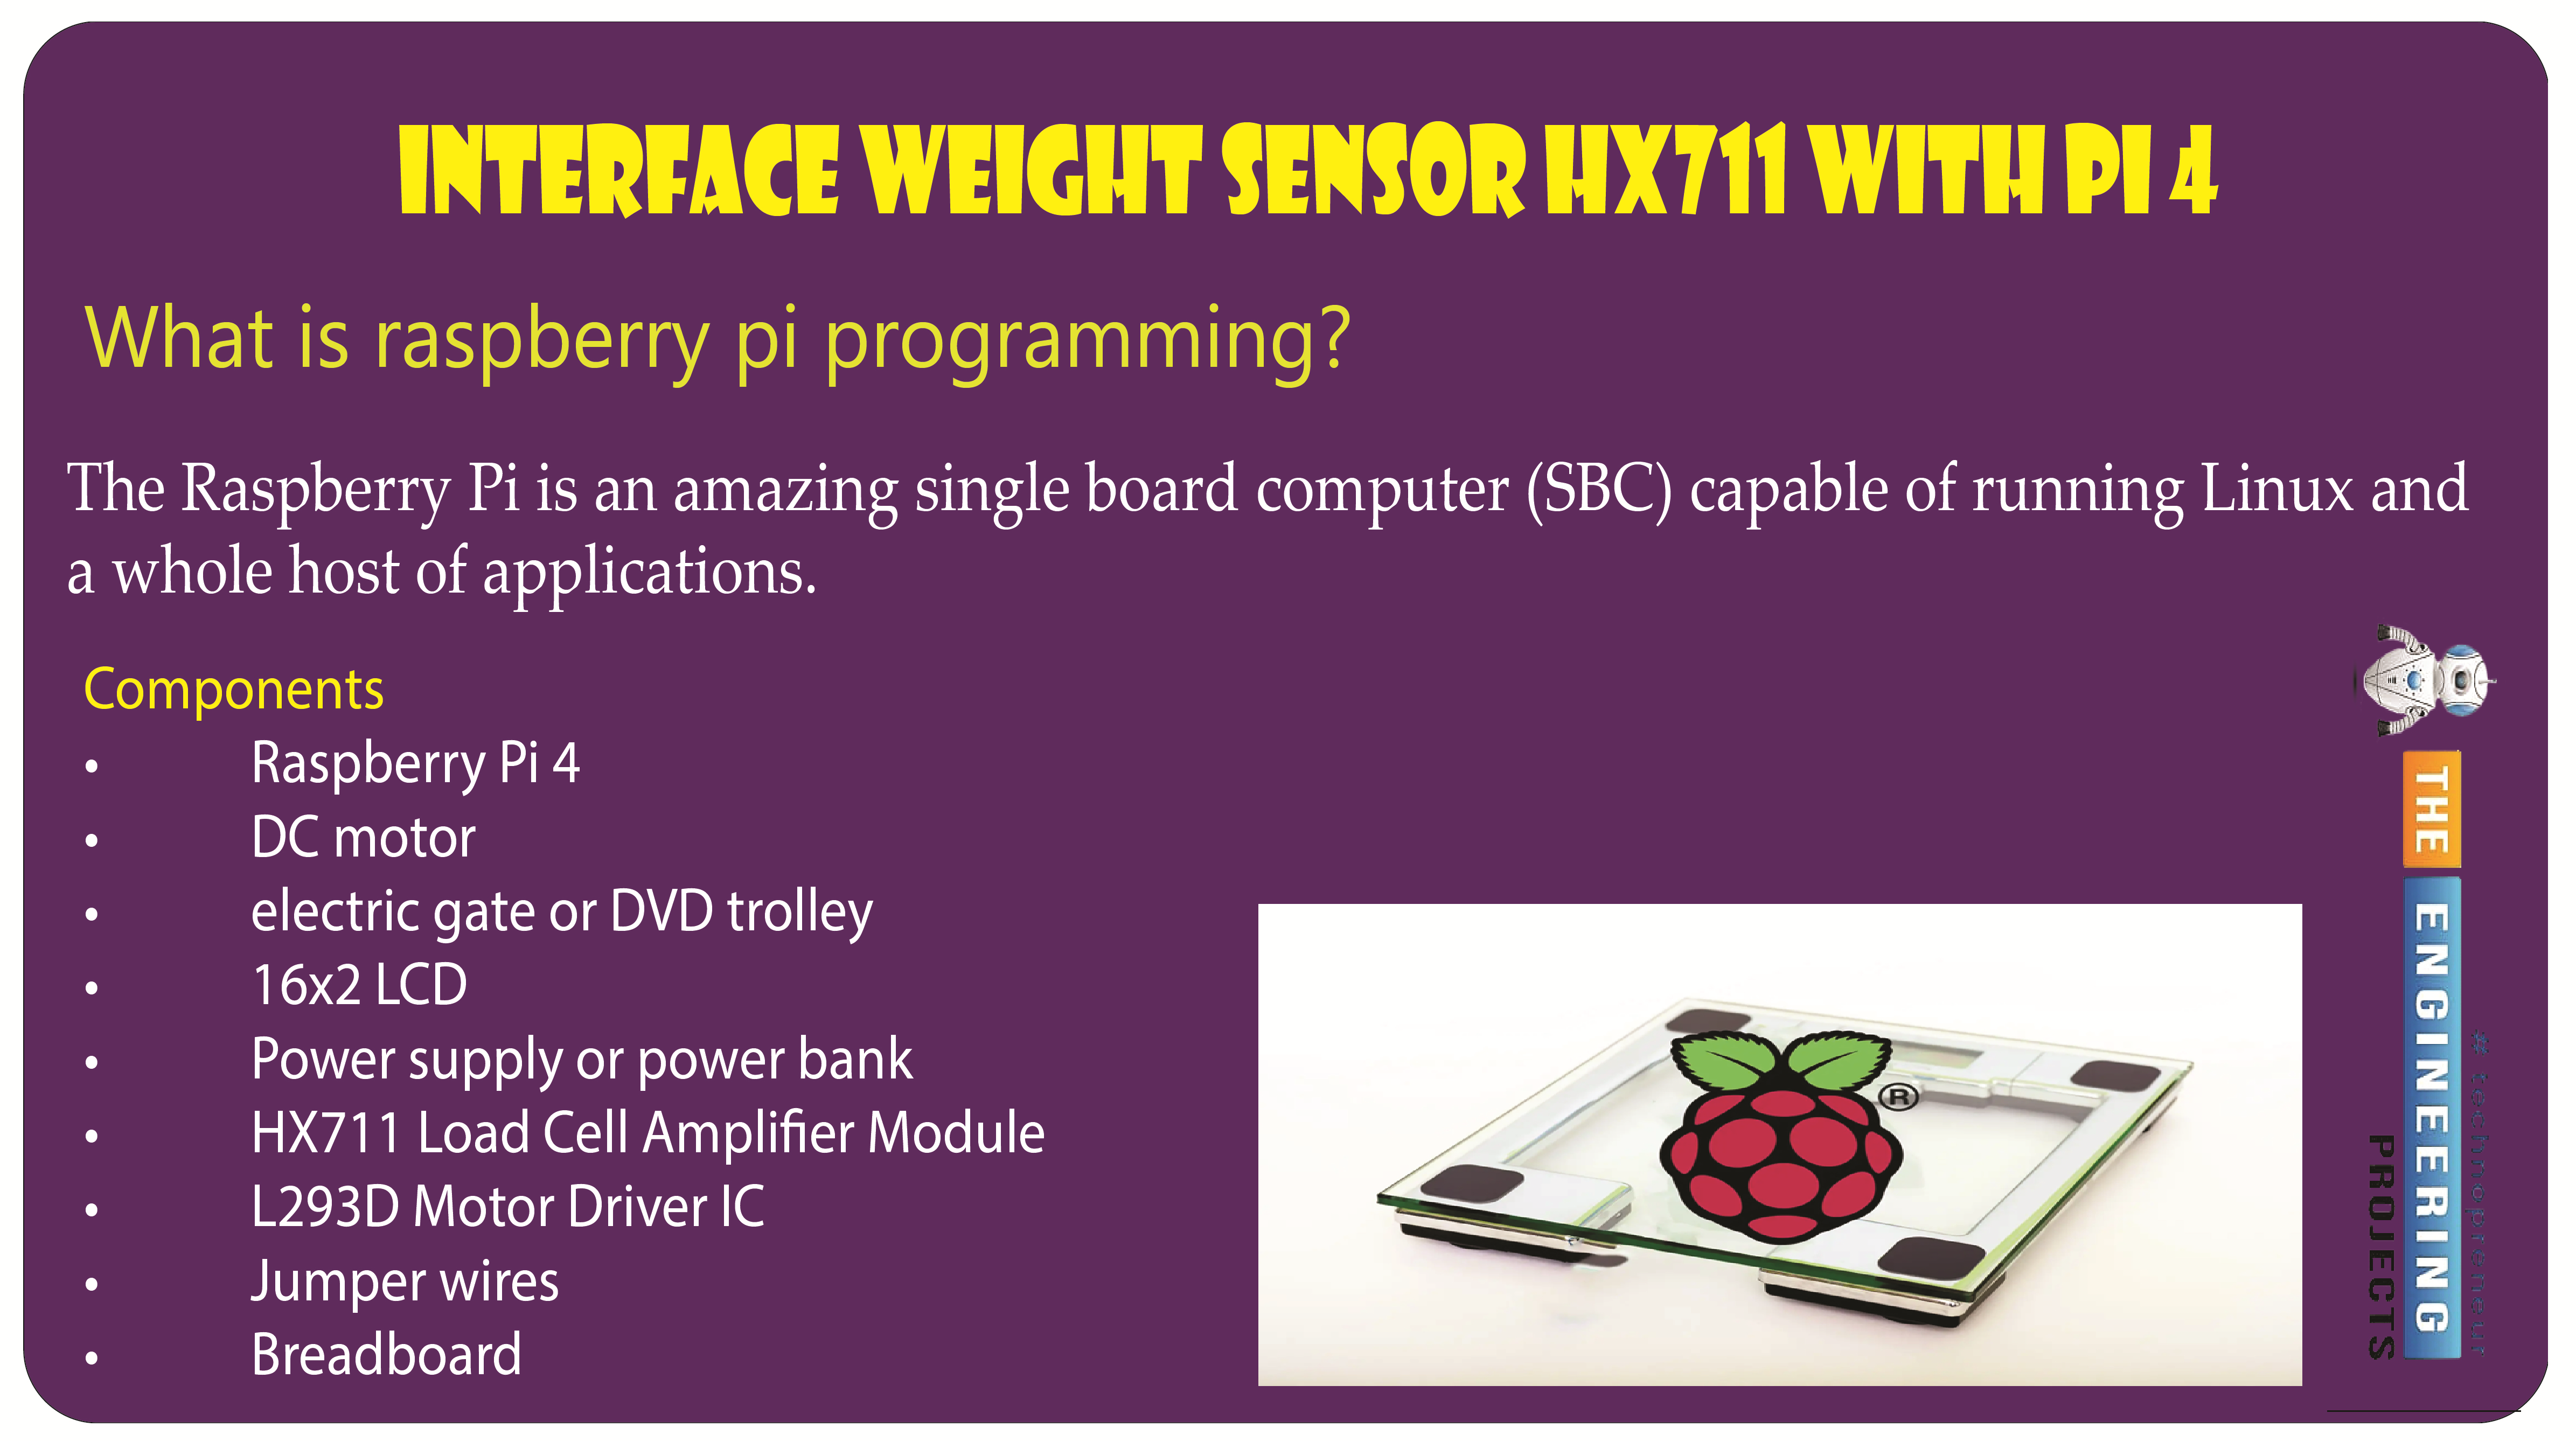
Welcome to the next tutorial of our raspberry pi programming tutorial. The previous tutorial showed us how to set up a weather station using the Internet of Things (IoT) on a Raspberry Pi 4. First, we studied how a weather station works on a fundamental level. Then we developed a Python script to collect data from the station. In contrast, we'll construct an automatic gate using a Raspberry Pi, a load cell, and an HX711 weight sensor.
These pressure-sensitive gates are common in shopping centers and showrooms; they open when someone is in the immediate vicinity and close again when the person is out of sight. Like the Automatic Gate, we just made, this one will open in response to weight or pressure and stay that way until the force is removed. If ...