Hello friends, I hope you all are doing great. Today, we are going to start a new section in our Raspberry Pi Programming Course. In this section-VIII, we will implement advance protocols in the RPi4 board. Today's our first lecture in this section and we are going to interface a USB Bar Code Scanner with Raspberry Pi 4.If you have visited any big grocery store, you must have seen, it's
quite important as well as difficult to maintain the products in stock
at all times. To ease the job, barcode technology is used because it can
easily maintain an organized database of your items, costs, and
inventory levels in one convenient location. Price changes can be
implemented whenever you desire without requiring new labels for
previously packaged goods. You can tell exactly when your s ...
Hello friends, I hope you all are having fun. Welcome to the 10th tutorial of our Raspberry Pi programming course. In the last chapter,
PWM was utilized to regulate the DC motor's speed and direction
with a motor driver L293D. In this chapter, we'll advance our skills with PWM and use it to control a stepper motor using the same motor driver L293D.Here's the video demonstration of this project:Let's get started:
Components RequiredHere's the list of components, which we will use to control the speed and direction of Raspberry Pi 4:
Raspberry Pi 4.Stepper Motor.
Motor Driver IC(L293D).
Jumper wires.
9V Battery.
Breadboard.
The Raspberry Pi with desktop is required for this project. An SSH connection can be made, or the RPi can ...
Hi Guys! I welcome you on board. In this post today, we’ll study What is Raspberry Pi Pico? We’ll also detail Raspberry Pi Pico Pinout, Specs, Projects & Datasheet.
Raspberry Pi Pico is a little different from other modules introduced by Raspberry Pi Foundation. This unit is similar to Arduino Nano and is called a microcontroller board that incorporates a powerful RP2040 chip. This is different from other single-board computers that fall under the Raspberry Pi series. It is not a computer but a microcontroller board.
I suggest you buckle up as I’ll explain Raspberry Pi Pico in detail.
Let’s get started.
What is Raspberry Pi Pico?
Raspberry Pi Pico is a microcontroller board (released on 21 Jan 2021) mainly developed for robotics and embe ...
Introduction
Greetings, and welcome to the next section of our Raspberry Pi 4 tutorials. In the last section, we discovered how to set up and run our self-host bitwarden on our Raspberry Pi. We learned how to set up admin panels and perform a wide range of actions, such as limiting the creation of new accounts and users for security purposes. However, in this guide, we will discover how to configure a PS3 or PS4 joystick with our raspberry pi and set up and run Xbox cloud gaming on our Pi 4.
Components
Raspberry pi 4
SD card
Power supply
Ethernet cable or wifi
Xbox controller
Xbox game pass ultimate subscription
USB keyboard
USB mouse
HDMI cable
Through a service called Xbox Cloud Gaming, users may play a wide variety of games witho ...
Thank you for being here for today's tutorial of our in-depth Raspberry Pi programming tutorial. The previous tutorial demonstrated the proper wiring of the photoresistor sensor to the GPIO pins. Finally, we learned how it might be included in a Python script for data collection and analysis needs. We also looked at the functions of each component in the circuit. However, I'll walk you through installing a Pi 4 Print Server in this guide. While installing the program is straightforward, setting it up so that a Windows network can locate the print server requires a little more effort. Rather than spending hundreds of dollars upgrading to a laser printer, you may easily upgrade your current USB printer to laser quality by installing a print server.
Because of this software, you no longer ha ...
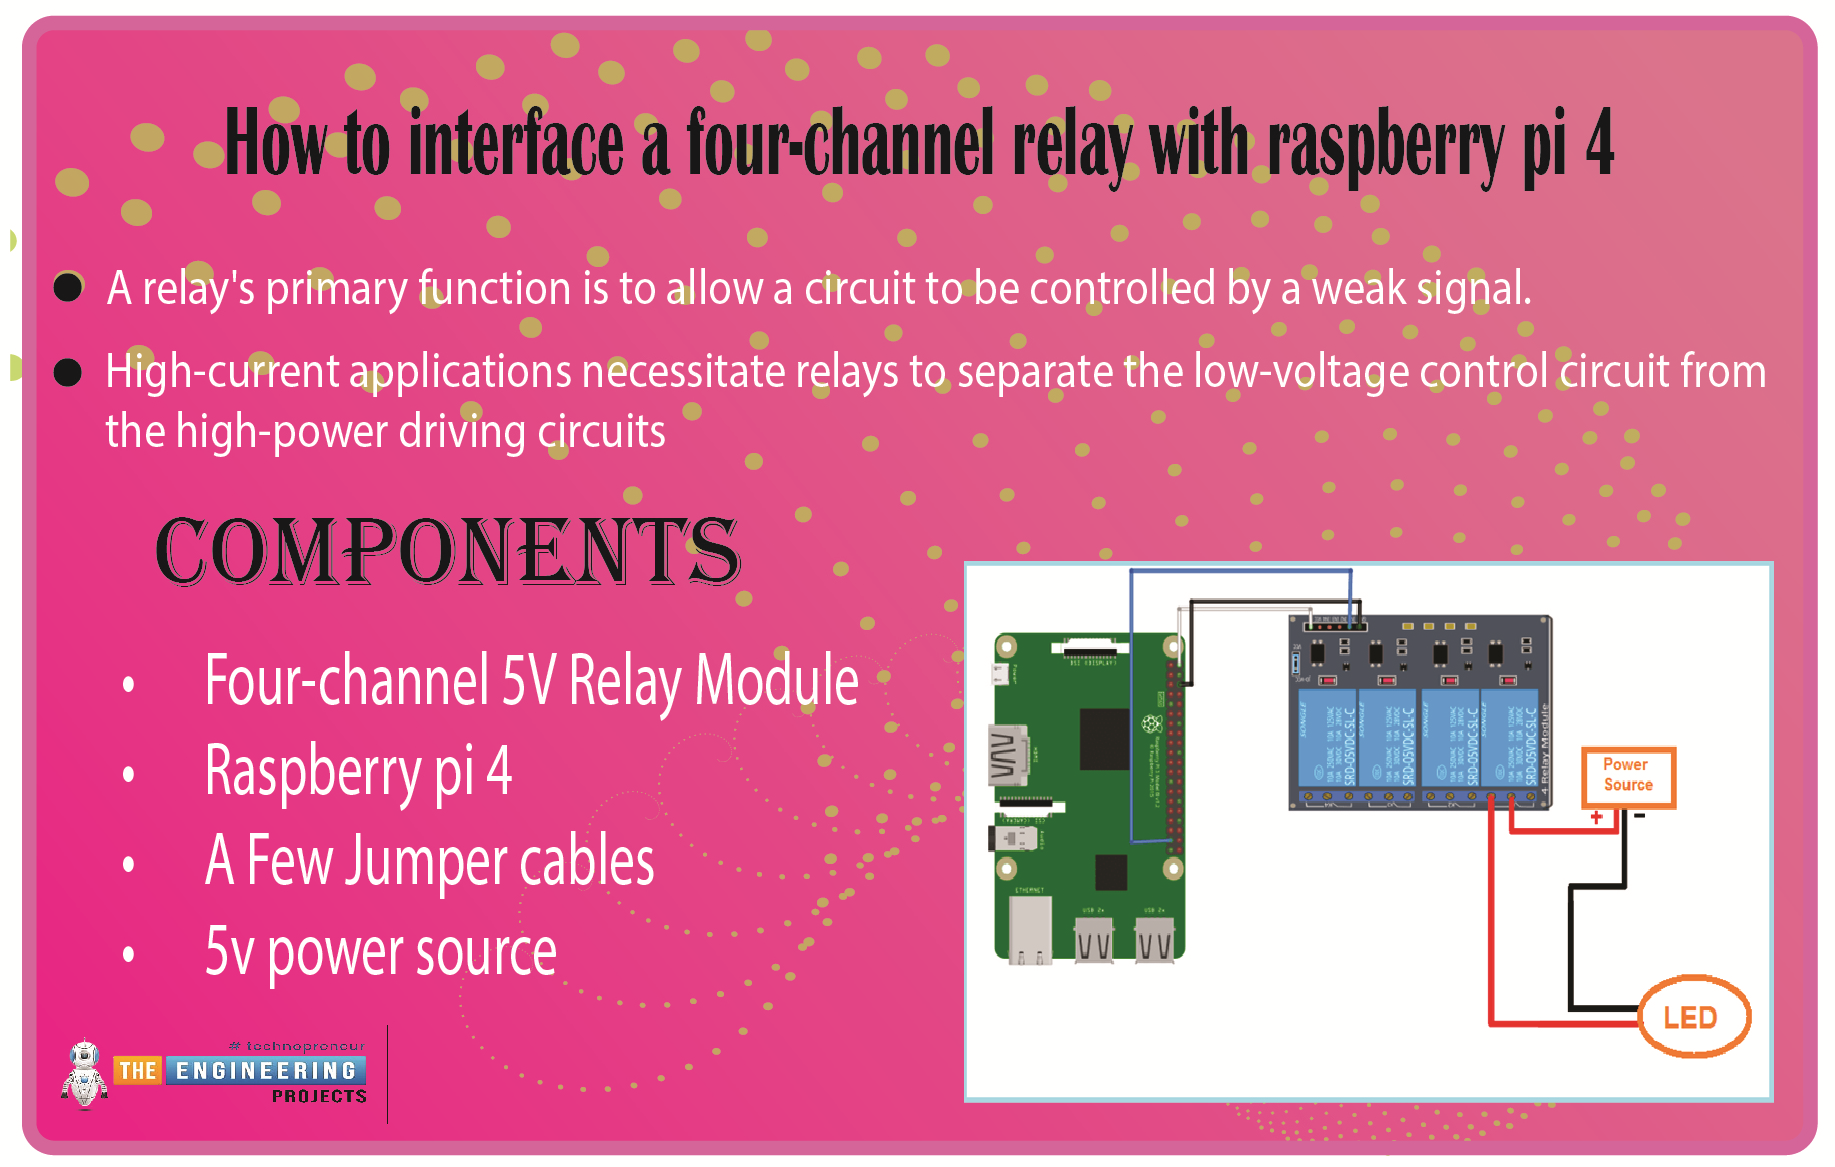
We learned in the previous tutorial how to connect a joystick to a Raspberry Pi 4 using an mcp3008 and an op-amp IC, the LM324A. For each of the interface methods we studied, we created a python script allowing us to interact with the circuit. This tutorial will show you how to connect a 4-channel relay module with a Raspberry Pi to carry out switching.
A relay's primary function is to allow a circuit to be controlled by a weak signal. High-current applications necessitate relays to separate the low-voltage control circuit from the high-power driving circuits. Because of this, understanding it is crucial for those interested in industrial or household automation.
If you've been tinkering with a raspberry pi for a while, consider the various ways ...
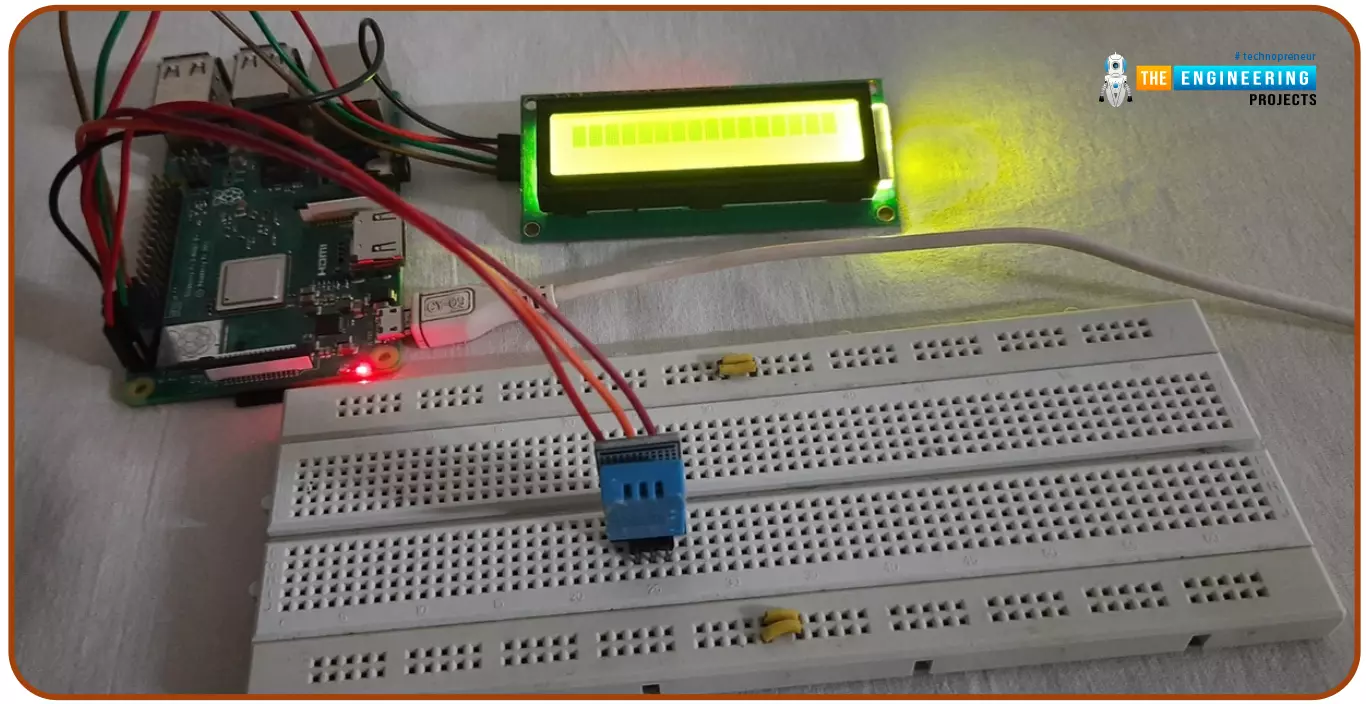
Hello friends, I hope you all are doing great. Today, I am going to share the 6th tutorial of Section-III in the Raspberry Pi Programming Course. In our previous tutorial, we have seen how to interface an Ultrasonic Sensor with Raspberry Pi 4 and used Python to perform its calculations. In today's tutorial, we'll discuss how to interface a DHT11 temperature and humidity sensor to a Raspberry Pi. So, let's get started:
ComponentsHere's the list of components, we are going to use in today's circuit:
LCD display
DHT11 sensor
Raspberry pi
Breadboard
Male-to-female jumper wires
What is a DHT11 sensor?
DHT11 is a low-cost digital sensor, used to measure temperature and humidity in the surr ...
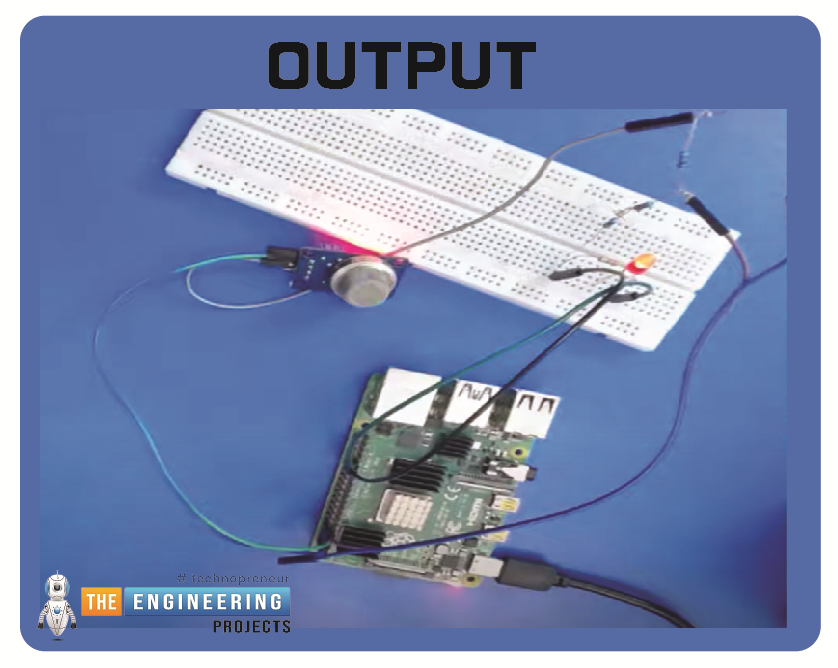
Hello friends, I hope you all are having fun. Today, I am going to share the 9th tutorial of Section-III in our Raspberry Pi 4 Programming Course. In the previous tutorial, we interfaced an air pressure sensor BMP180 with Raspberry Pi 4. In this tutorial, you'll learn how to interface an MQ-2 gas sensor with a Raspberry Pi 4. Many apartments, residences, and workplaces rely heavily on these gas sensors to detect smoke or gas and alert the appropriate personnel in an emergency. In addition to gas and smoke, this sensor is sensitive to various odorous gases.
Project DescriptionToday, we will interface a gas sensor MQ-2 with Raspberry Pi 4 and will display the values on Raspberry Pi Console Window.
Components Required
These are the components use ...
Thank you for joining us for yet another session of this series on Raspberry Pi programming. In the previous tutorial, we built a motion sensor-based security system with an alarm. Additionally, we discovered how to use Twilio to notify the administrator whenever an alarm is triggered. However, in this tutorial, we'll learn how to build a stop motion film system using raspberry pi 4.
What you will make
With a Raspberry Pi, Py, and a pi-camera module to capture images, you can create a stop-motion animated video. In addition, we'll learn about the various kinds of stop motion systems and their advantages and disadvantages.
The possibilities are endless when it comes to using LEGO to create animations!
...
Introduction
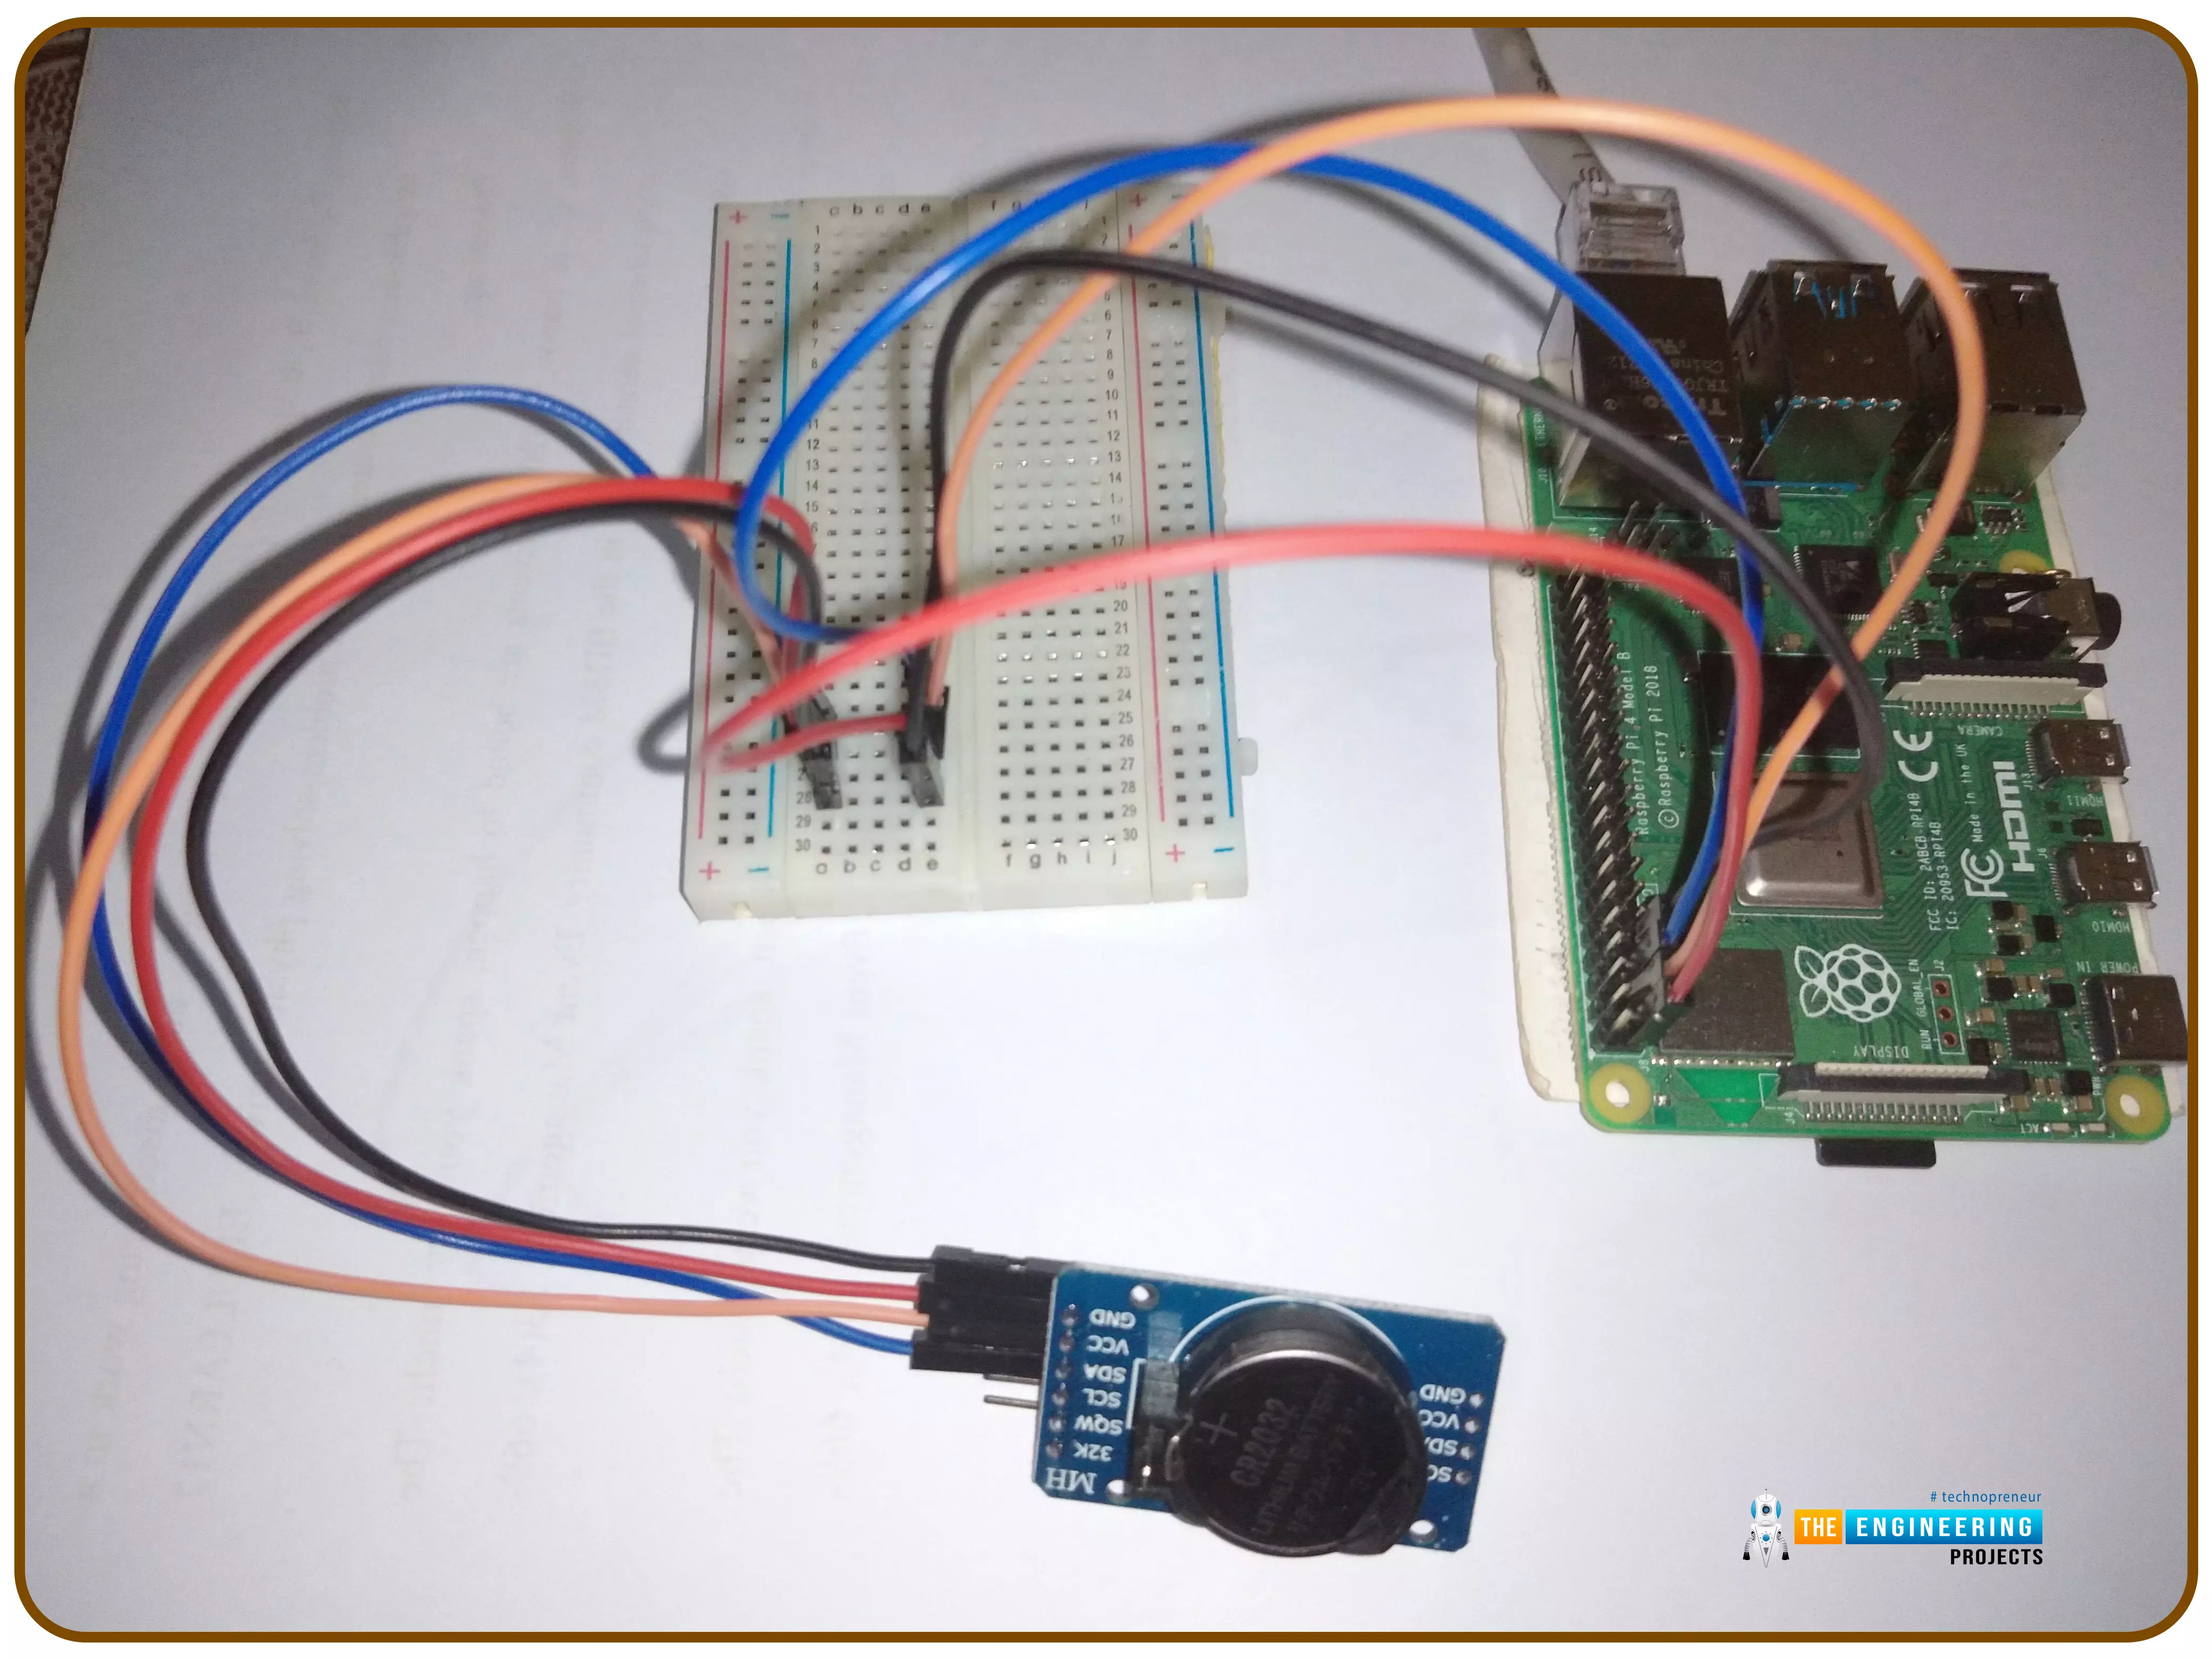
Thank you for joining us for yet another session of this series on Raspberry Pi programming. In the preceding tutorial, we implemented a speech recognition system using raspberry pi and used it in our game project. We also learned the fundamentals of speech recognition and later built a game that used the user's voice to play. However, this tutorial will integrate a real-time clock with our raspberry pi four and use it to build a digital clock. First, we will learn the fundamentals of the RTC module and how it works, then we will build a digital clock in python3. With the help of a library, we'll demonstrate how to integrate an RTC DS3231 chip with Pi 4 to keep time.
Real-Time Clocks: What Are They?
RTCs are clock units, as the name ...