Thank you for being here for today's tutorial of our in-depth Raspberry Pi programming tutorial. The previous tutorial taught us how to install a PIR sensor on a Raspberry Pi 4 to create a motion detector. However, this tutorial will teach you how to connect a single seven-segment display to a Raspberry Pi 4. In the following sections, we will show you how to connect a Raspberry Pi to a 4-digit Seven-Segment Display Module so that the time can be shown on it.
Seven-segment displays are a simple type of Display that use eight light-emitting diodes to show off decimal numbers. It's common to find it in gadgets like digital clocks, calculators, and electronic meters that show numbers. Raspberry Pi, built around an ARM chip, is widely acknowledged as ...
Hello friends, I hope you all are doing well. Today, I am going to share the 8th tutorial of Section-III in our Raspberry Pi Programming Series. In the previous tutorial, we interfaced the temperature sensor DS18B20 with Raspberry Pi 4. In today's guide, we'll discover another temperature sensor BMP180 and will interface it with Raspberry Pi 4.So, let's get started:
Project DescriptionIn today's tutorial, we will interface the BMP180 sensor with Raspberry Pi 4 and will display the values of temperature, barometric pressure and altitude in the Raspberry Pi Console Window.
Components Required
We will use the following components in today's project:Raspberry pi 4BMP180 sensorFemale-Female Jumper wiresBreadboard
BMP180 Air Pressure Sensor
BMP180 i ...
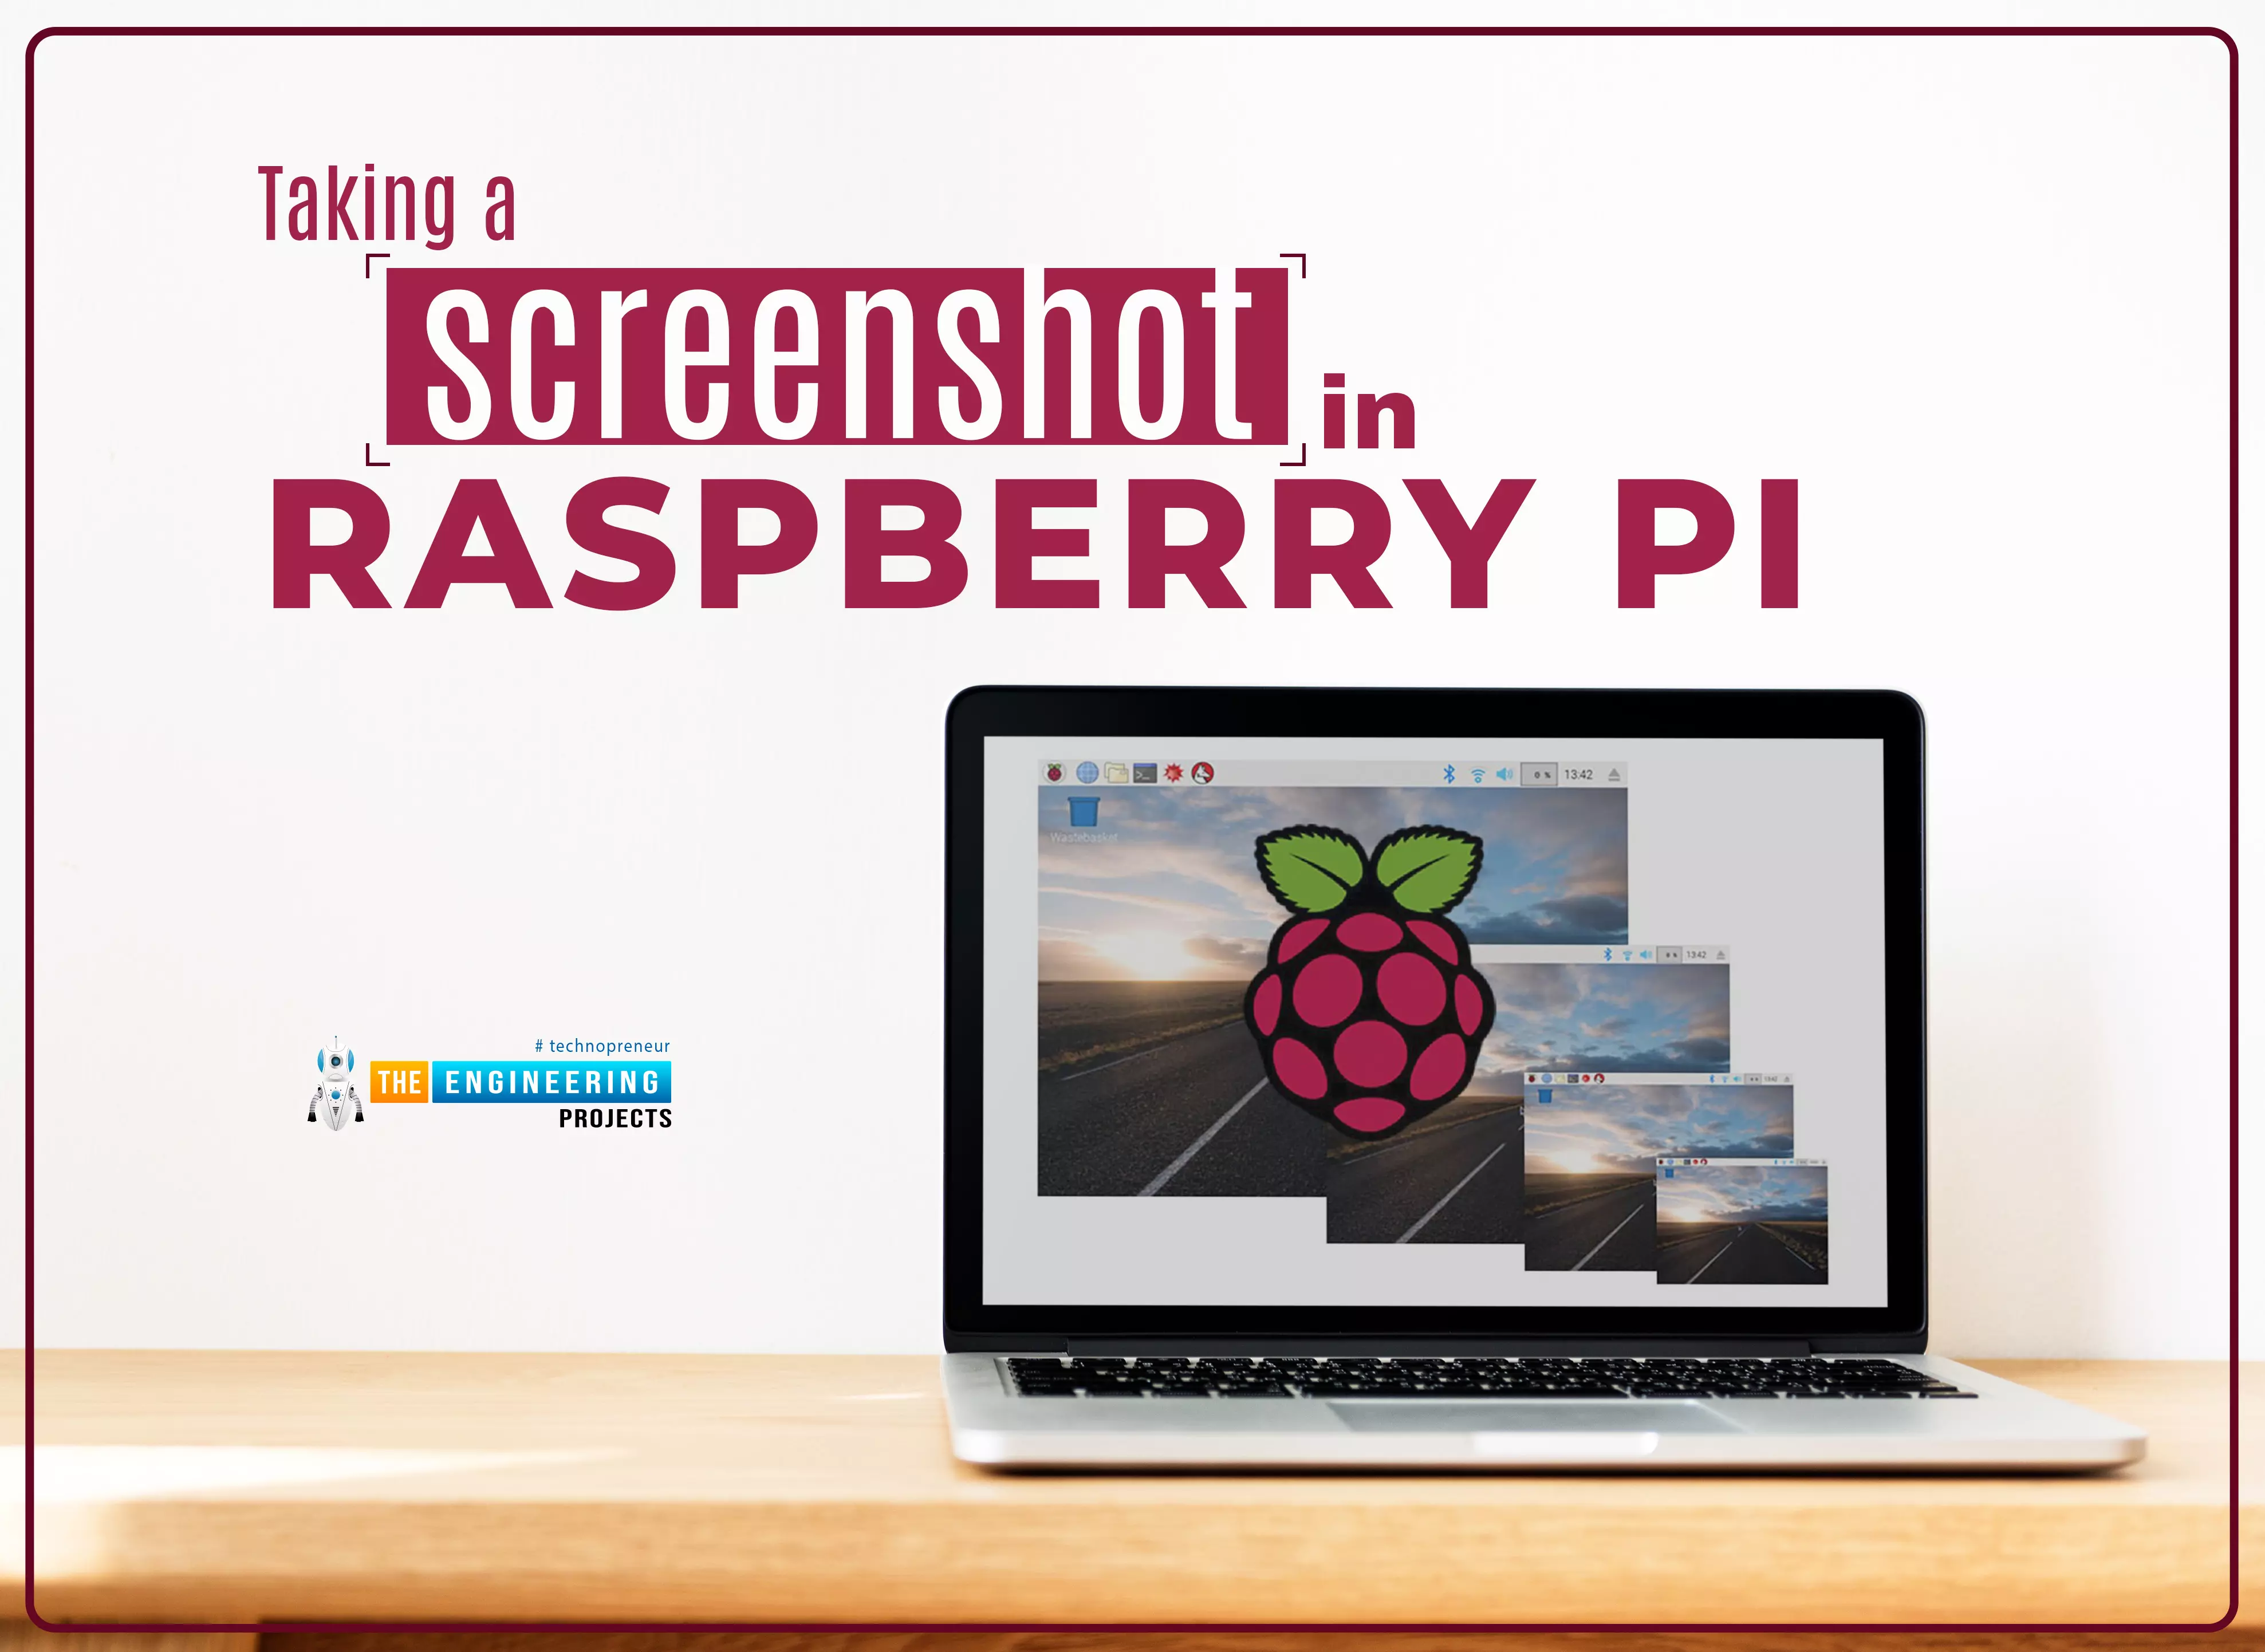
Welcome to the next tutorial of our Raspberry Pi programming course. Our previous tutorial taught us to how to print from a Raspberry pi. We also discussed some libraries to create a print server in our raspberry pi. We will learn how to take screenshots on Raspberry Pi using a few different methods in this lesson. We will also look at how to take snapshots on our Raspberry Pi using SSH remotely.
Why should you read this article?
This article will assist you when working with projects that require snapshots for documenting your work, sharing, or generating tutorials.
So, let us begin.
Screenshots are said to be the essential items on the internet today. And if you have seen these screenshots in tutorial videos or even used them in regular commu ...
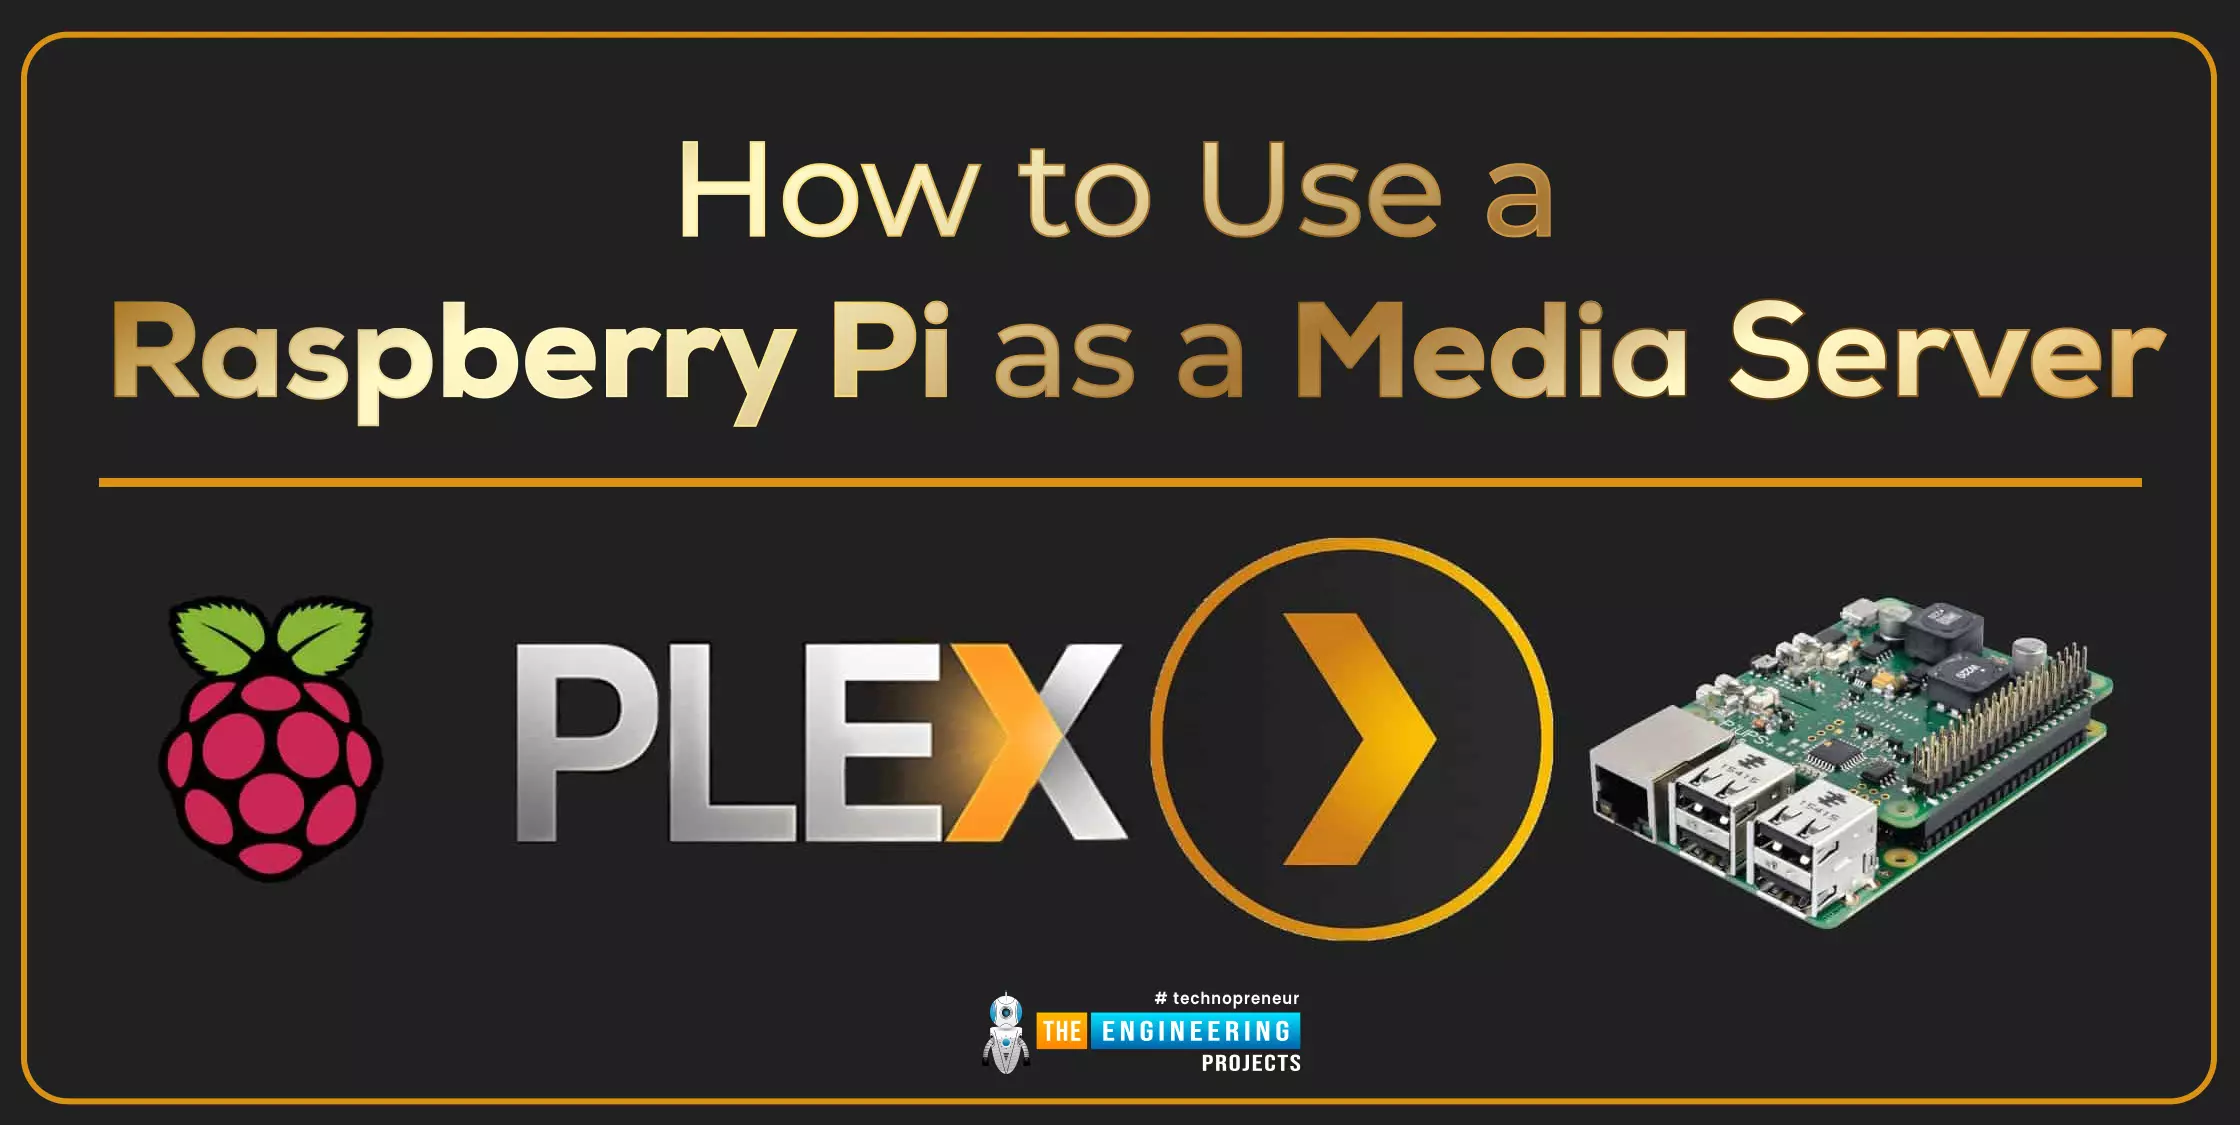
Welcome to the next tutorial of our Raspberry Pi programming course. Our previous tutorial taught us to set up a webserver in raspberry pi. We also looked at configuring addclient and deploying apps to our repositories. This tutorial will teach us to set up a free media server on Raspberry Pi.
Using a Raspberry Pi as a multimedia server requires:
An operating system and miniDLNA program installed on your Raspberry Pi,
You can attach various cleanly formatted and fragmented hard disks to your Raspberry Pi for storing and streaming media files.
A basic understanding of how to use a computer, Client-server architecture skills, familiarity with Unix terminal and Secure shell, and a passion for computing and the media are a must!
Even if you ...
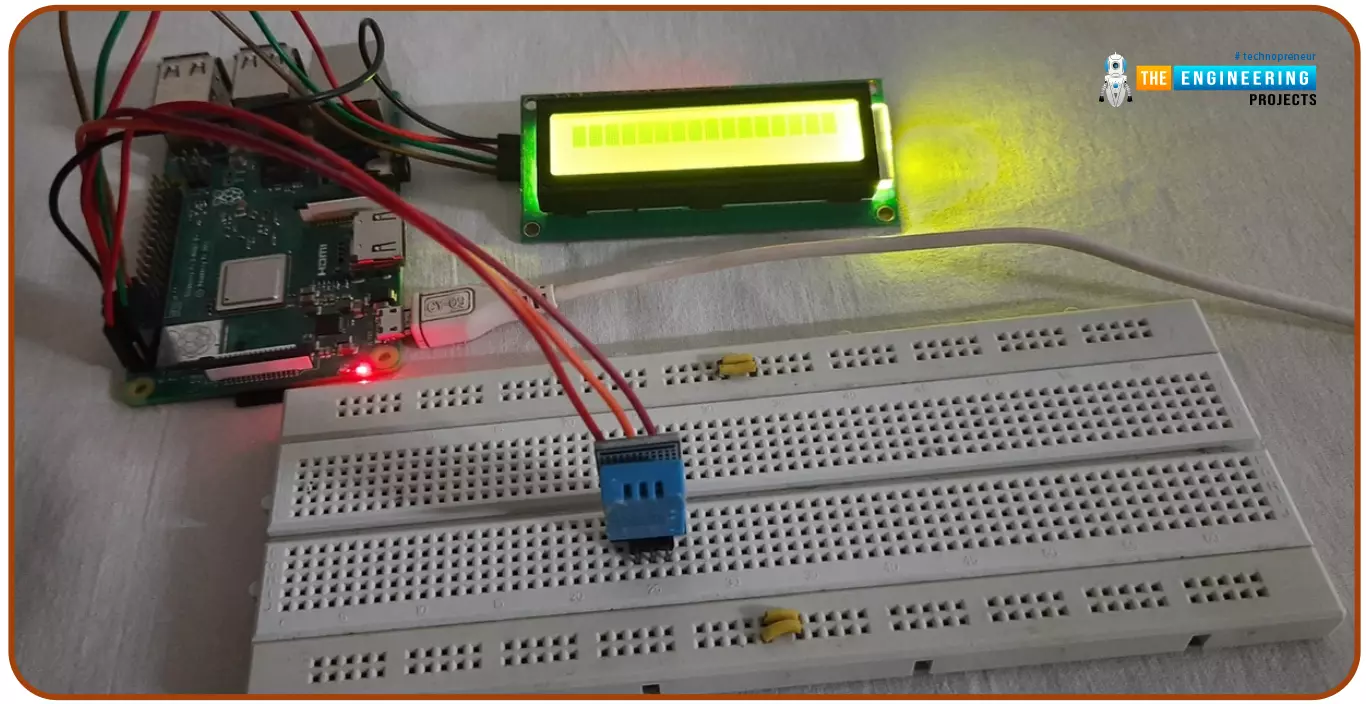
Hello friends, I hope you all are doing great. Today, I am going to share the 6th tutorial of Section-III in the Raspberry Pi Programming Course. In our previous tutorial, we have seen how to interface an Ultrasonic Sensor with Raspberry Pi 4 and used Python to perform its calculations. In today's tutorial, we'll discuss how to interface a DHT11 temperature and humidity sensor to a Raspberry Pi. So, let's get started:
ComponentsHere's the list of components, we are going to use in today's circuit:
LCD display
DHT11 sensor
Raspberry pi
Breadboard
Male-to-female jumper wires
What is a DHT11 sensor?
DHT11 is a low-cost digital sensor, used to measure temperature and humidity in the surr ...
Hi Folks! I welcome you on board. Today, I am sharing the 2nd
tutorial in the Raspberry Pi 4 learning series. In this post today,
we’ll cover What is Raspberry Pi 4?
Raspberry Pi 4 Pinout, Specs, Projects, Datasheet etc.
Raspberry
Pi 4 is a tiny dual-display single-board computer, developed by
Raspberry Pi Foundation. This foundation has introduced a series of
Raspberry Pi boards to teach computer basics in schools.
With Raspberry Pi 4, you can control two monitors at once. Moreover, it
is incorporated with a quad-core processor that is powerful and comes
with more speed compared to its predecessors.
I suggest you read this post till the end as I’ll cover Raspberry Pi 4
in detail.
Let’s get started.
What is Raspberry Pi 4?
Raspberry Pi 4
is a dua ...
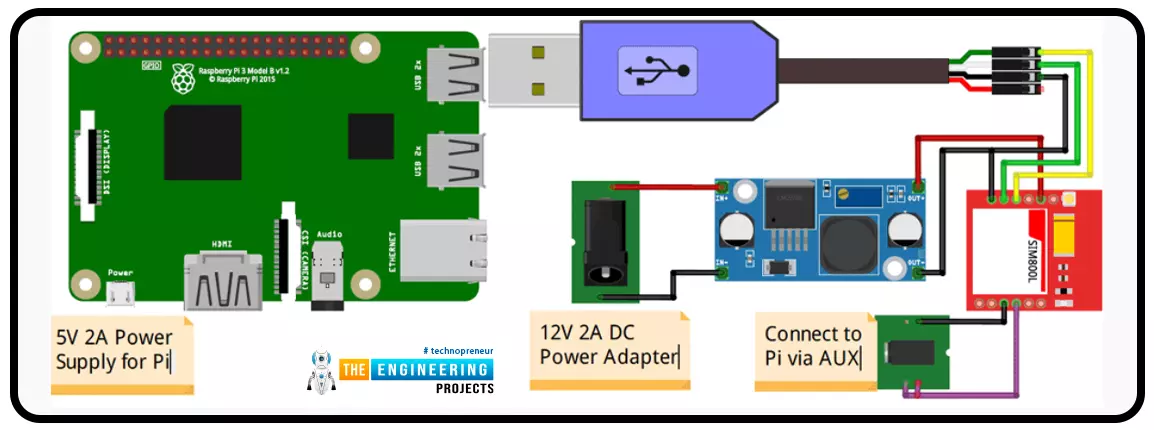
A low-literate audience can nevertheless have their voices heard and their questions answered by using an IVR system, as has been proven time and time again. However, achieving such aims in a development setting calls for a cheap system that welcomes input from various parties. RASP-IVR is an inexpensive IVR system that operates on a PI 4 and a local Global System for Mobile Communications modem. RASP-IVR was designed as an open-source, community-driven solution. It's unusual to find a customer-focused company that still uses human operators rather than an interactive voice response system. Credit card companies typically have IVR systems that can be used to make payments or file fraud reports. Airlines use elaborate IVR systems to schedule flights and check their current status. To facili ...
Hello friends, I hope all are fine. Today, we are going to share the 3rd chapter of Section-III in our Raspberry Pi Programming Course. In our previous lecture, we interfaced the Soil Moisture Sensor with Raspberry Pi 4. Today, we are going to Interface the Infrared(IR) sensor with RPi4. IR Sensor is typically employed for the presence/motion detection of objects in the immediate area. With their low power consumption, straightforward design, and user-friendly features, IR sensors are a popular choice for detection purposes. Infrared(IR) impulses are invisible to the naked eye and lie between the visible and microwave parts of the electromagnetic spectrum. So let's get started:
Components Required
To learn how an IR sensor detects the existence o ...
Hello friends, I hope you all are doing well. Today, I am going to share the 4th chapter of Section-III in our Raspberry Pi programming course. In the previous lecture, we studied the Interfacing of IR sensor with Raspberry Pi 4. In this guide, you'll learn how to interface a PIR sensor with Raspberry Pi to create a motion detector. A passive infrared (PIR) sensor is a straightforward yet effective tool for motion detection.
As a bonus, a piezo speaker will play an audio clip whenever motion is detected. GPIO pins are required for both of these accessories. This tutorial is a great starting point for those who have never worked with electronic components and circuits.
These sensors are used in traditional, old-generation security
systems. In con ...
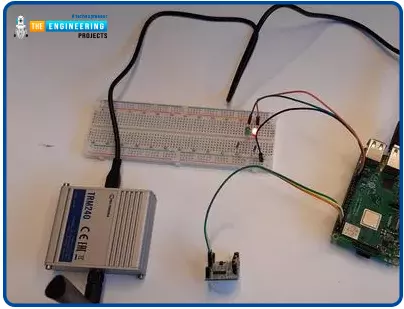
Welcome to the next tutorial of our raspberry pi 4 programming course. A previous article covered connecting a Remote Control Radio Frequency Module (433 MHz) to a Raspberry Pi 4. To turn things on and off wirelessly, we programmed a Raspberry Pi 4 to act as a radio-frequency (RF) remote control. However, this guide will study how to wirelessly pair a Raspberry Pi 4 and an ESP32. After reading this article, you'll get a good grounding in the fundamentals of Bluetooth module operation between two ESP32 and Pi 4 communication.
When it comes to sharing data over short distances using Ultra High-Frequency Radio Waves, Bluetooth is one of the most reliable and effective short-range wireless communication solutions. Since Bluetooth Technology was initially conceived as a cable substitution tech ...