


Project Files of IoT RGB Mood Lamp with ESP32 - Proteus Simulation
 Libraries
 Code
 Projects
 Simulation
30f5624f1eb649259ccf0ffb5158cd2e.zip
IoT RGB Mood Lamp with ESP32 - Proteus Simulation V1.0
IoT RGB Mood Lamp with ESP32 - Proteus Simulation V1.0 comes as a ZIP archive of 18 files (3.8 MB, 9.4 MB unpacked) holding Proteus library files, simulation model DLLs, a Proteus simulation, an Arduino sketch and compiled HEX firmware.
- LIBProteus library
- DLLProteus model
- DSNProteus simulation
- INOArduino sketch
- HEXHEX firmware
Description
IoT-RGB-Mood-Lamp-ESP32-Proteus-Simulation-v1.0.zip: the complete Proteus simulation project (ESP32 DevKit V1, WS2812B ring of 16, 60 mm slide potentiometer, push button, the Laptop and Mobile WiFi Monitors), the Arduino sketch, every LIB and DLL the simulation needs and a README.

File Structure
 File Structure
8.9 KB20.7 KB36.6 KB39.5 KB13.1 KB75.8 KB1.6 MB274 KB2.9 MB305 KB312.5 KB41.5 KB71 KB274 KB2.9 MB305 KB312.5 KB10 KBGallery12 images from the tutorialOpen the tutorial
 Gallery12 images from the tutorial
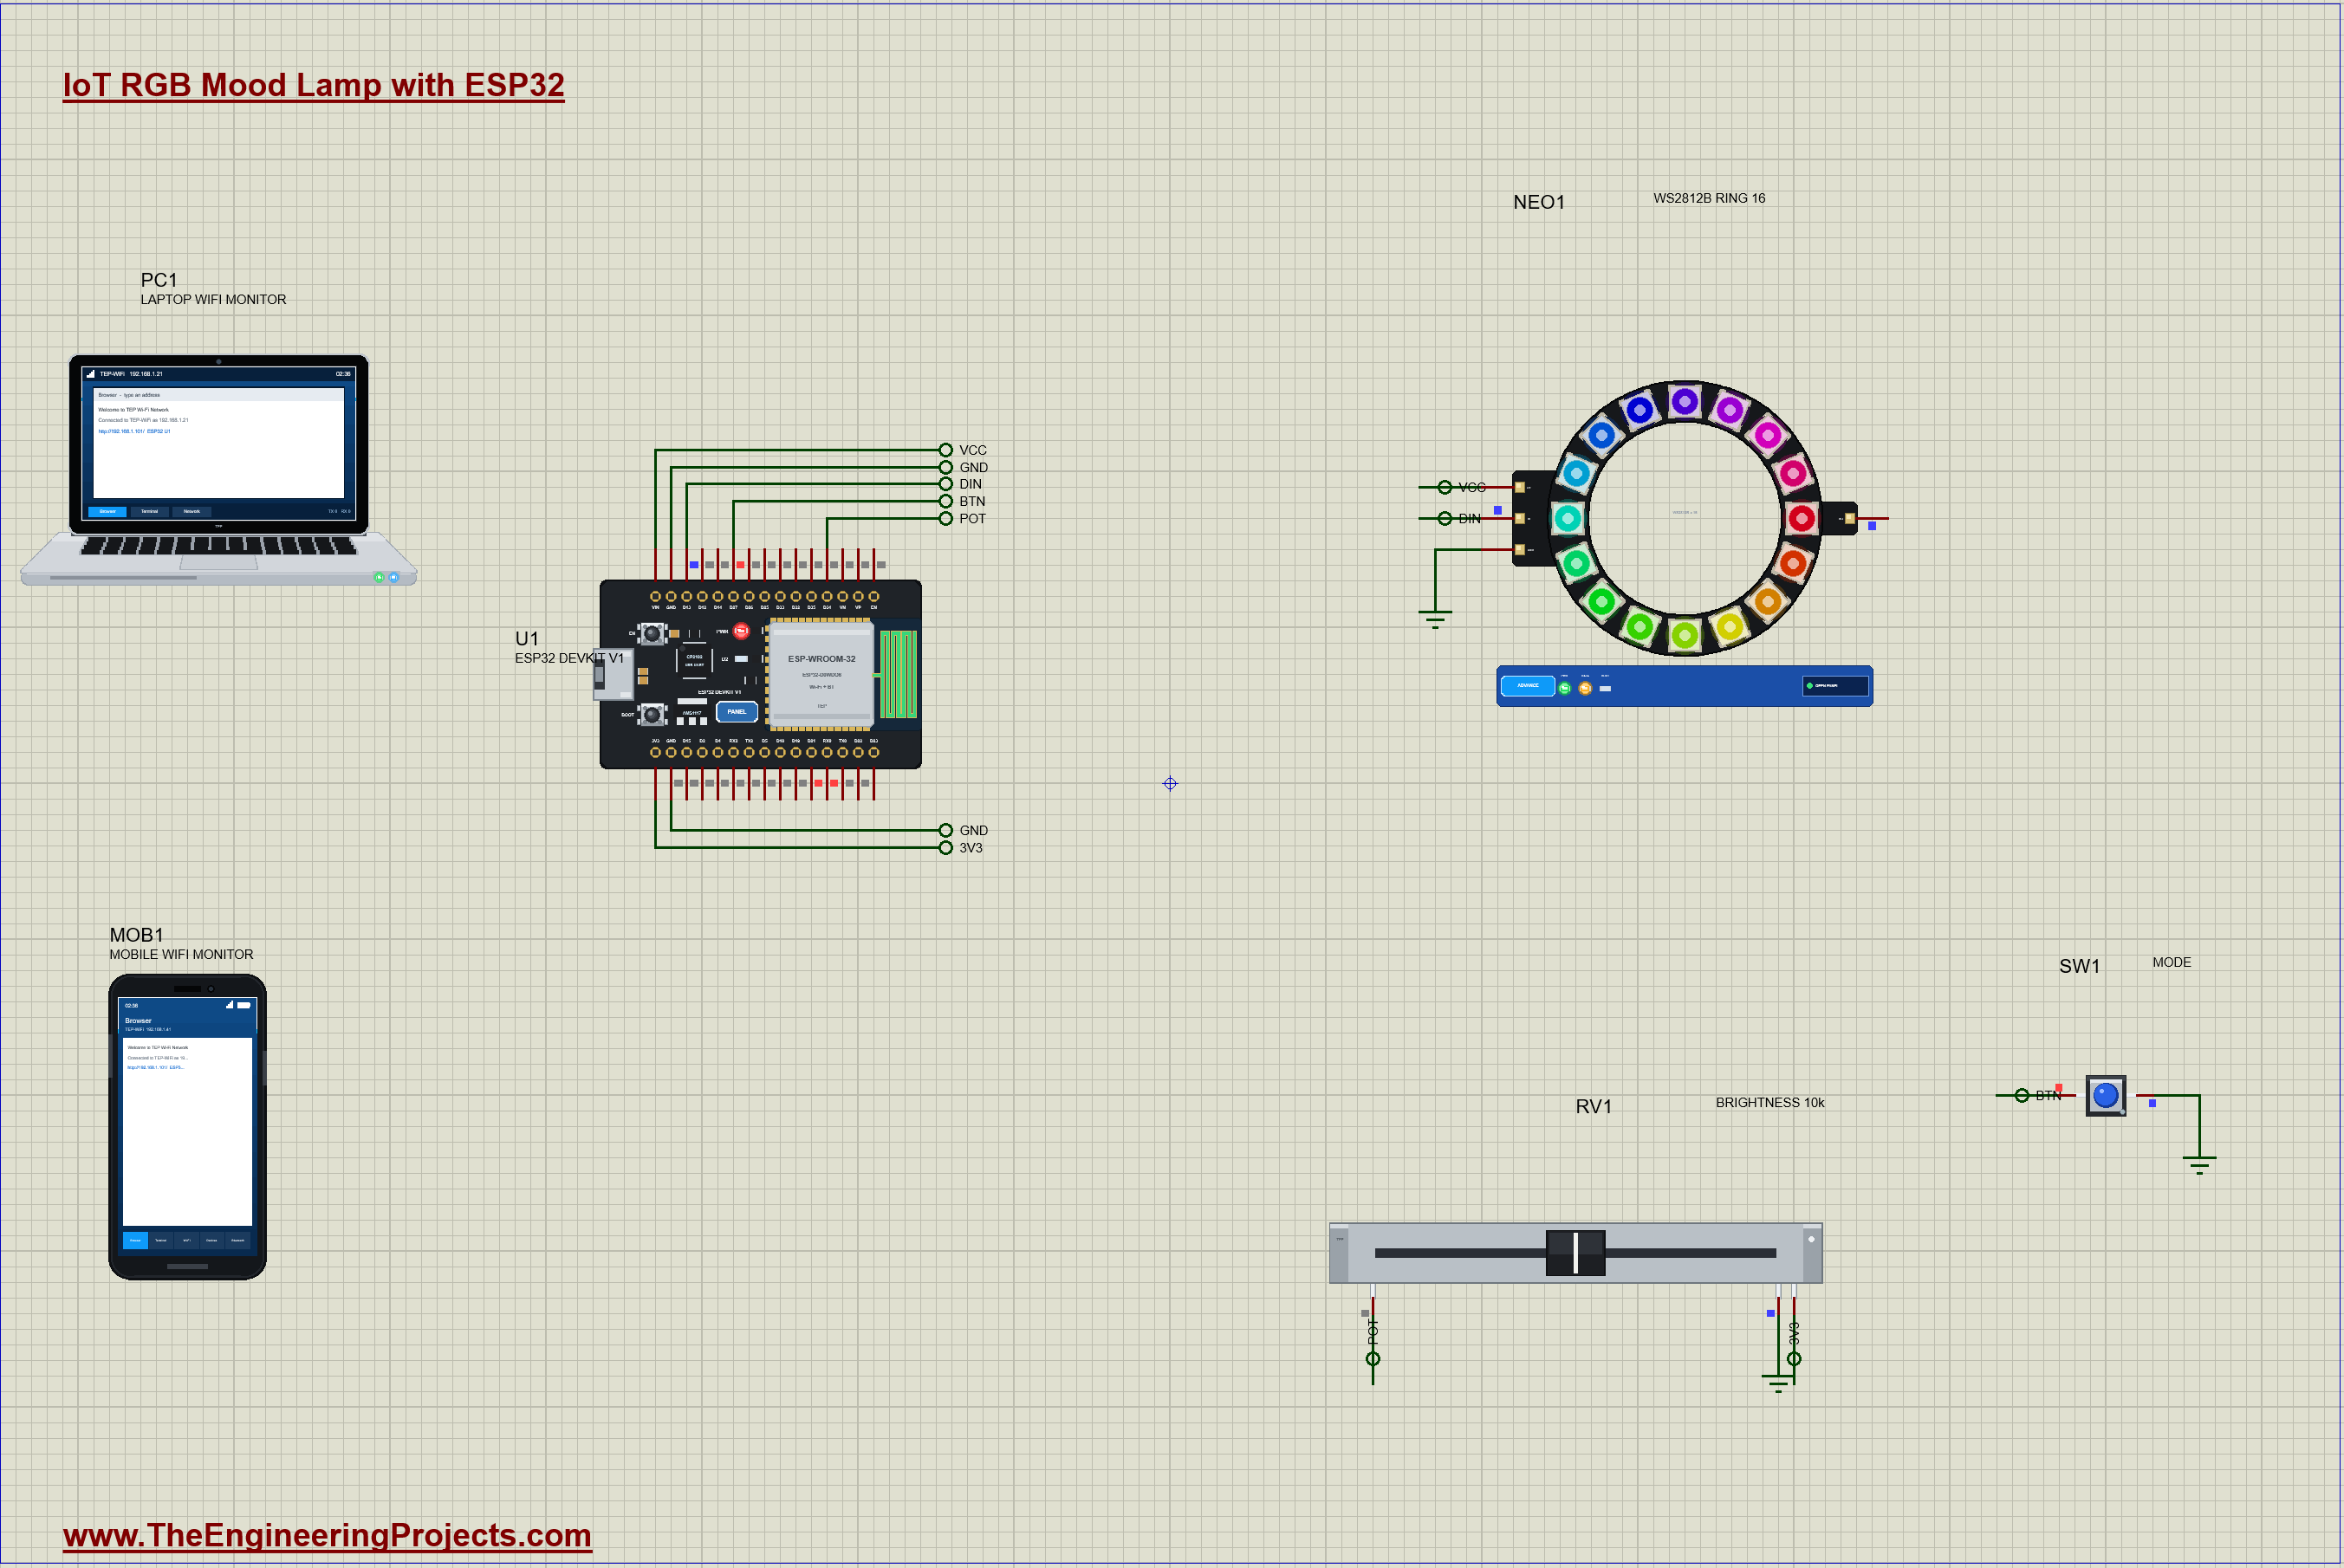
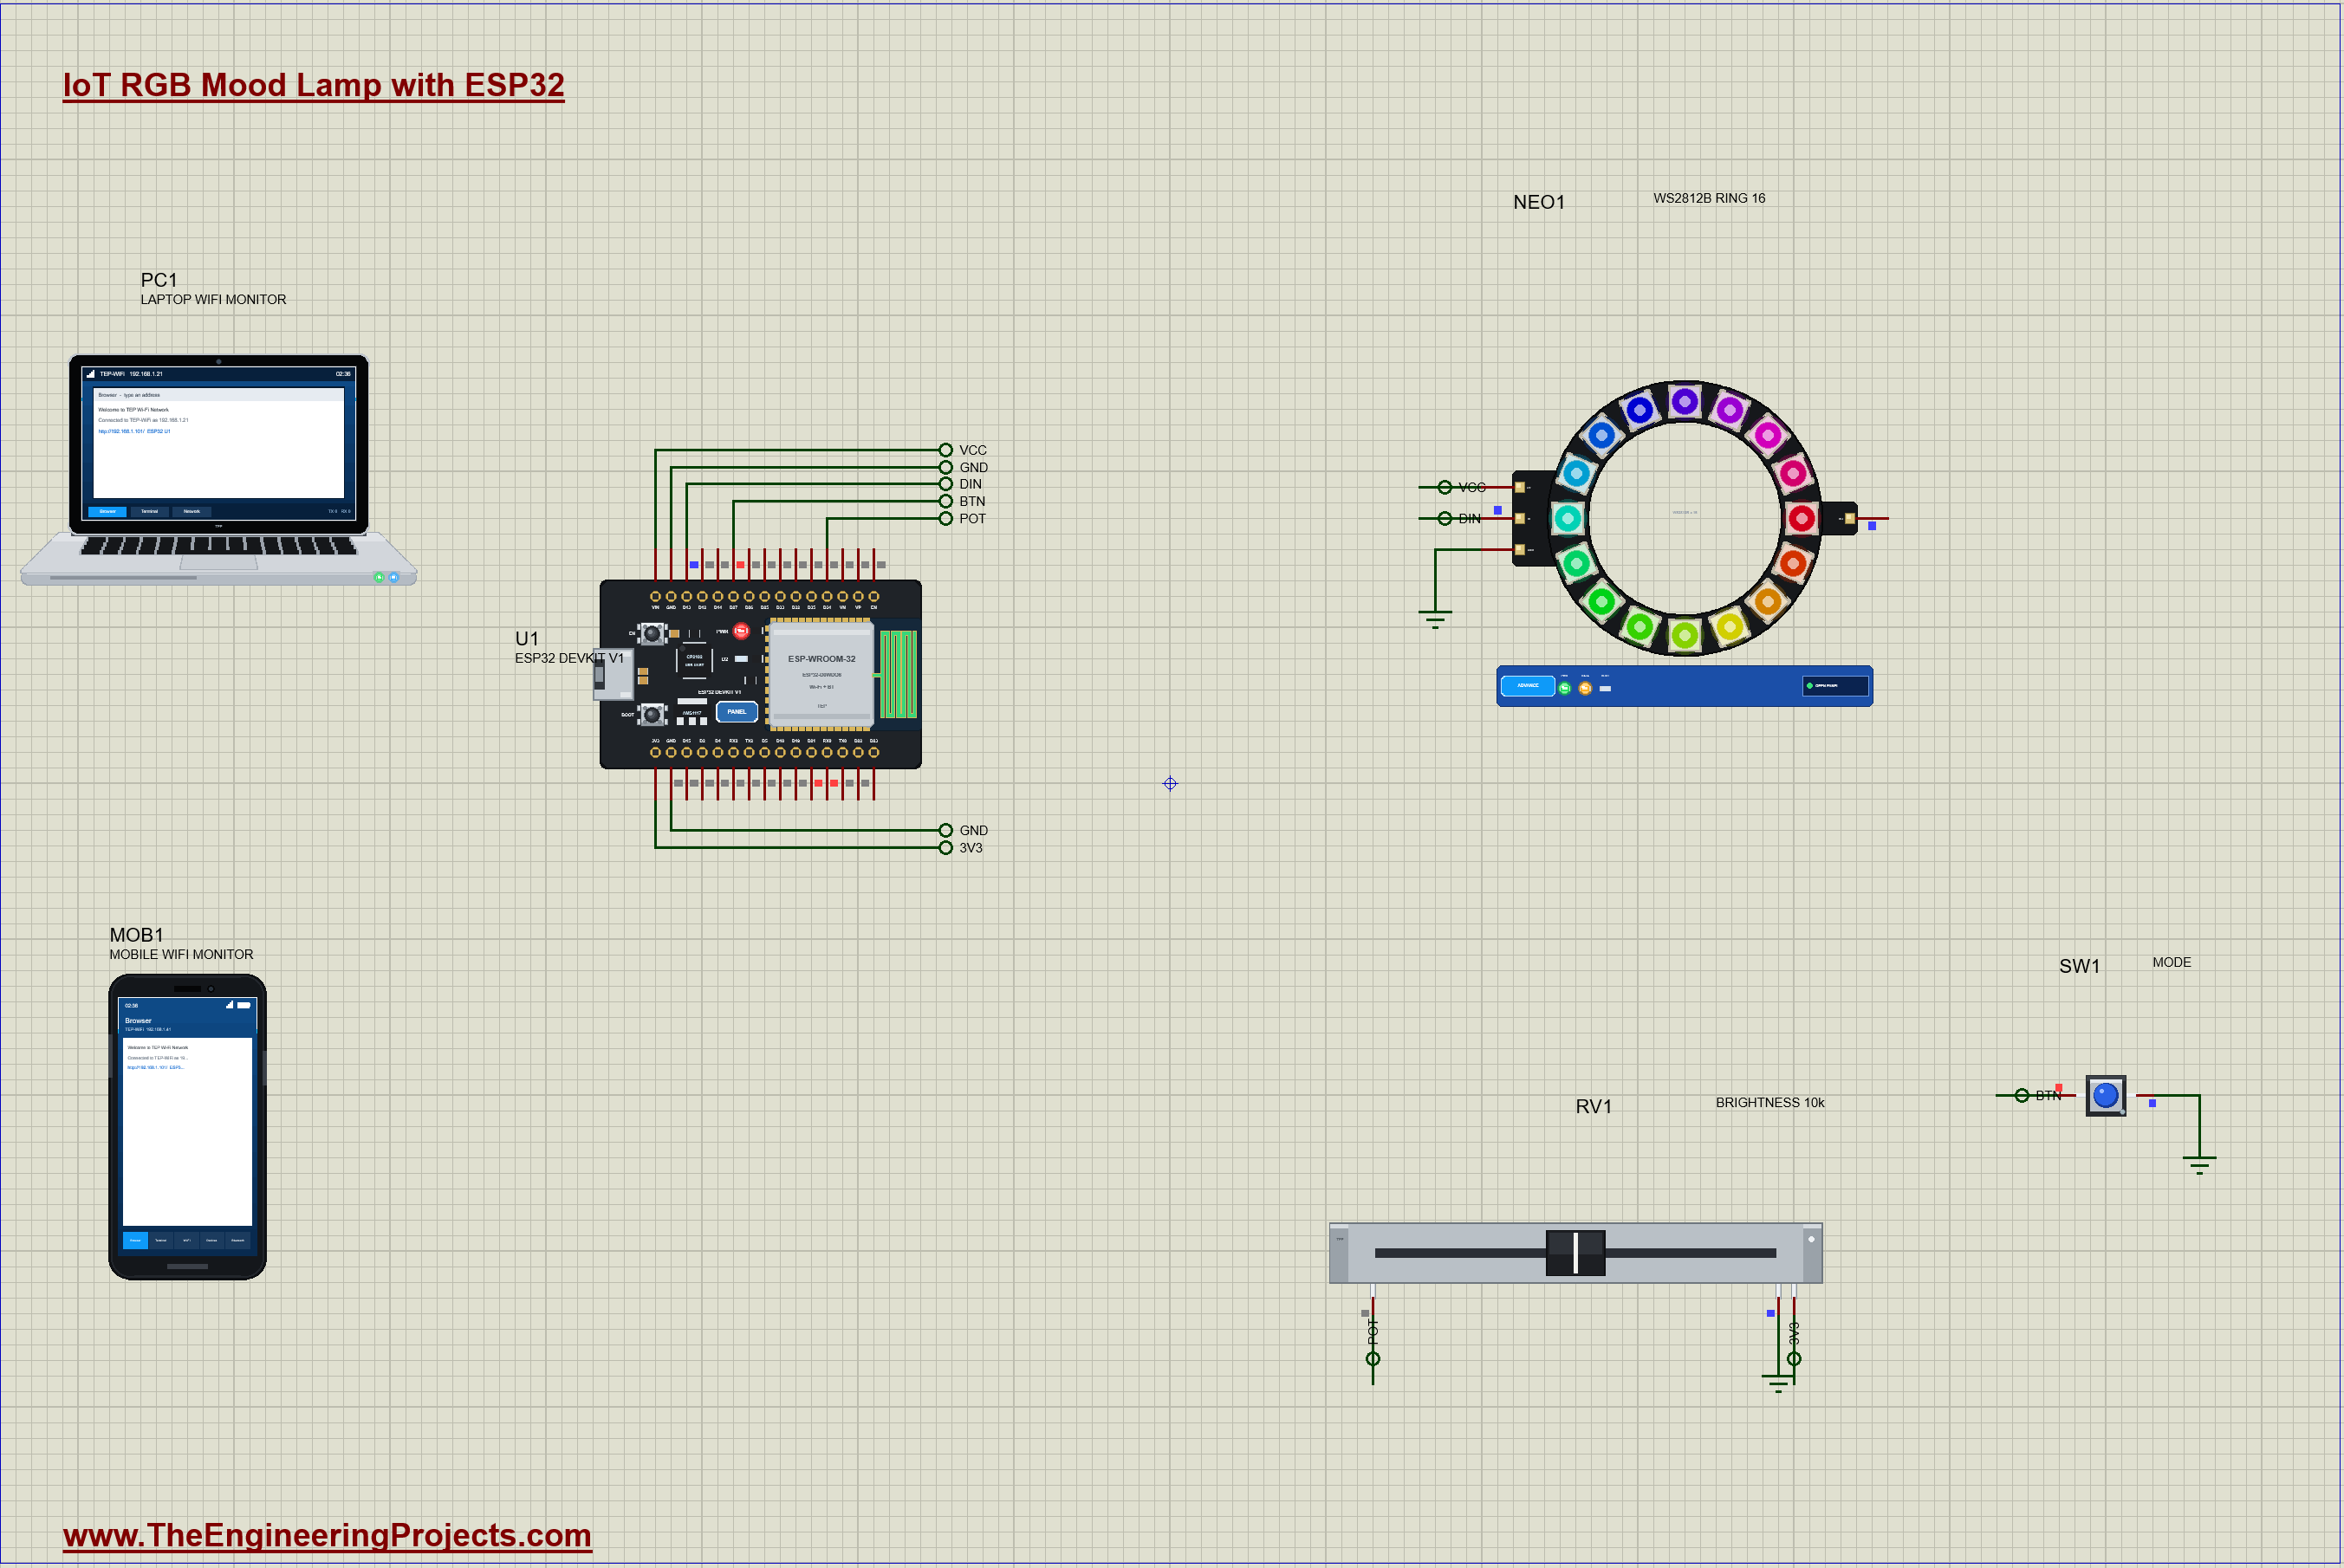
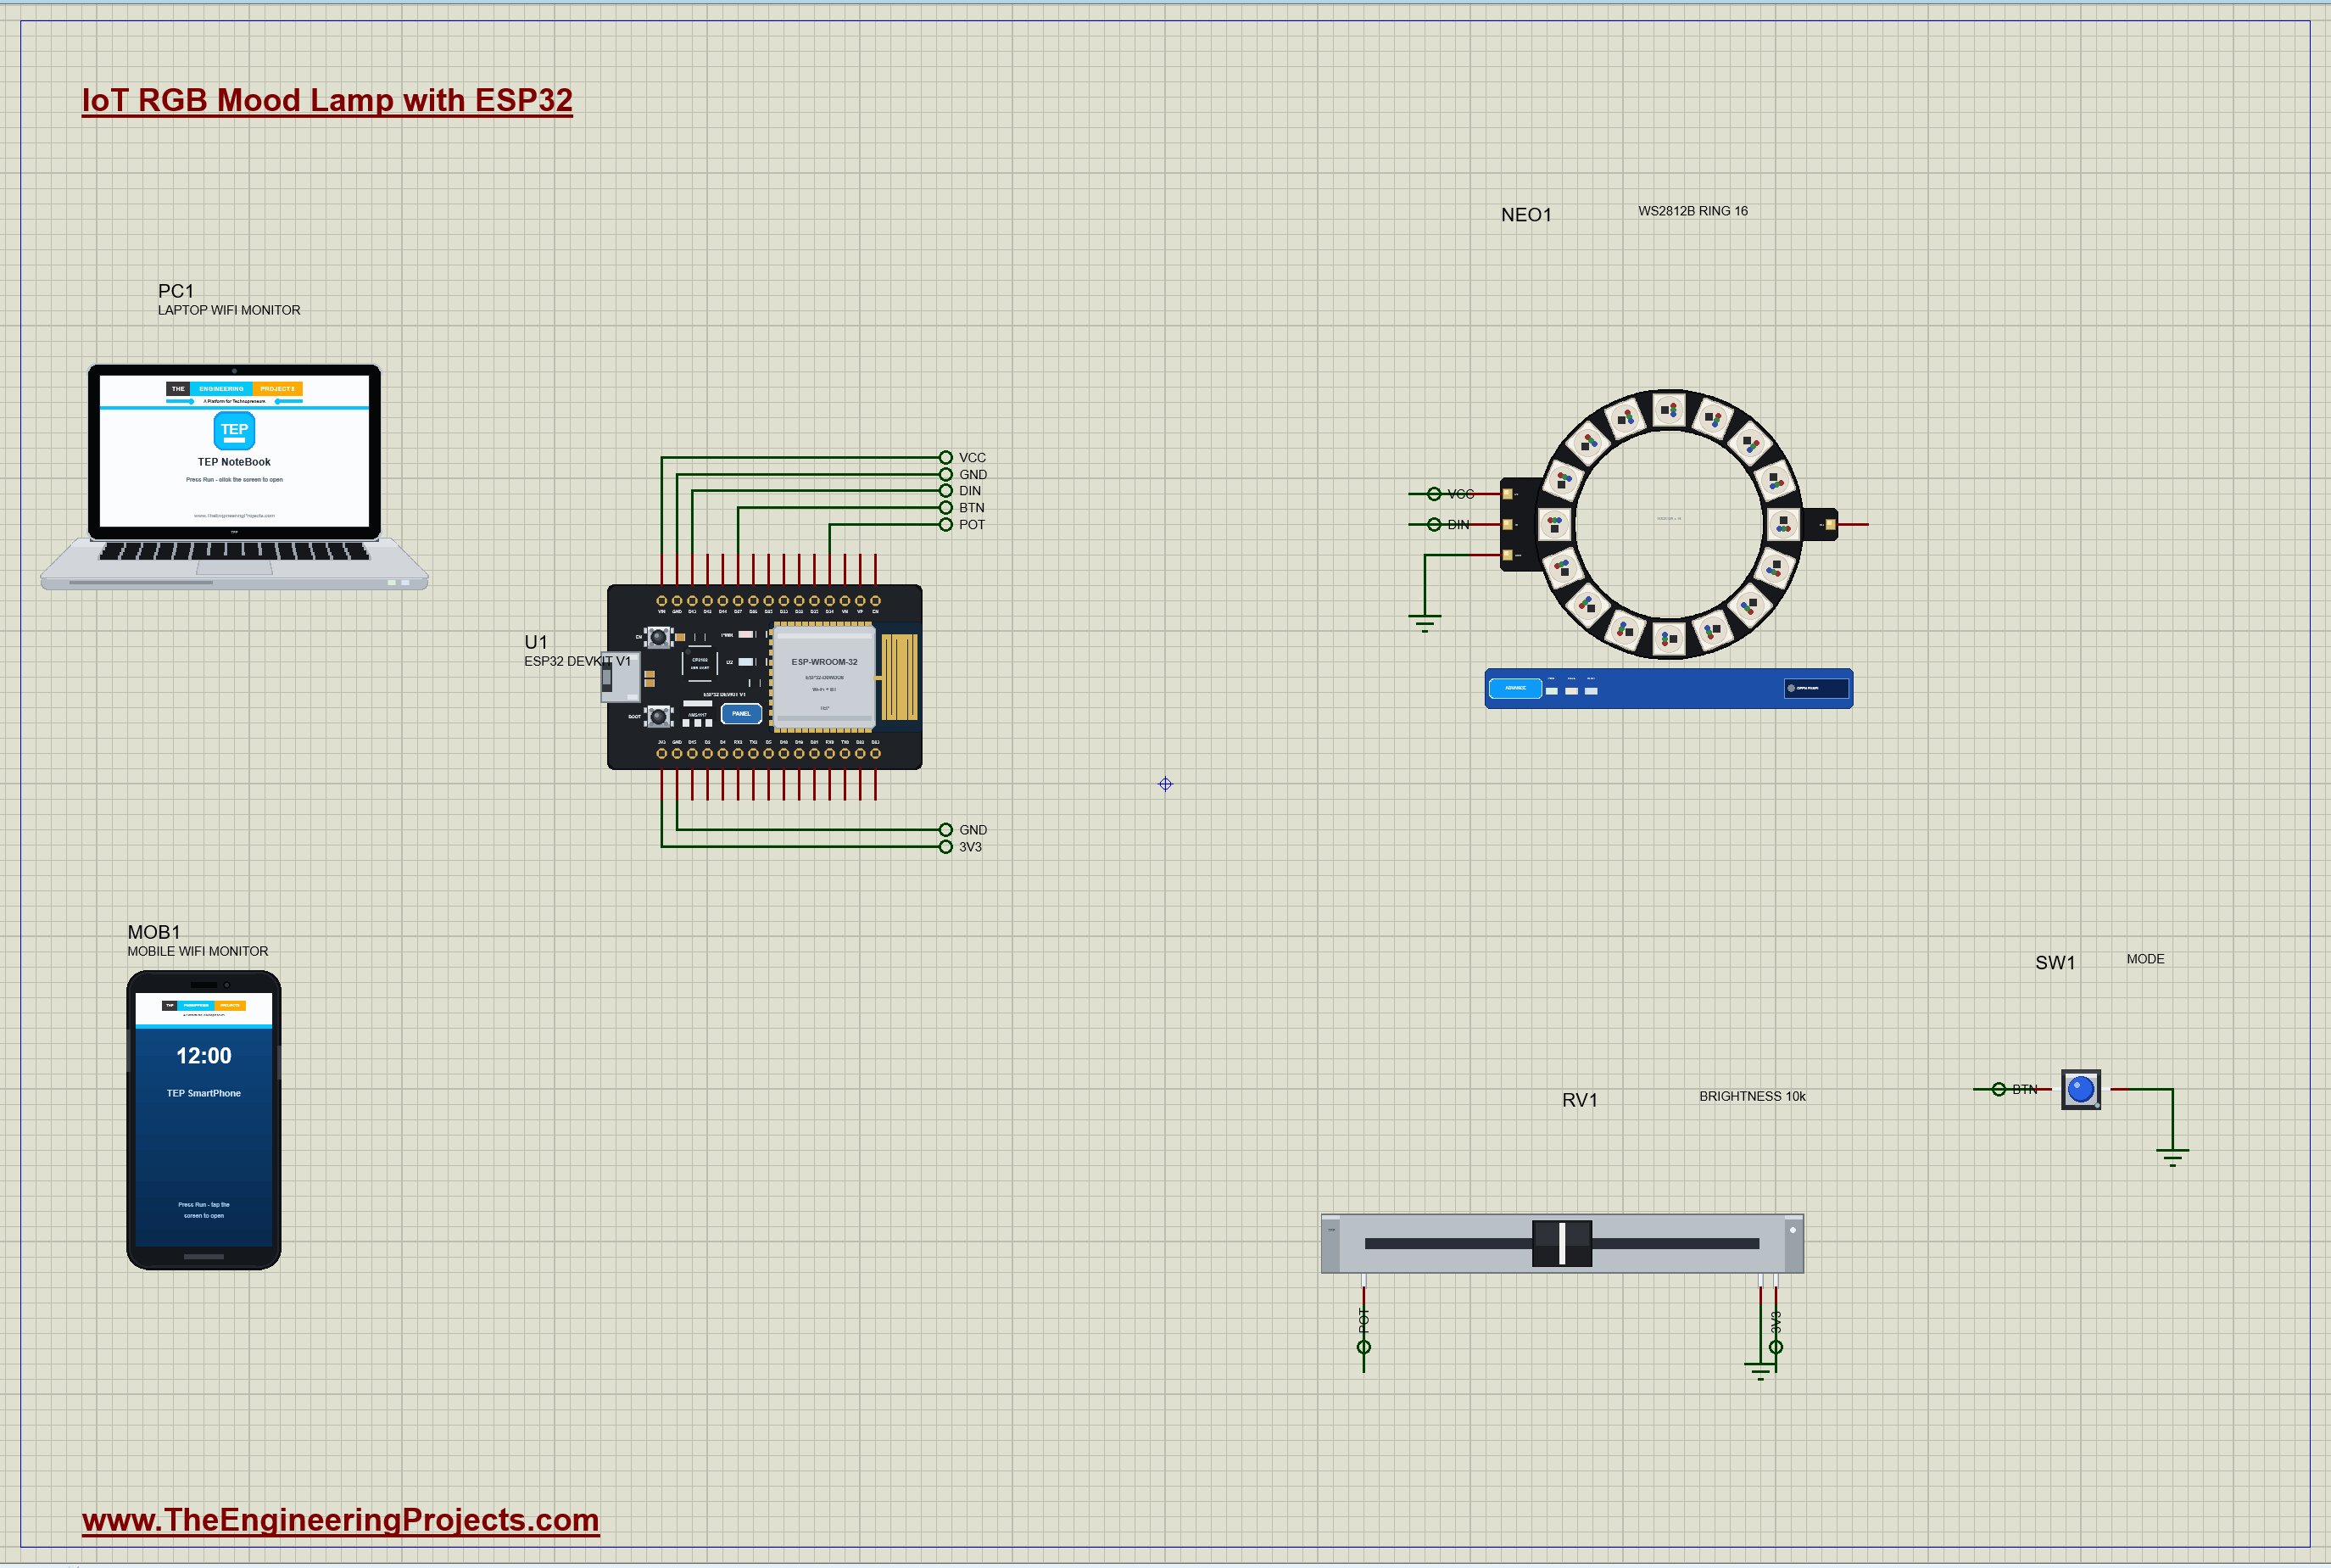
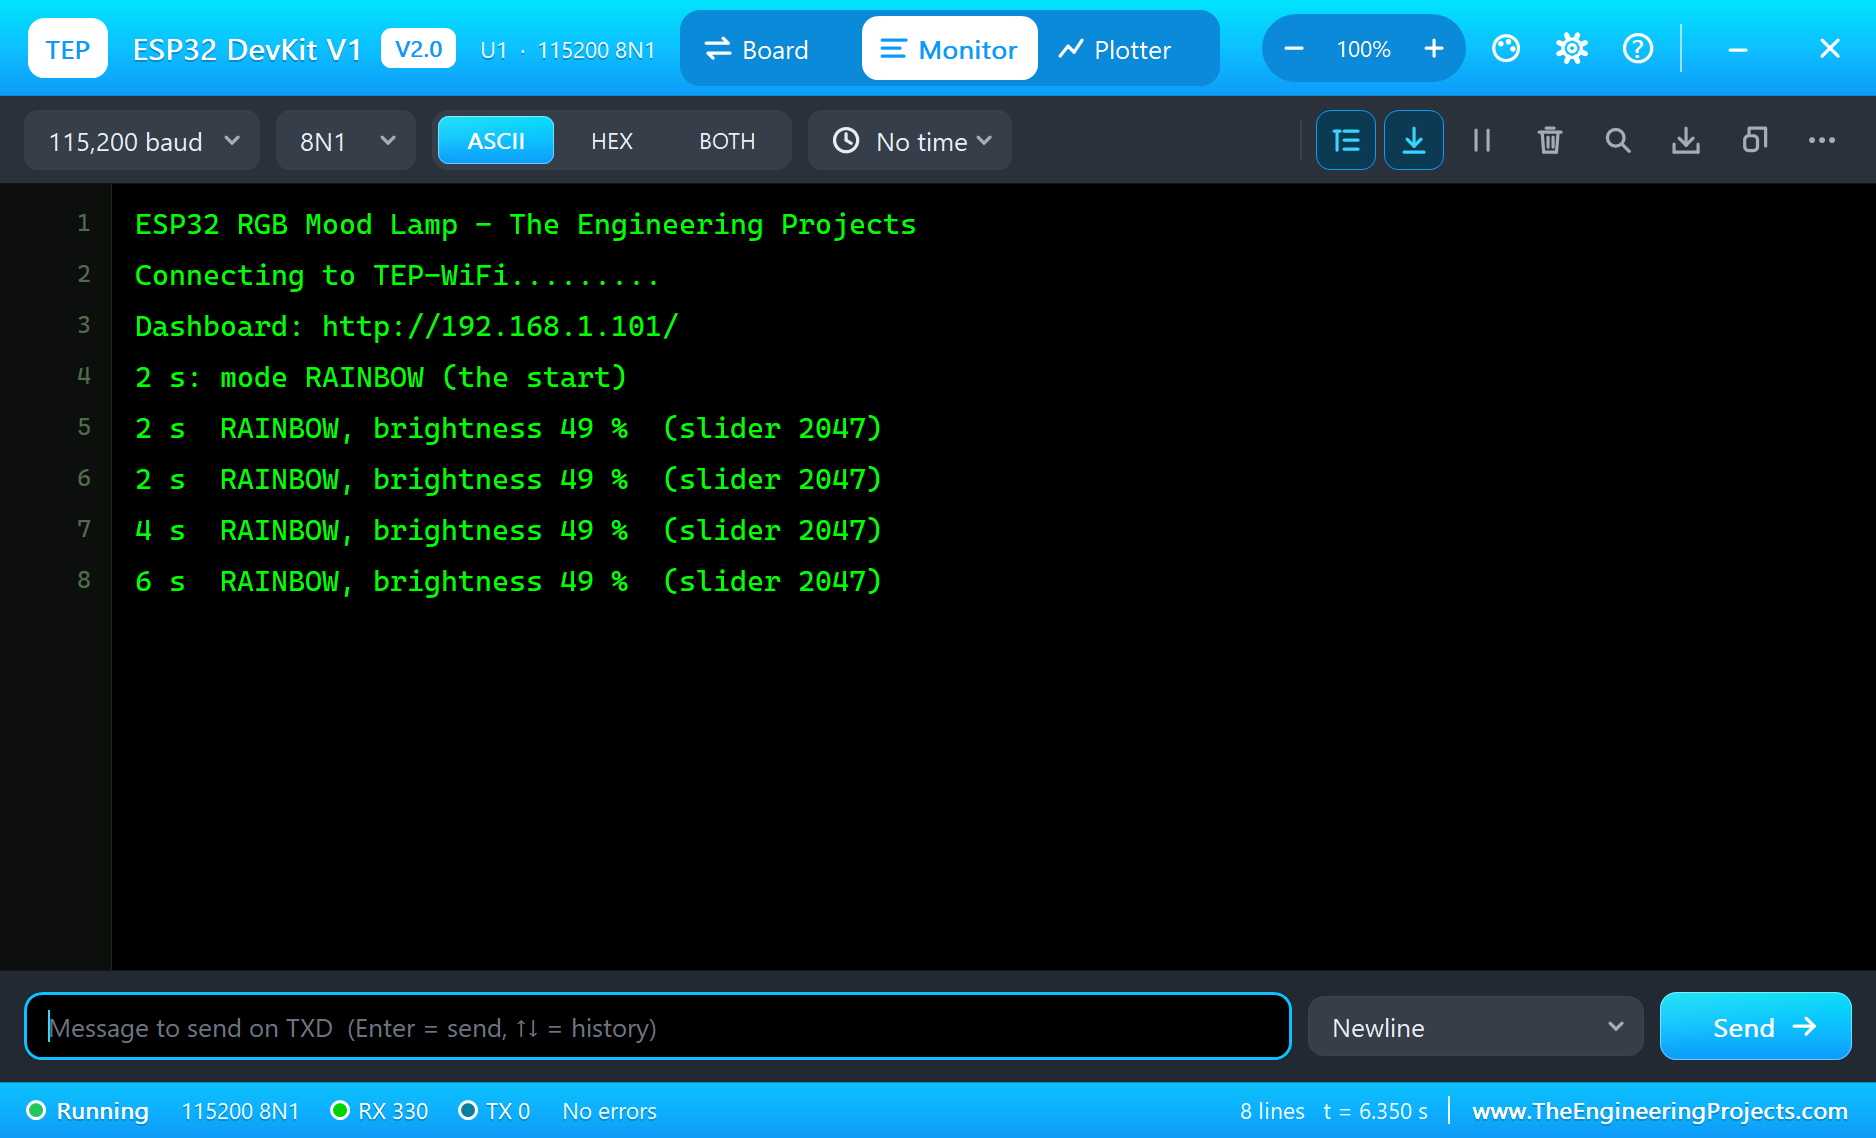
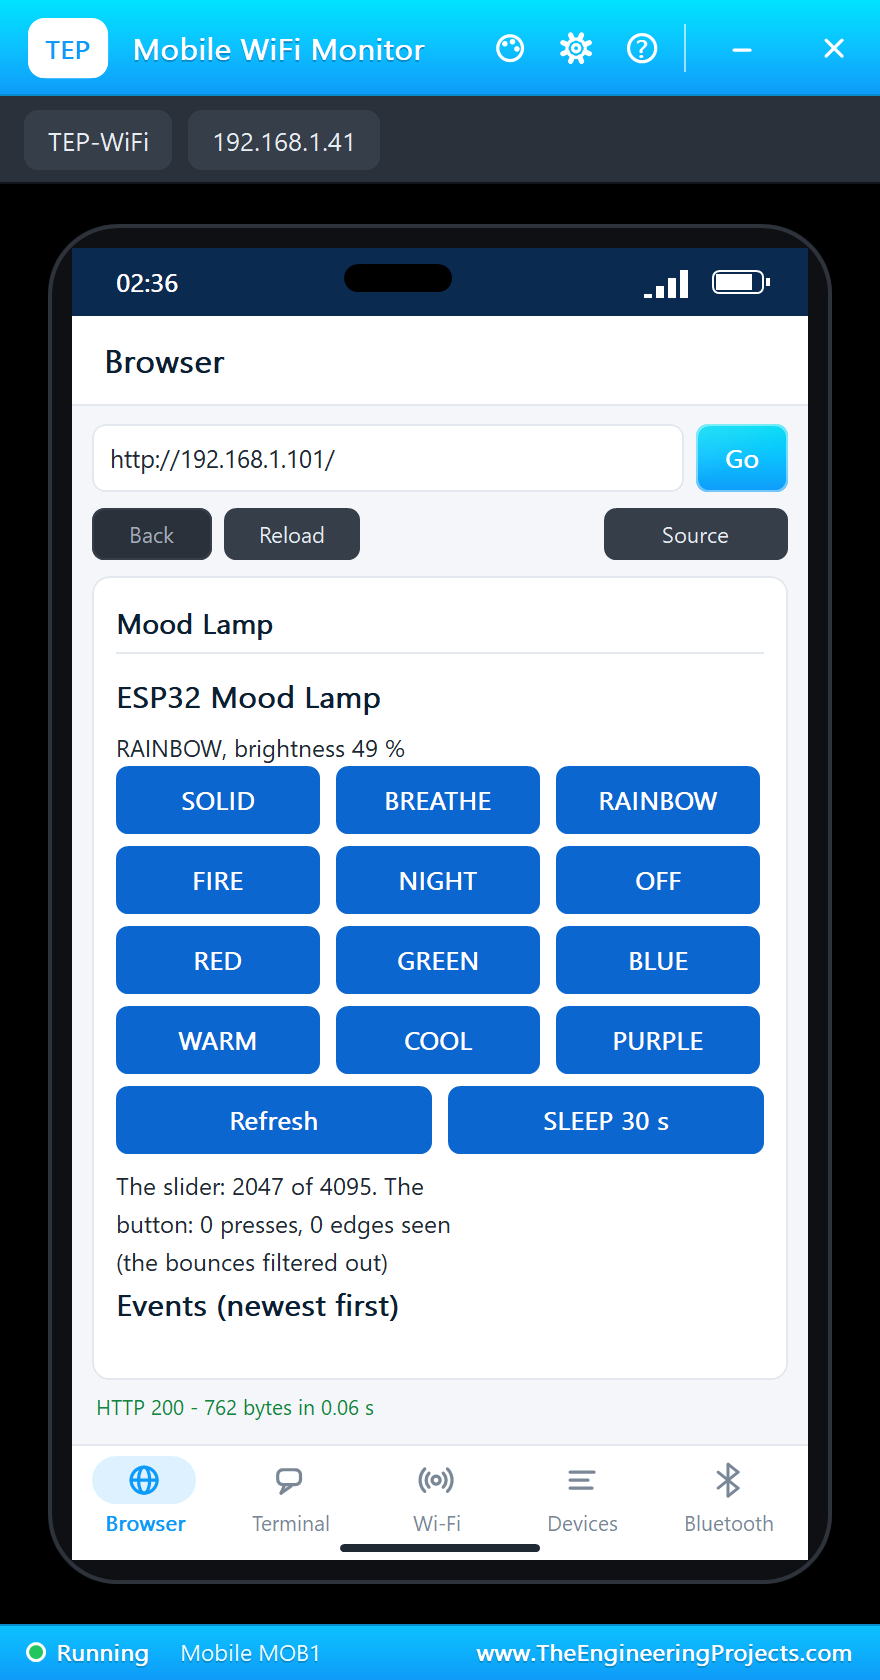
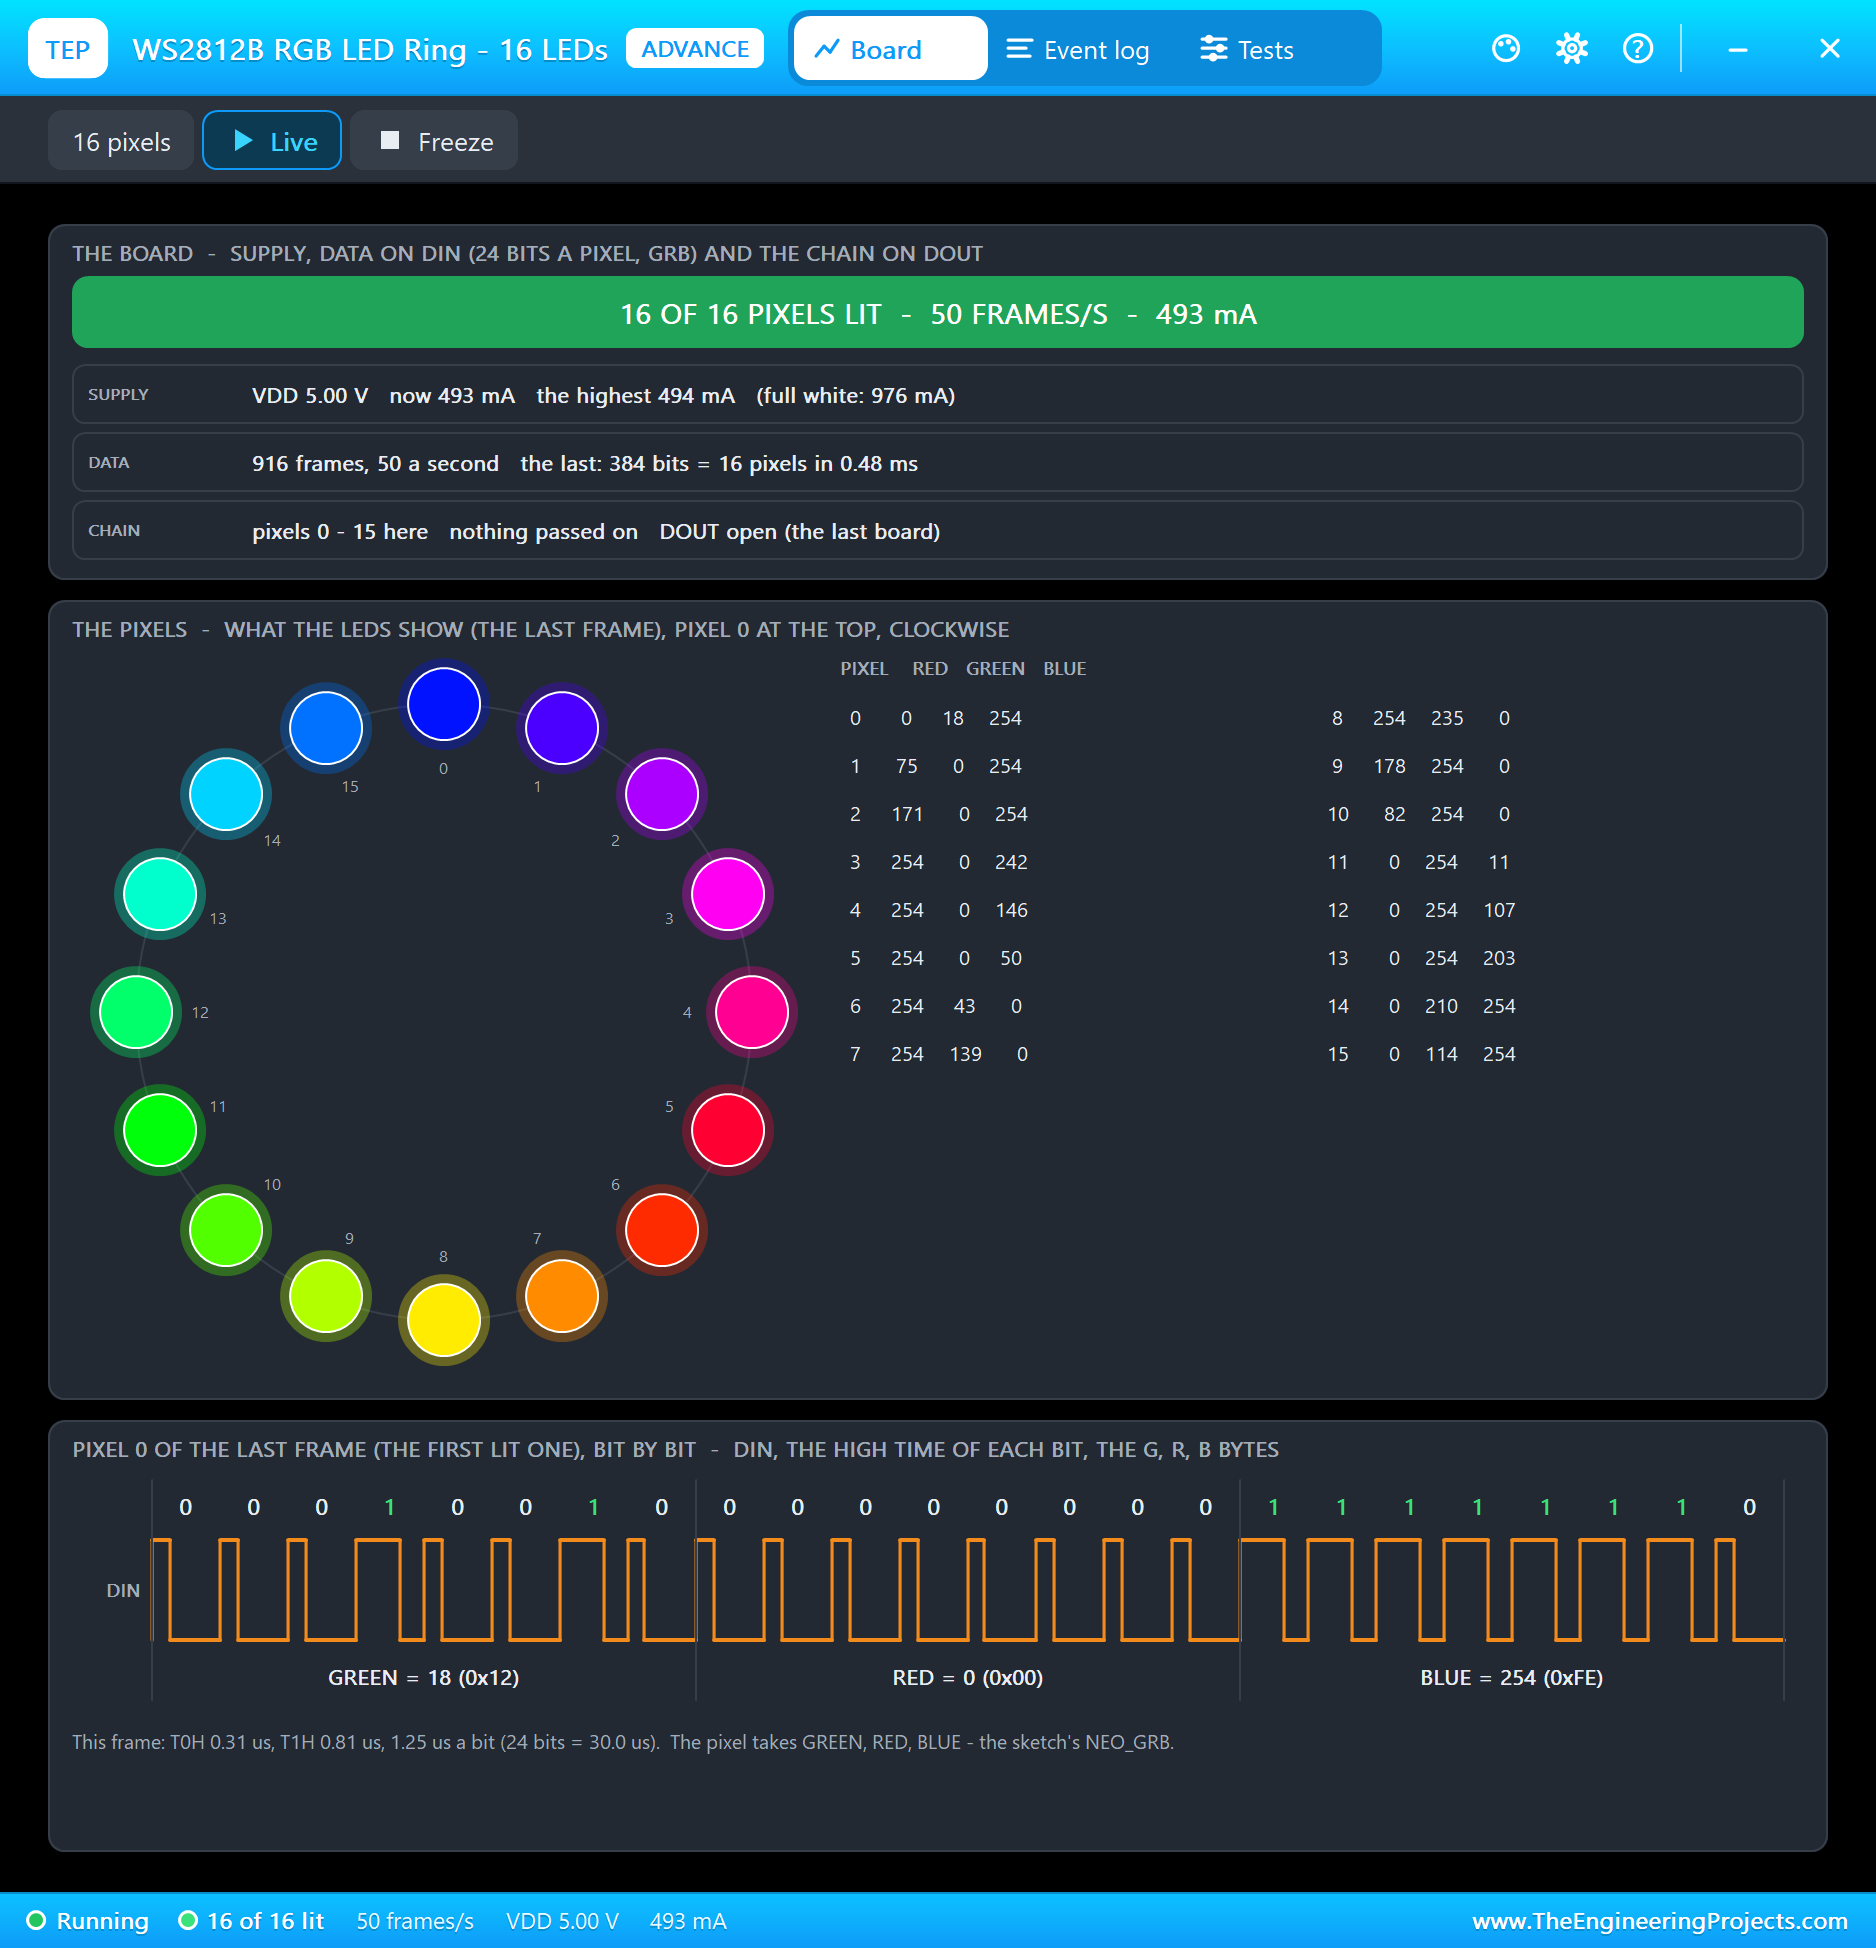
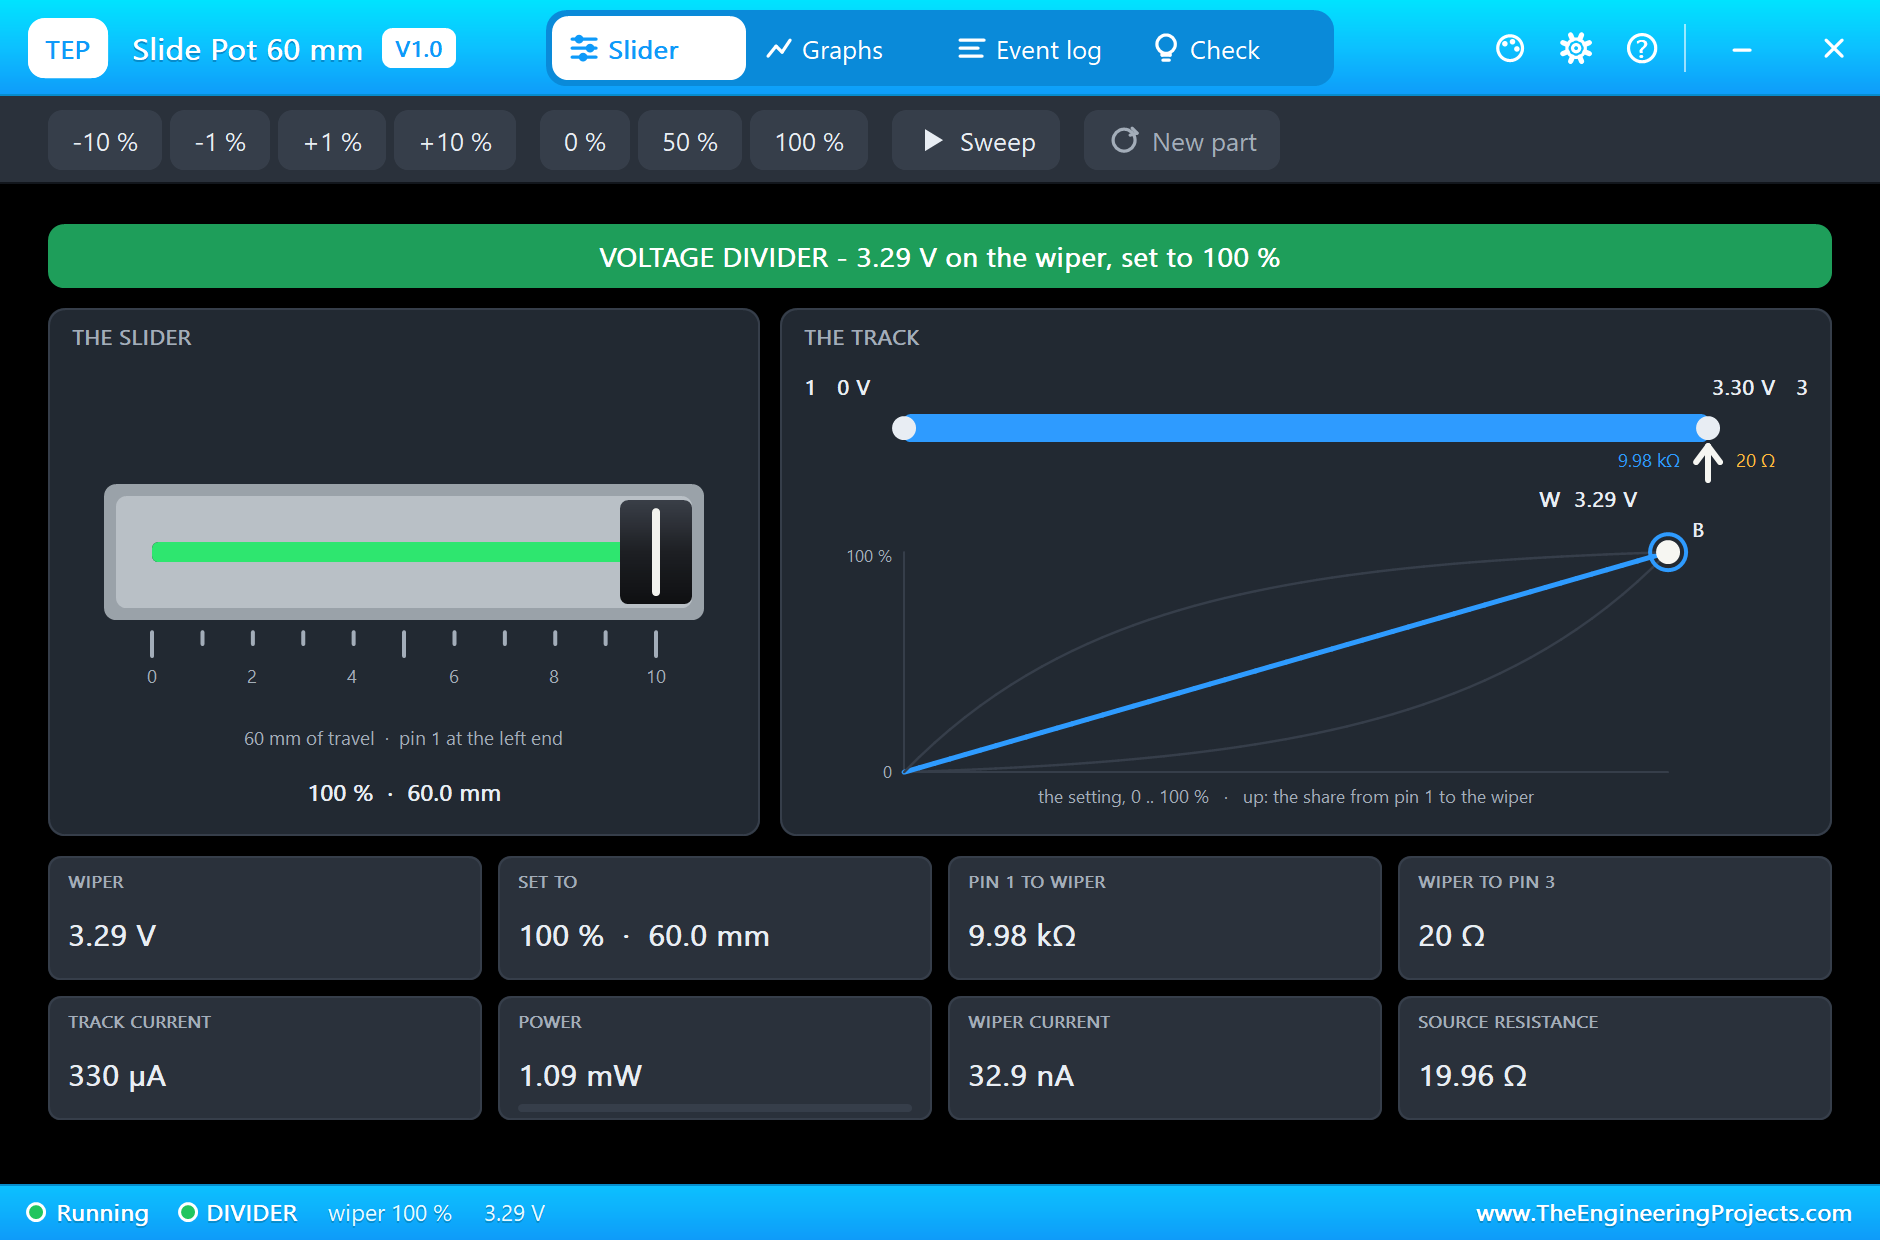
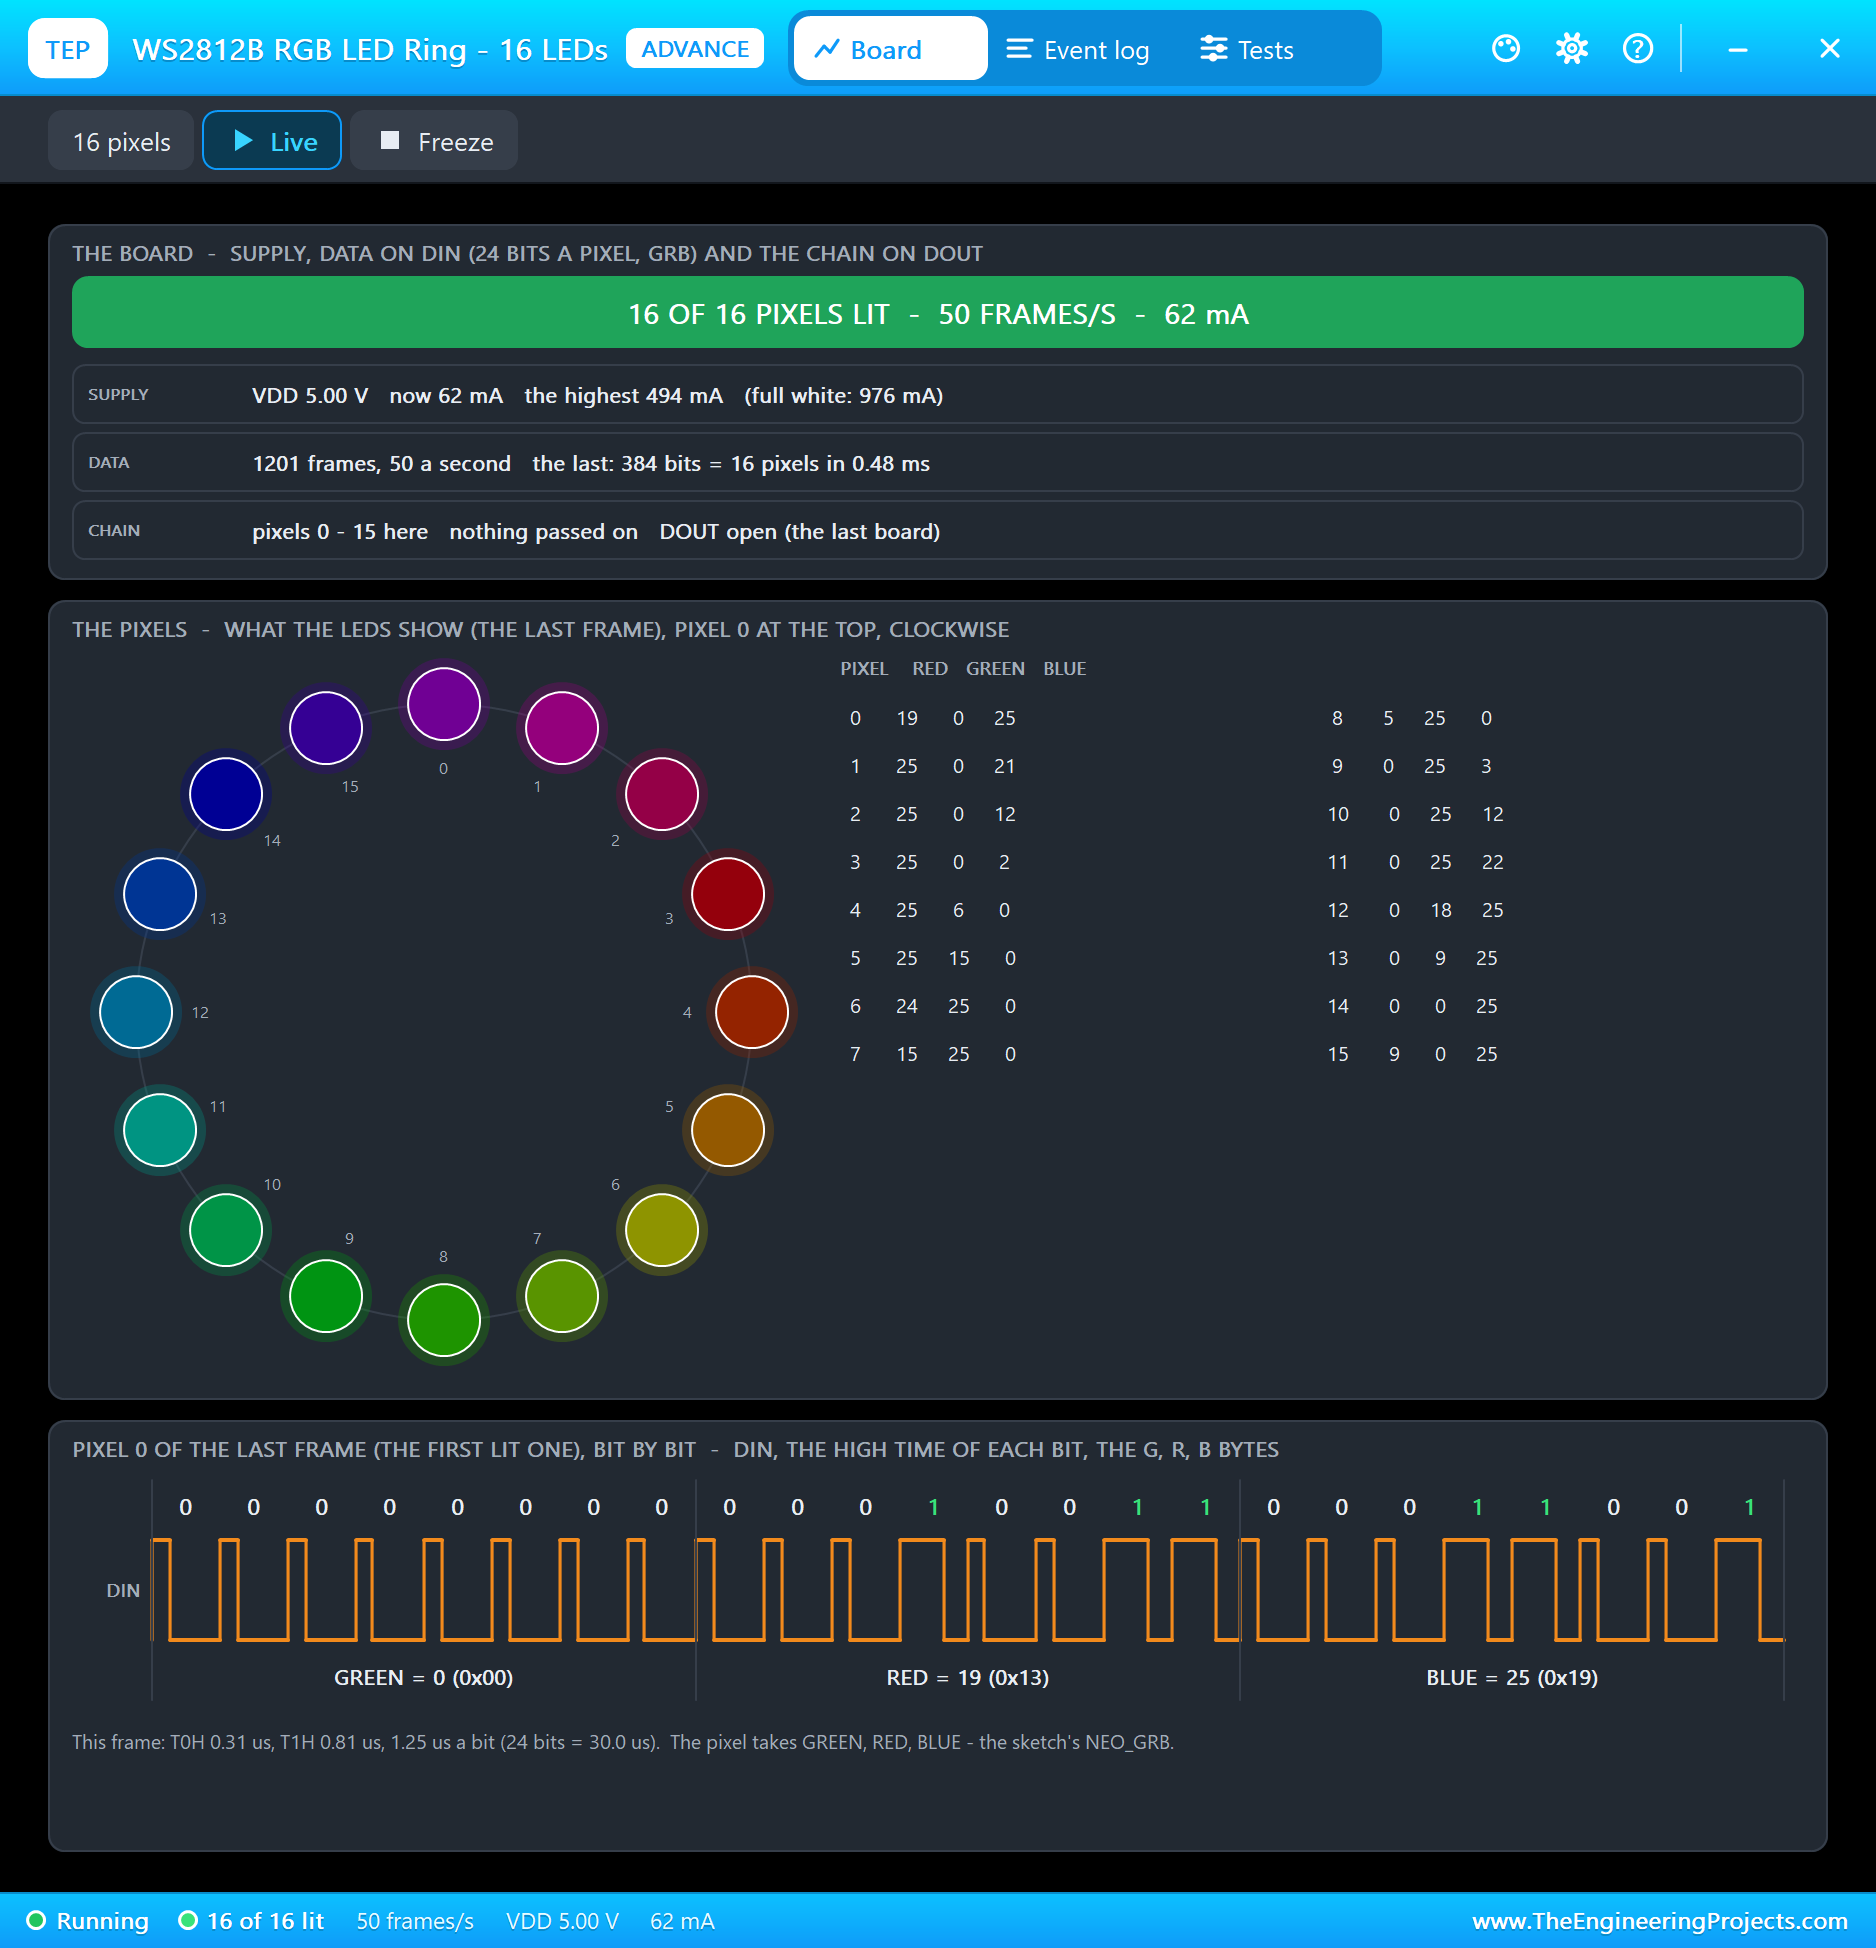
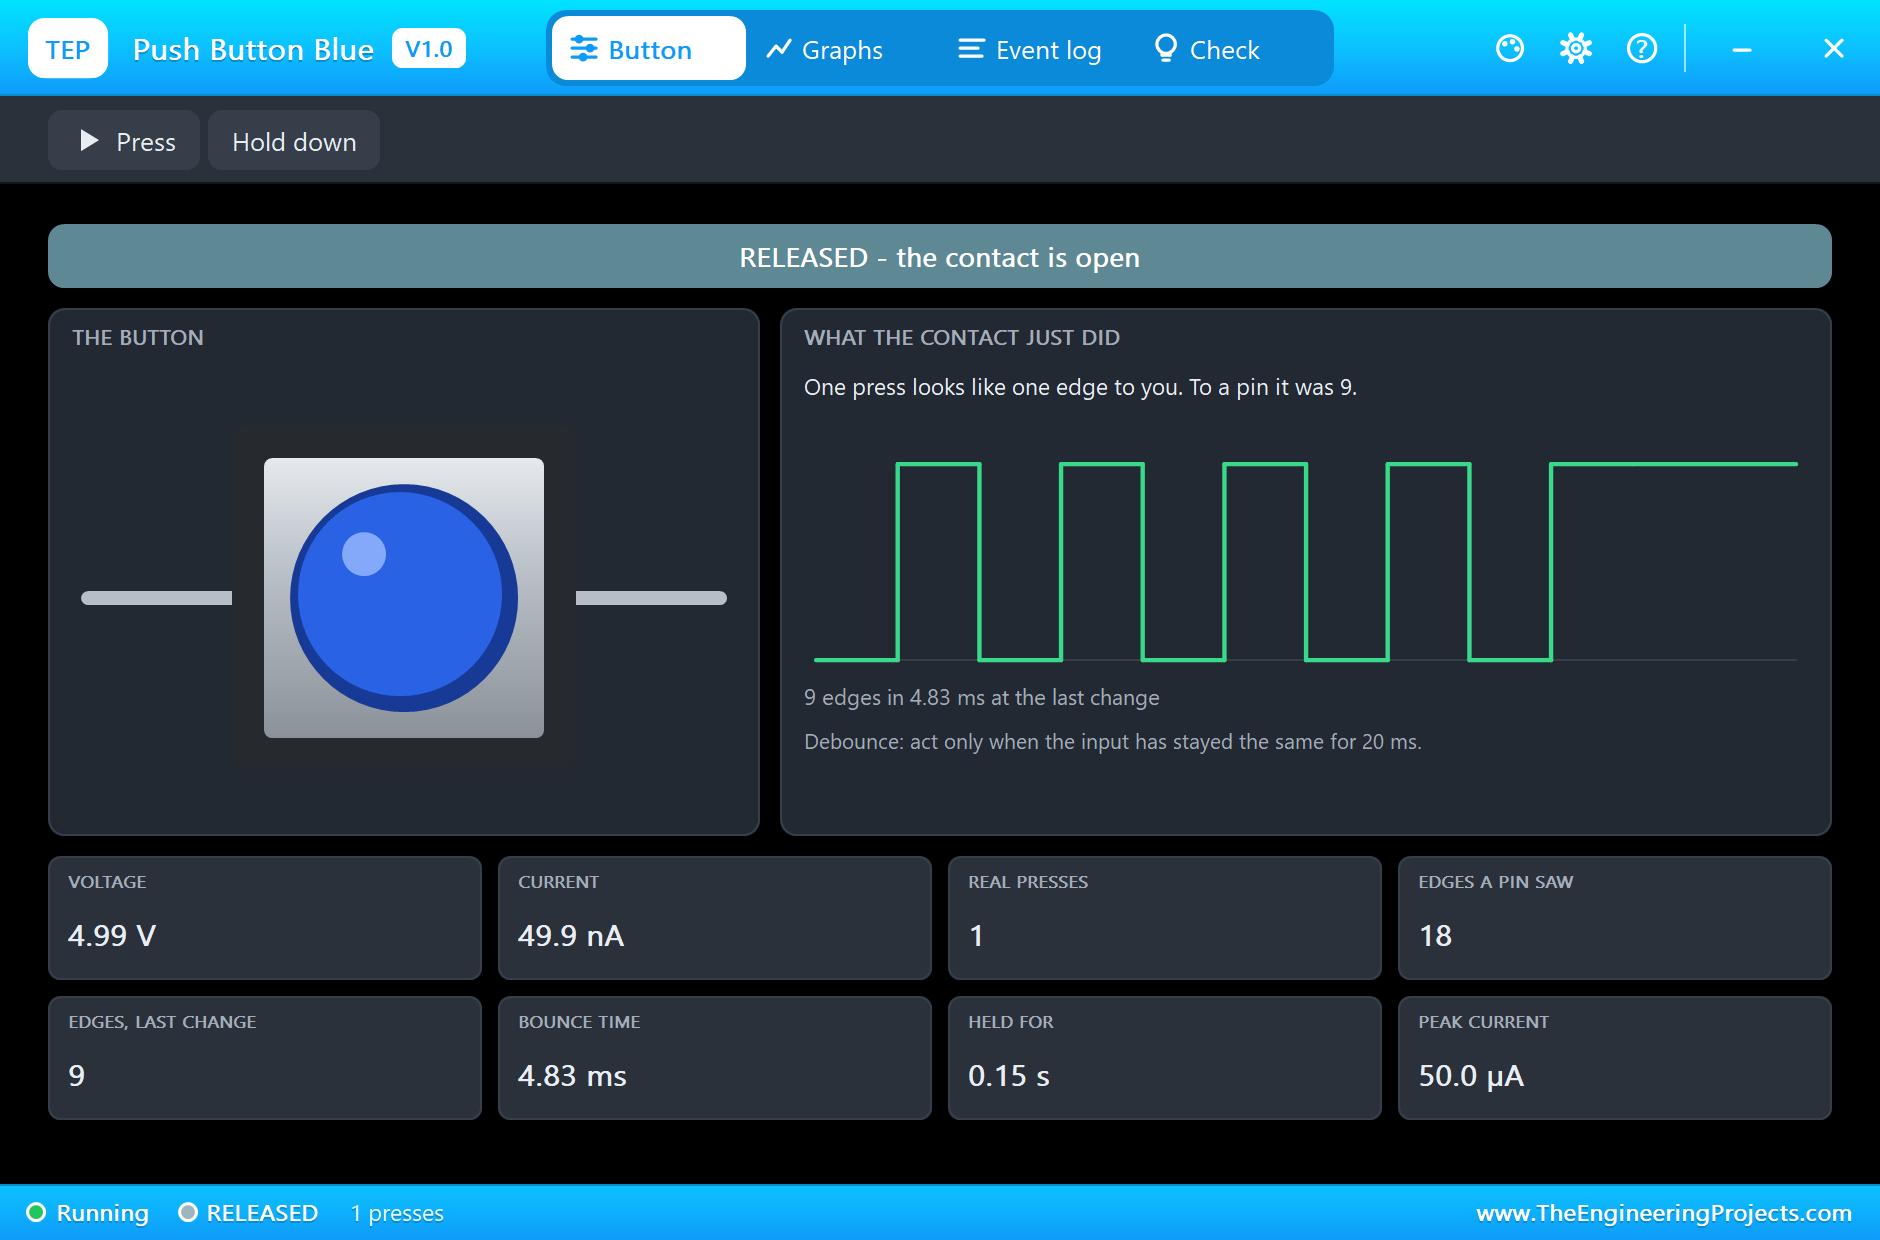
The circuit, the board and the results as they appear in IoT RGB Mood Lamp with ESP32 - Proteus Simulation. Open an image for its full size.
README
 README
===============================================================================================================
  IoT RGB Mood Lamp with ESP32 - Proteus Simulation Project V1.0
  The Engineering Projects - www.TheEngineeringProjects.com
===============================================================================================================

IMPORTANT LINKS
  The project tutorial (circuit, code, simulation results):
    https://www.theengineeringprojects.com/2026/11/iot-rgb-mood-lamp-esp32-proteus-simulation.html
  The libraries this project is built from (each post has its own full download and tutorial):
    ESP32 DevKit V1 board:
      https://www.theengineeringprojects.com/2026/10/esp32-devkit-v1-library-for-proteus-v2-0.html
    WS2812B NeoPixel (the ring of 16):
      https://www.theengineeringprojects.com/2026/10/ws2812b-neopixel-library-for-proteus-v1-0.html
    Slide potentiometer:
      https://www.theengineeringprojects.com/2026/11/slide-potentiometer-library-for-proteus.html
    Push button:
      https://www.theengineeringprojects.com/2026/11/push-button-library-for-proteus.html
    Laptop WiFi Monitor:
      https://www.theengineeringprojects.com/2026/10/laptop-wifi-monitor-library-for-proteus.html
    Mobile WiFi Monitor:
      https://www.theengineeringprojects.com/2026/10/mobile-wifi-monitor-library-for-proteus.html
  Support our free work: https://www.theengineeringprojects.com/donate

FILE STRUCTURE
ESP32-RGB-Mood-Lamp-TEP-v1.0/
|-- Proteus Library Files/
|   |-- TEPBUTTON.LIB                                  20.7 KB   a part of the project -> LIBRARY folder
|   |-- TEPESP32V1.LIB                                 36.6 KB   a part of the project -> LIBRARY folder
|   |-- TEPLAPTOP.LIB                                  39.5 KB   a part of the project -> LIBRARY folder
|   |-- TEPMOBILE.LIB                                  13.1 KB   a part of the project -> LIBRARY folder
|   |-- TEPSLIDEPOT.LIB                                75.8 KB   a part of the project -> LIBRARY folder
|   |-- TEPWS2812.LIB                                  1.59 MB   a part of the project -> LIBRARY folder
|-- Proteus Model Files/
|   |-- TEPBUTTON.DLL                                 274.0 KB   a model -> MODELS folder
|   |-- TEPNET.DLL                                     2.89 MB   a model -> MODELS folder
|   |-- TEPSLIDEPOT.DLL                               305.0 KB   a model -> MODELS folder
|   |-- TEPWS2812.DLL                                 312.5 KB   a model -> MODELS folder
|-- Proteus Simulation/
|   |-- ESP32_RGB_Mood_Lamp.hex                        71.0 KB   the firmware
|   |-- ESP32-RGB-Mood-Lamp.pdsprj                     41.5 KB   the project simulation
|   |-- TEPBUTTON.DLL                                 274.0 KB   copy of the model
|   |-- TEPNET.DLL                                     2.89 MB   copy of the model
|   |-- TEPSLIDEPOT.DLL                               305.0 KB   copy of the model
|   |-- TEPWS2812.DLL                                 312.5 KB   copy of the model
|-- Arduino Code/
|   |-- ESP32_RGB_Mood_Lamp/ESP32_RGB_Mood_Lamp.ino     8.9 KB   the sketch (source of the .hex)
|-- README.txt                                        ~10.5 KB   this file
Total: 9.43 MB (unzipped). The C++ source code of the models is not included.

WHAT IS IT?
  An RGB mood lamp you can run in Proteus: an ESP32 drives a ring of 16 WS2812B LEDs, a slide potentiometer sets
  the brightness, a push button steps through the modes and a web dashboard picks the mode, the colour and a sleep
  timer.
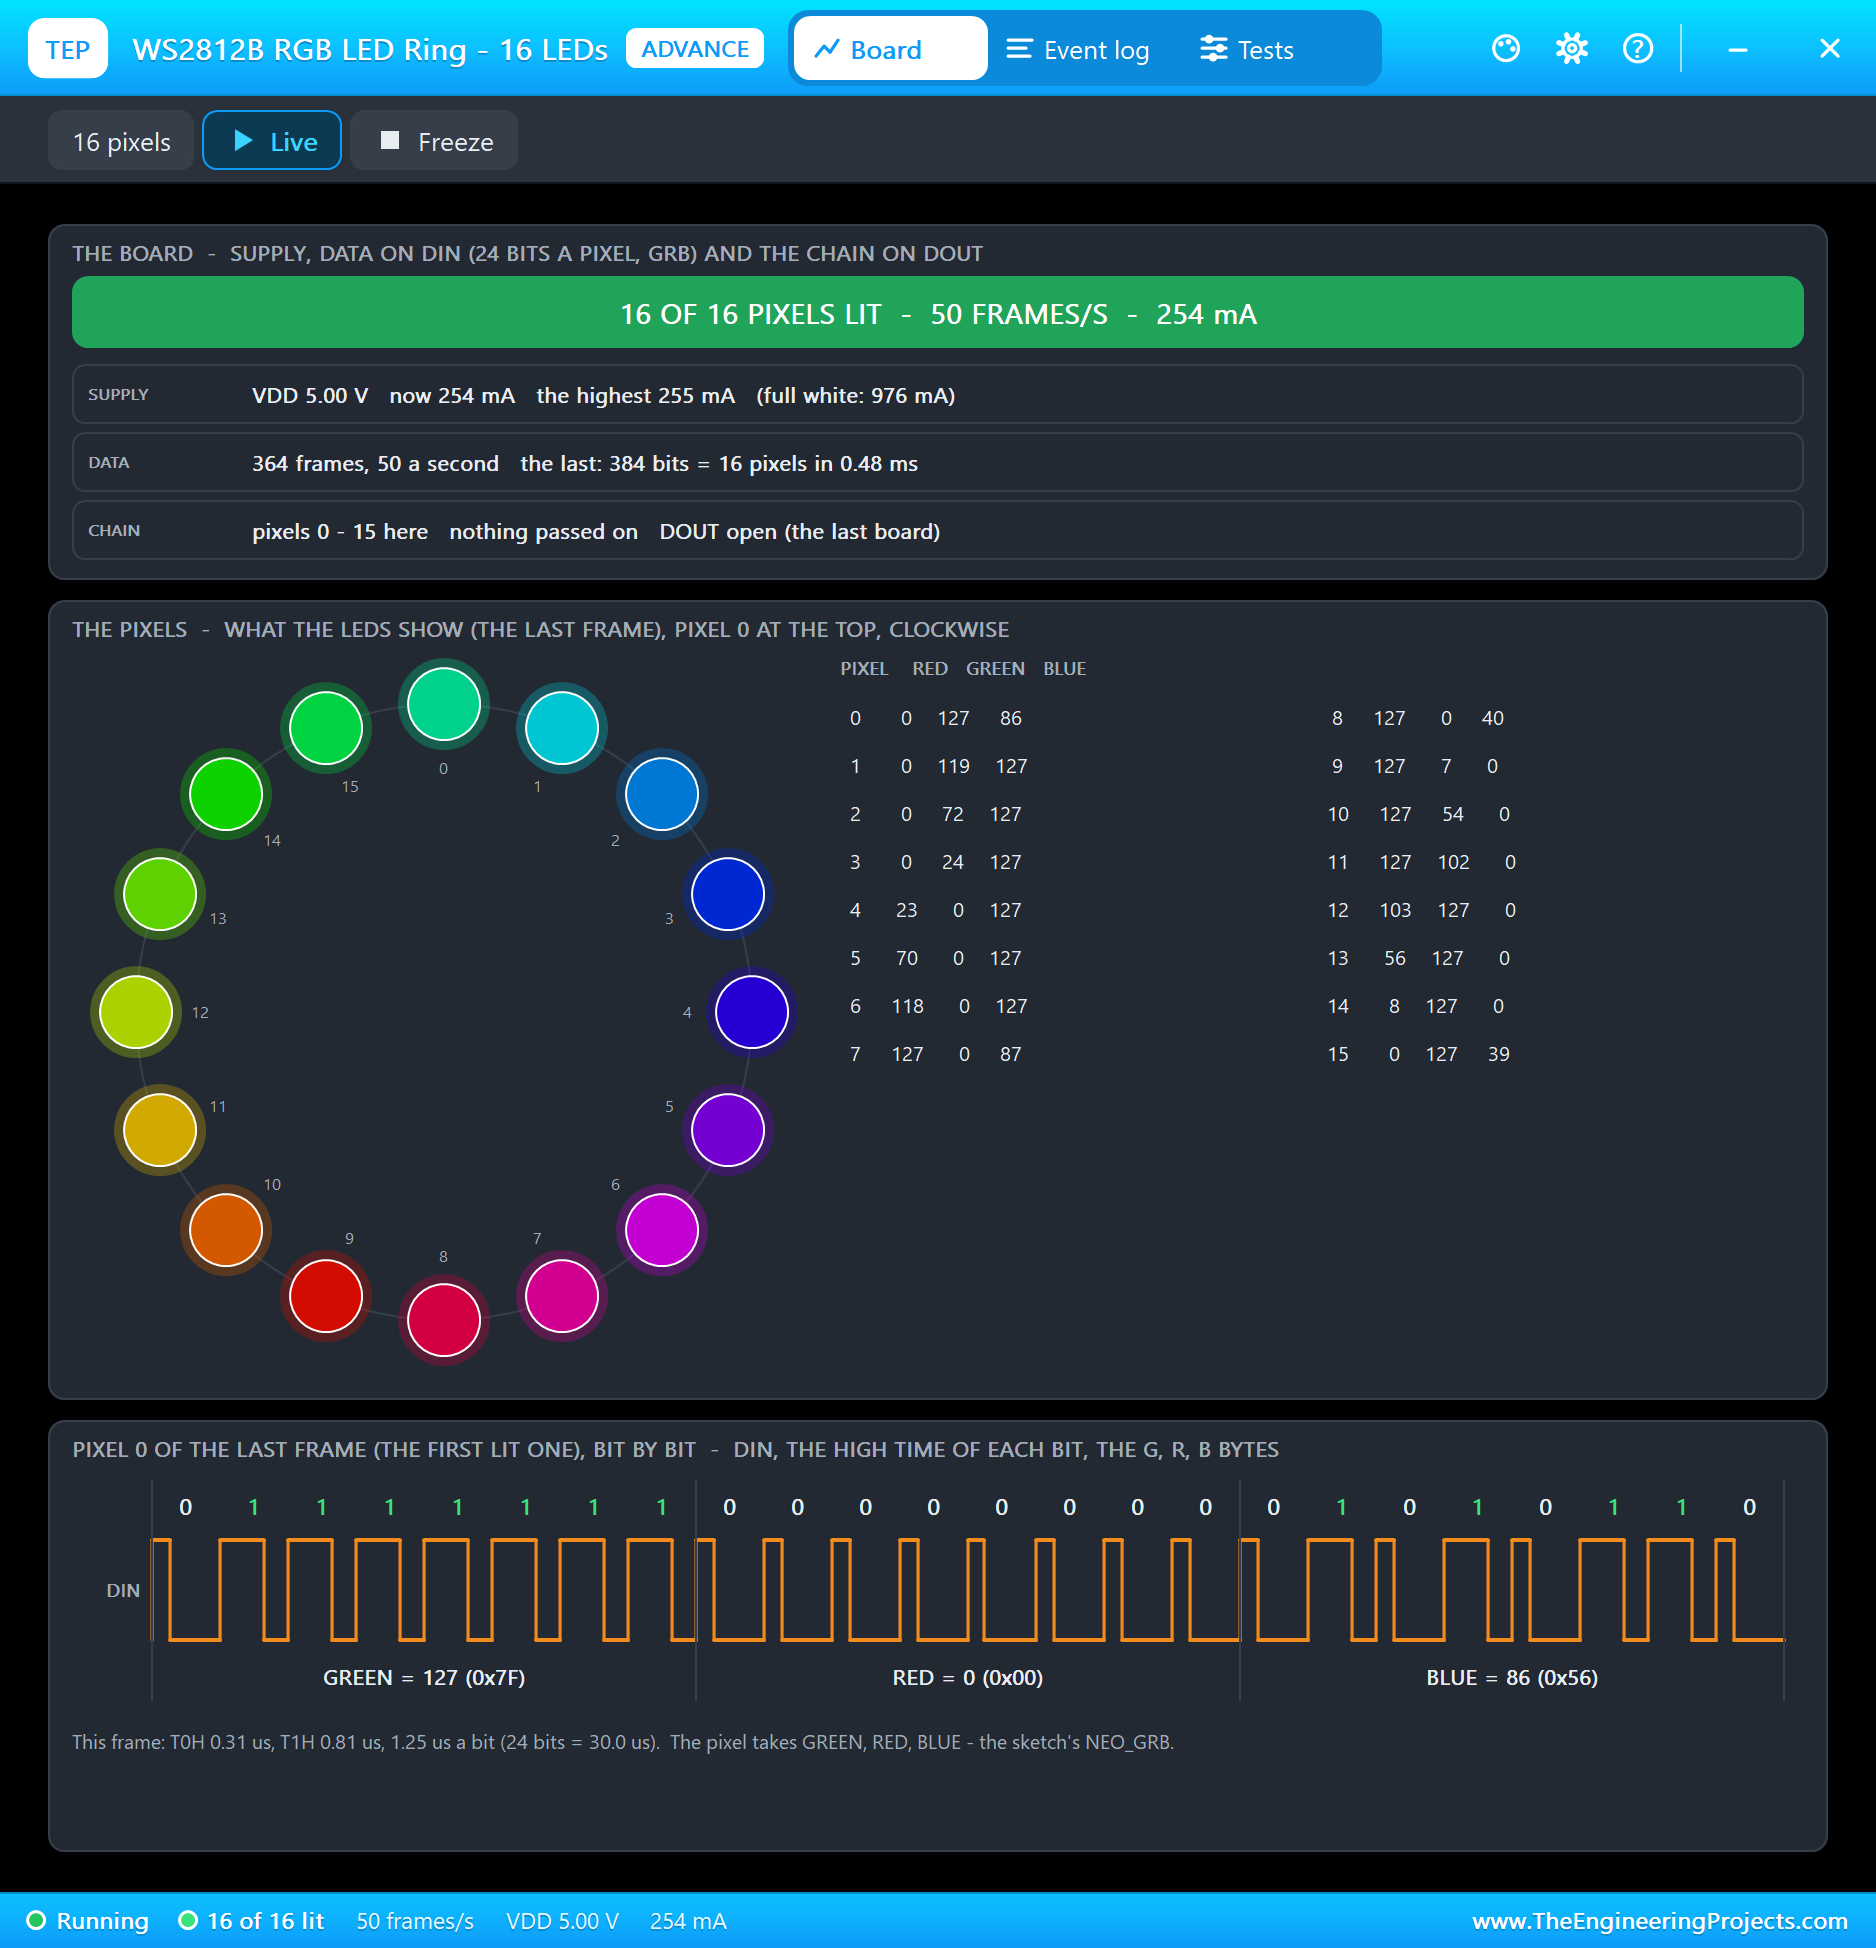
    * WS2812B ring of 16 (WS2812RING16ADVTEP, NEO1): 5V on VIN (5 V), DIN on D13, DOUT open (the end of the chain).
      One data wire: 24 bits a LED (green, red, blue, MSB first) at 800 kHz, 384 bits for the whole ring, then a
      reset pause latches the frame. 50 frames a second.
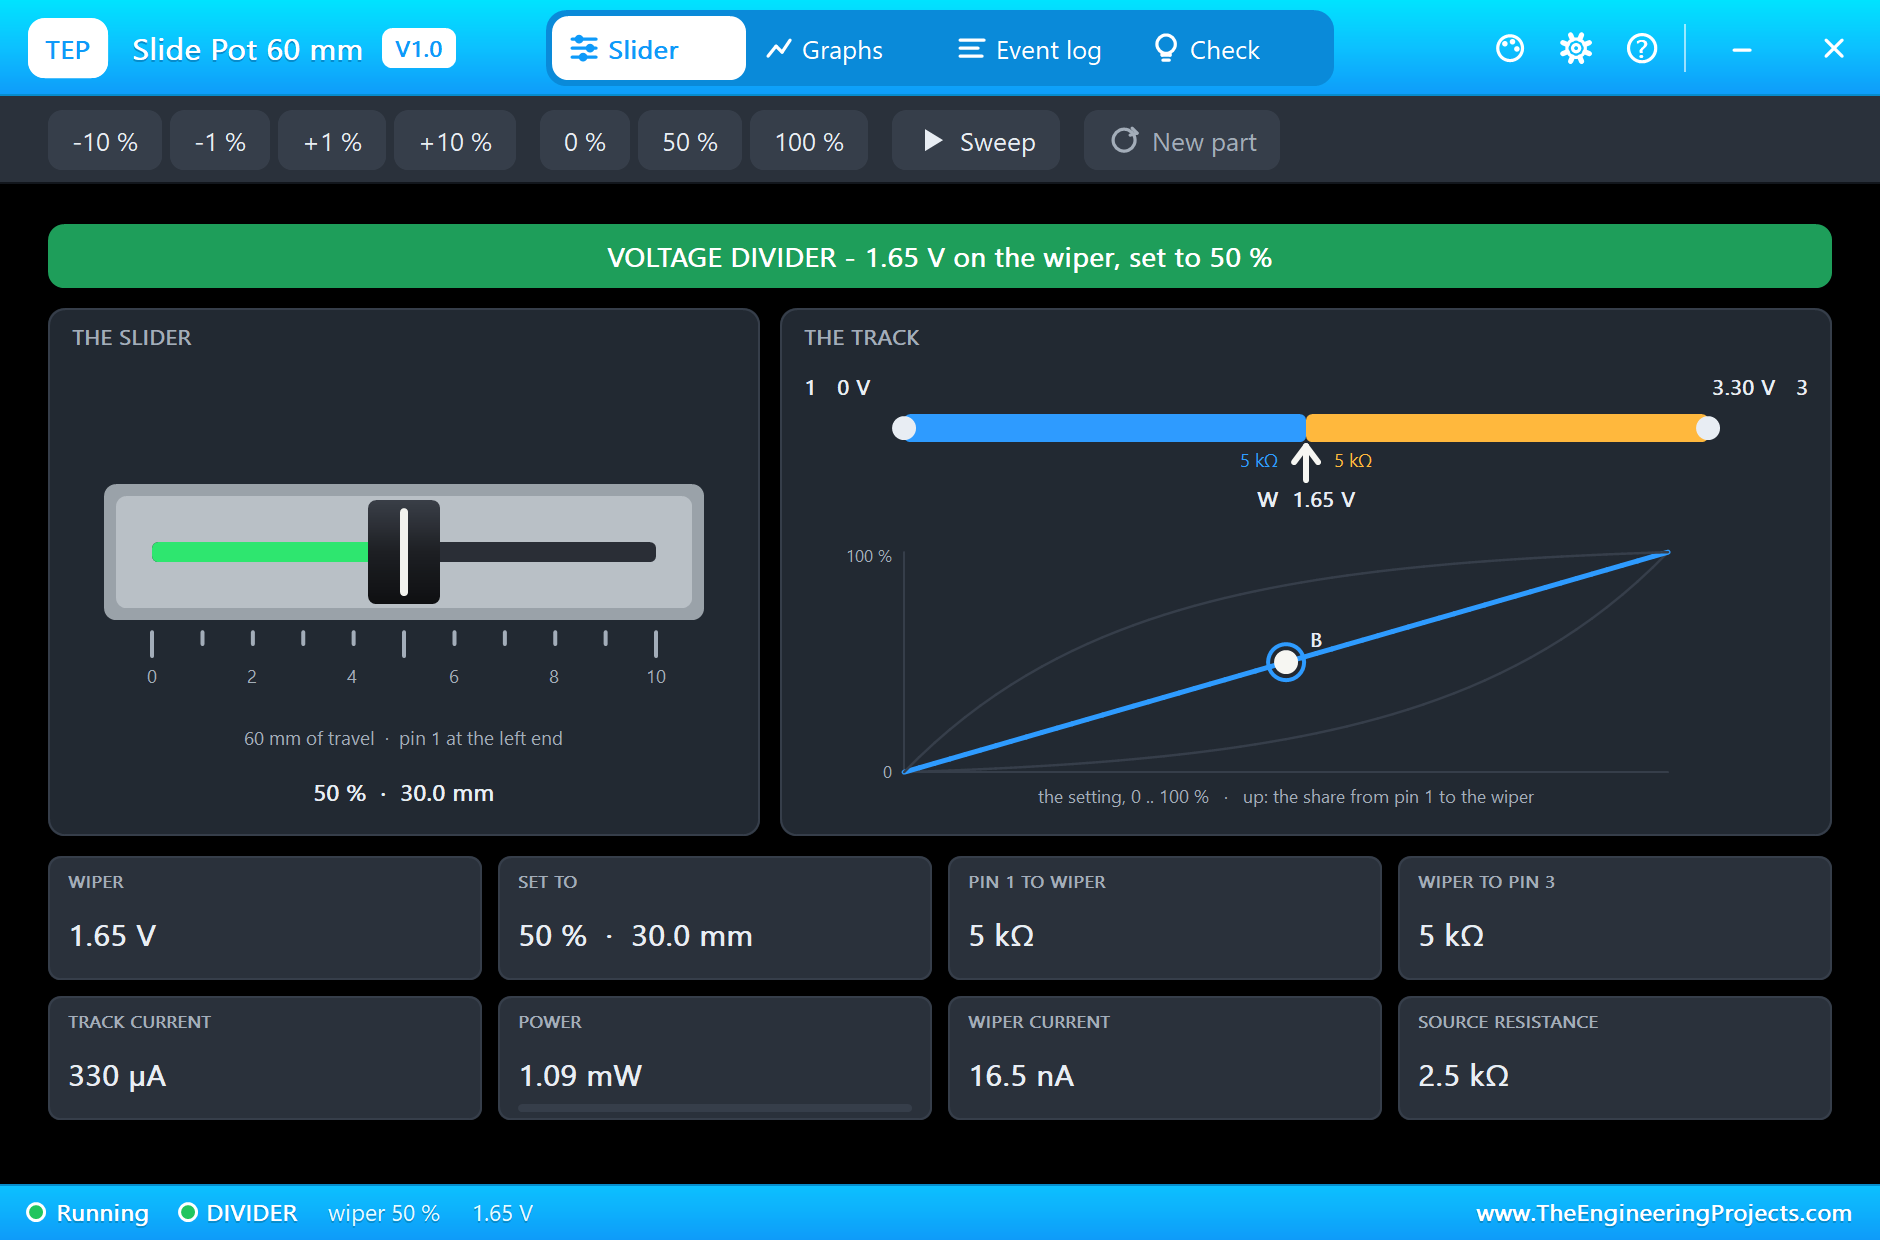
    * 60 mm slide potentiometer (SLIDEPOT60TEP, RV1, B10K): pin 1 to GND, pin 3 to 3V3, the wiper W on D34 (ADC,
      0 - 4095). The reading is mapped to a brightness of 0 - 255.
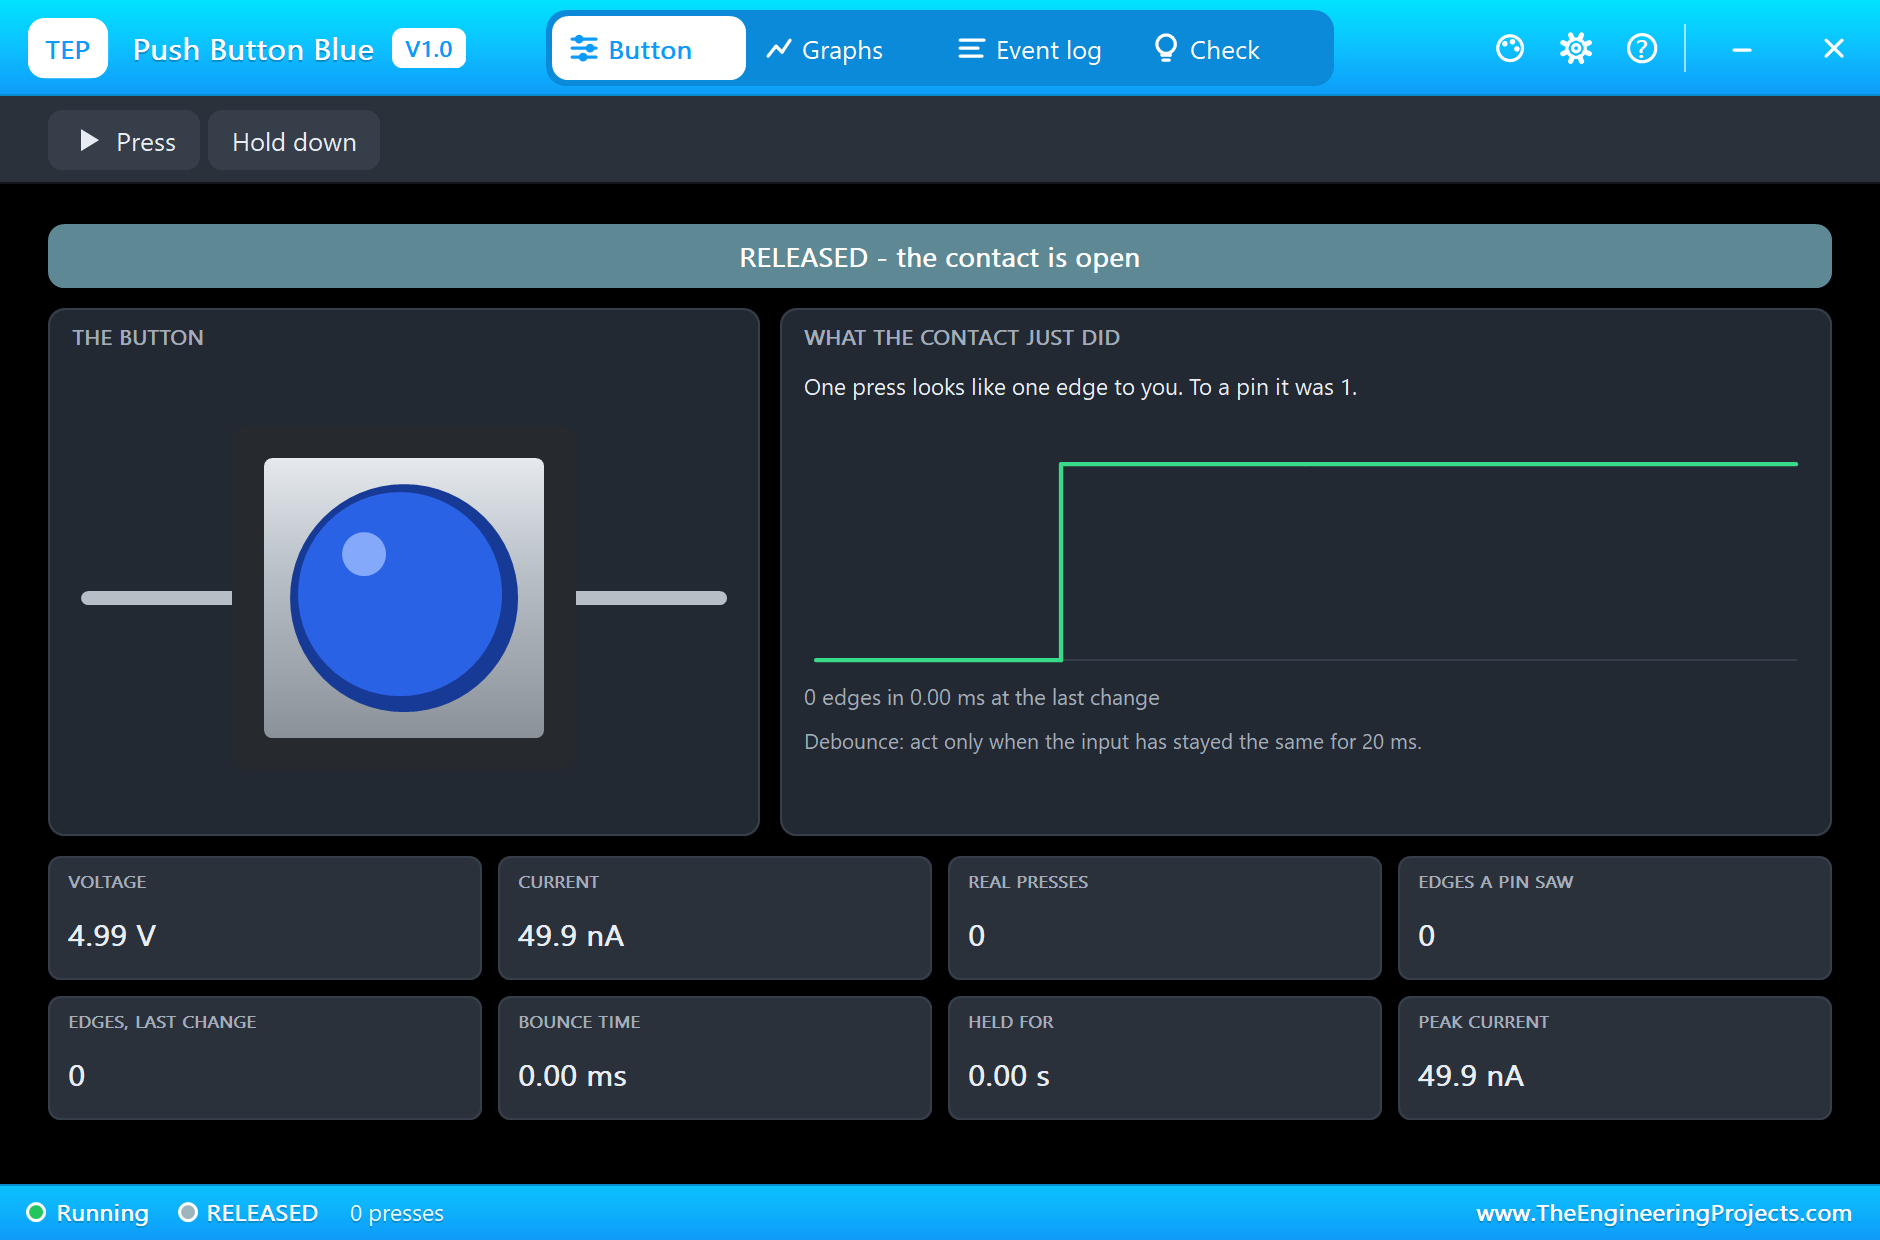
    * Push button (BUTTONBLUETEP, SW1): pin 1 on D27 (INPUT_PULLUP), pin 2 to GND. Its contacts bounce for 5 ms
      (BOUNCE=5), and the sketch accepts a change only after the pin has been still for 30 ms.
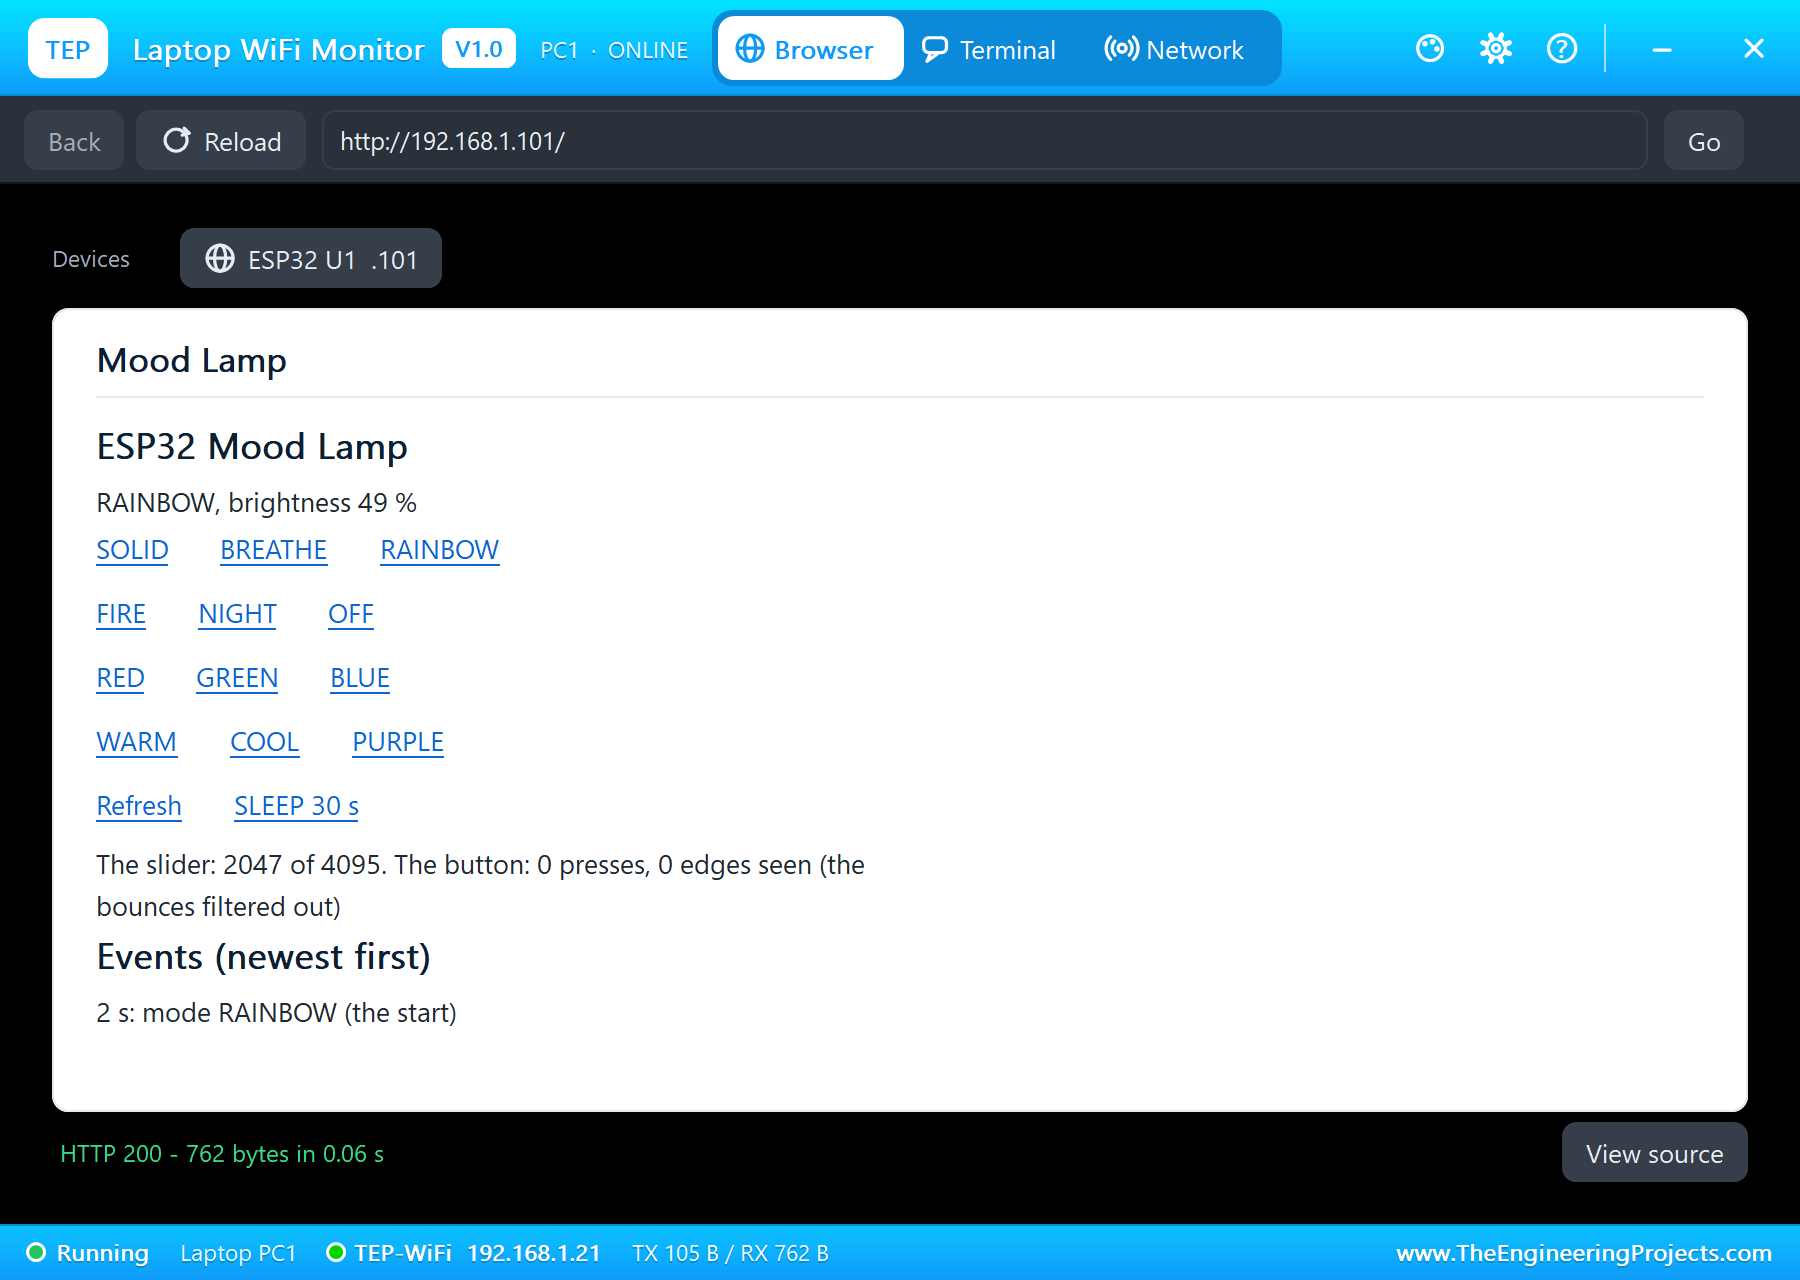
    * ESP32 DEVKIT V1 (U1) runs ESP32_RGB_Mood_Lamp.hex on TEP-WiFi at 192.168.1.101 (port 80).
    * Laptop WiFi Monitor (PC1) and Mobile WiFi Monitor (MOB1) open http://192.168.1.101/.
  The modes (the button goes round them in this order):
    SOLID (one colour), BREATHE (the colour fading in and out, 4 s), RAINBOW (the colour wheel turning round the
    ring, one turn in 5 s), FIRE (a warm flicker, every LED on its own), NIGHT (a warm glow at 10 % of the
    brightness), OFF. The colours: RED, GREEN, BLUE, WARM, COOL, PURPLE. The sleep timer fades the lamp out in a
    straight line and switches it OFF (30 s in the demo; make it 30 minutes on a real lamp).
  Its pages:
    /                                           the dashboard: the mode, the colour, the brightness, the events
    /solid /breathe /rainbow /fire /night /off  the mode
    /red /green /blue /warm /cool /purple       the colour (and SOLID; in BREATHE it keeps breathing)
    /sleep                                      the sleep timer
    /data                                       everything as JSON
  Only / and /data are registered with server.on(); every other address goes to server.onNotFound(), the same
  dashboard handler, which reads the address with server.uri(). (The ESP32 WebServer holds 12 routes at most; a
  13th server.on() is dropped without a word and its page answers 404.)
  Library for your own builds (not included): Adafruit NeoPixel 1.12.3 - install it in the Arduino IDE.

TEST STATUS
  Tested in Proteus 8 Professional on Windows 11, the run that made the tutorial's screenshots (the sketch's times):
    * 2 s: mode RAINBOW at 49 % (the slider at 2047 of 4095, 1.65 V): 16 of 16 LEDs lit, 50 frames a second, each
      frame 384 bits = 16 pixels in 0.48 ms (T0H 0.31 us, T1H 0.81 us, 1.25 us a bit); the ring drew 254 mA.
    * The slider to 100 % (4087): 99 %, 493 mA; to 0 % then +10 % (416): 9 %, 62 mA; back to 50 %.
    * The button: "mode FIRE" at 26 s - "press 1: 9 edges, 8 of them bounces" - FIRE drew 176 mA; "mode NIGHT" at 31 s
      ("press 2: 5 edges, 4 of them bounces"), 36 mA.
    * WARM from the laptop at 34 s: SOLID WARM, 267 mA. BREATHE from the phone at 36 s, PURPLE at 38 s: 233 mA at the
      top of a breath, 93 mA near its bottom.
    * SLEEP 30 s from the laptop at 44 s: halfway 89 mA, "mode OFF (the sleep timer)" at 74 s: 0 of 16 lit, 16 mA (the
      LEDs' own idle current, 1 mA each).
    * The button at 78 s: "mode SOLID (the button)" ("press 3: 7 edges, 6 of them bounces"), SOLID PURPLE, 281 mA.
    * At the end: 4,190 frames; the highest current 494 mA (full white would be 976 mA); the button 3 presses and 52
      edges - every bounce filtered out, no press counted twice.
  84 s of simulation took about 6.5 minutes on our PC with all the captures.

INSTALLATION
  1. Close Proteus. Extract the WHOLE zip file, for example to your Desktop.
  2. Copy the files from "Proteus Library Files" into the LIBRARY folder of Proteus, for example
     C:\Program Files (x86)\Labcenter Electronics\Proteus 8 Professional\LIBRARY
  3. Copy the files from "Proteus Model Files" into the MODELS folder (next to LIBRARY).
  4. Start Proteus. Press P in the schematic and search for ESP32 DEVKIT V1, WS2812RING16ADVTEP, SLIDEPOT60TEP or
     BUTTONBLUETEP to check that the parts are there.

RUN THE SIMULATION
  1. Open "Proteus Simulation\ESP32-RGB-Mood-Lamp.pdsprj". Keep the HEX and the DLL files beside it.
  2. Press Play. The ring turns in the RAINBOW mode at half brightness.
  3. Move the slider in its pop-up (RV1): the buttons 0 %, 50 %, 100 % and the steps of 1 % and 10 %.
  4. Press the button in its pop-up (SW1) to go to the next mode.
  5. Open the Laptop WiFi Monitor (PC1) or the Mobile WiFi Monitor (MOB1) and press Go. Try the colours, BREATHE
     and SLEEP 30 s; press Refresh to update the page.
  The ring's pop-up (NEO1) shows every LED, its colour value, the frames and the current.
  Your own sketch: compile it, export the compiled binary and set U1's PROGRAM property to the new file.

PROPERTIES USED IN THIS PROJECT
  U1 ESP32 DEVKIT V1           PROGRAM=ESP32_RGB_Mood_Lamp.hex, AUTOOPEN=YES (TEP-WiFi, 192.168.1.101)
  NEO1 WS2812RING16ADVTEP      (no changes)
  RV1 SLIDEPOT60TEP            VALUE=B10K (a linear 10 kOhm track), POWER=0.25
  SW1 BUTTONBLUETEP            BOUNCE=5 (5 ms of contact bounce), RCLOSED=0.1
  PC1, MOB1                    HOMEPAGE=http://192.168.1.101/

TROUBLESHOOTING
  * The ring stays dark: the data goes into DIN, not DOUT; check the 5 V on the ring's 5V pin.
  * Red and green swapped: the ring is RGB, not GRB - change NEO_GRB to NEO_RGB in the sketch.
  * One press jumps two modes: the debounce time is shorter than the bounce - raise DEBOUNCE_MS.
  * The brightness never reaches 0 or 100 %: the slider's ends are swapped or not on GND and 3V3.
  * A dashboard link answers 404: more than 12 server.on() routes - send the rest to onNotFound().
  * The dashboard does not open: wait for the "Dashboard: http://192.168.1.101/" line in the serial monitor.

LICENCES
  * The project, the sketch, the parts (LIB files) and the models (DLL files) are made by The Engineering Projects
    and are free for learning and for your own projects. The models use only standard Windows libraries.
    The C++ source code of the models is not included; the source code is not included for any model.
  * The sketch uses the Adafruit NeoPixel library (GNU LGPL v3); it is named here, not included.
  * Proteus is a product of Labcenter Electronics and is not included. ESP32 is a product of Espressif Systems;
    NeoPixel is a name used by Adafruit. This project is not made or endorsed by them.

VERSION
  V1.0 - the first release of the project.
===============================================================================================================Development1 release
 Development1 release
-
V1.0IoT RGB Mood Lamp with ESP32 - Proteus Simulation V1.0this page
V1.0 is the only release in the Download Center so far. When a newer version is published, it appears above with its own download page.
Installation8 steps
 Installation8 steps
From the download to a working project, in order. The steps follow what the package contains.
You will need
- Proteus Design SuiteProteus 8 or newer (Labcenter), on Windows
- Arduino IDE1.8 or 2.x, with the board of the tutorial chosen under Tools → Board
- Any archive toolWindows, macOS and Linux extract ZIP files on their own
Steps
- 1
Extract the archive
Right-click 30f5624f1eb649259ccf0ffb5158cd2e.zip and choose Extract All (or open it with 7-Zip or WinRAR) into a folder you can find again. Keep its folder structure (ESP32-RGB-Mood-Lamp-TEP-v1.0) as it is.
- 2
Copy the library files into Proteus
Move TEPBUTTON.LIB, TEPESP32V1.LIB and TEPLAPTOP.LIB and 3 more and the files into the LIBRARY folder of your Proteus installation: C:\Program Files (x86)\Labcenter Electronics\Proteus 8 Professional\LIBRARY for Proteus 8, or the matching Proteus 7 folder. Older versions keep it under ProgramData\Labcenter Electronics. If Proteus is open, close it first.
- 3
Add the simulation model
Copy TEPBUTTON.DLL, TEPNET.DLL and TEPSLIDEPOT.DLL and 1 more into the MODELS folder next to LIBRARY, so the component can run, not only be drawn.
- 4
Restart Proteus and place the component
Start Proteus, open a schematic, press P (Pick Devices) and search for the component by the name used in the tutorial. It appears with its pins ready to wire.
- 5
Open the sketch in the Arduino IDE
Open ESP32_RGB_Mood_Lamp.ino, select your board and port under Tools, then Verify. Sketch → Export Compiled Binary writes the HEX file a simulation needs.
- 6
Load the HEX file
In Proteus double-click the microcontroller, set Program File to ESP32_RGB_Mood_Lamp.hex and run the simulation. For real hardware, flash the same file with your programmer.
- 7
Open the example simulation
Open ESP32-RGB-Mood-Lamp.pdsprj in Proteus to see the wiring exactly as in the tutorial. Check the controller's Program File path, then press Play.
- 8
Follow the tutorial
IoT RGB Mood Lamp with ESP32 - Proteus Simulation explains every connection and setting in order; keep it open beside the files while you build.
FAQs9 questionsContact TEP
 FAQs9 questions
How do I download IoT RGB Mood Lamp with ESP32 - Proteus Simulation V1.0?
Wait for the 30-second guest countdown on this page, then press the download button; the file comes straight from our storage. Members who are logged in skip the wait. If the browser opens the file instead of saving it, use its Save as option. The download link is made for you when the countdown ends and works for 15 minutes; a saved or shared link stops working, so share this page instead.
What is inside the archive?
IoT RGB Mood Lamp with ESP32 - Proteus Simulation V1.0 comes as a ZIP archive of 18 files (3.8 MB, 9.4 MB unpacked) holding Proteus library files, simulation model DLLs, a Proteus simulation, an Arduino sketch and compiled HEX firmware. Open the File Structure tab for the full list of 18 files.
What should I do if the download does not start?
Check the browser's download list first; an ad blocker or a company firewall can also hold it back, so try another browser or network. If the file arrives incomplete, download it again. For an installation problem, read the Install tab or tell us in the comments with your software version and the exact error message.
Is this file free?
Yes. Every file in the TEP Download Center is free for learning, personal and student projects. If you share it, link back to this page or the tutorial so others find the latest version.
How do I check that the file arrived complete?
Compare its SHA-256 with the one on this page, 6ccbd7db3646c5fe5d8245ded901c71c53b620d2175963a360bb25bece9e3981. In PowerShell run Get-FileHash "30f5624f1eb649259ccf0ffb5158cd2e.zip"; on macOS or Linux run shasum -a 256 "30f5624f1eb649259ccf0ffb5158cd2e.zip". The same value means the file is exactly the one in our storage; a different one means the download broke off, so download it again.
Do I need WinRAR to open the ZIP file?
No. Windows, macOS and Linux open ZIP archives on their own (Extract All, or double-click). WinRAR and 7-Zip work too. Extract the whole archive before using the files.
Where do I put the LIB and IDX files?
Both files go into the LIBRARY folder of your Proteus installation (Proteus 8: C:\Program Files (x86)\Labcenter Electronics\Proteus 8 Professional\LIBRARY; Proteus 7 has the same folder under its own name). Restart Proteus afterwards and search for the component with P.
Which Proteus version does the library need?
The tutorial names the Proteus version the library was made and tested with. Most TEP libraries work in Proteus 7 and Proteus 8; if the component does not appear after a restart, check that both the LIB and the IDX file were copied and that Proteus was fully closed while copying.
How do I get the HEX file into the simulation?
Compile the sketch in the Arduino IDE (Sketch → Export Compiled Binary gives you the HEX next to the sketch), then in Proteus double-click the board, set Program File to that HEX and run.
Members skip the wait. Log in or join TEP.

- 0Total downloads
- 4%Popularity
- ESP32 ProjectsCategory
- 0Comments
- ssyedzainnasirUploaded by
- 15 Nov 2026Uploaded at


 SHA-256
6ccbd7db3646c5fe5d8245ded901c71c53b620d2175963a360bb25bece9e3981


 Need help with this file?
 Tags
Related ESP32 Projects
All ESP32 Projects tutorials


More ESP32 project files
All ESP32 tutorials

Comments
0