Hi Guys! Glad to see you around. I welcome you on board. In this post today, I’ll walk through the Introduction to LM2575.
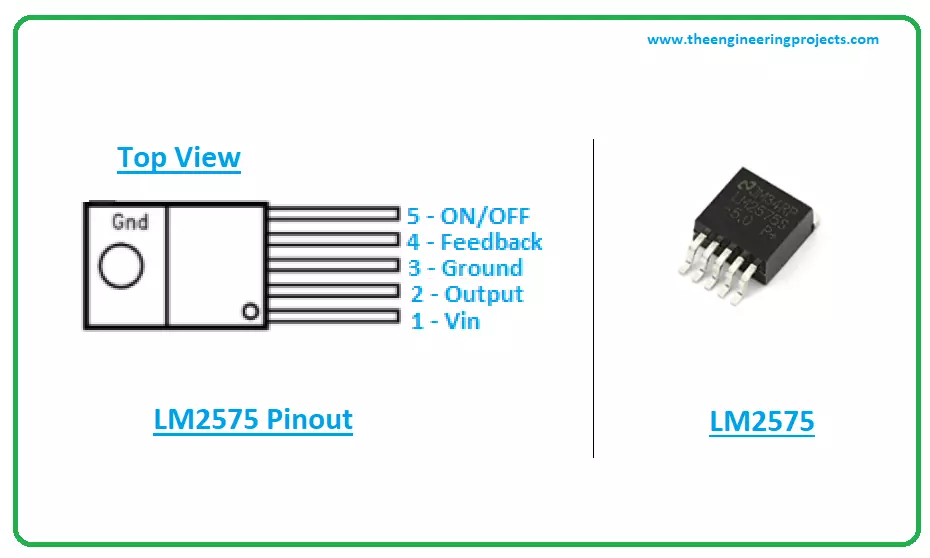
LM2575 is a step-down voltage regulator mainly used to step down the voltage. It is also known as a buck converter and is used to drive load under 1A. In the customized output version of the buck converter, you can set the output voltage as you like better. It comes with an extremely good load and line regulation and is available in fixed output voltages with 3.3V, 5V, and 12V.
I suggest you read this post all the way through, as in this post I’ll detail the Introduction to LM2575 covering the datasheet, pinout, features, and applications of this component LM2575.
Let’s get started.
Introduction to LM2575
LM2575 is a vol ...
Hi Folks! Hope this finds you well. Thank you for stopping by. In this post today, I'll be discussing the Introduction to BD137.
BD137 is an NPN medium power transistor mainly employed in switching and audio amplification applications. It is composed of silicon material and comes in the TO-126 package. The collector-base and collector-emitter voltages are 45V and the emitter-base voltage is 5V which details that only 5V is required to bias this transistor and start transistor action. The collector current is 1.5A which documents that it can support loads under 1.5A. Power dissipation is 12.5W and storage temperature ranges from -55 to 150C.
Read this entire post, as I'll walk you through the complete Introduction to BD137 detailing pinout, datas ...
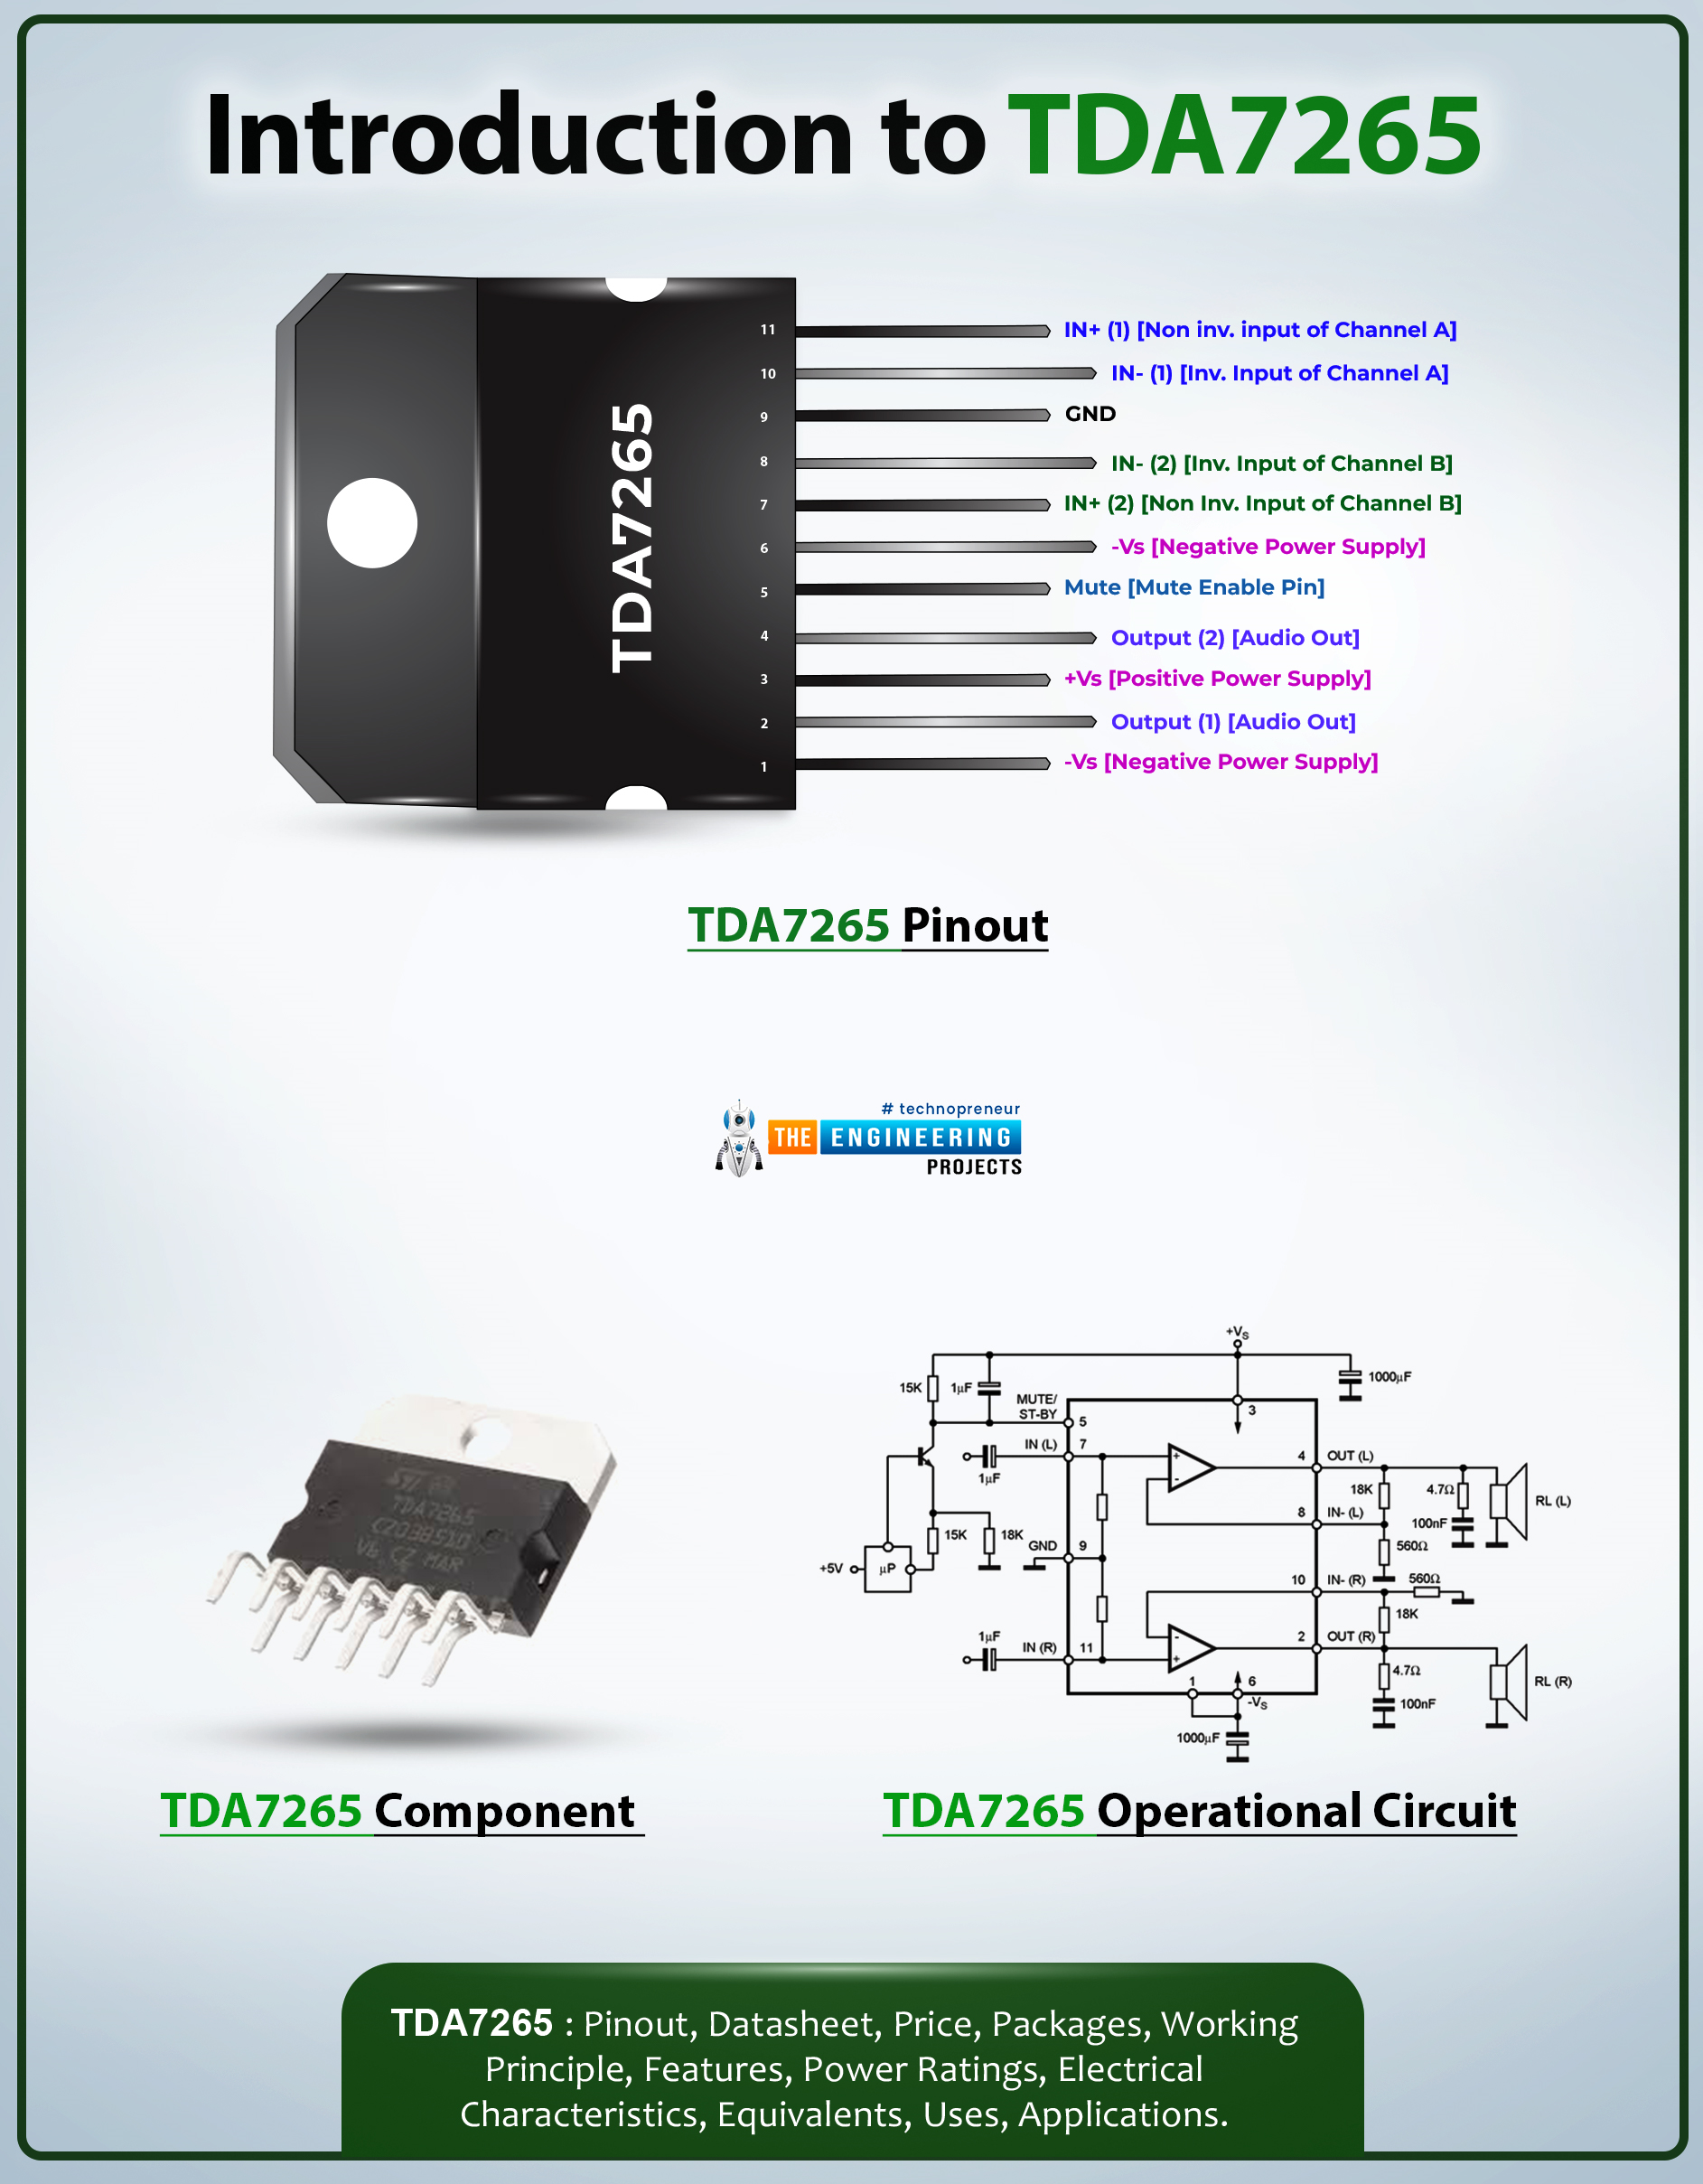
Hi Friends! I hope you’re well today. I welcome you on board. In this post today, I’ll walk you through the Introduction to TDA7265.TDA7265 is a +25-watt class AB dual audio power stereo amplifier. This multi-watt package IC is carefully designed for high-quality audio power amplification applications. This device receives a low-input audio signal and amplifies it into a high-quality audio output.
I suggest you buckle up as I will detail the complete introduction to TDA7265 covering datasheet, pinout, features, and applications.
Let’s jump right in.
Introduction to TDA7265
TDA7265 is a +25-watt class AB dual audio power stereo amplifier that is mainly employed in audio amplifiers and woofer amplifiers.
This device gets a low-input audio signal and converts it into a high-out ...
Hi Friends! Hope you are doing well. In this post, I'll uncover the details on How to use pinMode Arduino Command. The pinMode defines the Arduino Pins, if they are used as an input or output. The INPUT_PULLUP is another option achieved by pinMode, that is mainly used to place a virtual pull-up resistor to the input pins.
We have started Arduino Tutorials for Beginners quite a while now for the newbies, who are really interested to get a hands-on experience with Arduino. Generally, Arduino is known as a Microcontroller, but it is a step ahead of it. The PIC microcontrollers require some basic circuit to start with but Arduino brings revolution in the automation industry by removing the need of developing any basic circuit. Although Atmega328 is th ...
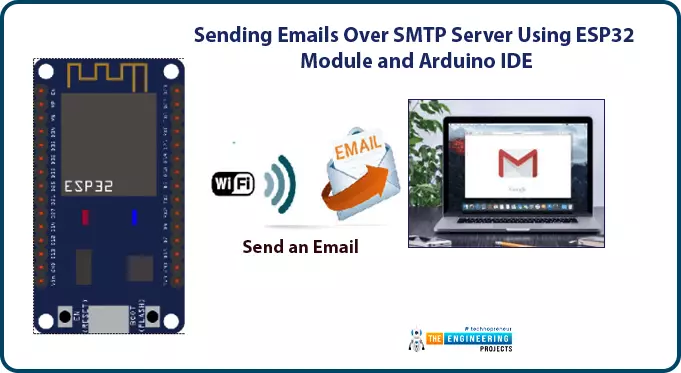
Hello readers, I hope you all are doing great. In this tutorial, we will learn how to send an email using ESP32 module. We will also learn to send text files, images or some sensor readings using the SMTP server using the ESP32 module.
In IoT (Internet of things), there are various applications where we need to send emails carrying information like sending some sensor readings, altering emails, images, text files and much more.
What is SMTP?
SMTP or simple mail transfer protocol is an internet standard for sending and receiving electronic mail (or email) where an SMTP server receives emails from the email client.
SMTP is also used for setting communication between servers.
Various email providers like Gmail, Hotmail, Yahoo, etc. have unique SMTP ...
Hello everyone! I hope you all will be absolutely fine and having fun. Today, I am going to share my knowledge about Introduction to LM335. LM 335 is basically an Integrated Circuit (IC) for precise temperature sensor. LM-335 operates on a current range 400uA-5mA having resistance less than 1 ohm. At 10mV/K, its absolute temperature becomes directly proportional to the breakdown voltage.
LM-335 operates as two terminal zener diode. At the temperature ranging from -40 degree Celsius to 100 degree Celsius, LM 335 can be used for each type of temperature sensing purposes. This device is available in different dimensions and in different sizes. LM-335 is most commonly available in the market due to its unique features including e.g. large temperatur ...
Hello friends, I hope you all are doing great. In today's tutorial, we are gonna have a look at a detailed Introduction to DS3231. DS3231 is a real-time clock (RTC) with an integrated temperature-compensated crystal oscillator. It consists of a battery that provides supply to DS3231 when the main supply is off. In this way, it continues working without any interference. It is available in industrial and commercial temperature ranges. It exists in a 16-pin, 300-mil SO package.
DS3231 is used in industrial projects and different electronic devices such as laptops, computers, and GPS for high accuracy of time. In today's post, we will have a look at its working, pinout, applications, protocol, etc. I will also share some links to projects where I have interfaced it with some oth ...
In today's post we are gonna see how to connect Arduino YUN with Putty and access the files on Linux OS in Arduino YUN. In my last post Getting Started With Arduino YUN, I have explained in detail about basics of Arduino YUN. I am recall few important things here. Arduino YUN is a very powerful board with two processors on it. One is Arduino microcontroller used to control the output / input pins. The other processor is named as Atheros and it has Linus operating system on it, so one can easily run python scripts on it and can do any server or client side coding in it.
So, today we are gonna see ow to access this Linux operating system of Arduino YUN using Putty software in Windows. Putty is a third party software used for accessing serial termina ...
Hello Learners, hope you are doing well. I am here with a new tutorial. We'll discuss about Junction Field Effect transistors. In this tutorial, we will learn the basic Introduction to JFET nad will also have a look at its practical Implementation and simulation in Proteus.
Basically, Junction Field Effect is a type of transistor, similar to Bipolar Junction Transistors but they have different characteristics due to some reasons as discussed below:
Introduction to JFET
We Define the JFET as:
"Junction Field Effect transistors or simply JFET is the semiconductor ,Voltage Control, three terminal device that is present in both configurations either N channel or P channel."
JFET are named so because the the operation of JFET relies on the Field of th ...
Hi guys, I hope you are good and doing well in your life. In this article, I am going to tell you about a new pH Sensor Library for Proteus. I hope you all will enjoy it and find it useful. We are all well aware of pH Sensors which are used for the detection of pH of different fluids. By knowing the pH of a liquid we can tell whether the liquid is acidic or basic. You can’t find a pH sensor in Proteus software, so we designed a pH sensor for simulation purposes. You can interface this pH Sensor with any Microcontroller, for example: Arduino, PIC Microcontroller, 8051 Microcontroller etc.
In this pH Sensor Library, I have added four different pH Sensors, which are used for the detection of the pH of any fluid. Since we can’t place real liquid and m ...