The Internet of Things ( or IoT) is a network of interconnected computing devices such as digital machines, automobiles with built-in sensors, or humans with unique identifiers and the ability to communicate data over a network without human intervention.
Hello readers, I hope you all are doing great. In this tutorial, we will learn how to send sensor readings from ESP32 to the ThingSpeak cloud. Here we will use the ESP32’s internal sensor like hall-effect sensor and temperature sensor to observe the data and then will share that data cloud.
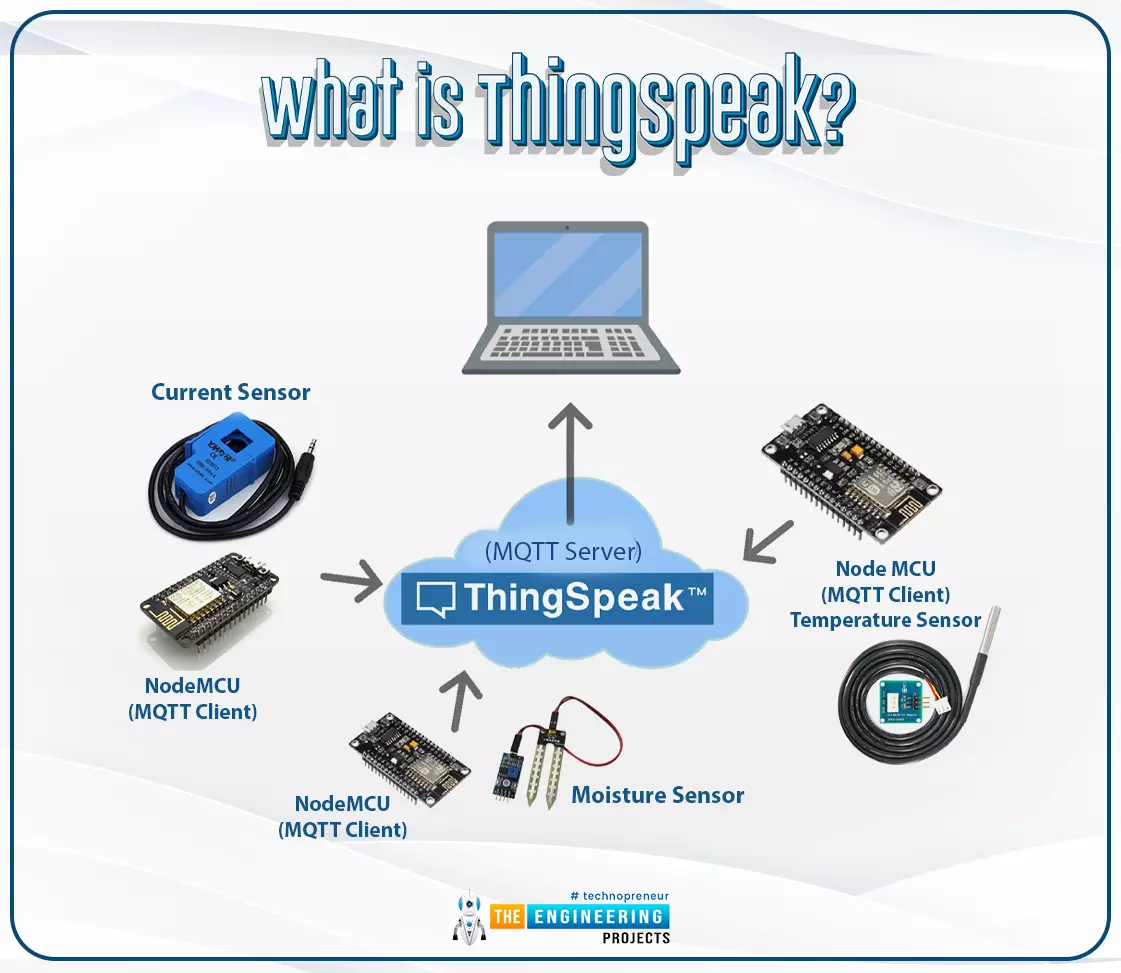
What is ThingSpeak?
Fig. 1: ESP32 ThingSpeak
It is an open data platform for IoT (Internet of Things). ThingSpeak is a web service operated by MathWorks where we can send sensor readings/data to the cloud. We ...
Hello readers, I hope you all are doing great. In our previous tutorial, we learned SMTP server and how to implement an SMTP server for sending emails with ESP32. In the previous tutorial, we also demonstrated some examples like sharing raw text, HTML text, images and text files.
So, at the transmitter end, we are using the SMTP server.
But, what about the receiver end?
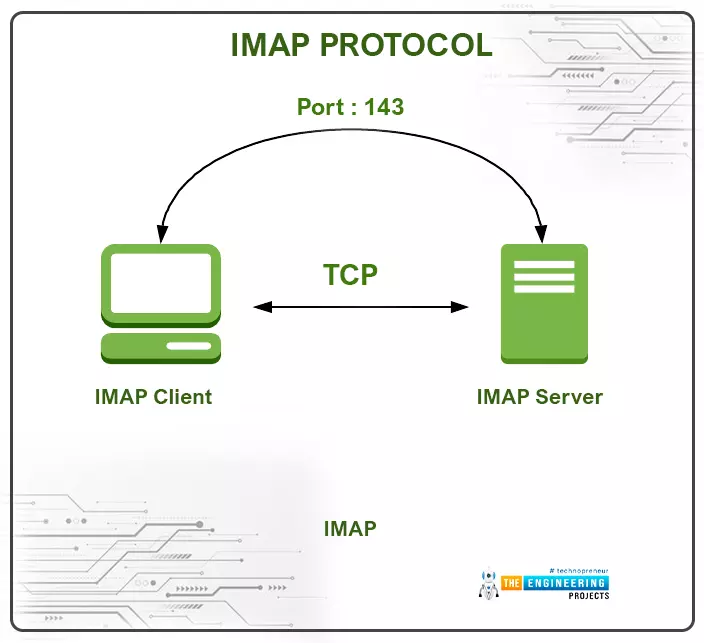
At the receiver end, we use another protocol called IMAP (or Internet Message Access Protocol) and POP3 (Post office Protocol V3) for receiving the emails.
Fig. IMAP and SMTP
What is IMAP Protocol and How does it Work?
IMAP is an application layer (TCP/IP) protocol that is used at the receiver end to receive emails from SMTP server or mail server. IMAP follows the client/server mo ...
Hello everyone, I hope you're all doing well. In the previous lecture(Chapter 0: ESP32 Pinout), we discussed the ESP32 features & specs in detail. Today, we are officially starting this ESP32 Programming Series. In this ESP32 Programming Series, we will start with basic concepts and
will gradually move towards complex topics. I will try to keep this
ESP32 series as simple as I can. But still, if you encounter any issues,
please ask in the comments, will try to resolve the issues as soon as
possible.As ESP32 has numerous features & applications, so I have divided this series into different sections. I have named the 1st section "ESP32 IDEs". In this section, we will discuss different IDEs used to program ESP32 boards. In each Chapter of this section, we will install one of t ...
Hello readers, hope you all are doing great. Today, we will discuss interrupts and timers in ESP32 and how to handle internal as well as external interrupts. So, we will discuss What is interrupt, Polling, ESP32 interrupt, Software interrupts, Hardware Interrupts, IRS (Interrupt Service routine), Steps to execute an interrupt or how is an interrupt handled in the microcontroller, Code description for ESP32 interrupts with Arduino IDE, Code description for hardware interrupts, Why is it preferred to use timer to add delay instead of using delay() function. So, let's get started:
What is Interrupt?
Interrupts are used when a micro-controller needs to continuously monitor for an event while the same micro-controller is executing a particular task ...
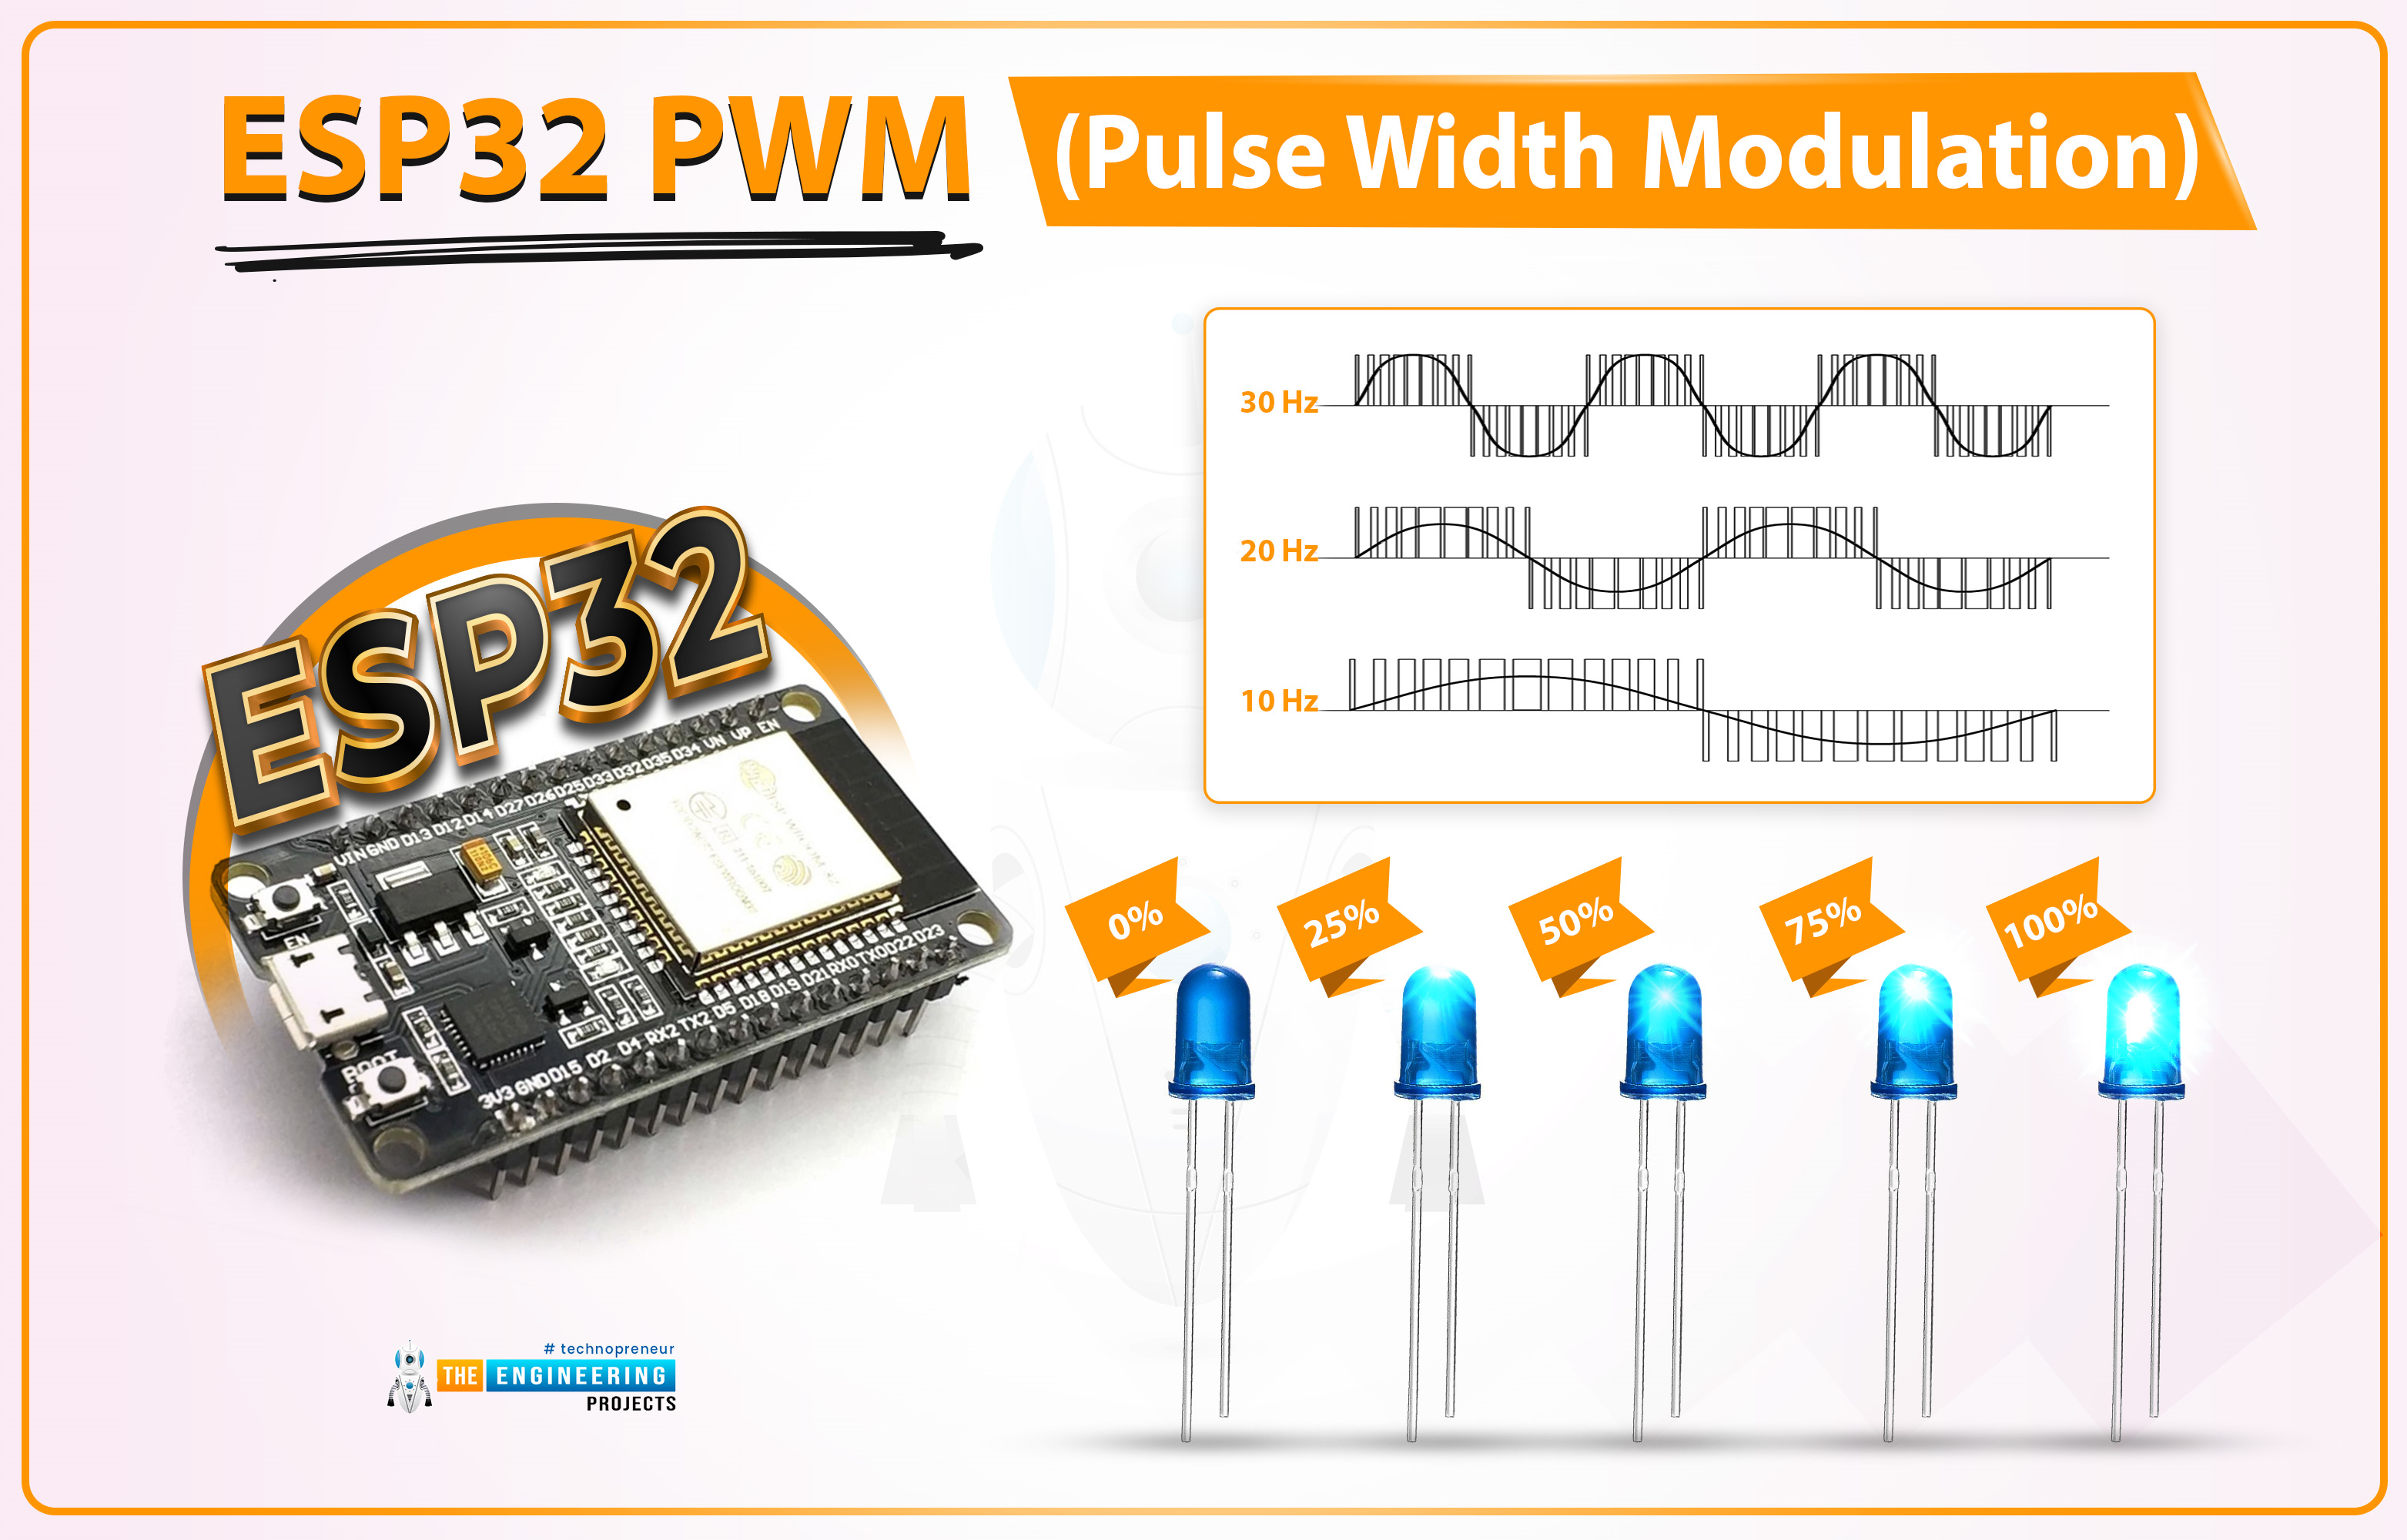
Hello readers, I hope you all are doing great. Welcome to the 3rd Lecture of Section 2 in the ESP32 Programming Series. In this tutorial, we are going to discuss another important feature of ESP32 i.e. PWM(Pulse Width Modulation).
Pulse Width Modulation is a technique to reduce the voltage by pulsating it. In today's lecture, we will first understand the basic concept of PWM, and after that will design two projects to fully grasp it. In the first project, we will control the brightness of an LED, while in the second one, we will control the speed of a DC Motor.
Here's the video demonstration of PWM Control in ESP32:
Before going forward, let's first have a look at the PWM working:
What is Pulse Width Modulation?
PWM is used to control the power delivered to the load by pul ...
Hello readers, I hope you are all doing great. Welcome to the 2nd lecture of Section 5(ESP32 Sensors) in the ESP32 Programming Series. In the previous tutorial, we discussed the built-in ESP32 Hall Effect Sensor. In this tutorial, we will discuss another inbuilt sensor of the ESP32 i.e. Capacitive Touch Sensor.
ESP32 Board has 10 built-in capacitive touch pins, which generate an electrical signal when someone touches these pins. These ESP32 touch pins are normally used to wake up the board from deep sleep mode. These touch pins are also used to replace the normal mechanical buttons with touch pads, improving the presentation of the IoT projects.
Here's the video demonstration of the ESP32 Capacitive Touch Sensor:
Before going forward, let's first understand how this touch sens ...
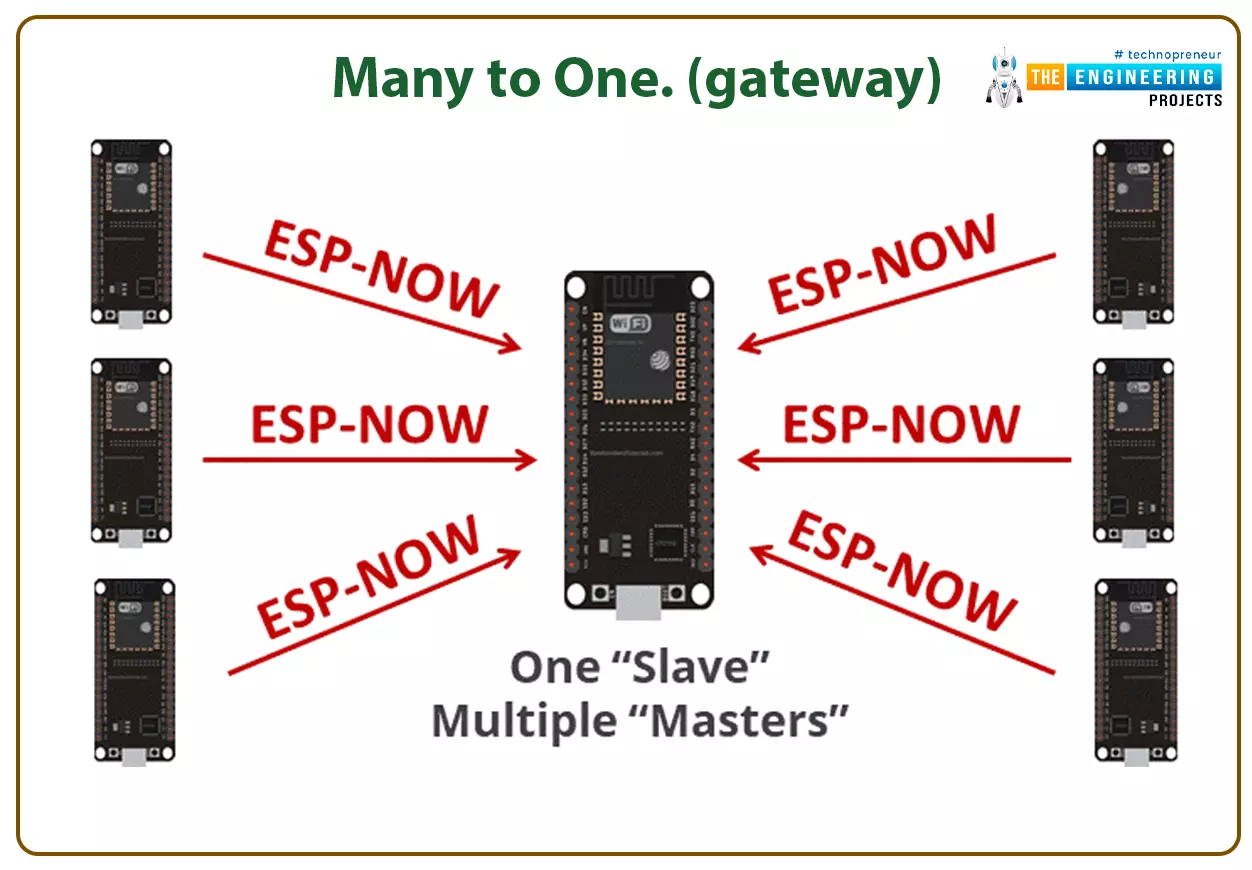
Hello readers, I hope you all are doing great. In this tutorial, we will learn about the ESP-NOW protocol and how to communicate data between two ESP modules through ESP-NOW protocol and that is too without Wi-Fi connectivity.
What is ESP-NOW Protocol?
Fig. 1: ESP-NOW Protocol
ESP–NOW is a connectionless communication protocol that is used for sharing small data packets between two ESP boards. This protocol is developed by Espressif.
Features of ESP-NOW Protocol:
It is a low-power wireless protocol, which makes two or more ESP devices communicate directly with each other without using Wi-Fi.
ESP-NOW protocol does not require a handshake for establishing a connection but, they require pairing and once the devices are paired they can exchang ...
Hello readers, I hope you all are doing great. Today, we are going to start the second section of the ESP32 tutorial series and today's our first tutorial, where we will have a look at How to Create a Web Server with ESP32. In our previous tutorial, we introduced you to the basics of the ESP32 microcontroller. where we discuss How to set up Arduino IDE to program ESP32. In this tutorial, we will discuss creating a web server using the ESP32 module.One of the most interesting features of the ESP microcontroller series is its wireless connectivity via WiFi & Bluetooth. Wireless connectivity protocols supported by ESP32 are:
Wi-fi: 802.11b/g/n/e/i
Bluetooth : BLE(Bluetooth low energy) and V4.2
What is a Web server?
A web server is software or hardware that stores, processe ...
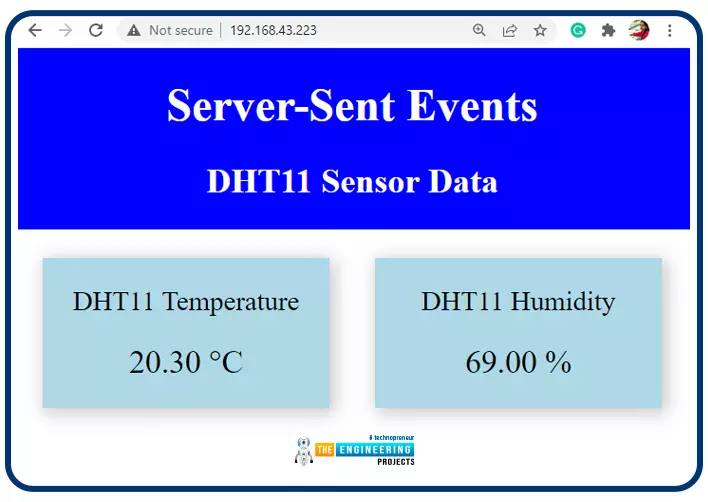
Hello readers, I hope you all are doing great. In this tutorial, we will learn how to update a webpage using Server-Sent Events and the ESP32 web server.
What is Server-Sent Events (SSE)?
It is a server push technology that enables the client devices to receive automatic updates from a server over HTTP (Hypertext Transfer Protocol) connection. SSE also describes how the server can initiate data transmission towards the client once an initial connection with the client has been established.
We have already posted a tutorial on how to implement Web socket protocol with ESP32 which is also a protocol used to notify events to a web client. Both the Server-Sent Events (SSE) and Web-Socket technologies seem to be quite similar but they are not.
The major difference between the two is that SSE ...
Hello readers, I hope you all are doing great. In this tutorial, we will learn how to interface the BMP280 sensor with the ES32 module to get temperature, pressure and altitude readings. Later, in this tutorial, we will also discuss how to upload these sensor readings to a web server.
BMP280
BMP280 or Barometric pressure sensor is a module used to measure temperature pressure and altitude. The small size and low power consumption feature of this sensor makes it feasible for battery-powered devices, GPS modules and mobile applications etc.
Fig. 1 BMP280 Sensor
The BMP280 is the product of BOSCH which is based on Bosch’s proven Piezo-resistive pressure sensor technology featured with high accuracy, long term stability, linearity and high EMC robus ...