Hello friends, hope you all are fine and having fun with your lives. Today, I am going to share a tutorial on DC Motor Speed Control using Arduino in Proteus ISIS. In my previous post, we have seen How to design a DC Motor Direction Control Project using Arduino in Proteus ISIS and if you haven't checked it out then I would recommend you to have a look at it first. Because, in today's tutorial, I am gonna extend that tutorial and will add the DC Motor Speed Control in it. So, today, we will control both the direction as well as speed of the DC Motor. Moreover, you should also have a look at How to use Arduino PWM Pins if you are not much familiar with PWM control.
In the previous tutorial, we have seen How to control the direction of a DC Motor, w ...
Hello friends, hope you all are fine and having fun with life. Today, I am going to share DC Motor Direction Control with Arduino. I have designed a complete simulation in Proteus, which will help you in understanding the controlling of DC motor. I would recommend you to first read How to Control relay in Proteus ISIS which will help you in understanding the functionality of relays because in today's tutorial, I have used relays to do the DC Motor Direction Control. I have already posted a tutorial on DC Motor Drive Circuit in Proteus ISIS.
So, for DC Motor Direction Control, I have used Arduino UNO baord, so you should also download this Arduino Library for Proteus so that you can use Arduino boards in Proteus software. I have also provide the si ...
Hello friends, hope you all are fine and having fun with your lives. Today, I am going to share a new Genuino Library for Proteus. Genuino boards are just the same as Arduino boards but with slight difference of color and shape. I have already posted a tutorial on Arduino Library for Proteus in which I have explained how to download the Arduino Library and use it in Proteus. Today, I am going to post a similar library but for Genuino boards. Their functionality is exactly the same as the Arduino Library but they have better look and Genuino Color.
II hope you are gonna like this library as well. Other bloggers are welcome to share this library with their reader but do mention our link in creator section, we will be really obliged. Now, let's start ...
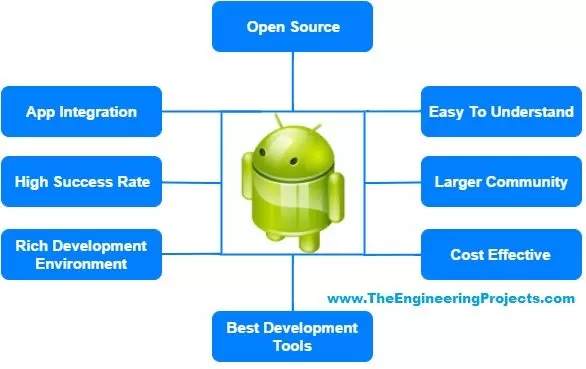
Hello Friends, welcome back to the second tutorial of ‘Android Application Development’ by ‘The Engineering Projects’. I hope you guys are fine and enjoying your lives. In the previous tutorial, we have seen How to Get started with android studio. Today, we are going to have a look at How to install Android studio on your computers. Its a beginner level tutorial and is quite essential for beginners. Because when you plan to start learning some new software then its correct installation and environment setup is the main key. When you are going to start with the installation of any platform, first of all, what you need to do is to set up the environment in proper way. So that's why, today we are going to cover the installations of all the software r ...
Hello Friends, My name is Syed Daniyal Nasir. I hope you guys are fine and enjoying your lives with passion. Today, we are going to start the new series of tutorials related to Android Development and here's my first tutorial in thie series which is, Getting Started with Android. This is gonna be my first tutorial of Android Development for “The Engineering Projects”. As we all know, Android Development is enhancing vigorously day by day, Google Play Store is flooded with tons of new mobile applications each day. So a lot of people want to understand the basics of Android Development, so that they could develop their own applications. But some people find it very difficult due to certain reasons. That’s why we are going to make these tutorials as simple as possible, so that most of the peo ...
Hello friends, hope you all are fine. Today, I am going to share a new Bluetooth Library for Proteus. Using this Library, now you can quite easily use Bluetooth modules in Proteus ISIS. I have designed two Bluetooth modules which are HC-05 and HC-06. We all know about these modules. We use these modules for sending data through Bluetooth. Till now, there's no such Bluetooth Library designed for Proteus and we are the first developers of this awesome Bluetooth Library for Proteus. I hope you guys are gonna like it. I have also posted a tutorial in which I have done Arduino Bluetooth Communication using HC05 in hardware. I hope that one will also be interesting to read, if you have planned to start working on Bluetooth Module.
Other bloggers are wel ...
Hello friends, hope you all are fine and having fun with your lives. Today, I am going to share a new project in which we are gonna do Arduino Bluetooth communication. The Bluetooth module I have used for this project is HC-05, which is a serial Bluetooth module. We can quite easily perform the Bluetooth communication with this module using Arduino board. I have worked on many projects in which I have to send the data from sensors to my computer via Bluetooth. So, in such projects I normally use this Bluetooth module which is connected with the sensors and then Arduino gets the data from these sensors and then send this data to computer via Bluetooth module. In this project, I have used Arduino board but you can use PIC Microcontroller or 8051 Mic ...
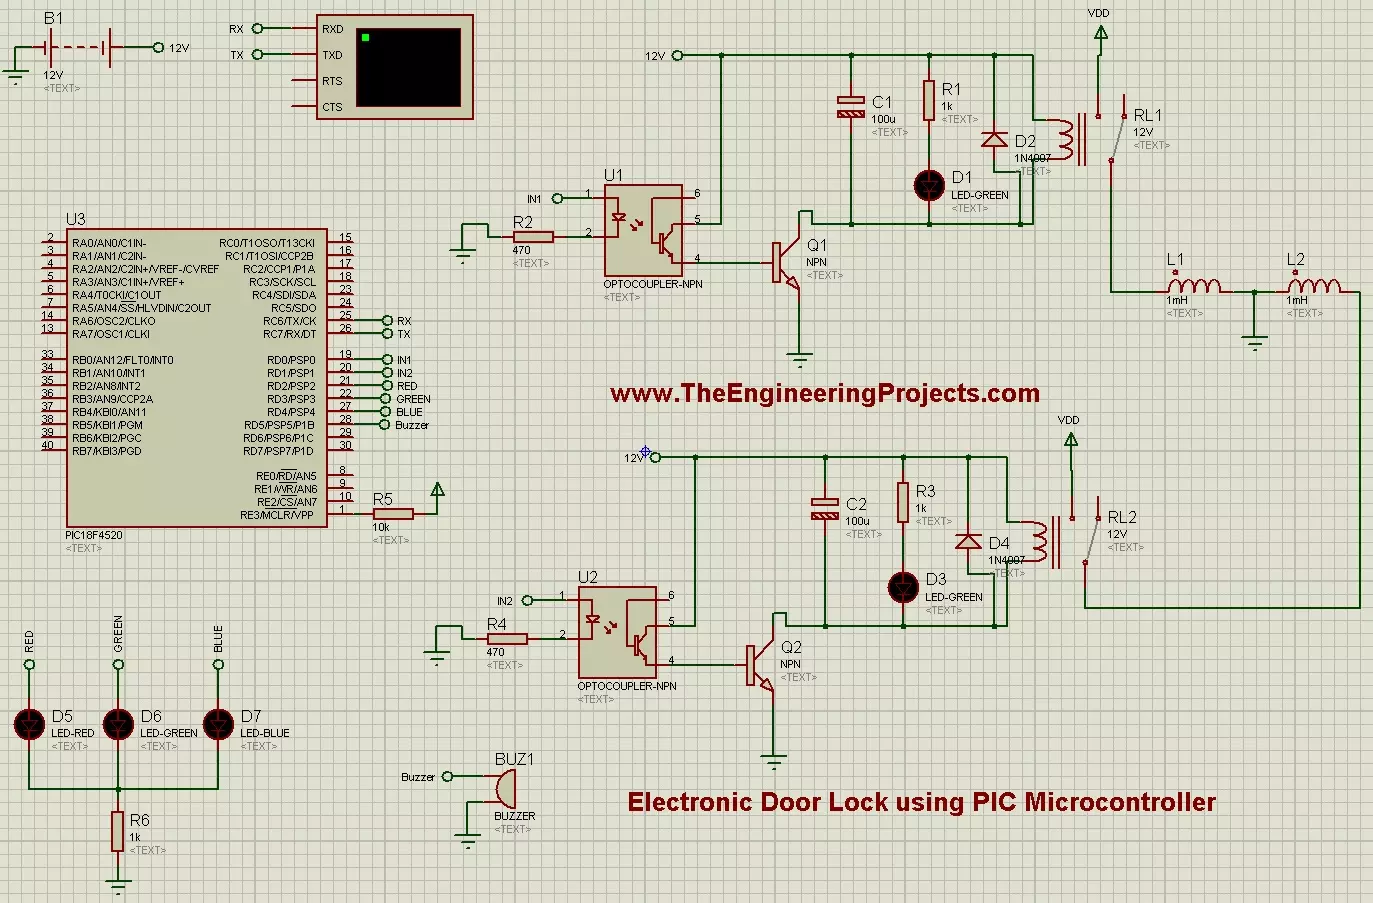
Hello friends, hope you are having fun. Today, I am going to share two types of Electronic Door Locks design using PIC Microcontroller and simulated in Proteus ISIS software. We all know about Electronic Door Locks as we have seen them in many homes. In electronic door locks, there's some password that is only known to some persons. Now if you enter the wrong password then the door won't open up and will ask for the password again. And if you keep on trying the wrong password then it will start the buzzer or can alert the concerned person via SMS etc. So, such electronic door locks are quite common in our society and are considered among the best electronic door locks.
Today, I am going to share a similar project in which I have simulated an Elect ...
Hello friends, hope you all are fine and having fun with your lives. Today, I am going to share a complete list of Electronics Projects which I have posted on our blog. I hope you are gonna enjoy these electronics projects. Most of these electronics projects are designed using Proteus simulation software. I have also uploaded these simulations in the respective project tutorial. So, you can download those projects and can learn from them a lot. If you ask me then I suggest that instead of downloading these electronics projects simulations, you should design them on you own so that you learn from them. I know you are gonna do mistakes but you won't learn unless you do mistakes. :)
All these projects are completely designed by our team so other blog ...
Hello friends, hope you all are fine and having fun in your lives. Today, I am going to share Top 3 PIC C Compiler. We all know about PIC Microcontrollers because of which now we can quite easily add complex automation in our projects. So, today, I am going to share C compilers for PIC Microcontrollers. When an engineer starts working on some engineering project then he must have to choose a microcontroller. PIC is most commonly used Microcontroller in engineering projects. So, now when you have selected that you are gonna use PIC Microcontroller in your project then there comes a need which compiler to use for designing programming code for PIC Microcontroller.
It's quite a difficult as well as important decision because I have seen that once you ...