In the previous tutorial, I explained Getting Started with PIC microcontrollers and the software etc. Today, I am going to explain the hardware of PIC18F452 i.e. the functions available in PIC18F452. In other words, working of pins. We have a total of 40 pins in 18F452 microcontroller. Different PIC microcontrollers have different pins and different functions. Some of the PIC Microcontrollers lack the below functions and some of them have much more functions than these. So, here I am just discussing the PIC Microcontroller 18F452 because it is a moderate one and is mostly used in engineering projects. It's an 8-bit microcontroller. So now we are gonna have a look at the functions available in the PIC18F452 microcontroller. In the next tutorial, I ...
Update: We have created a new version of this library, which you can check here: Arduino Mega 2560 Library for Proteus V2.0.
Hello friends, hope you all are fine. In today's post, I am going to share Arduino Mega 2560 Library for Proteus. In the previous post, I have shared the Arduino UNO Library for Proteus and I have mentioned that I am gonna share more Arduino Libraries soon. Actually these days I am quite excited about this Proteus component designing and I am designing the Arduino boards as a starter. So, till now I have designed two Arduino boards in Proteus. First one was Arduino UNO which I have provided for download in previous post and today, I am going to share Arduino Mega 2560 Library for Proteus.
In the coming posts, I am gonna sh ...
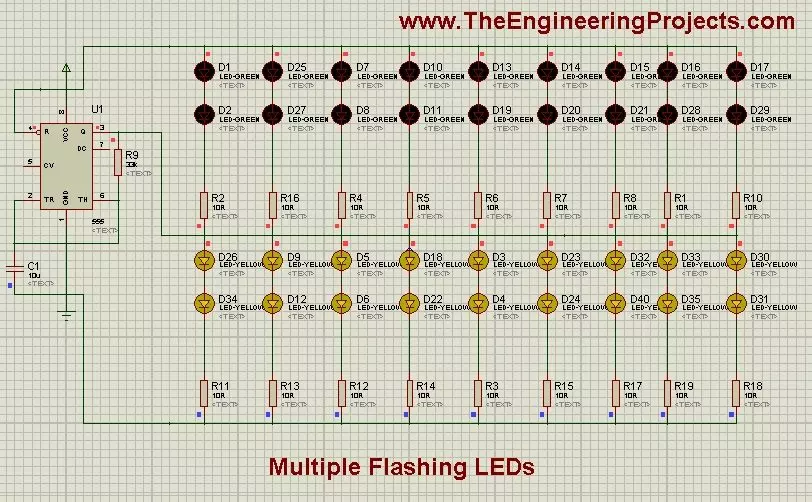
Hello friends, hope you all are enjoying and having fun. In today's tutorial, we are gonna see How to design a Multiple LED Flasher Project using 555 Timer in Proteus ISIS. In our previous tutorial we have seen How to design a LED Flasher Project with 555 Timer in Proteus ISIS, in which we have flashed single and double LEDs. In today's post, I am gonna extend that previous tutorial and will see How to flash multiple LEDs with 555 Timer in Proteus ISIS.
Its quite a quick tutorial, as I don't have much material on it and its also quite simple so no much explanation is required. The complete project is given at the end for download but again as I always mention, try to design it by yourself, so that you get some knowledge out of it.This type of proj ...
Hello friends, I hope you all are doing great. In today's tutorial, we are gonna have a look at detailed Introduction to TIP35. It is a reliable silicon NPN transistor that is projected to use in common persistence amplification and swapping capitulations. It is existing in TO-247 that is no more used by most fabricators. It's corresponding transistor TIP36 which is PNP transistor.
It is a communal transistor which is used in several industrial projects where audile magnification is required. Its structures are good-observing much the similar refusing for the exciting power acceptance that is rather lesser. In today’s post, we will have a look at its fortification, wreckage, eminence, claims, etc. I will also share some links where I have connecte ...
Thank you for joining us for yet another session of this series on Raspberry Pi programming. In the previous tutorial, we built a motion sensor-based security system with an alarm. Additionally, we discovered how to use Twilio to notify the administrator whenever an alarm is triggered. However, in this tutorial, we'll learn how to build a stop motion film system using raspberry pi 4.
What you will make
With a Raspberry Pi, Py, and a pi-camera module to capture images, you can create a stop-motion animated video. In addition, we'll learn about the various kinds of stop motion systems and their advantages and disadvantages.
The possibilities are endless when it comes to using LEGO to create animations!
...
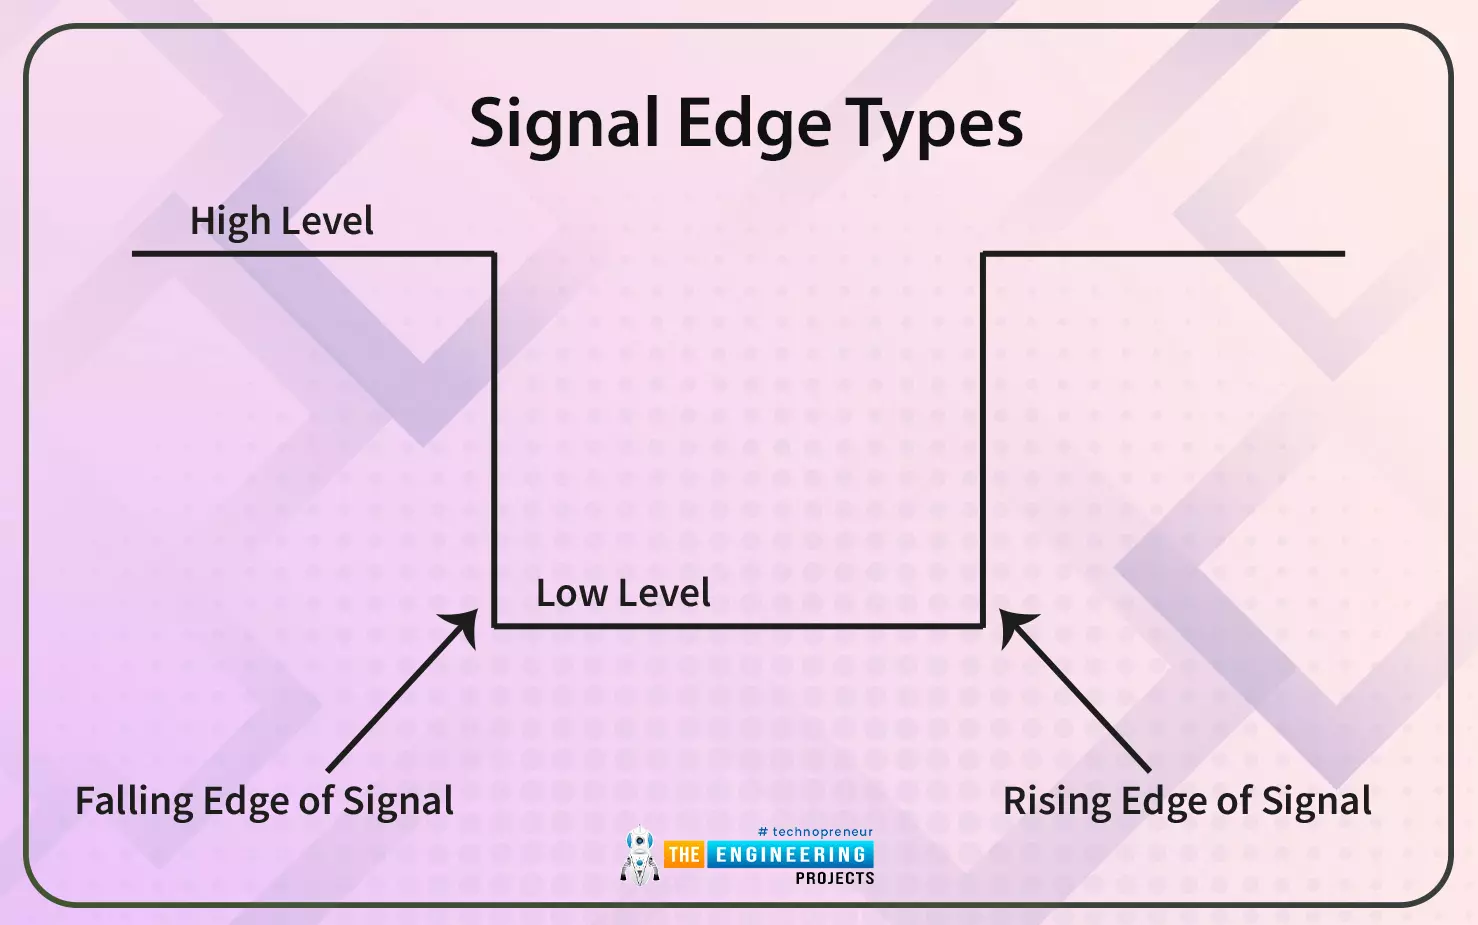
An Analog to Digital Converter (ADC) converts a continuous signal (usually a voltage) into a series of discrete values ??(sequences of bits). The main features are:
Resolution (in analog terms): It is the minimum variation of the analog input voltage that can determine the variation of the LSB, that is of the least significant bit of the output code. Since the quantization step Q corresponds to the LSB, it can be said that the resolution coincides with the quantization step Q (and therefore is measured in Volts). We can say that the quantization step Q corresponds to the LSB because two contiguous quantization bands, each of amplitude Q, are identified by codes that differ only for the least significant bit.
Resolution (in digital terms): It is the number n of bits present at the co ...
Hello friends, I hope you all are doing great and having fun in your lives. In today's tutorial, we are gonna design a Heart Beat Monitor using Arduino in Proteus ISIS. You should download this Heart Beat Sensor Library V2.0 for Proteus because we are gonna use that to detect heart beat in Proteus.
I have also used a 20x4 LCD which will display our heart rate value. You should download this New LCD Library for Proteus. I have counted the heart beat for ten seconds and then I have multiplied it with 6 to get the heartbeat per minute which is abbreviated as bpm (beats per minute). So, let's get started with Heart Beat Monitor using Arduino in Proteus ISIS.
Heart Beat Monitor using Arduino in Proteus
First of all, click the below button to downloa ...
Hey readers! Welcome to the penetrative guide to PCB manufacturing. Hopefully, you are doing well and looking for something great. The solder mask is the most vital component in manufacturing a printed circuit board (PCB), which guarantees reliability and ensures that everything functions smoothly.
These printed circuit boards serve as the backbone for almost all modern electronics, right from the simple household consumer products like a smartphone and a laptop to diverse applications such as industrial machinery and space equipment. A PCB provides physical and electrical connections and support for the components of electronics. The most crucial area for protection is the solder mask because of its great contribution to the copper behavior of an entire circuit regarding oxidation, dirt, ...
Hello friends, I hope you all are doing great. In today’s tutorial, we will have a look at the detailed “Switch Statement in JavaScript”. It’s our 6th tutorial in JavaScript Series.
As we have learned about the conditional statement and its types (if, if..else, If...else if) in the last article, a conditional statement is the most useful and common feature in the programming language.
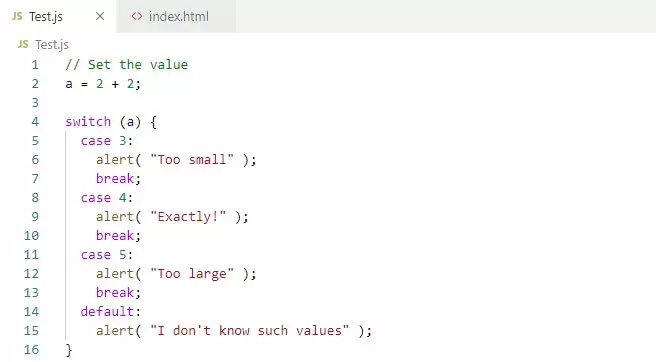
Switch is also a type of conditional statement and it will evaluate an expression against multiple possible cases and run one or more blocks of codes base on matching cases. The switched statement work almost as if...else if statement containing many blocks, and it does work so more efficiently than repeated if...else if statements.
Switch Statement in JavaScript
...
Hello everyone, today I am going to share Stepper Motor Control using PIC Microcontroller. We are all quite well aware of stepper motor but if you don't have much of the idea about this motor then you should give it a google search. :P Stepper motor is used in such projects where precise movement is required. Projects where we need to move the object at some particular angle. Stepper Motor works on electromagnetic phenomena. Electromagnets are present in the stepper motor and when we supply voltage across them, these electromagnets got polarized and produce a magnetic field and in order to depolarize them, what we need to do is simply depolarize these electromagnets. We all know that in motors, we have rotor and stater so in stepper motor these el ...