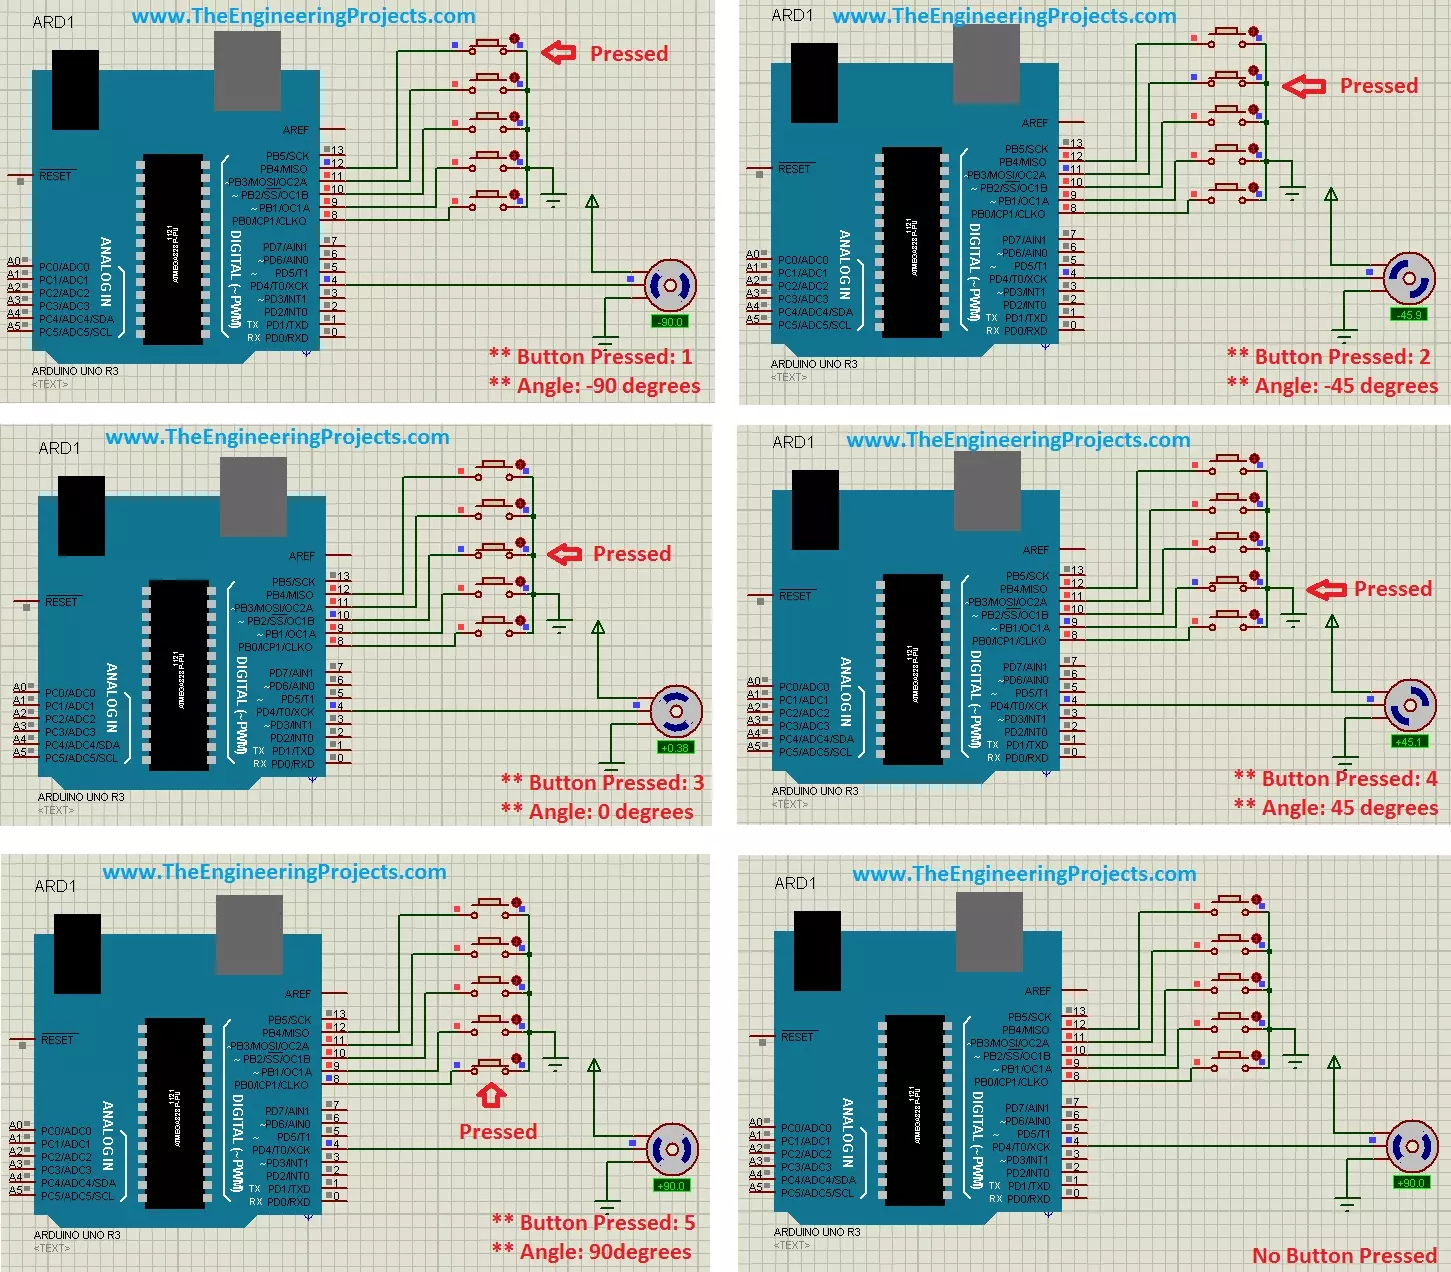
Hello friends, hope you all are fine and having fun with your lives. Today's post is about the Controlling of Servo Motor with Arduino in Proteus ISIS. Servo Motor is a common motor used in engineering projects for precise circular motion. We can move the servo motor at any desired angle, which is not possible in the case of other motors i.e. Stepper or DC.
For example, suppose I want to move an antenna at a precise angle of 47.5 degrees then if I use DC Motor, I have to use an encoder. So, in such cases instead of using a DC motor, I will prefer Servo Motor.
I have already posted Angle Control of Servo Motor using 555 Timer in which I have controlled servo motor using 555 timer and another tutorial about Controlling of Servo Motor using PIC Micro ...
Today we will talk about an extremely powerful tool in the use of microcontrollers. The Serial communication, specifically the USART (Universal Synchronous Asynchronous Receiver Transmitter) standard.
The system works using two wires. RX (Receiver) and TX (Transmitter), connecting two devices. The RX of one is connected to the TX of the other. If the choice is for a synchronous connection, it may be necessary to add one or two more pins to operate as a “traffic light”. But most current microcontrollers can operate asynchronously, which saves us the expense of pins. Data is sent, as the name implies, in a series of bits.
ESP8266 provides us with two ports, one of them converted to USB in the NodeMCU module.
Applications
The range of uses of se ...
Today, we are gonna have a look on How to Interface Ultrasonic Sensor with Arduino. Few days ago, I have posted a complete tutorial on How to Use Ultrasonic Sensor Library in Proteus and later I have posted different examples on How to Simulate Ultrasonic Sensor in Proteus. Those posts were about Proteus Simulations and weren't about hardware interfacing, so I thought today let's interface it in hardware.
Simulation is a good starting point for projects but they are really far away from real world. It happened to me a lot of times that my simulations are working perfectly fine but when I design the same circuit in hardware then it says no I am not gonna work. :) So, the bottom line is never trust simulations, unless you properly test it on hardwar ...
[vc_row][vc_column][vc_column_text]
In the previous tutorial, we have seen how to Get Started with Pixy Camera, which was quite a basic tutorial and we have covered just the basic cables required to set up pixy camera. Now along with cables we are also gonna need software for training our Pixy Camera. So in this tutorial we are gonna see how to install Pixy Camera Software which is named as PixyMon. As I explained earlier in previous post that first of all, we need to connect our Pixy Camera with Computer or laptop and then using its software PixyMon we need to train our Pixy Camera so that it can recognize objects present in front of it.
PixyMon is quite a simple software and quite easy to use. In this post, we are not gonna check How to use PixyM ...
Hi Folks! I hope you’re well today. I welcome you on board. Happy to see you around. In this post today, I’ll walk you through the Introduction to LF353N.The LM393N is a wide bandwidth and high input impedance Dual Input JEFET op-amp that is widely used in high-speed integrators and low noise circuits. The low bias current and input noise make it a good pick for audio amplifier applications. It carries a high slew rate (13V/uS) and wide bandwidth around (4MHz).
I suggest you read this post all the way through, as I’ll detail the complete introduction to LF353N covering datasheet, pinout, features, and applications.
Let’s dive in.
Introduction to LF353N
Introduced by the Texas Instrument, the LM393N is a high input impedance dual op-amp where the input of this device is attached ...
Hello friends, hope you all are having fun and enjoying life. Today's post is quite a simple one and is about designing of circuit diagram of buzzer in Proteus ISIS. Buzzer is quite a common electrical component which is used in almost every Embedded Systems project. For example, you have seen a simple UPS, it gives a beep each time the light goes off or it has depleted its battery. Buzzer is normally used for given some indication and normally this indication is kind of a warning.
Proteus has a builtin component for buzzer and its an animated component means it gives a sound (beep) when its turned ON. So, I am gonna use that one and will give you an actual beep on it. So, it won't be much difficult and quite a simple procedure. In this post, I am ...
Hello friends, I hope you all are fine and having fun with your lives.Today I am not gonna post a new topic or tutorial, instead I am going to arrange all my Arduino Projects and tutorials in this post, as its better to have all of them in one place. I recently posted a PIC Microcontroller Projects post and it was highly appreciated by the followers so I thought to do the same with Arduino as well because I have posted more Arduino projects as compared to PIC Microcontroller.
I will post all the Arduino Projects & Tutorials links below in sequence i.e. from easy to pro level so if you are a new user and want to get command over Arduino projects then read all of them one by one. Moreover, I will also keep on updating this post whenever I am go ...
Hey Fellas! I hope you are doing great and getting most out of your lives. Today, I am going to uncover the details on the Introduction to 2n5401. It is a PNP(positive-negative-positive) bipolar junction transistor which comes in TO-92 casing. It consists of N doped semiconductor that exists between the two layers of P doped material. It is useful for the applications where regulated negative voltage is required at a modest current level. I'll give you brief details about this amplifier transistor. Let's get started.
Introduction to 2n5401
2n5401 is a PNP bipolar junction transistor, also known as amplifier transistor, that comes with collector-emitter voltage of 150V and mostly used for amplification purpose.
In order to operate this transis ...
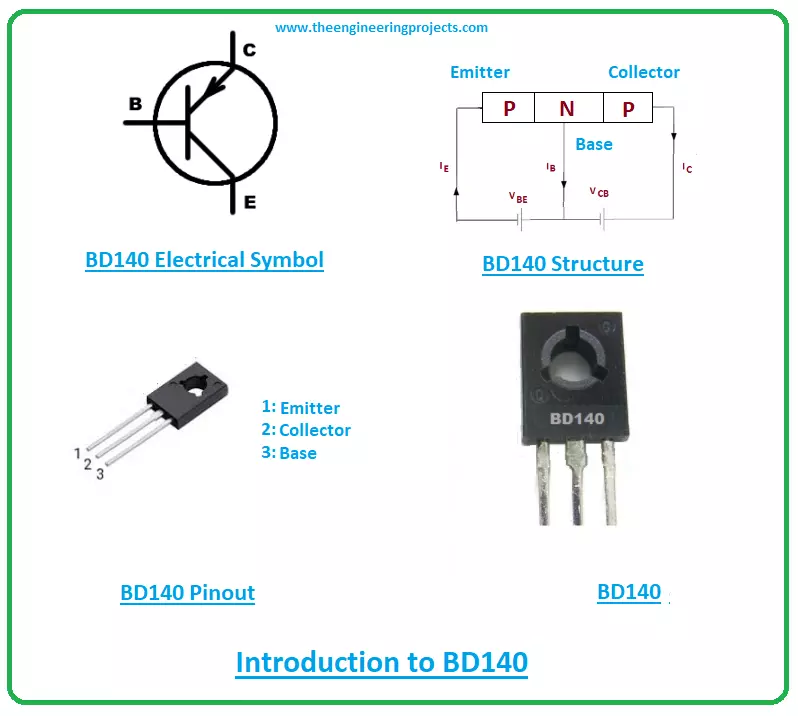
Hello Friends! Hope this finds you well. I welcome you on board. Thank you for clicking this read. In this post today, I’ll walk you through the Introduction to BD140.
BD140 is a medium power bipolar junction transistor that is mainly used for switching and amplification purpose. It belongs to the PNP transistor category and comes in the TO-126 package. It is made up of silicon material with collector current 1.5A which indicates it can support loads under 1.5A. The collector-base and collector-emitter terminal voltages are 80V and emitter-base voltage is 5V which is used to bias the transistor.
In this post, I’ll be detailing the complete introduction to BD140 covering pinout, working, absolute maximum ratings, physical dimensions, alternatives ...
The IoT is the interconnection of physical objects or devices with sensors and software accessing capabilities to communicate data or information over the internet.
To build an IoT network, we need an interface medium that can fetch, control, and communicate data between sender and receiver electronics devices or servers.
Espressif Systems created the ESP32 Wi-Fi chip series. The ESP32 module is equipped with a 32-bit Tensilica microcontroller, 2.4GHz Wi-Fi connectivity, an antenna, memory, and power management modules, and much more. All of these built-in features of this ESP32 module make it ideal for IoT applications.
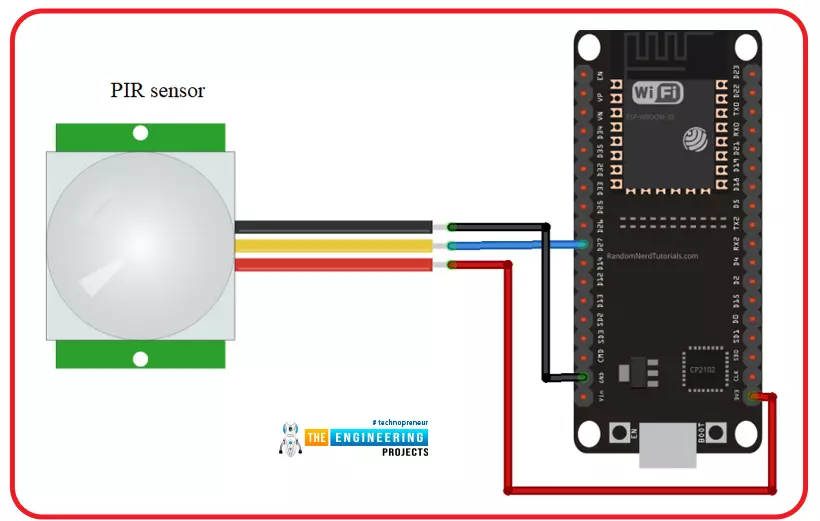
Hello readers, I hope you all are doing great. In this tutorial, we will learn another application of ESP32 in the field of IoT (Internet of Things). We are using a PIR s ...