The WebM video format has its set of limitations. It can be used on some platforms, but is incompatible with the most popularly used multimedia software. With the masses spending more time in watching videos on their mobile devices, having an incompatible video format like WebM doesn’t make much sense. Whether you are a professional, a business or spend a lot of time watching videos, you would want to convert WebM to MP4. And you can achieve this easily and quickly using the Movavi video converter.
You will often come across a number of online tools that claim to offer free video conversion. But all those providers come with a hidden caveat. No one can afford to run a website for free and offer free services at the same time. So your video files ...
There are quite a number of theories that revolve around thesis writing. Technology students are a busy lot with a lot of theory and practical work to deal with. For students in other departments, there is a belief that a thesis or dissertation is written to prove to the student’s committee that what has been done and communicated through the research is worthy of a degree award. However, the view among tech students is different: the idea is to have a research that can be documented. Ideally, both these perspectives are correct but the main idea is to have reliable research even for future reference. Even with the search for homework online help to get a good mark, here are top 3 engineering tips to use as made available by a thesis writing servic ...
The majority of schools around the world rely on the traditional methods of teaching and learning. Students have to attend lectures in the classrooms, read paper textbooks and memorize lots of irrelevant facts and figures from them to prepare for different tests, they do handwriting assignments and complete different types of essays such as a five-paragraph essay or compare and contrast essay on Picasso painting. All these methods are boring, inefficient and outdated. But there are schools that use innovative teaching methods, strategies, and learning techniques and where the learning process is really fun.
The innovation in education can be presented in different ways, for example, integrating new teaching methods, cutting-edge technologies, rejec ...
Hello everyone, I hope you all are doing great. In today's tutorial, I am going to share a new version of Heart Beat Sensor Library for Proteus i.e. version 2.0. I have already posted the First Version of the Heart Beat Sensor Library for Proteus in which you can use the TestPin and if it's HIGH then a single heartbeat pattern will start. So, if you use that library, you will always get the same result for your heartbeat. But in this 2nd version, I have added variable heartbeat depending on the value of TestPin. I will show you in detail, how to do it.
I have also posted a project Heart Beat Counter using Arduino in which I have shown you How you can use this sensor and count your Heart Beat. So, let me show you How you can use this new Heart ...
Hello everyone, I hope you all are doing great. In today's post, I am going to share a Final Year Project in detail, named as Real Time Security Control System using XBee and GSM. I will give you all the details so that you can easily design it on your own. I've given the Proteus Simulation to download below. In that zip file, you will get both the Arduino codes and Proteus Simulations.
I have divided this whole project design into four parts. If you got into any trouble in your project, then ask in comments and I will try my best to resolve them. So, today we are gonna have a look at the basics of this Security project. There are a lot of systems introduced in the market these days that are used to transfer sensor data from one node to another ei ...
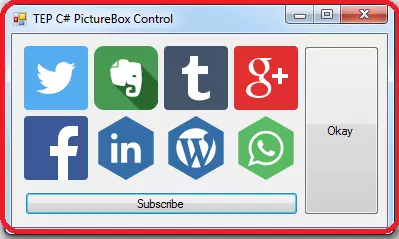
Hey everyone hopes you are good. In this tutorial, I'm going to share an amazing GUI tool which is mostly used in Point of Sale application which is C# PictureBox Control. As the name reflects it's feature, it's the box which allows you to preview the images. In short, we can say that this the PictureBox which is used to show images on the application, such as the logo or social media icon etc. In my previous tutorials, I have explained C# ListBox Control, C# Button Control, C# Label Control and C# TextBox Control which are similar to C# PictureBox. You will get to know about each and everything of C# PictureBox including Events. You can simply drag and drop the C# PictureBox from the toolbox in design tab and adjust that according to your needs.
...
Hello everyone, I hope you all are doing great. In today's tutorial, I am gonna show you How to Select Best Enterprise eCommerce Platform. Customer experience has been evolved in an amazing way in last decade. Nowadays, customers pay evident attention to the merchants that provide them feel of security and impeccable customer experience. Running an online business is now tricky though, you need to maintain high traffic, customer satisfaction and provide them a flawless experience that allows them to come again and again on your site.
Poor customization and site design that comes with glitches can scare the hell out of your customers. This would make a negative impact on the customer experience and your overall credibility may get affected. It is g ...
Hey, everyone, hope you are doing great. In today's article, we are going to explore C# Checked ListBox Control. In the previous article, we discussed in details about C# TextBox, C# Label, C# ListBox, C# ComboxBox and C# Button. C# Checked ListBox plays very important role in Point Of Sale applications. In some words, we can say this is a combination of check boxes and list. C# Checked ListBox is used to gain specific information from end-user. It's mostly used in survey-based application to gain the voting for a specific purpose.
We will work with Checked ListBox same as we have worked with ListBox & ComboBox. You can use C# Checked ListBox for multiple purposes. You can use this as the attendance taker to mark the attendance of students.
C# ...
Hello, everyone, I hope you are doing great. In this tutorial, I am going to explain you about C# checkbox control, in my previous tutorials I have already explain you, C# RadioButton Control, C# ListBox Control, C# Button Control and C# Checked ListBox Control. C Sharp checkboxes have their own values in point of sale mission and desktop application development. Checkboxes are basically used to retrieve the specific data from the user.
C# CheckBox allows the user to give specific input. It's mostly used where we have to retrieve the specific data from the user such as the gender selection, terms and condition agreement, and age-restricted data. You can simply use a single object C# CheckBox or multiple objects it totally depends on your requireme ...
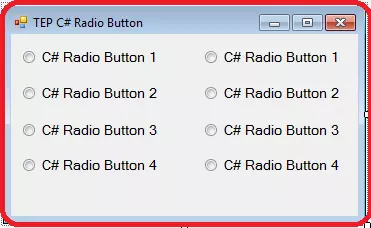
Hello folks, hope you are doing good. Today in this article I'm going to explain you all about C# RadioButton Control. In my previous articles, we discussed C# Checked ListBox & C# ListBox Control. C# RadioButton is also known as the OptionButton. The radio button allows the user to select the specific values as the input. When user will click on the radio button, it will get activated, a user can select only one radio button at the same time.
Radio buttons have mostly used in the point of same applications and signup forms. You have mostly seen the radio button for the gender selection in the forms. Radio button makes easier for a user to give input. You can make specific input values. You can create any kind of application with the help of R ...