Hello friends, I hope you all are doing great and having fun in your lives. In today's tutorial, we are gonna design a Heart Beat Monitor using Arduino in Proteus ISIS. You should download this Heart Beat Sensor Library V2.0 for Proteus because we are gonna use that to detect heart beat in Proteus.
I have also used a 20x4 LCD which will display our heart rate value. You should download this New LCD Library for Proteus. I have counted the heart beat for ten seconds and then I have multiplied it with 6 to get the heartbeat per minute which is abbreviated as bpm (beats per minute). So, let's get started with Heart Beat Monitor using Arduino in Proteus ISIS.
Heart Beat Monitor using Arduino in Proteus
First of all, click the below button to downloa ...
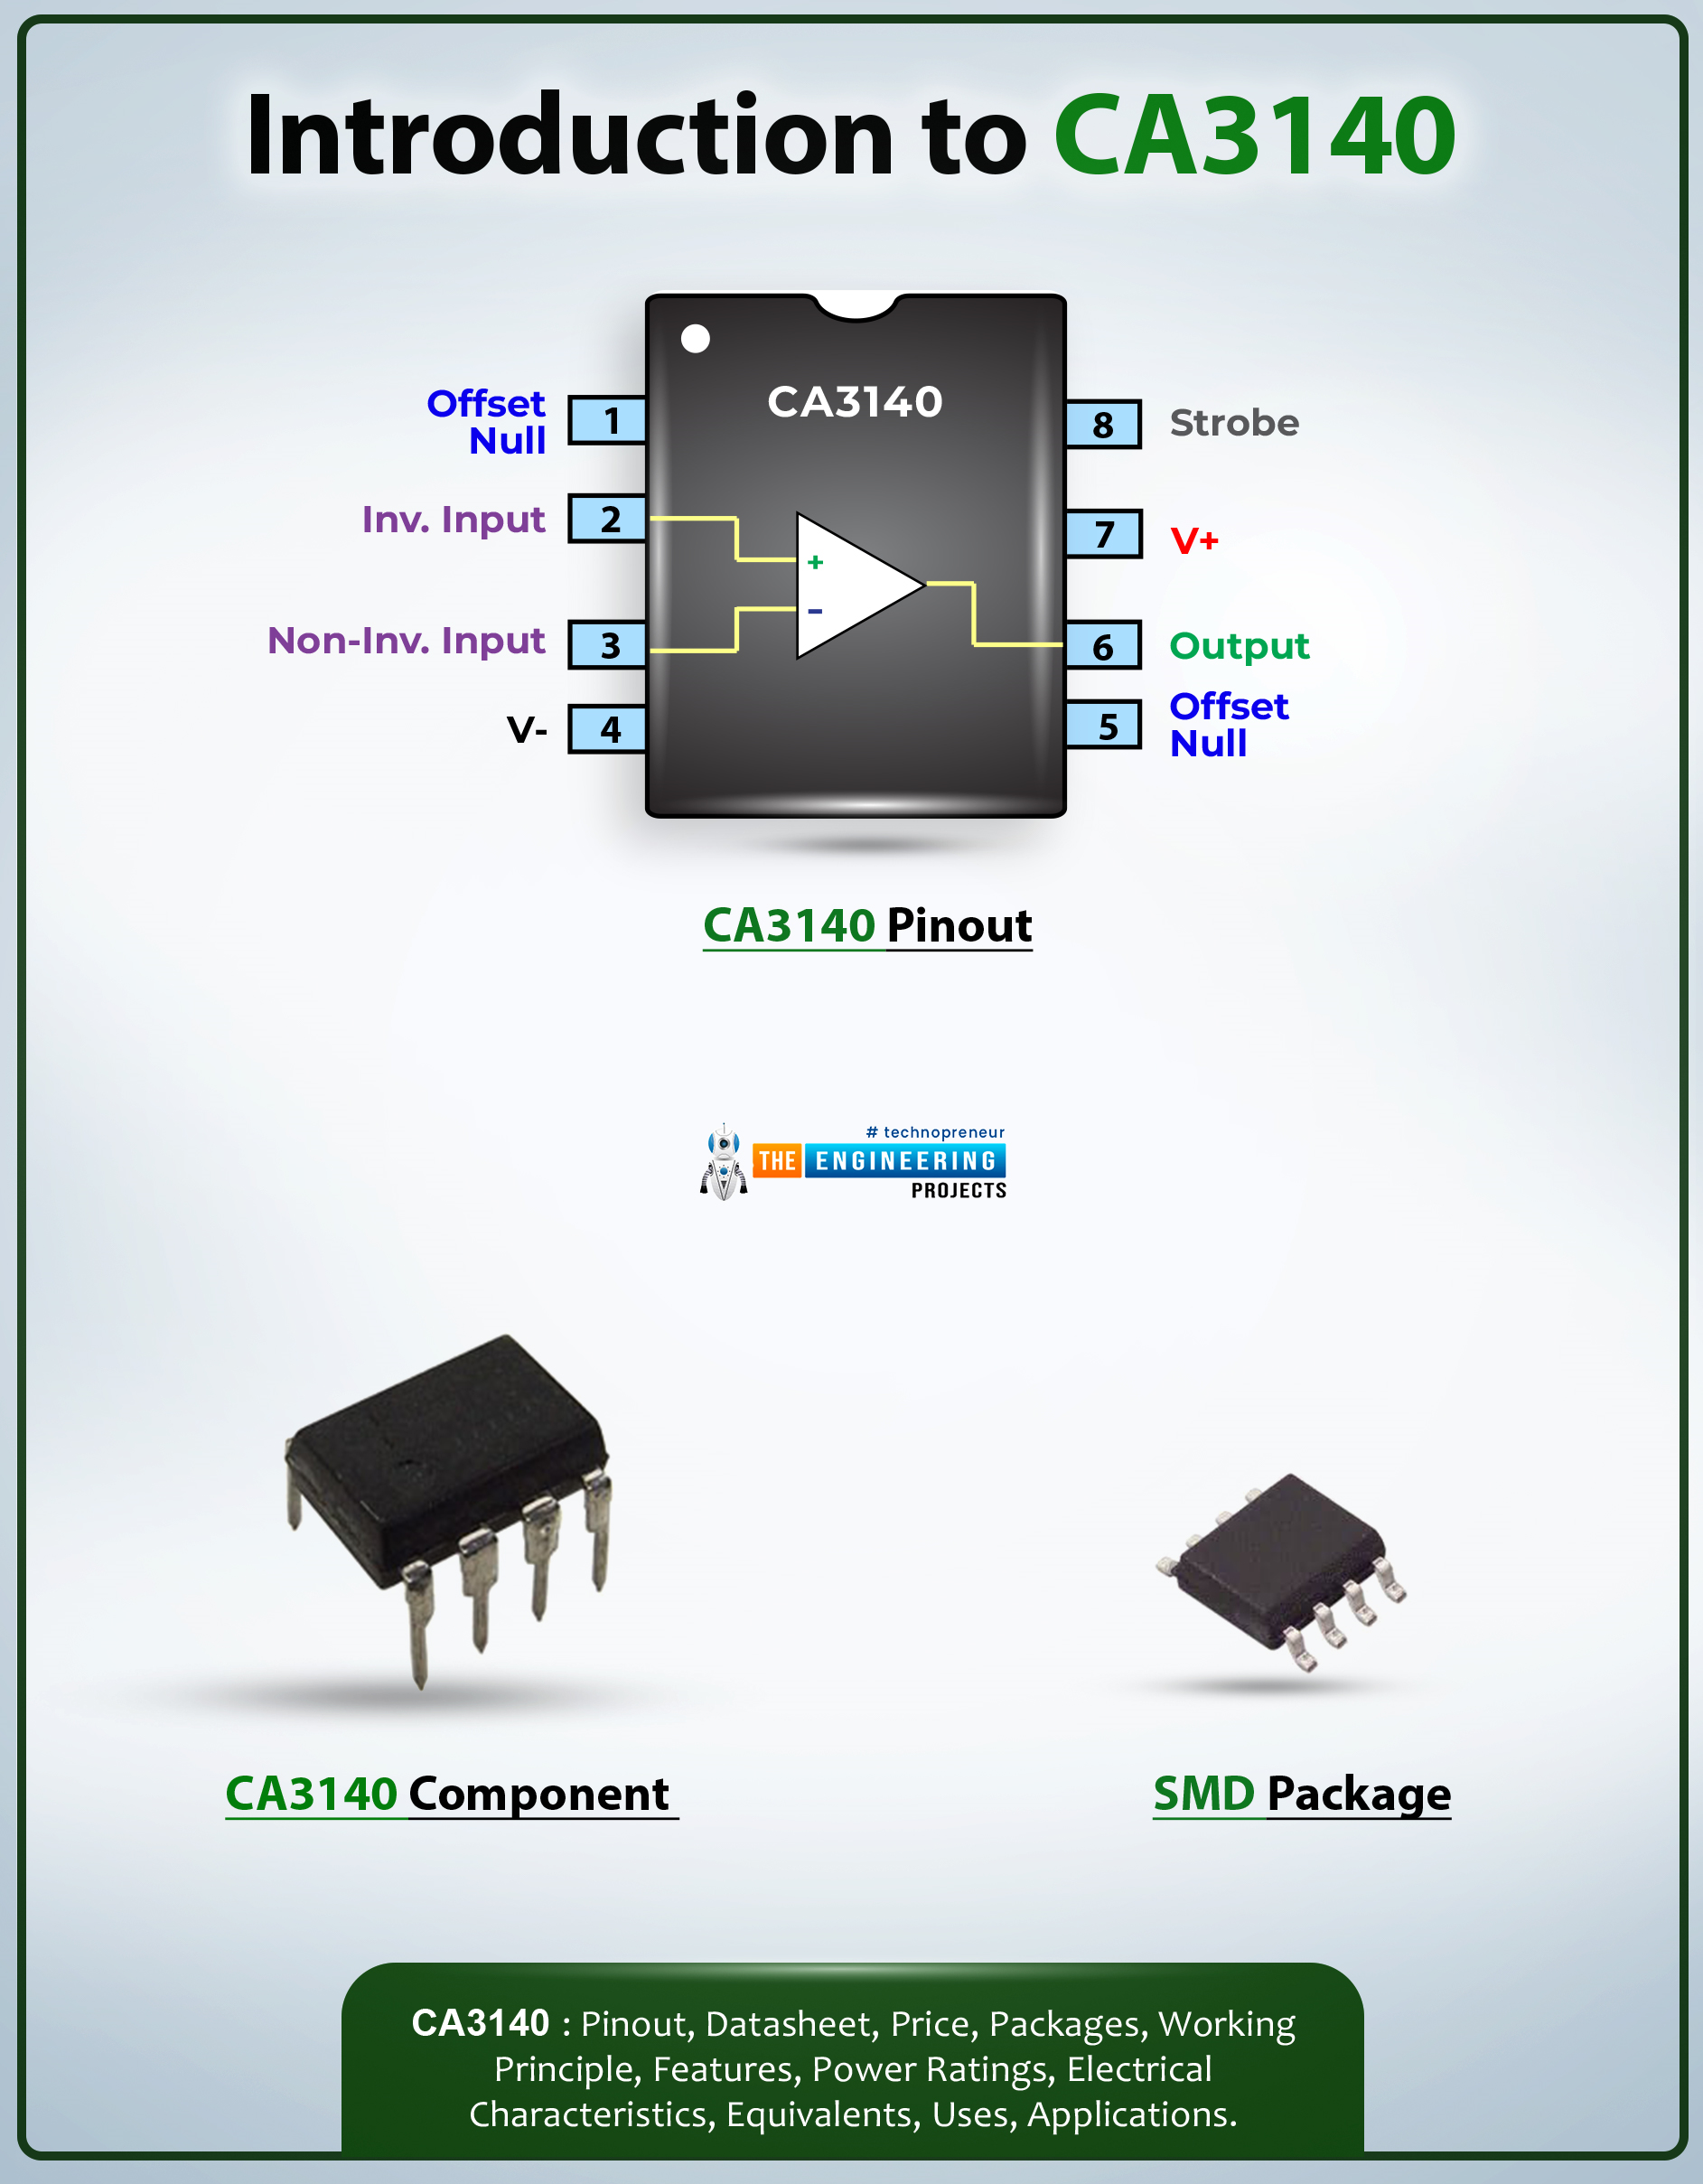
Hi Folks! I welcome you on board. Thank you for clicking this read. Happy to see you around. In this post today, I’ll walk you through the Introduction to CA3140.The CA3140 is a general-purpose op-amp that comes with a 4.5MHz frequency. It is a BiMOS Operational Amplifier incorporated with MOSFET Input/Bipolar Output that extends the advantages of both… high-voltage bipolar transistors and high-voltage PMOS transistors on a single integrated chip.
I suggest you read this post all the way through as I’ll detail the complete Introduction to CA3140 covering datasheet, pinout, features, and applications. Let’s jump right in.
Introduction to CA3140
The CA3140 is a general-purpose op-amp that comes with MOSFET Input/Bipolar Output and extends the advantages of both… high- ...
Hi Guys! Hope you all are doing great! We always feel happy when you come back again and again for useful information so you can excel and grow in your relevant field. Today, I am going to unlock the details on the Introduction to 2n2219. It is an NPN (negative-positive-negative) bipolar junction transistor (BJT) which is specially designed for a small signal general purpose and switching applications. It contains P doped semiconductor that lies between the two layers of N doped material.
You can also check an Introduction to 2n2905 which is a complementary PNP transistor of this NPN transistor.
I'll try to cover every aspect related to this transistor so you don't need to go anywhere and you find all information in one place. Let's dive in and ...
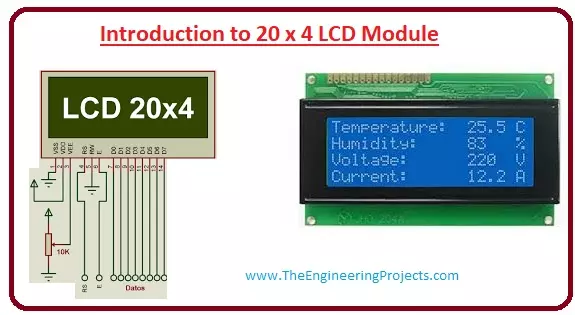
Hello friends, I hope you all are doing great. In today’s tutorial, we will have a look at the Introduction to 20x4 LCD Module. The LCD stands for liquid crystal display, which works on the light modulation features of liquid crystals. It is available in electronic visible display, video display and flat panel display. There are numerous categories and features are exist in markets of LCD and you can see it on your mobile, laptop, computer and television screen.
The invention of LCD gives new life to electronic industries and replaces lED and gas plasma techniques. It also replaces the CTR (cathode ray) tube that is used for visual display. The input power consumed by the liquid crystal display is less than the light-emitting diode and plasma display. In today's post, we will have a loo ...
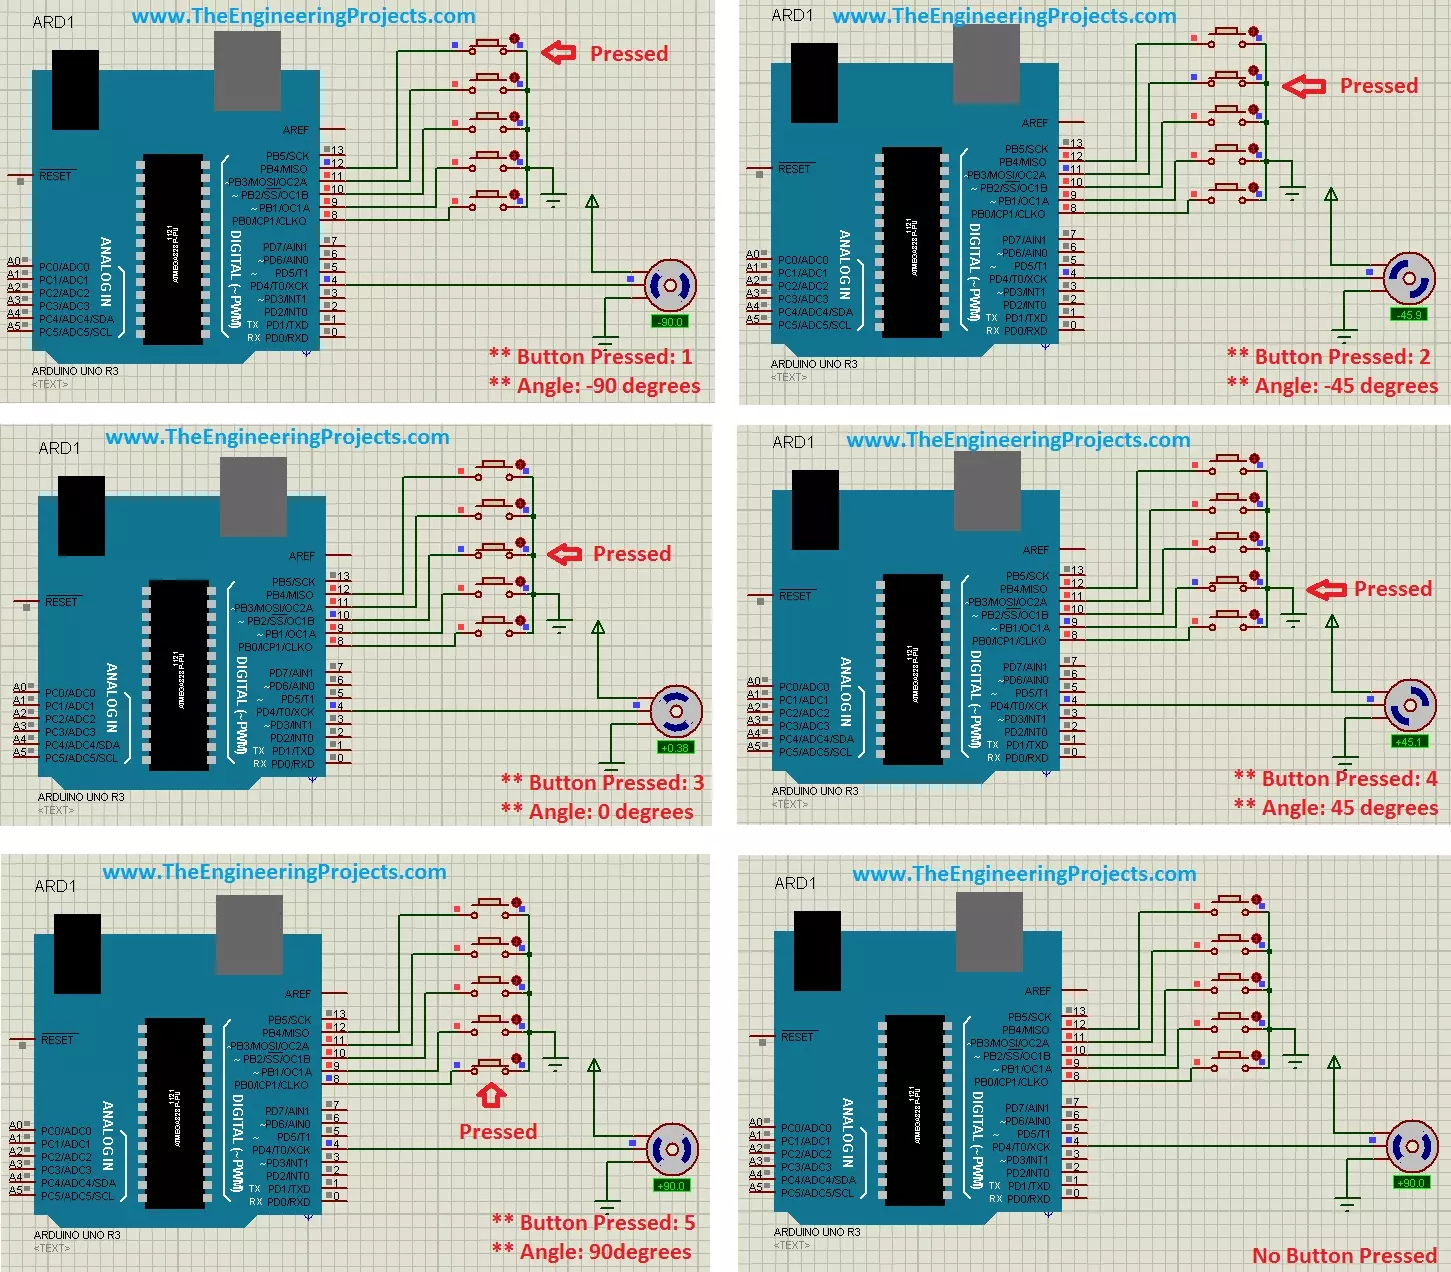
Hello friends, hope you all are fine and having fun with your lives. Today's post is about the Controlling of Servo Motor with Arduino in Proteus ISIS. Servo Motor is a common motor used in engineering projects for precise circular motion. We can move the servo motor at any desired angle, which is not possible in the case of other motors i.e. Stepper or DC.
For example, suppose I want to move an antenna at a precise angle of 47.5 degrees then if I use DC Motor, I have to use an encoder. So, in such cases instead of using a DC motor, I will prefer Servo Motor.
I have already posted Angle Control of Servo Motor using 555 Timer in which I have controlled servo motor using 555 timer and another tutorial about Controlling of Servo Motor using PIC Micro ...
Hello Friends! I aspire you a very happy life. Whenever you come over and visit our site, we feel happy to keep you updated with relevant information that can help resolve your questions and queries. Most of the hobbyist and students take interest in electronic devices and components that are the building blocks of electronic projects. Today, I am going to uncover the details on the Introduction to DG408. It is a multiplexer, also known as data selector, that comes with 8 channel input, in which of one the eight inputs is connected to the common output for the transmission of data over network in a specific bandwidth and time. It is an ideal choice for audio signal routing and single supply system. I'll discuss each and everything related to this ...
Hello friends, hope you all are fine and having fun with your lives. Today I am gonna post 555 Timer projects list which are already posted on our blog. Actually, I have posted many 555 Timer Projects on my blog but we don't have a list of these tutorials and they are quite scattered. So, today I thought to arrange them in a proper list so that you can find all of them in one place. All these 555 timer projects are simulated in my favorite simulating software Proteus. I have also given their simulations for download in almost all tutorials. If you feel problem in any of them then ask in comments and I will resolve them.
All these 555 Timer Projects and tutorials are written and designed completely by our team so we hold the complete ownership for ...
Hello readers, I hope you all are doing great. In our previous tutorial, we learnt how to make HTTP POST from ESP32 to the IFTTT server.
In this tutorial, we will learn about another application of the ESP32 module in the field of IoT (Internet of Things). We can publish multiple sensor readings from ESP32 to Google sheets via the IFTTT web service.
IFTTT is used as a third-party web service to integrate Google sheets with ESP32.
Fig. 1
Creating an IFTTT Account for Integrating ESP32 with Google Sheets
We are going to create an applet (on the IFTTT server) that is responsible to integrate the Webhooks and Google Sheets services.
While operating with the IFTTT server there are some services/utilities that we are going to deal with like Applets an ...
Hey Fellas! We always strive to give you useful information that resonates with your needs and requirements. Today, I'm going to unlock the details on the Introduction to 4n25. It is a standard single channel 6 pin optocoupler that contains silicon NPN phototransistor and gallium arsenide infrared LED. It is widely used in motor drive and control, communication and networking, and power management.
I'll try to cover every aspect related to this optocoupler so you don't need to go anywhere else and find all information in one place. Let's dive in and explore what it does and what are its main features.
Introduction to 4n25
4n25 is a standard single channel 6 pin industry standard phototransistor coupler that contains silicon NPN phototransistor ...
Hello friends, hope you all are fine and having fun with your lives. Today's post is about getting started with pixy camera. Now, the first thing comes in mind is what is Pixy Camera so let's first have a little introduction about Pixy Camera on which I recently worked. Pixy Camera is a small camera board which uses NXP microcontroller. Its a very powerful board and can get easily interfaced with simple Arduino UNO board. So, now we can do image processing even on Arduino UNO. Image Processing needs a powerful board that's why we can't interface simple webcam with Arduino UNO or mega etc. Before using pixy camera, when I need to do on board image processing I always used either Arduino YUN, Raspberry Pi or Arduino USB host shield but still it was ...