Hello everyone! I hope you all will be absolutely fine and having fun. Today, I am going to share my knowledge about Introduction to 1N4007. It is a PN junction diode. Diodes can be made by combining two different types of semiconductor e.g. P and N. PN junction is a junction formed between P and N types of semiconductors. You guys should also have a look at Introduction to 1N4148.
1N 4007 belongs to the series of 1NXXXX devices. Its an American standard numbering system standard used for semiconductor devices. This standard has been adopted globally now. In 1N 4007 the first part 1N indicates single junction semiconductor. 1N indicates 1 junction whereas N indicates the semiconductor diode. 4007 is the specific number to indicate the particular ...
Hello friends, I hope you are all fine and will be doing something special in your life. In today's post, we are gonna have a look at a detailed Introduction to MPU6050. MPU6050 is a sensor for motion processing devices. It is the world's first six-dimension motion tracking device. It was designed for low-cost and high-performance smartphones, tablets and wearable sensors. It is capable of processing nine-axis algorithms, it captures motion in X, Y and Z axis at the same time.
MPU6050 is used in different industrial projects and electronic devices to control and detect the 3-D motion of different objects. In today's post, we will have a look at its working, pinout, protocol, it's interfacing with Arduino, features, applications, etc. I will also share some links of projects wh ...
Hello everyone! I hope you all will be absolutely fine and having fun. Today, I am going to give you an elaboration on Introduction to LM293 an Integrated Circuit (IC). LM-293 is a dual independent accurate voltage comparator. LM 293 has a capability to perform its operation from a single supply source as well as from split power supply. The purpose to design LM-293 is to permit a common mode range to the ground level and it perform this operation with single power supply source.
LM-293 is the most common device in the market these days due to its high performance and cost effectiveness. This device is considered to be an ideal for a lot of electronics applications. LM-293 has a lot of features which make it different from all other devices. The ...
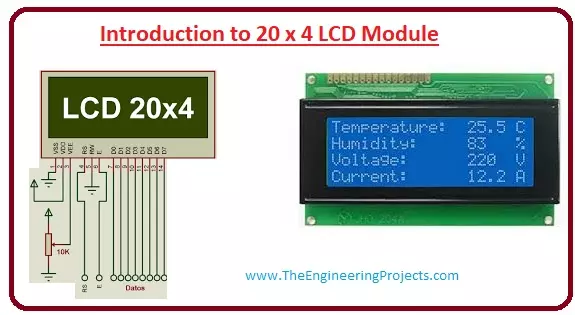
Hello friends, I hope you all are doing great. In today’s tutorial, we will have a look at the Introduction to 20x4 LCD Module. The LCD stands for liquid crystal display, which works on the light modulation features of liquid crystals. It is available in electronic visible display, video display and flat panel display. There are numerous categories and features are exist in markets of LCD and you can see it on your mobile, laptop, computer and television screen.
The invention of LCD gives new life to electronic industries and replaces lED and gas plasma techniques. It also replaces the CTR (cathode ray) tube that is used for visual display. The input power consumed by the liquid crystal display is less than the light-emitting diode and plasma display. In today's post, we will have a loo ...
Hello friends, hope you are having fun. In today's post, we will have a look at Serial Communication with 8051 Microcontroller in Proteus ISIS. In the previous post, we have seen a detailed post on LED Blinking Project using 8051 Microcontroller in Proteus ISIS, which was quite a simple tutorial. And I hope if you are new to 8051 Microcontroller then from that post you must have got some idea about C Programming of 8051 Microcontroller.
Now, today we are gonna go a little further and will have a look at Serial Communication with 8051 Microcontroller and we will also design the simulation of this project in Proteus ISIS software. 8051 Microcontroller also supports Serial port similar to Arduino and PIC Microcontroller. And the communication protoco ...
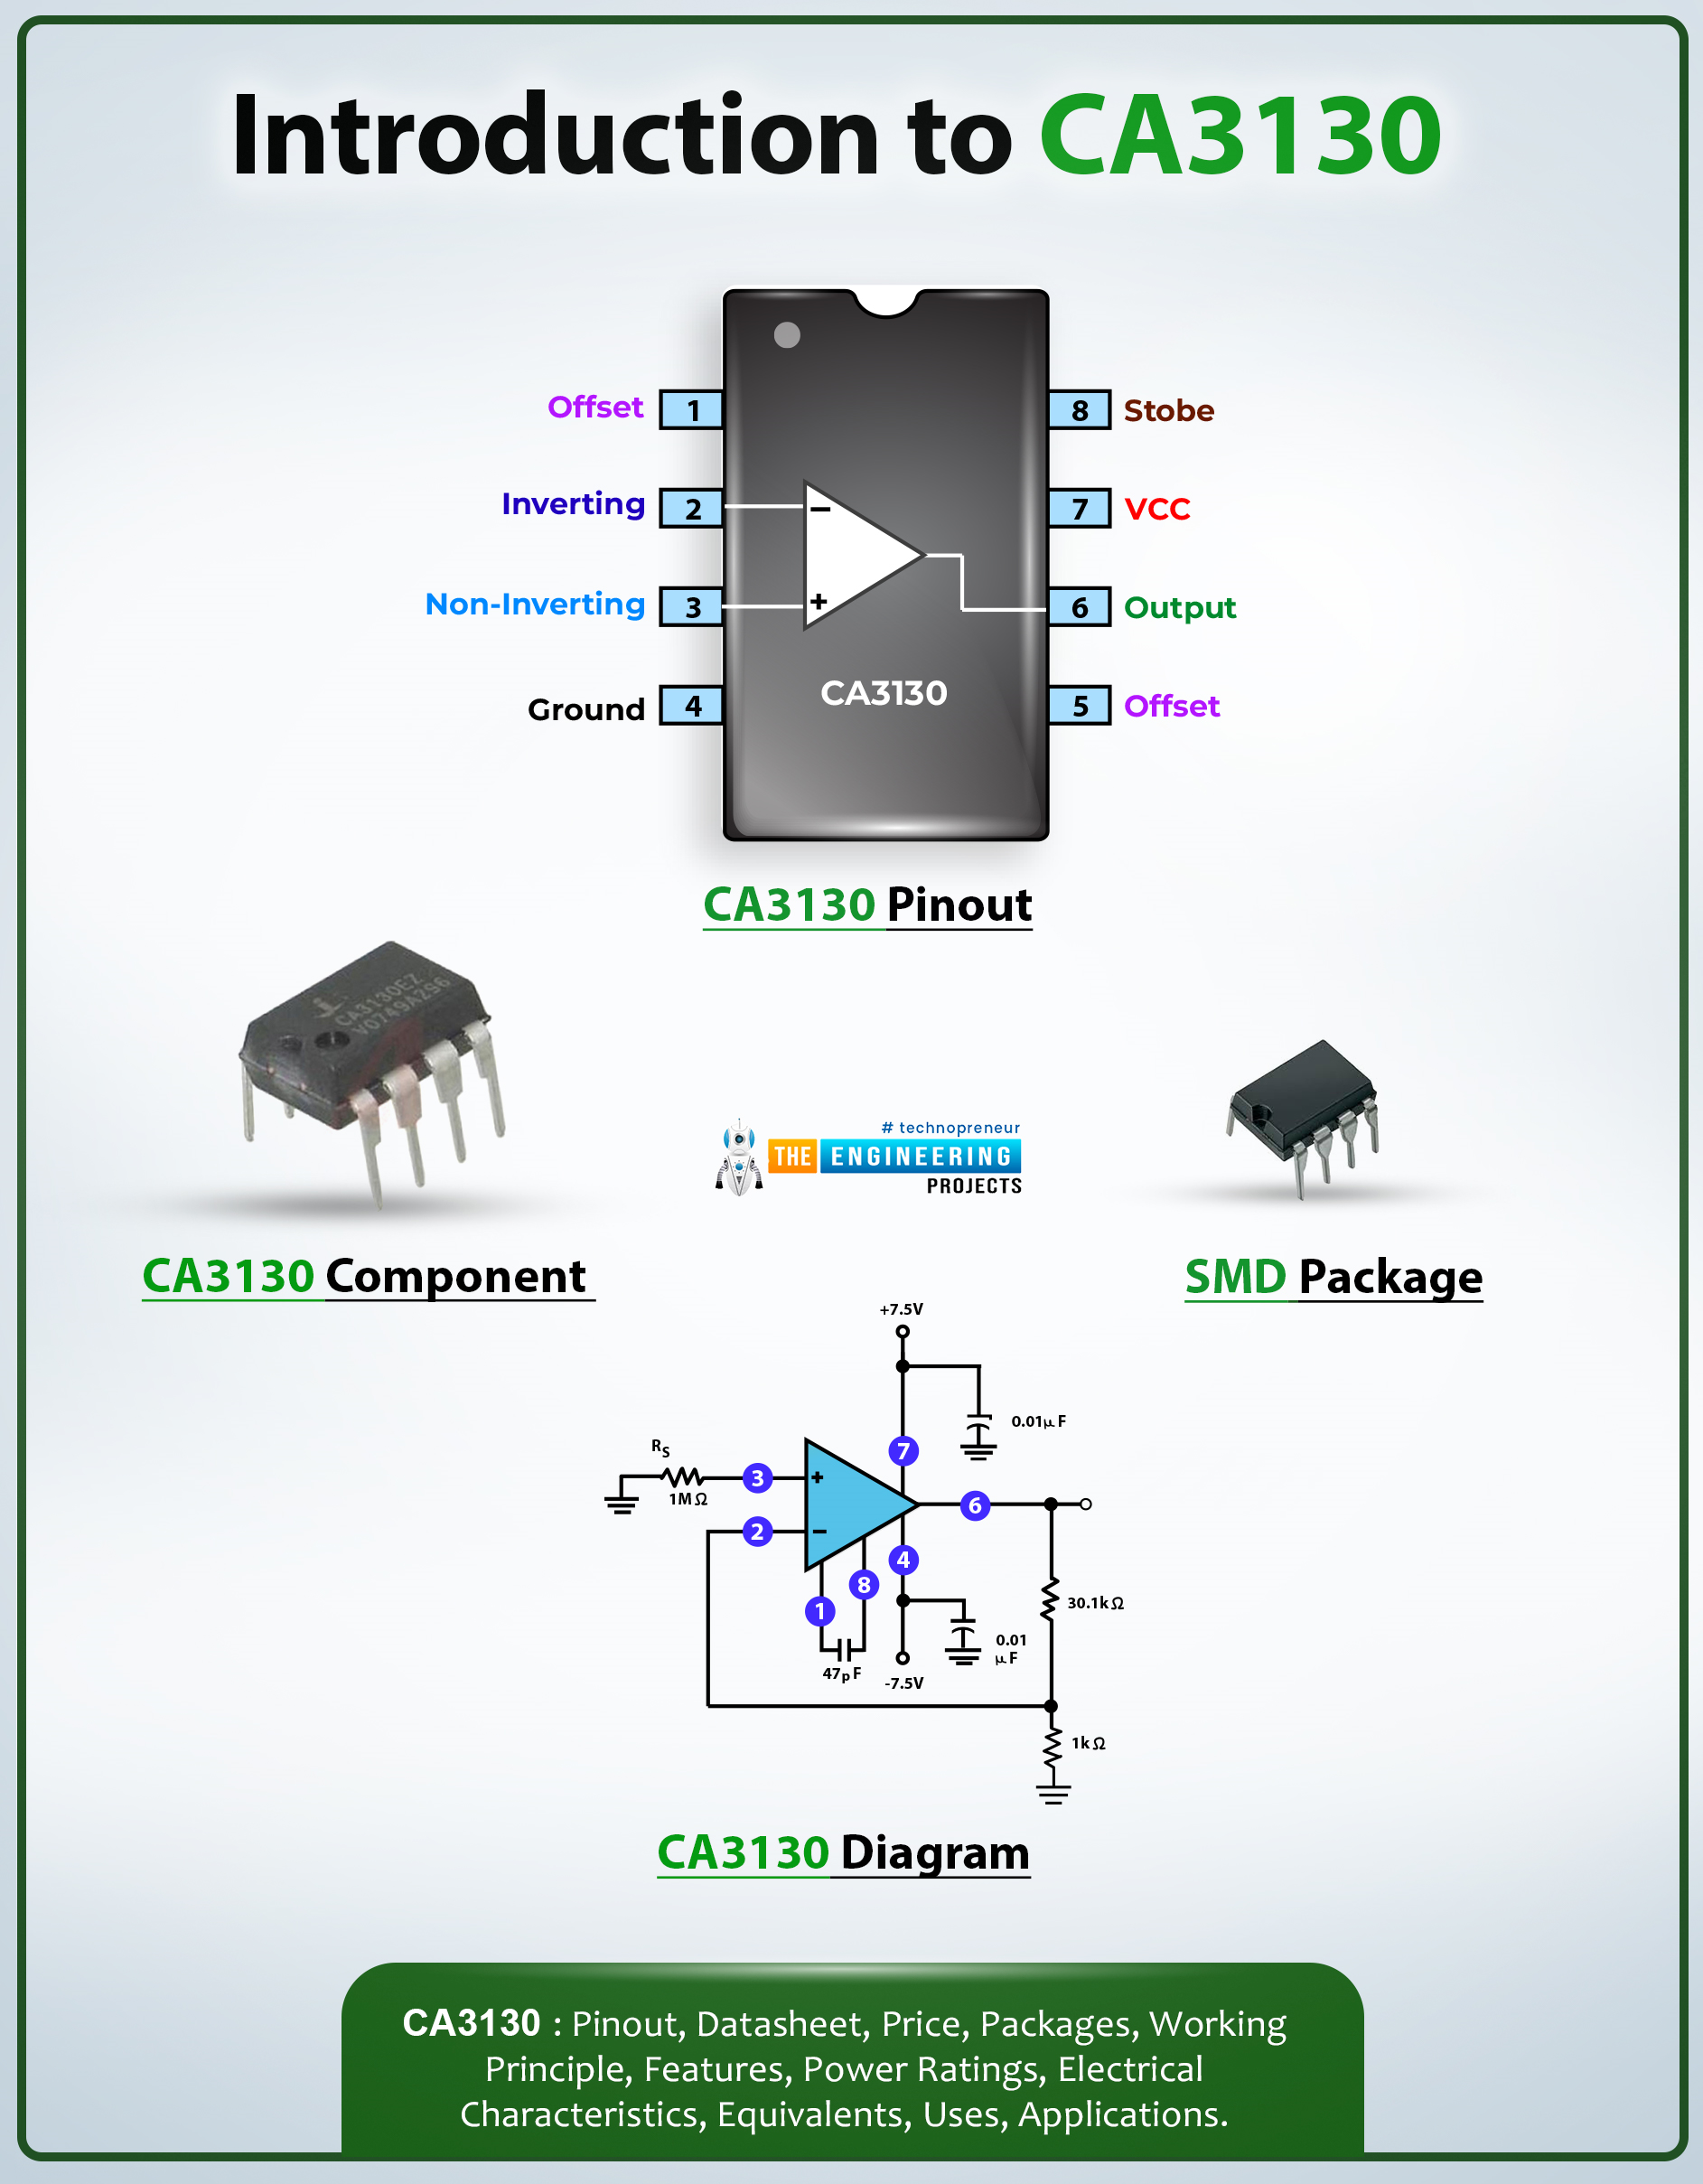
Hi Everyone! Hope you’re well today. I welcome you on board. In this post today, I’ll walk you through the Introduction to CA3130.The CA3130 is a BiMOS Operational Amplifier that comes with MOSFET at the output. The term BiMOS suggests that it projects the advantage of both Bipolar and CMOS op-amp technology.
This IC comes with high bandwidth due to bipolar op-amps and consumes less current due to CMOS op-amp, making it a perfect fit for mobile jammers and voltage follower circuits.
I suggest you read this post all the way through as I’ll detail the complete Introduction to CA3130 covering datasheet, pinout, features, and applications. Let’s get started.
Introduction to CA3130
The CA3130 is a BiMOS Operational Amplifier that contains MOSFET at the output. This chip consumes les ...
Hello everyone! I hope you all will be absolutely fine and having fun. Today, I am going to elaborate about the Introduction to LM324. It is an Operational Amplifier (Op-amp) consists of four channels. Its a low cost device having true differential inputs.For single supply applications LM 324 are superior to the other operational amplifiers. LM-324 is capable of operating at the minimum voltage up to 3V and at the high voltage levels up to 32V.
One of the major advantage of LM-324 is that common mode input range includes negative supply which eliminates the need of external biasing. Negative power supply voltage is also included in output voltage range. This device is lead (Pb) free, halogen free and RoHS compliant. It consists of four amplifier ...
Hello friends, I hope you all are fine and having fun with your lives. In today's post, we are gonna have a look at How to interface Seven Segment display with 8051 Microcontroller. Seven Segment Display is normally used in those projects where counting or clock functionalities are required. If you wanna read the basic details of Seven Segment Display then must read Interfacing of Seven Segment Display with Arduino, I have explained 7 Segment Display in detail in that tutorial. And have also interfaced it with Arduino board. So, I am not gonna go into the details of 7 Segment in today's tutorial and I would recommend you to must read this tutorial.
As 8051 Microcontroller is concerned, we all know that Its a Microcontroller in which we program our ...
Hello friends, today's post is, as the name suggests, about the Voice Recognition using EasyVR Shield. Voice recognition is quite a difficult task and usually done on software like MATLAB, but what if someone needs a stand alone project, a kind of autonomous voice recognition project, which doesn't use computer.
EasyVR is the solution for such projects. I recently did one project on this module named as Voice Recognition using EasyVR Shield and it worked really cool so I thought to share this new technology with you guys. I couldn't write the next part of Proteus tutorial, actually firstly I was busy in this project and then I thought to share this one as its quite exciting one. After completing this project, I will come back to Proteus tutorial.
...
Hello Guys! Hope you’re well today. I welcome you on board. In this post today, I’ll walk you through the Introduction to IRF830.The IRF830 is an n-channel power MOSFET where conduction is carried out by both electrons and holes but electrons are the major carriers and holes are the minority carriers. It is a high voltage and fast switching device that comes with low on-state resistance. You can also check this post on the Introduction to IRF730 that I’ve uploaded previously.
I suggest you buckle up and read this post all the way through as I’ll detail the complete Introduction to IRF830 covering datasheet, pinout, features, equivalent, and applications. Let’s get started:
Introduction to IRF830
The IRF830 is an n-channel power MOSFET where electrons are the major carriers and hol ...