


Ultrasonic Sensor Simulation in Proteus


Hello friends, a few days ago I posted an Ultrasonic Sensor Library for Proteus, using which one can easily simulate ultrasonic sensor in Proteus. The post was highly praised by the reader and I have received quite good feedback from the followers. So, I thought of sharing some more examples related to it so that users can get a complete understanding of how to use Ultrasonic sensors in Proteus. Today, we are gonna have a look on different Ultrasonic Sensor Simulation in Proteus. If you haven't read the previous post then first have a look at it because without the installation of Ultrasonic Sensor Library in Proteus, you won't be able to use these examples. Ultrasonic Sensor is used widely in Embedded Systems.
Today, I am gonna share three examples of Ultrasonic Sensor Simulation in Proteus, which will be enough for you guys to get the overview of this sensor. I have also attached these simulations below and you can easily download them but as I normally advise, it's better to design these simulations by yourself and write your own code as it will help you understand it more clearly. If you don't make mistakes, you won't learn from it. I am gonna share below three examples of Ultrasonic Sensor:
- Button
- Proximity
- Switch
- Other Proteus Libraries are as follows:
- I have also posted more examples on Ultrasonic Sensor Simulation in Proteus, have a look at them and you will get complete understanding of this sensor.
- Moreover, for hardware implementation of Ultrasonic Sensor with Arduino, check below posts:
Ultrasonic Sensor Simulations in Proteus using Button
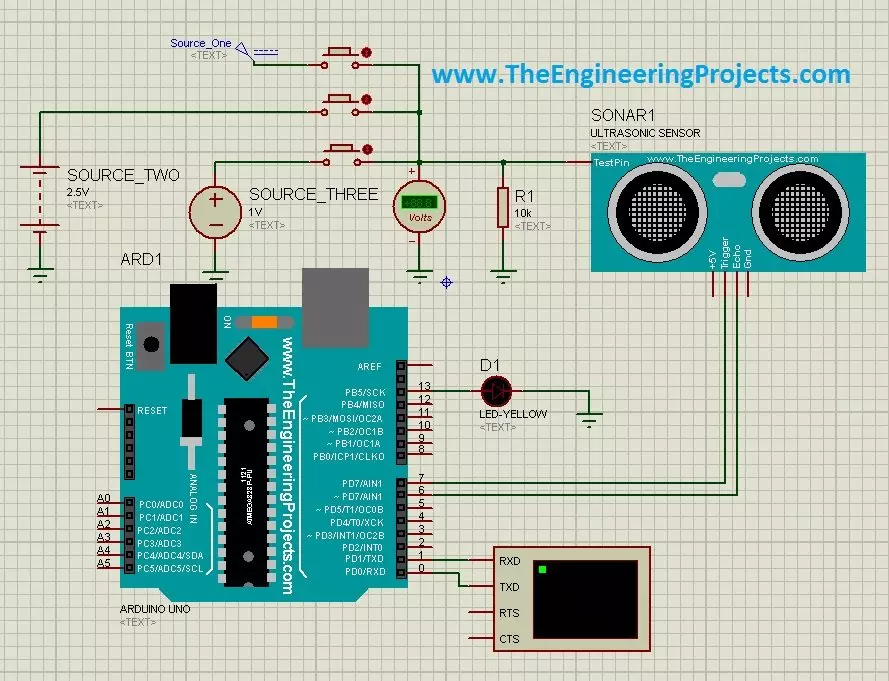
- In this tutorial, we are gonna use three buttons and using these buttons we will control our ultrasonic sensor.
- Think of these buttons as three obstacles, which are placed at different distances, if we hit the first button then first obstacle is reached, if we hit second then second obstacle and same as for third.
- So, open your Proteus ISIS and if you have already installed ultrasonic library for Proteus then design your Ultrasonic Sensor Simulation in Proteus as shown in below figure:
- Now open your Arduino software and paste below code in it and get your hex file to upload in this simulation.
Note:
- You should read How to get Hex File from Arduino first.
- Don't forget to upload the UltrasonicTEP.HEX file in your Ultrasonic Sensor as we done in Ultrasonic Library for Proteus.
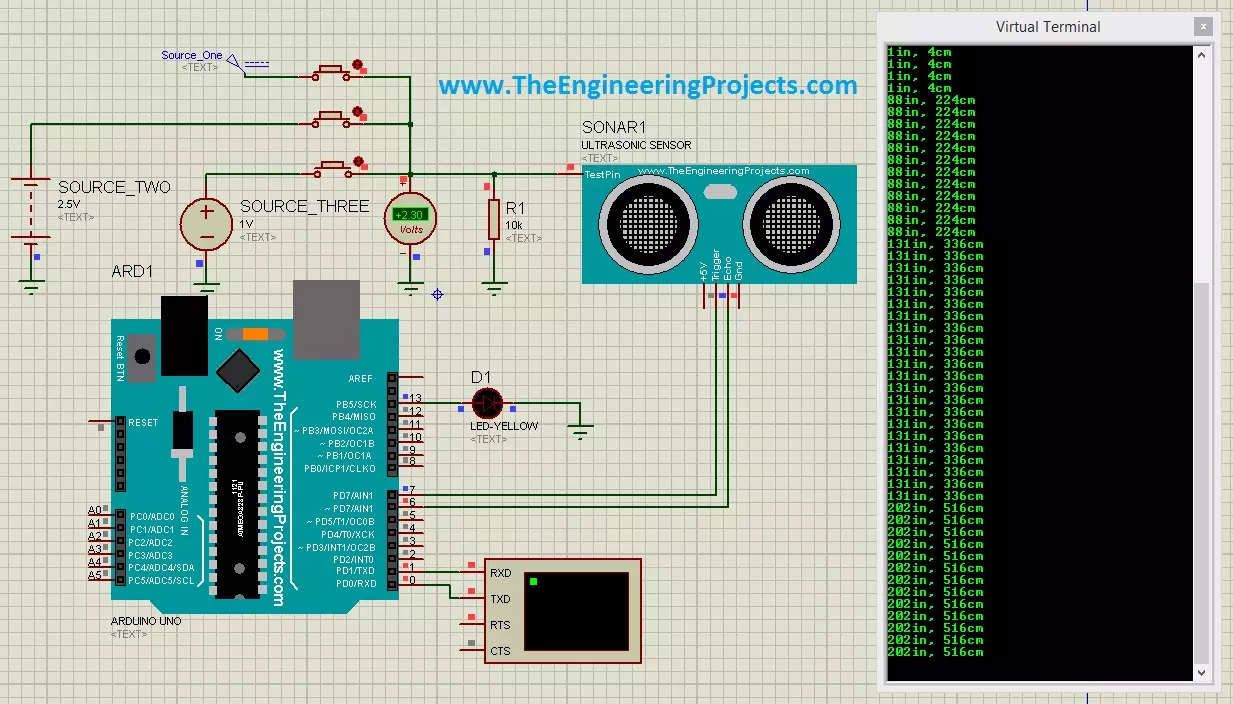
const int pingPin = 7; const int echoPin = 6; void setup() { Serial.begin(9600); } void loop() { long duration, inches, cm; pinMode(pingPin, OUTPUT); digitalWrite(pingPin, LOW); delayMicroseconds(2); digitalWrite(pingPin, HIGH); delayMicroseconds(10); digitalWrite(pingPin, LOW); pinMode(echoPin, INPUT); duration = pulseIn(echoPin, HIGH); inches = microsecondsToInches(duration); cm = microsecondsToCentimeters(duration); Serial.print(inches); Serial.print("in, "); Serial.print(cm); Serial.print("cm"); Serial.println(); delay(100); } long microsecondsToInches(long microseconds) { return microseconds / 74 / 2; } long microsecondsToCentimeters(long microseconds) { return microseconds / 29 / 2; } - After adding the hex file in this simulation, hit the RUN button and if everything goes as expected then you will get a simulation as shown in the below figure:
- You can download this simulation along with Arduino code and the hex file by clicking below button:
Download Ultrasonic Sensor simulation in Proteus Using Button
Ultrasonic Sensor Simulations in Proteus as Proximity Switch
- I have explained the first example in detail so I am not gonna much explain this one.
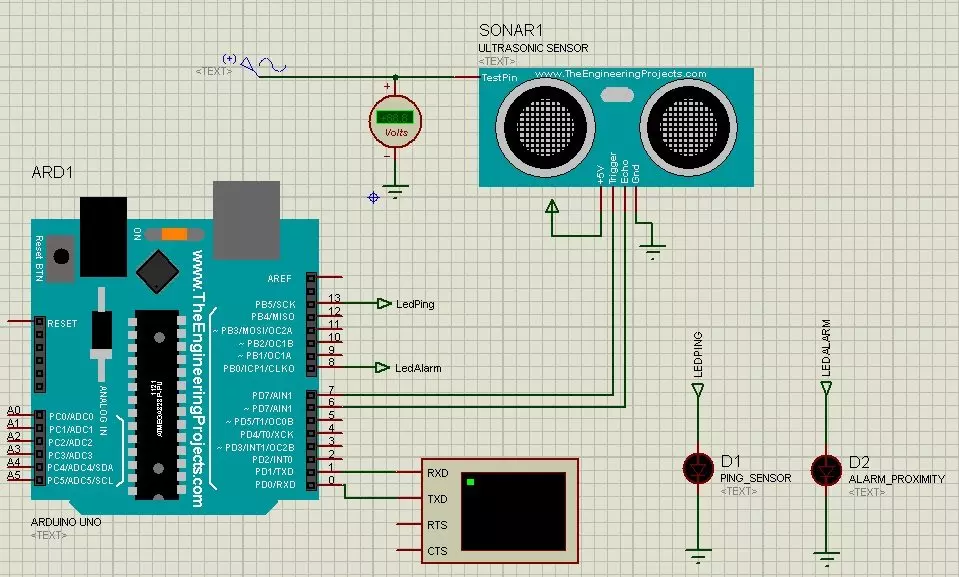
- In this example, we are using the Ultrasonic Sensor as a Proximity Switch, whenever any obstacle comes in the way of ultrasonic sensor, it will automatically give an indication.
- As you can see from the figure below that we are using a variable voltage source for the analog pin of ultrasonic sensor.
- So, first of all design a simulation as shown in the below figure:
- Now upload the Arduino hex file for this example, which is attached below along with the code and this simulation.
- After uploading the hex file, hit the RUN button and if everything is in your favor, then you will see results similar to below figure:
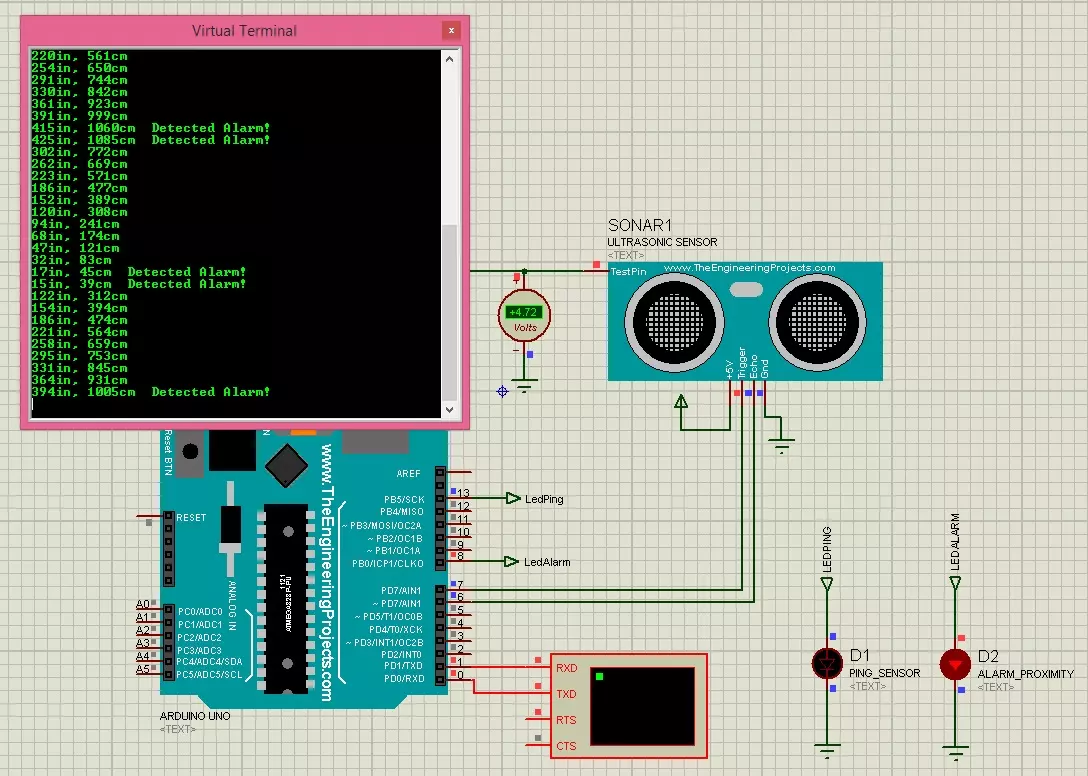
- As you can see in the above figure, we are sending a Ping from Ultrasonic Sensor and in the programming code we have placed an alarm at a specified distance, so whenever any object comes in that range, our program will give us Alarm, you could also use Buzzer in Proteus.
- You can download this Proteus Simulation along with Arduino Code and hex file by clicking on this below button:
Download Ultrasonic Sensor Simulation in Proteus As Proximity
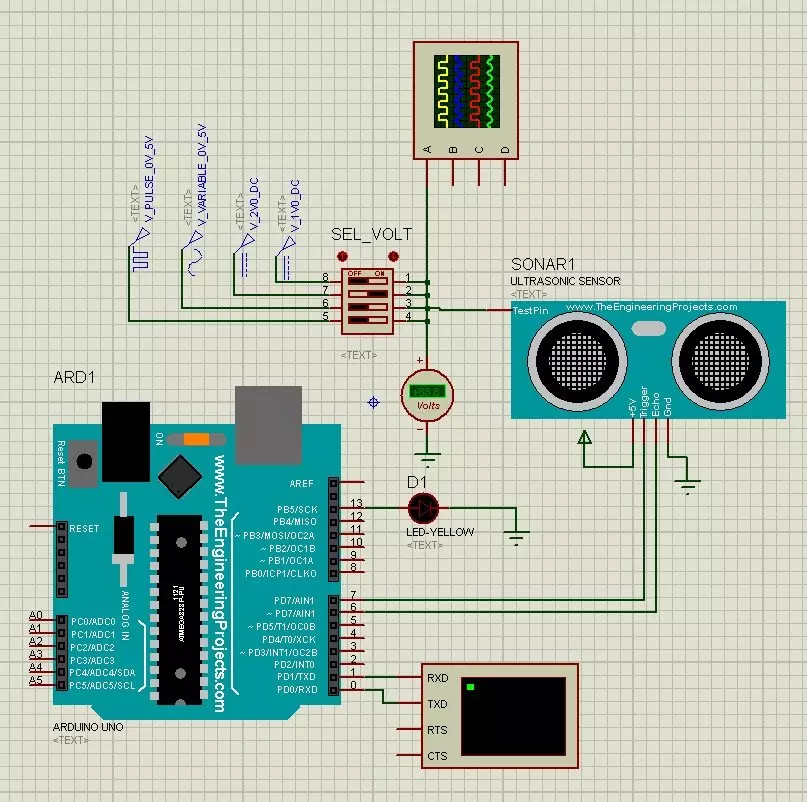
Ultrasonic Sensor Simulations in Proteus using Switch
- Here's the third and last example of Ultrasonic Sensor simulation in Proteus.
- In this simulation, we are using a switch and controlling the Ultrasonic with that Switch.
- There are total four states for that Switch, which determines what should be the voltage on the analog pin of Ultrasonic Sensor.
- I have also placed a oscilloscope in this simulation which will give you the voltage state for this switch, to get you an idea what's the voltage pattern coming to ultrasonic sensor, its mainly just for understanding and testing.
- If you are not much familiar with oscilloscope in Proteus then read How to use Oscilloscope in Proteus.
- Now upload your Arduino hex file in it and hit the RUN button and you will see something like this:
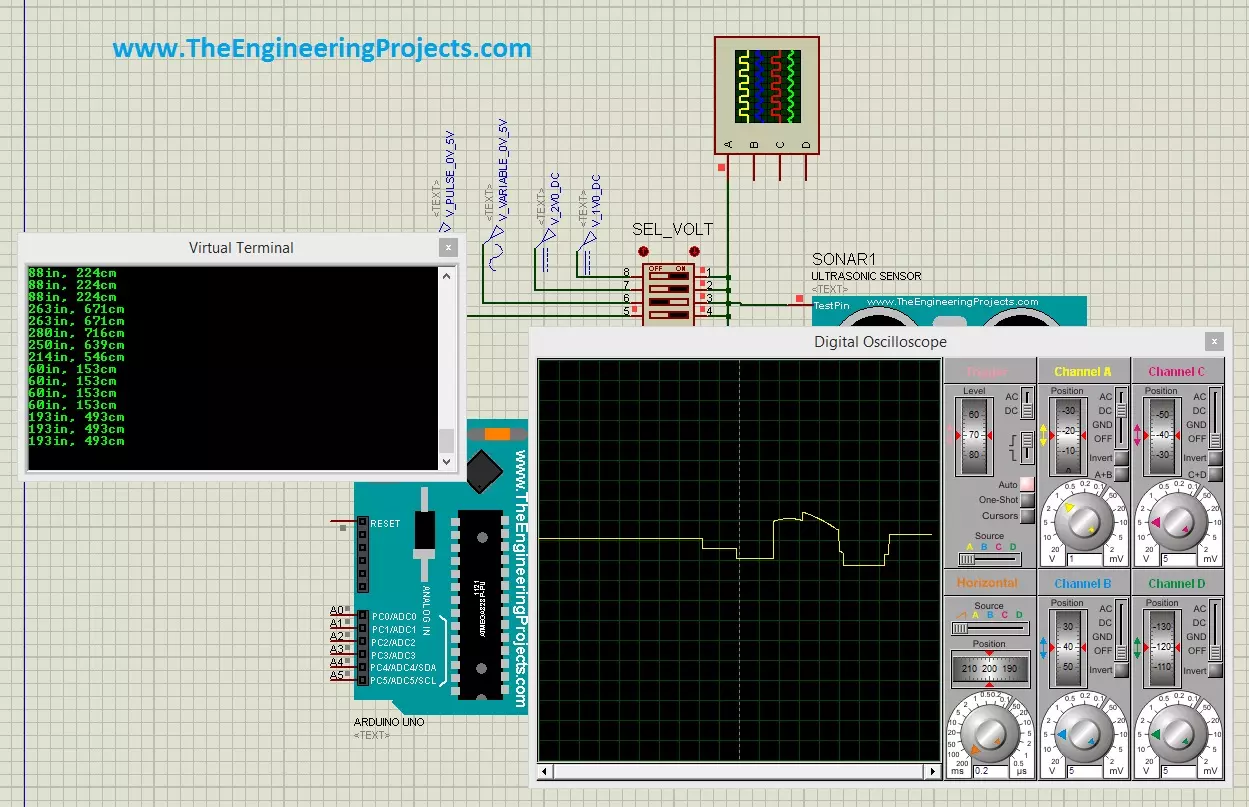
- As you can see above, the virtual terminal is showing the distances while the oscilloscope is giving us state of switch, play with it and you will learn more and if still confused then ask in comments.
- You can download the Proteus simulation of this example along with Arduino hex file and code by clicking on the below button.
Download Ultrasonic Sensor Simulation in Proteus Using Switch
That's all for today, hope you guys have learn something today, if you have any problem or question, do ask in comments and I will try my best to resolve them. Take care :)


