Hello friends, I hope you all are doing great. Today, I am going to share the xG26 Dev Kit Library for Proteus, so you can run a Bluetooth LE simulation of Silicon Labs' newest compact development kit. The xG26 Dev Kit carries the EFR32MG26, an Arm Cortex-M33 wireless SoC with 3200 kB of flash and 512 kB of RAM, together with temperature, humidity, pressure, light and motion sensors, an RGB LED and two buttons. With this library it runs your Arduino sketch in Proteus 8.5, reads its sensors, talks to a phone over Bluetooth LE and lights its LED just like the real kit.
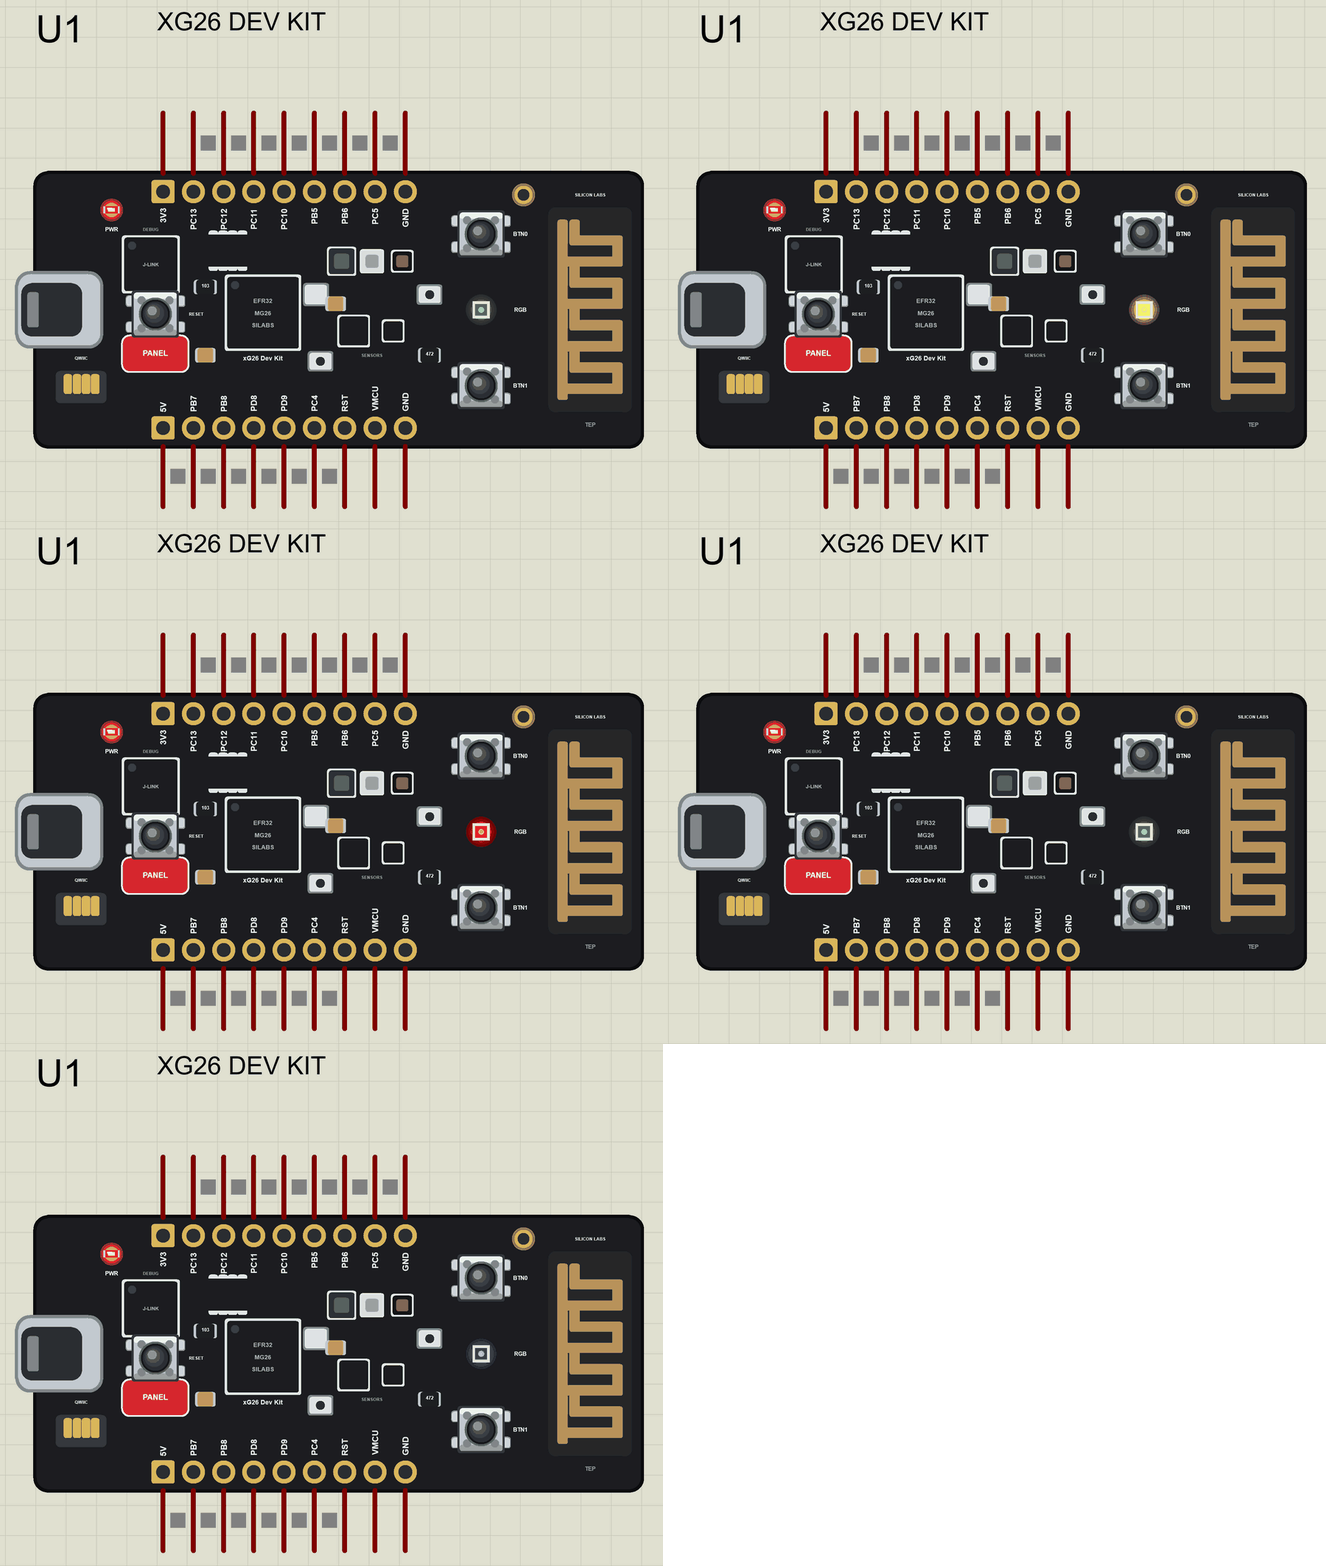
xG26 Dev Kit Library for Proteus
Latest version: V1.0 (November 2026, this tutorial)
Other new Arduino boards: UNO R4 WiFi · Nano ESP32 · UNO WiFi Rev2 · Nano 33 IoT · UNO Q · UNO R4 Minima · Nano Every · MKR WiFi 1010 · Nano RP2040 Connect · STM32 Black Pill · Nucleo-F401RE · STM32 Blue Pill · Teensy 4.1 · Arduino Due · Arduino Leonardo · Arduino Micro · BBC micro:bit V2 · GIGA R1 WiFi · MKR WAN 1310 · Nano 33 BLE Sense · XIAO nRF52840 Sense · RAK4631 WisBlock · Nano Matter · nRF52840 DK · nRF5340 DK · nRF9151 DK · nRF7002 DK · Nordic Thingy:53 · xG24 Dev Kit · xG24 Explorer Kit · Thunderboard BG22 · SiWx917 Dev Kit · B-L475E-IOT01A · NUCLEO-WB55RG · NUCLEO-WL55JC1 · NUCLEO-H743ZI2 · SAM R21 Xplained Pro · FRDM-MCXN947 · Portenta H7 · LP-CC2652R7 · PSoC 6 WiFi-BT · Feather nRF52840 · Thingy:91 X
RF modules: nRF24L01 · nRF24L01 PA LNA · CC1101 · RFM69HCW · HC-12 · 433MHz RF · XBee
Temperature and weather sensors: DHT11 / DHT22 · DS18B20 · BME280 · BMP280 · SHT31 · AHT20 · BME680 · MLX90614 · MAX6675
Helping Tools
- Laptop WiFi Monitor: a laptop on the Wi-Fi of your design: a browser, a TCP / UDP terminal and ping
- Mobile WiFi Monitor: a smartphone that opens the pages of your board and sends it commands
- Serial Monitor Advance: a serial terminal window for the UART of your board
For the demo we built a Bluetooth storm station. The kit watches the air pressure: when it falls, the weather is changing; when it falls a lot, a storm is coming. The RGB LED shows the forecast and a phone reads every value.
NOTICE: Proteus has no EFR32MG26 model, so our team has put a lot of effort into building this board ourselves: the pins, the sensors, the RGB LED, the buttons and Bluetooth LE are all our own model, and your sketch compiles with our free TEP Boards for Proteus add-on. Your feedback is the fuel that keeps us going, so please tell us what you think in the comments below. And if our free libraries help you, you can buy us a coffee. So, let's get started with the xG26 Dev Kit Library for Proteus:
What is the xG26 Dev Kit?
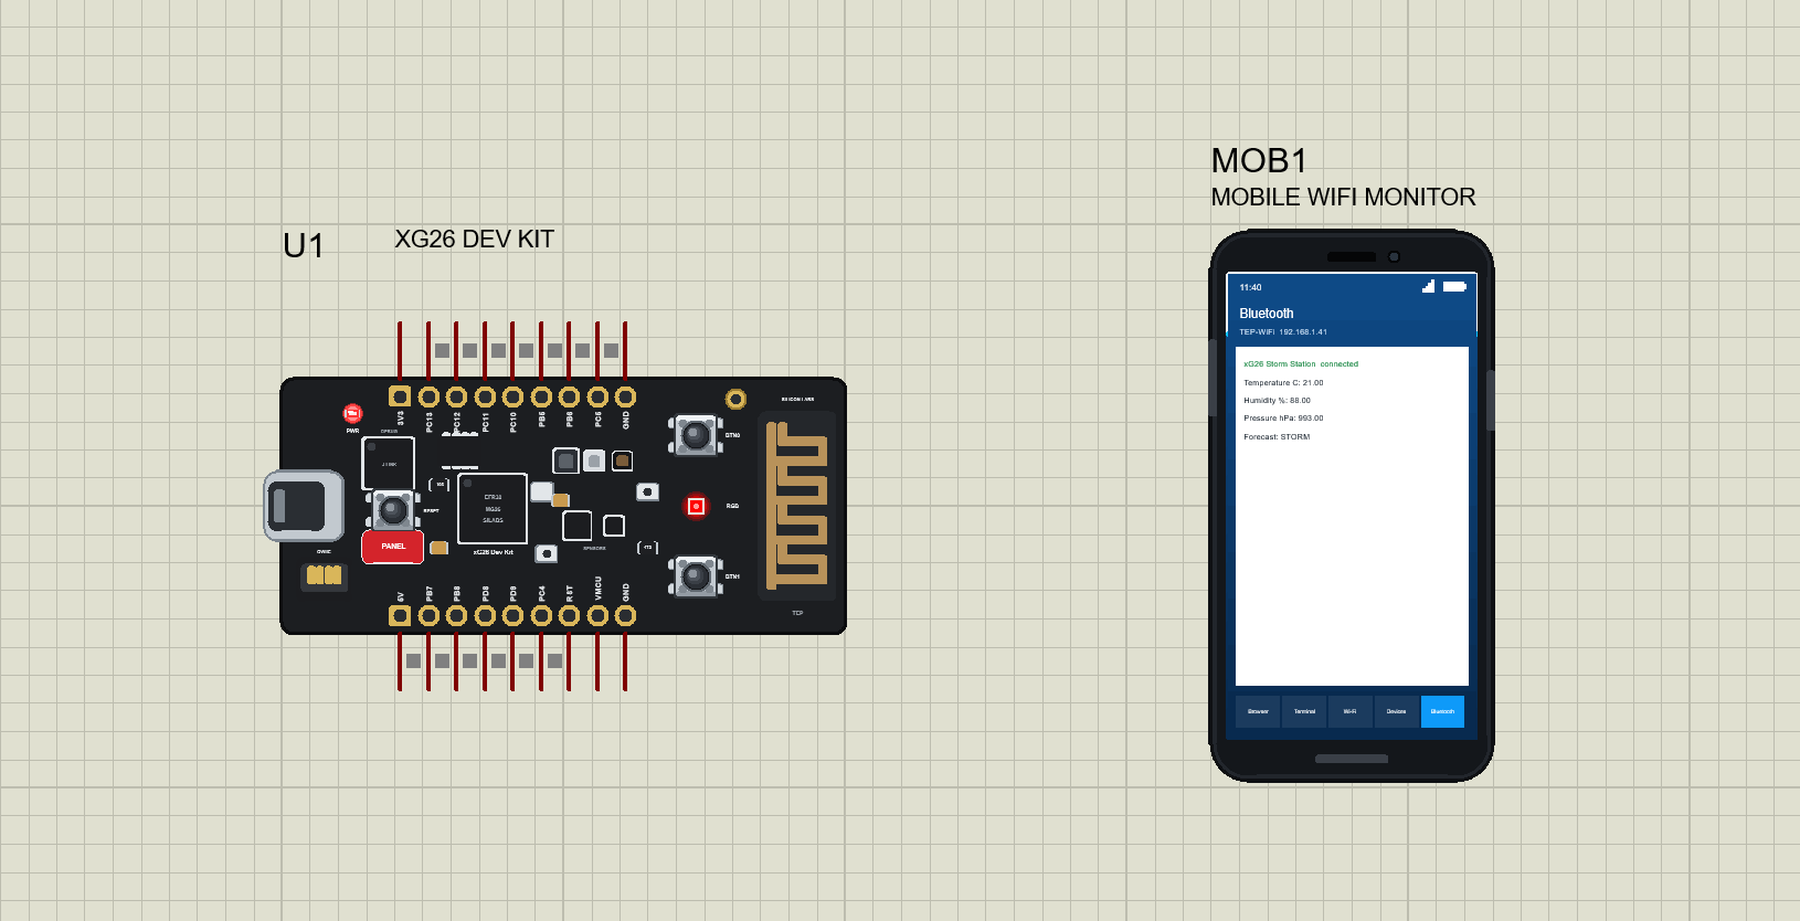
The EFR32xG26 Dev Kit (xG26-DK2608A, board BRD2608A) is Silicon Labs' small development board for its xG26 family. Its EFR32MG26 is an Arm Cortex-M33 running at 78 MHz with 3200 kB of flash and 512 kB of RAM - a lot of memory for a wireless microcontroller - and a 2.4 GHz radio for Bluetooth LE. Around it the kit packs a full set of sensors, an RGB LED, two push buttons and a reset button, a Qwiic connector for more sensors, a U.FL connector for an external antenna next to the printed one, breakout pads, a coin-cell holder and a SEGGER J-Link debugger with a virtual COM port on its USB.
| Part | The real xG26 Dev Kit | In the library |
|---|---|---|
| SoC | EFR32MG26: Cortex-M33 78 MHz, 3200 kB flash, 512 kB RAM | your Arduino sketch |
| Radio | 2.4 GHz, Bluetooth LE | ArduinoBLE |
| Sensors | Si7021, BMP384, VEML6035, ICM-40627, Si7210 | HS300x, BARO, APDS and IMU calls, the Sensors window |
| LED | RGB LED, active LOW | LEDR, LEDG, LEDB |
| Buttons | BTN0, BTN1, RESET | BTN0, BTN1 and RESET |
| Pads | two rows of breakout pads | D0 to D6, A0 to A4 |
| USB | J-Link debugger, virtual COM port | the serial monitor |
The Sensors on the Kit
The Si7021 measures temperature and humidity, the BMP384 measures the air pressure so precisely that it can tell one floor of a building from the next, the VEML6035 measures the ambient light, the ICM-40627 is a 6-axis motion sensor and the Si7210 senses magnetic fields. Two MEMS microphones complete the set. With all of them on one small board, the kit is a ready sensor node for experiments in a lab or a classroom.
The Sister of the xG24 Dev Kit
The xG26 Dev Kit shares its layout ideas with the xG24 Dev Kit: the same buttons, the same sensor bus, the same breakout pad numbering and the same debugger. The xG26 chip brings more memory and more pins. If you have used our xG24 Dev Kit Library for Proteus, this board will feel familiar - and sketches move between the two with the same pin names.
Breakout Pads Instead of Headers
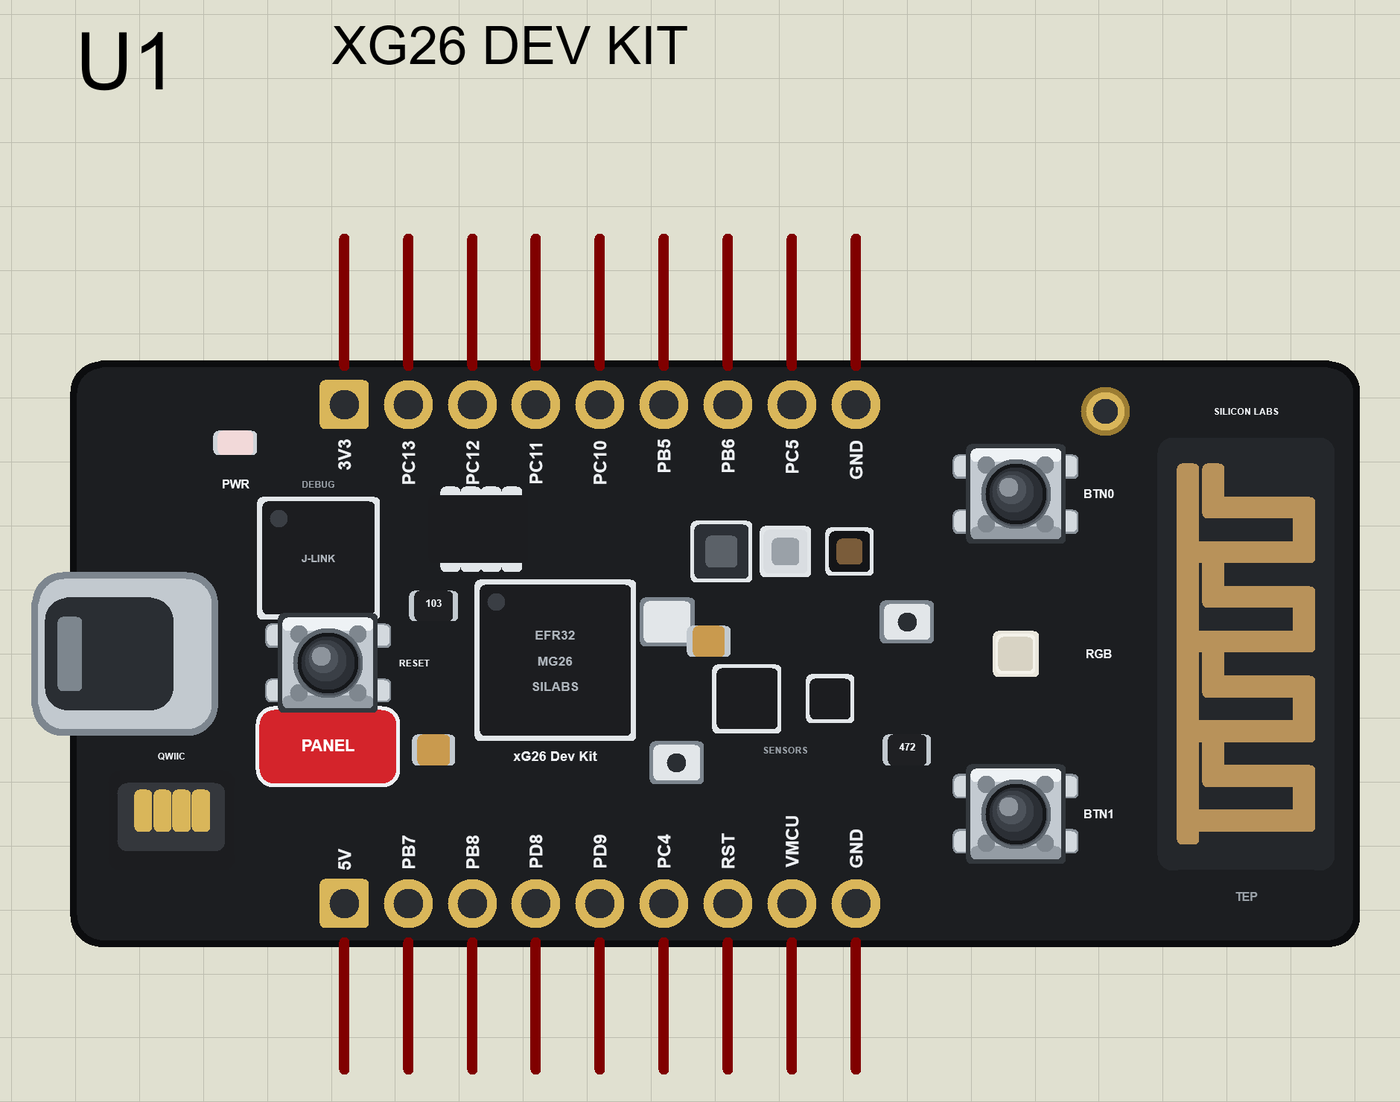
Instead of Arduino headers, the kit has two rows of breakout pads with the chip's port names printed beside them - PC13, PB5, PC4 and so on - following Silicon Labs' expansion header numbering. Silicon Labs' Arduino core has no variant for this kit yet, so our board package gives the pads the same D0 to D6 and A0 to A4 names our xG24 Dev Kit uses on the same positions, while the symbol shows the real port names.
Where Is It Used?
The xG26 family targets Bluetooth LE products that need a lot of memory: smart home devices, medical sensors, asset tags and products that combine several radio protocols. The dev kit itself is popular for evaluation, for battery-powered sensor experiments and in university labs. For a cellular device in this series, see our Nordic Thingy:91 X Library for Proteus.
A simulation lets you build the logic before the kit is on the desk: the sensors, the forecast, the LED and the phone. When the sketch works in the Proteus simulation, the real board only has to confirm it.
Features of the xG26 Dev Kit Library for Proteus
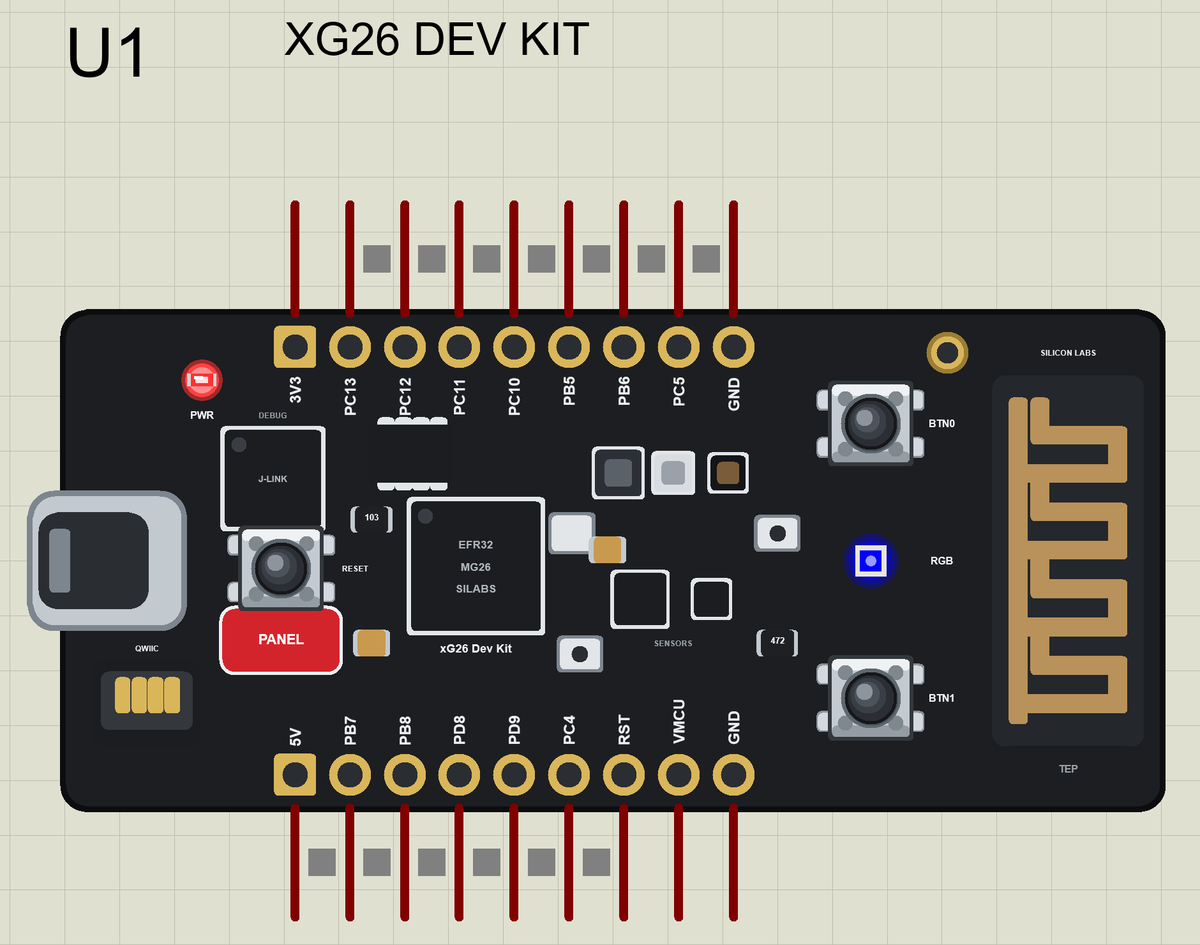
- The board as it looks: the black kit with the USB and the J-Link, the EFR32MG26, the flash, the sensors, the microphones, the RGB LED, BTN0, BTN1 and RESET, the Qwiic connector, the U.FL connector, the printed antenna, the breakout pads with their port names and our PANEL pad, drawn compact, with our small TEP signature.
- Your sketch: a .hex for "Silicon Labs xG26 Dev Kit (TEP Proteus)" with D0 to D6, A0 to A4, LEDR, LEDG, LEDB, BTN0 and BTN1.
- The sensors: temperature, humidity, pressure, light and motion through Arduino_HS300x, Arduino_LPS22HB, Arduino_APDS9960 and Arduino_BMI270_BMM150, set from the Sensors window.
- Bluetooth LE: ArduinoBLE, with our phone as the central.
- A real RGB LED and real buttons: each colour lights when its pin is LOW, and the buttons read LOW while you click them, as on the real kit.
- A complete package: about 3.4 MB with the part, the add-on, the phone and the demo, without the source code of the models.
The xG26 Dev Kit in Proteus Simulation
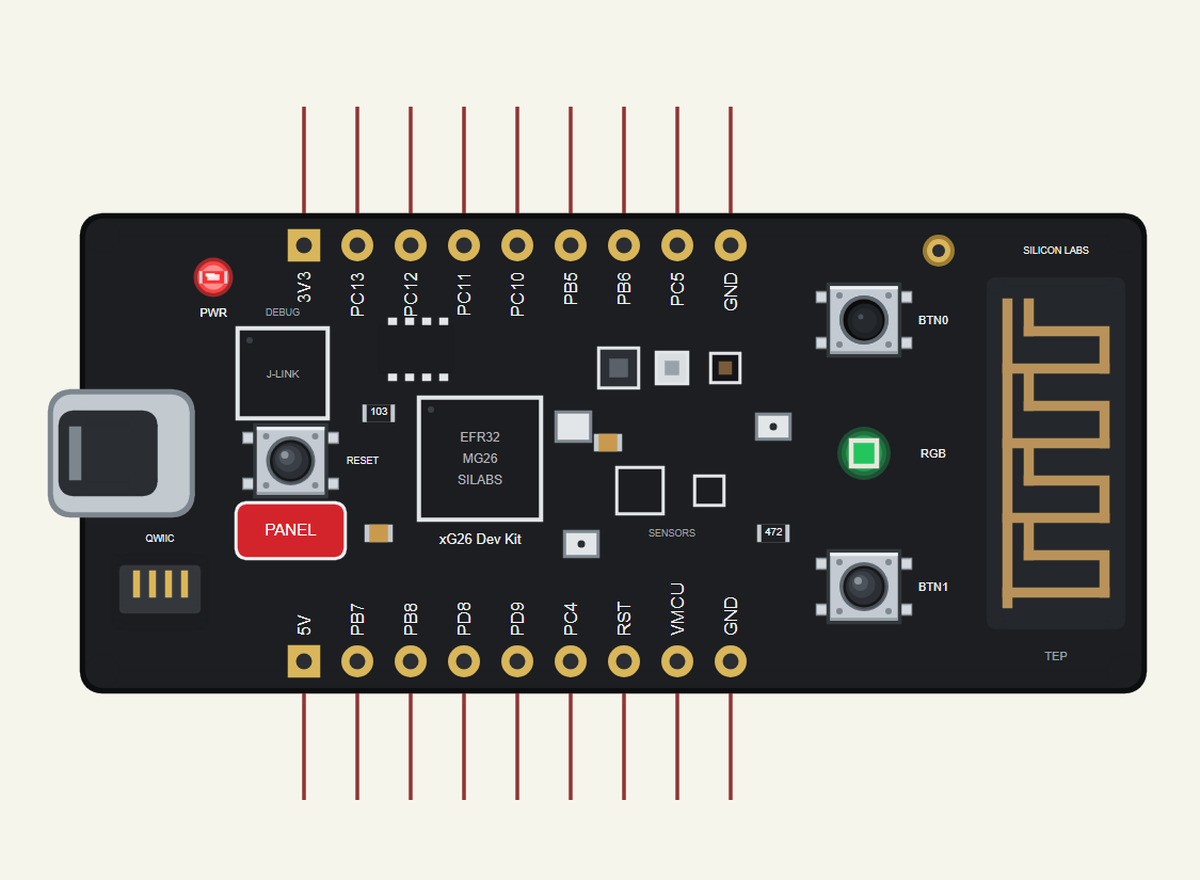
Search XG26 in Pick Devices; the device XG26 DEV KIT is in TEPXG26DK.LIB (Microprocessor ICs, Bluetooth Boards), with the prefix U. The USB opens the serial monitor and the PANEL pad opens the Sensors window.
The Pins
| Pads (port) | Name | What the library does with them |
|---|---|---|
| PC13, PC12, PC11, PC10 | D0 to D3 | GPIO, PWM, attachInterrupt; SPI MOSI, MISO, SCK, SS |
| PB5, PB6 | D4, D5 | Serial1 TX and RX, or GPIO |
| PC5 | D6 | Wire SDA, or GPIO |
| PB7, PB8, PD8, PD9 | A0 to A3 | analogRead 0 to 1023 for 0 to 3.3 V, or GPIO |
| PC4 | A4 | Wire SCL, or GPIO |
| on the board | LEDR, LEDG, LEDB | the RGB LED, each colour lit when LOW |
| on the board | BTN0, BTN1 | the buttons, LOW while pressed |
Download xG26 Dev Kit Library for Proteus
Click the button below to download xG26-Dev-Kit-Library-for-Proteus-v1.0.zip (about 3.4 MB, without the source code of the models):
xG26 Dev Kit Library for Proteus V1.0- README.txt: installation, the demo, the pins, the properties, troubleshooting and the limits.
- Proteus Library Files:
TEPXG26DK.LIBand the phone and laptop (TEPMOBILE.LIB,TEPLAPTOP.LIB). - Proteus Model Files:
TEPNET.DLL, the model of the board, the phone and the laptop. - Arduino Code: the demo sketch and the TEP Boards for Proteus add-on 1.80.0, with ArduinoBLE and the sensor libraries.
- Proteus Simulation: the demo project, its HEX file and a copy of the DLL.
No Proteus yet? Read How to Download and Install Proteus 7 and 8. New to libraries? Follow How to Install a New Library in Proteus.
How to Install xG26 Dev Kit Library for Proteus
- Close Proteus and extract the whole zip file, for example to your Desktop.
- Copy the files from Proteus Library Files into the LIBRARY folder of Proteus.
- Copy
TEPNET.DLLfrom Proteus Model Files into the MODELS folder, replacing an older one. - Delete
TEPXG26DK.IDXfrom the LIBRARY folder if it is there. - For your own sketches, copy Arduino Code\TEP Boards for Proteus\hardware into your Arduino sketchbook (Documents\Arduino) and restart the Arduino IDE; the board is Silicon Labs xG26 Dev Kit (TEP Proteus).
- Start Proteus, press P and search for XG26.
Demo: a Bluetooth Storm Station in Simulation
Long before weather apps, sailors and farmers read the weather from a barometer: falling pressure means bad weather on the way, rising pressure means it is clearing. A precise pressure sensor and a few lines of code turn the xG26 Dev Kit into the same instrument, and Bluetooth LE puts the reading on a phone.
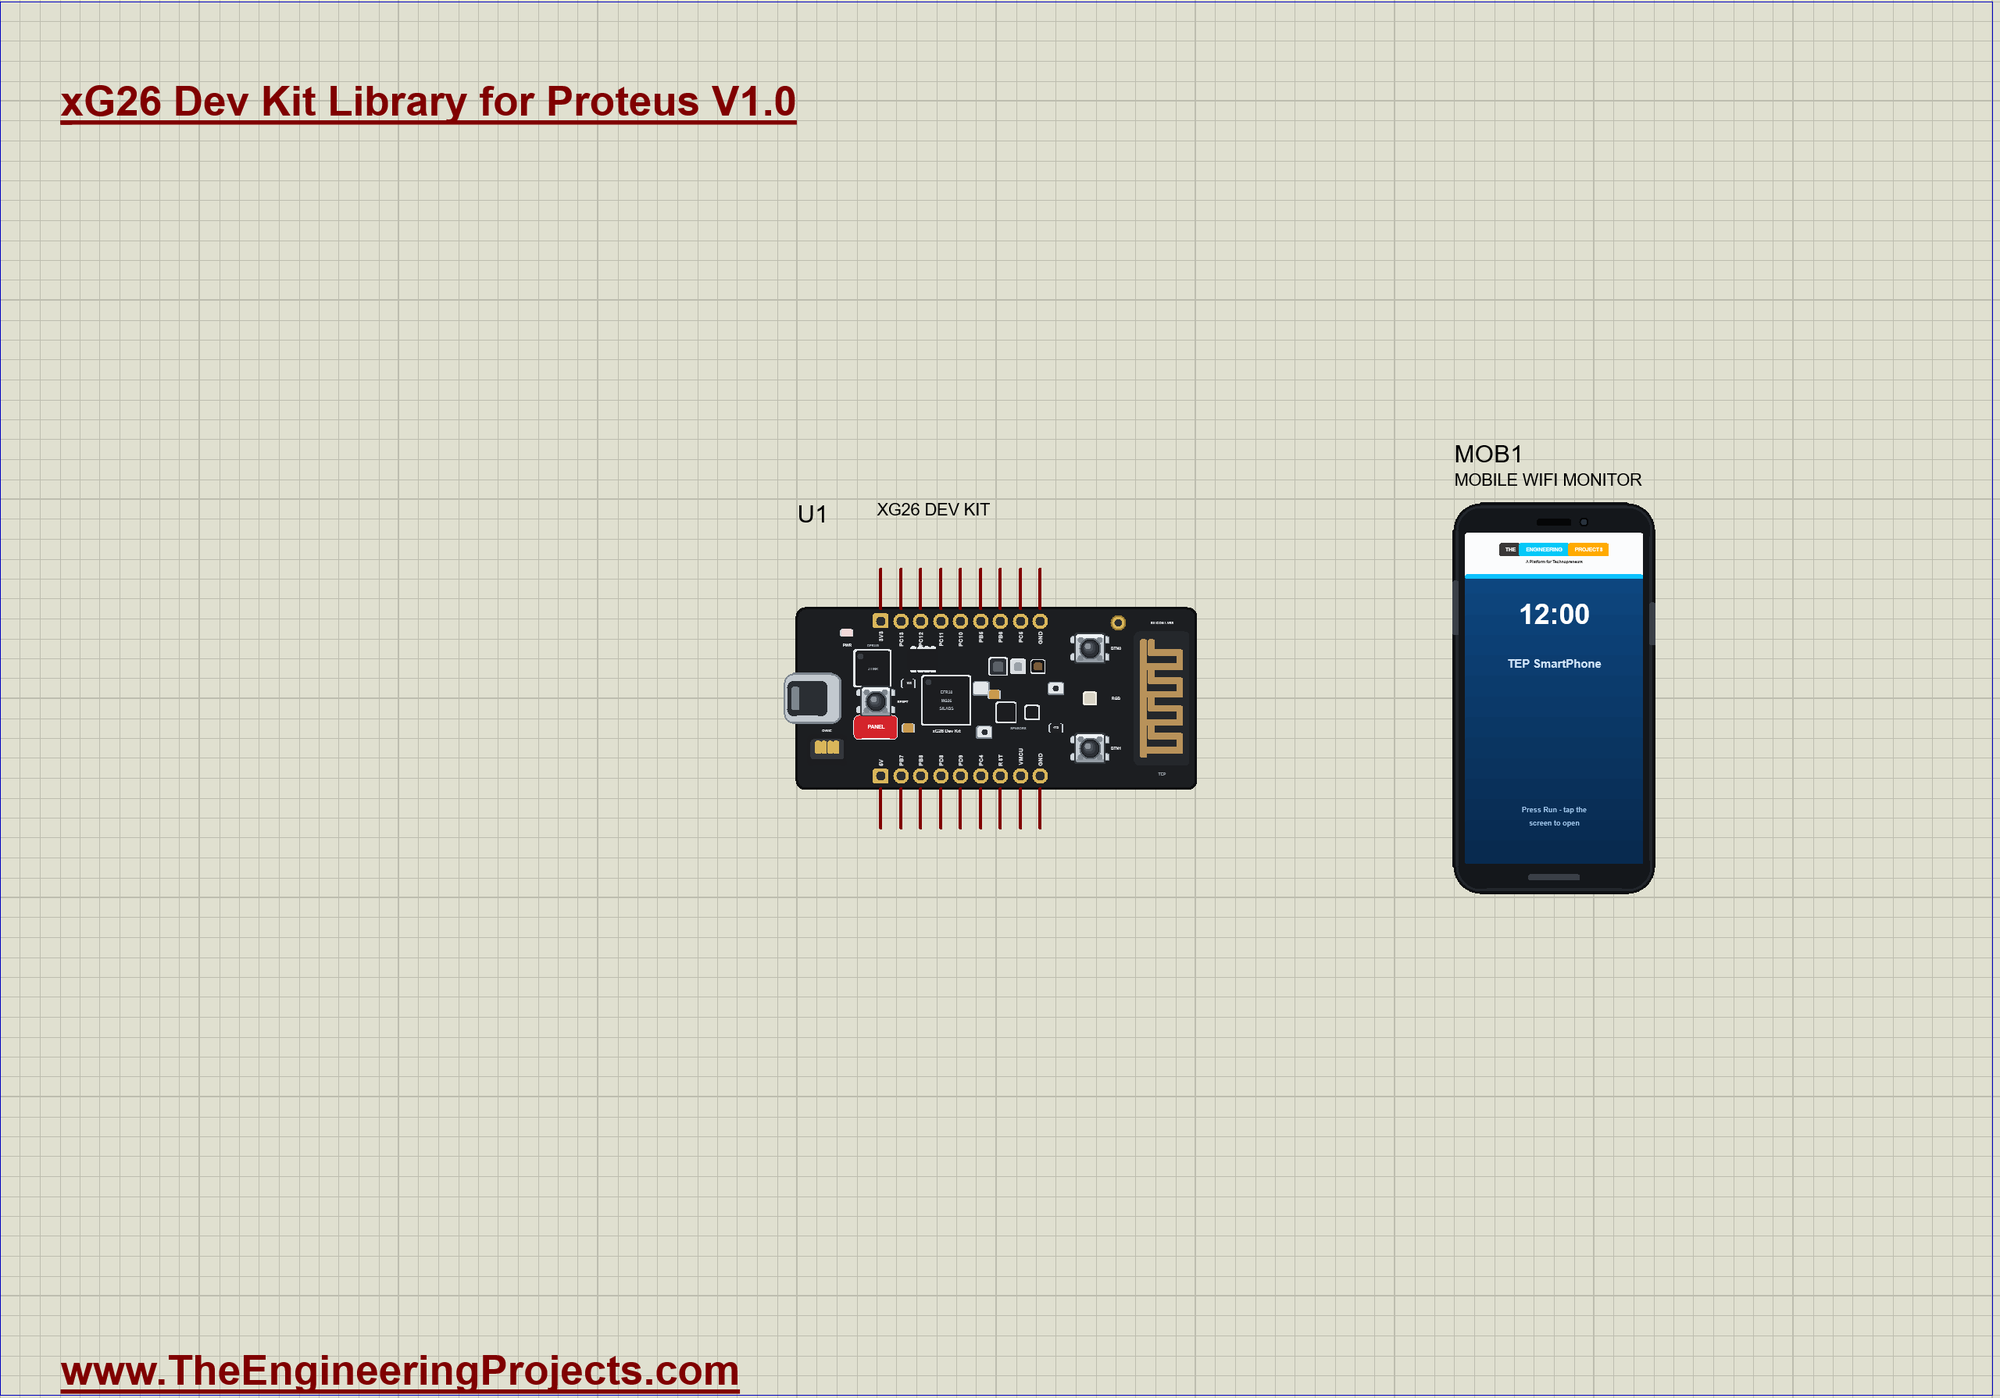
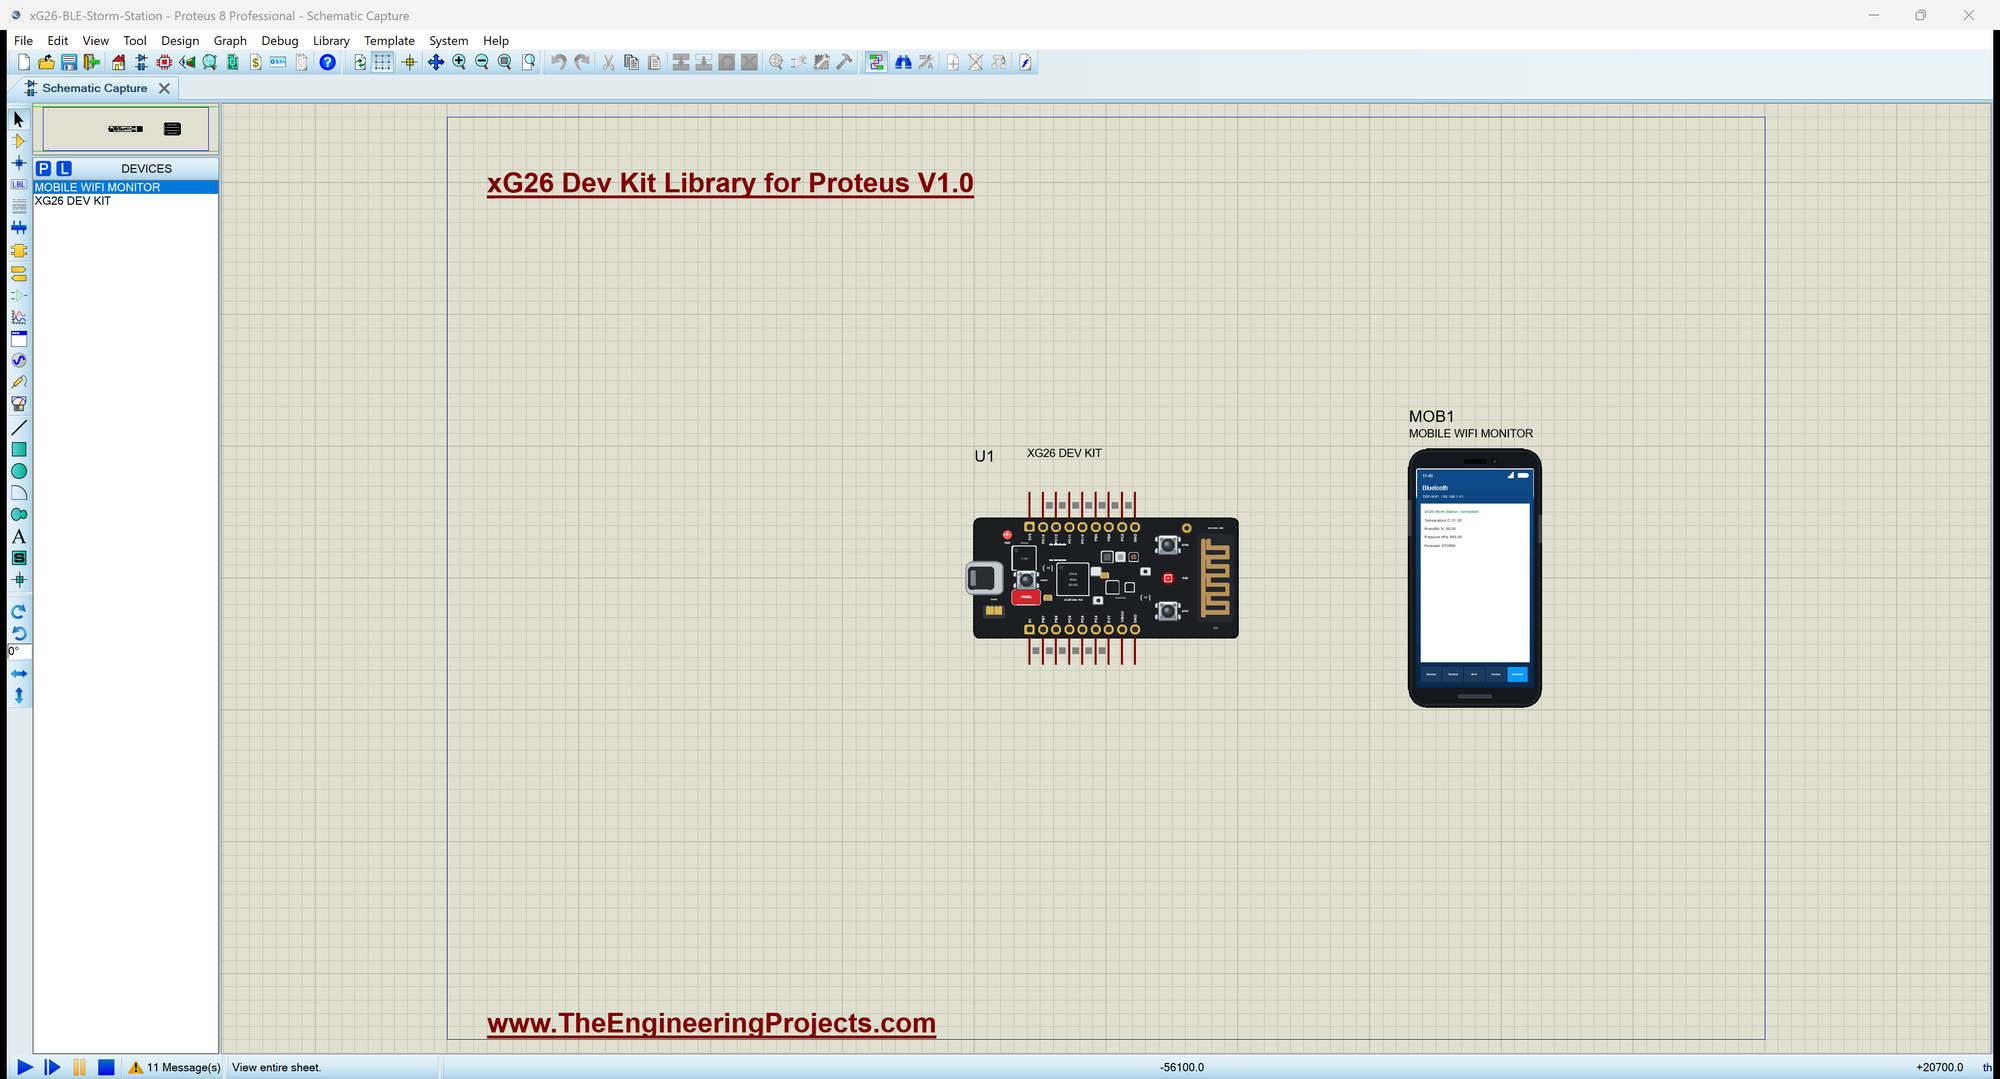
Open xG26-BLE-Storm-Station.pdsprj. U1 runs xG26_Storm_Station.hex, and MOB1 is our Mobile WiFi Monitor, a phone whose Bluetooth app connects to the kit. No wires: the sensors, the LED and the buttons are on the board. The air starts at 21 C, 78 % and 1013 hPa.
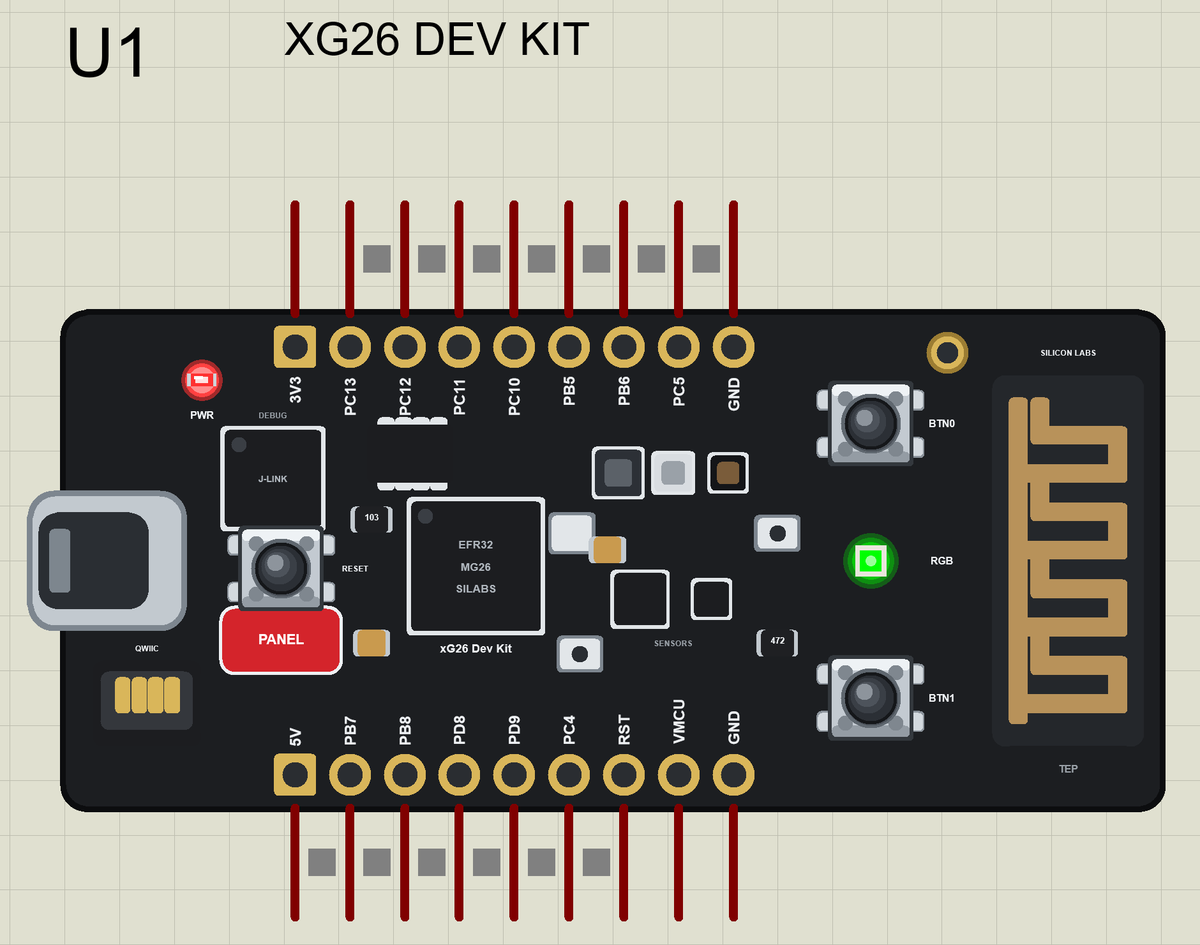
| Forecast | The pressure since the baseline | RGB LED |
|---|---|---|
| FAIR | within 5 hPa | green |
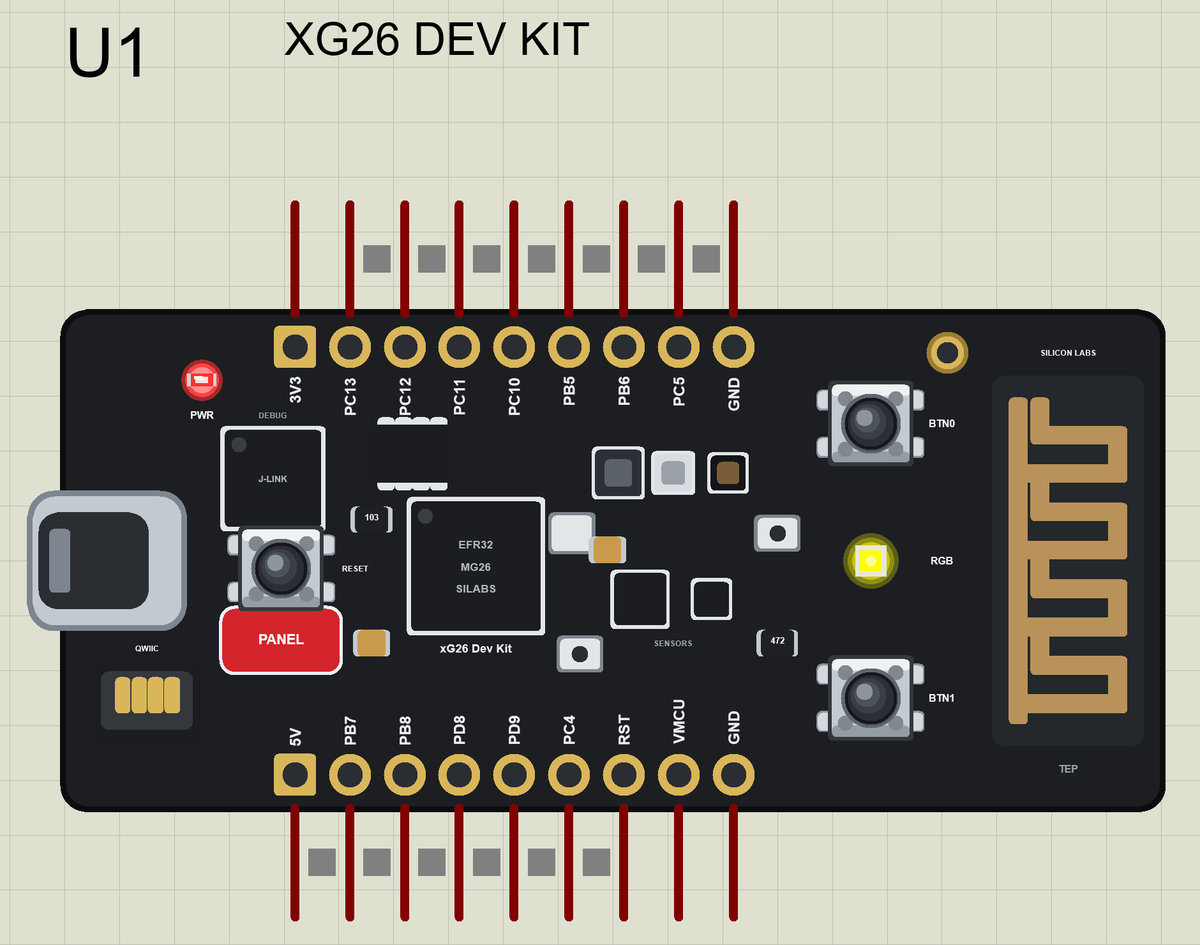
| CHANGING | 5 to 15 hPa lower | yellow |
| RAIN LIKELY | 5 hPa lower and humidity above 85 % | red |
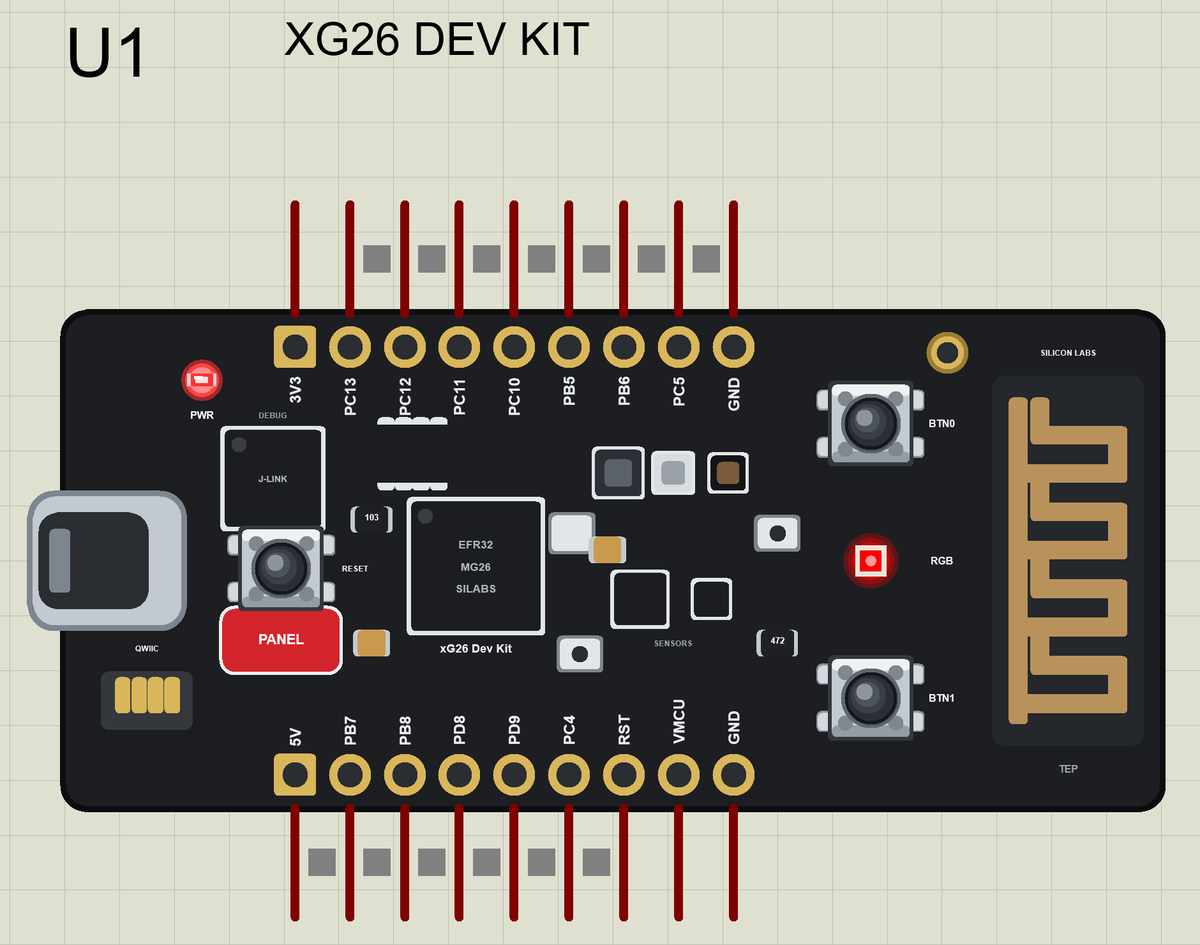
| STORM | 15 hPa lower or more | red |
| CLEARING | 5 hPa higher or more | blue |
From Pressure to a Forecast
forecastFor() turns the change since the baseline into one word. The order matters: a storm wins over rain, and rain needs both falling pressure and humid air:
String forecastFor(float trend) {
  if (trend <= -STORM_HPA) return "STORM";
  if (trend <= -CHANGE_HPA && humidity > RAIN_HUM) return "RAIN LIKELY";
  if (trend <= -CHANGE_HPA) return "CHANGING";
  if (trend >= CHANGE_HPA) return "CLEARING";
  return "FAIR";
}
Reading the Weather
Every second readWeather() reads the three sensors, keeps the day's lowest and highest temperature and, when the forecast changes, prints it, updates the LED and notifies the phone:
void readWeather() {
  tempC = HS300x.readTemperature();
  humidity = HS300x.readHumidity();
  hpa = BARO.readPressure() * 10;                           // kPa to hPa
  if (tempC < minC) minC = tempC;
  if (tempC > maxC) maxC = tempC;
  const float trend = hpa - baseHpa;
  const String now = forecastFor(trend);
  if (now != forecast) {
    forecast = now;
    if (forecast == "STORM" || forecast == "RAIN LIKELY") warnings++;
    showForecast();
    forecastChar.writeValue(forecast);
    Serial.print(F(">> Forecast ")); Serial.print(forecast); Serial.print(F(": ")); Serial.print(hpa, 1);
    Serial.print(F(" hPa (")); Serial.print(trend >= 0 ? "+" : ""); Serial.print(trend, 1); Serial.println(F(" hPa since the baseline)"));
  }
  tempChar.writeValue(tempC);
  humChar.writeValue(humidity);
  pressChar.writeValue(hpa);
}
The Colours
showForecast() sets the RGB LED. The kit's LED lights when its pin is LOW, which rgb() takes care of:
void showForecast() {
  if (forecast == "STORM" || forecast == "RAIN LIKELY") rgb(true, false, false);   // red
  else if (forecast == "CHANGING") rgb(true, true, false);                         // yellow
  else if (forecast == "CLEARING") rgb(false, false, true);                        // blue
  else rgb(false, true, false);                                                    // green: FAIR
}
Bluetooth LE: the Environmental Sensing Service
The sketch uses the standard Bluetooth Environmental Sensing service (0x181A) with the standard temperature, humidity and pressure characteristics, plus its own forecast text. Each one carries a 0x2901 description, so the phone shows readable names:
BLEService weatherService("181A");                          // Environmental Sensing
BLEFloatCharacteristic tempChar("2A6E", BLERead | BLENotify);
BLEFloatCharacteristic humChar("2A6F", BLERead | BLENotify);
BLEFloatCharacteristic pressChar("2A6D", BLERead | BLENotify);
BLEStringCharacteristic forecastChar("19B10061-E8F2-537E-4F6C-D104768A1214", BLERead | BLENotify, 14);
Run the Simulation
Press Run. The serial monitor - the same window as our TEP Serial Monitor Advance for Proteus - shows the first forecast and the name the kit advertises, and the RGB LED turns green:
xG26 Dev Kit BLE Storm Station - The Engineering Projects
>> Forecast FAIR: 1013.0 hPa (+0.0 hPa since the baseline)
Advertising as "xG26 Storm Station"   BTN0 = new baseline, BTN1 = report
Weather: 21.0 C, 78 %, 1013.0 hPa, FAIR
Phone connected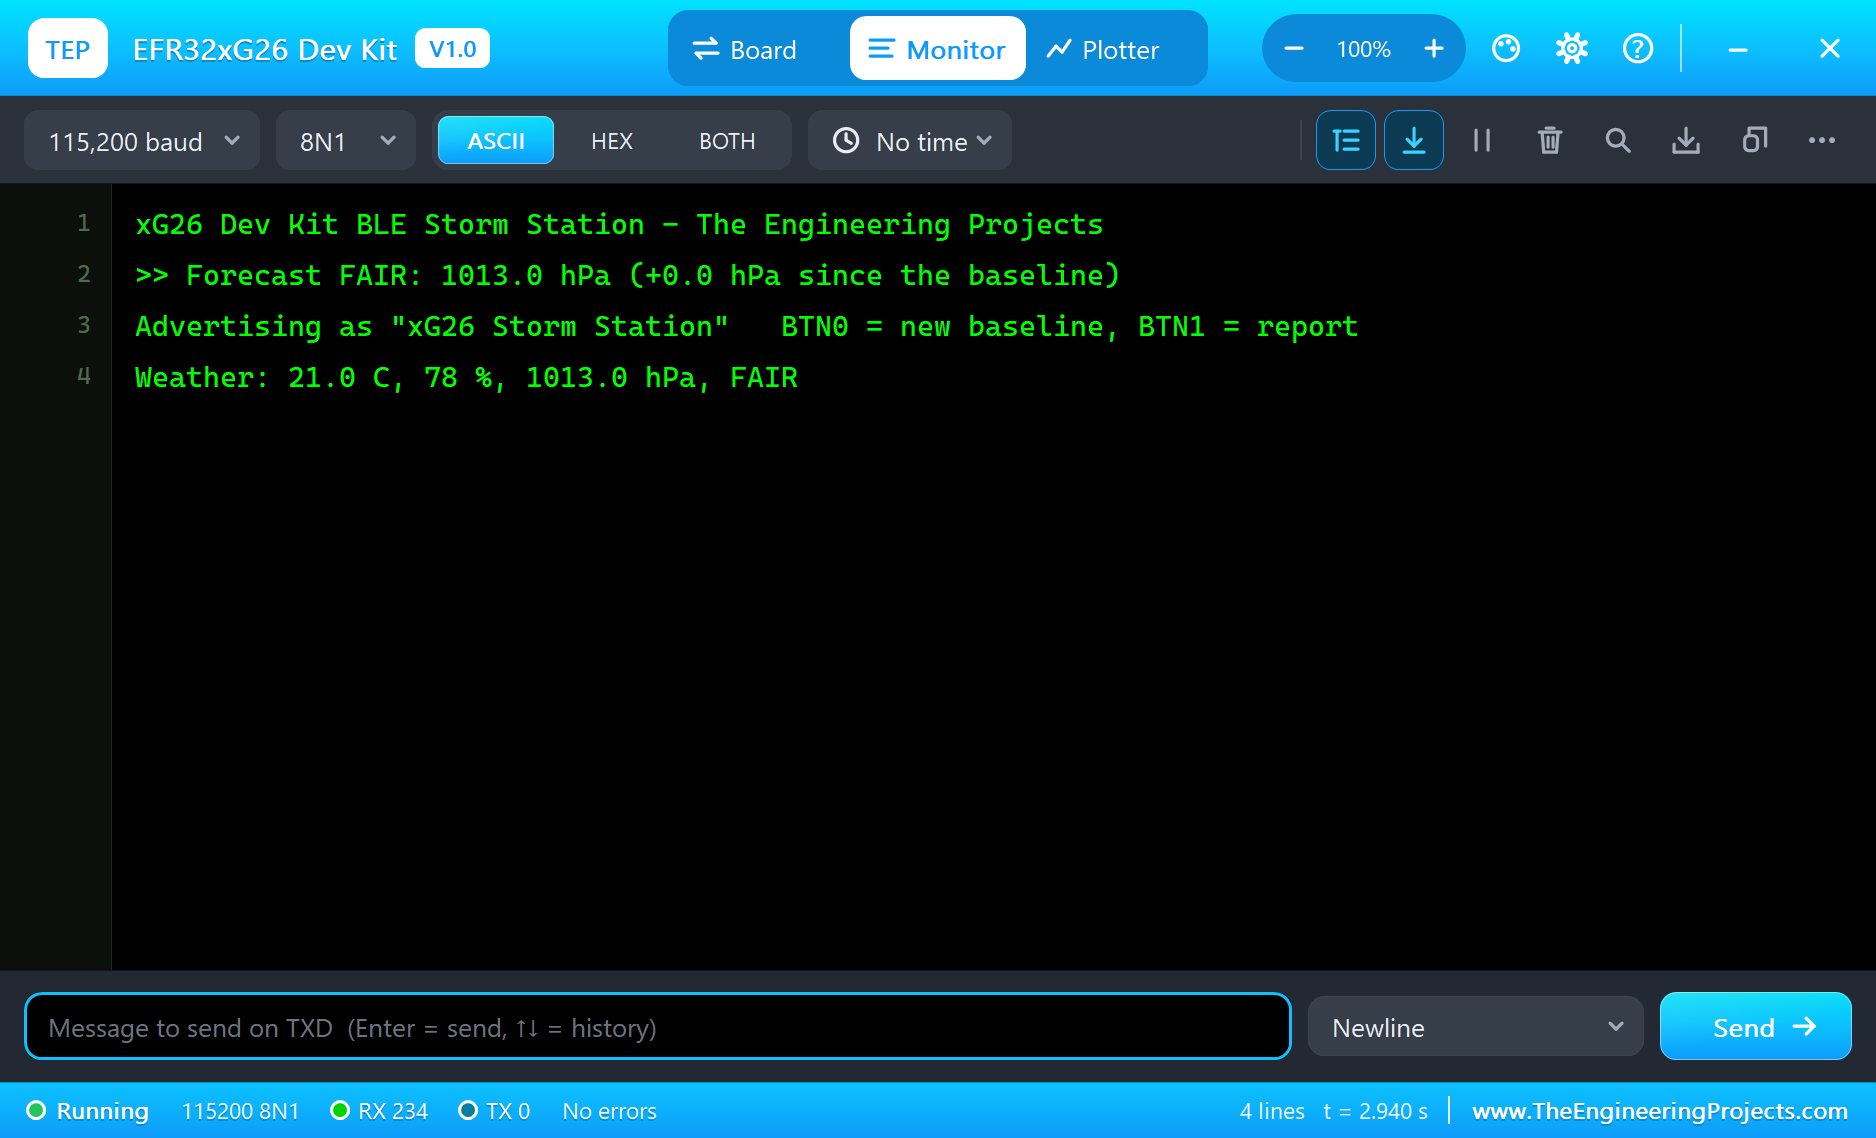
Connect the Phone
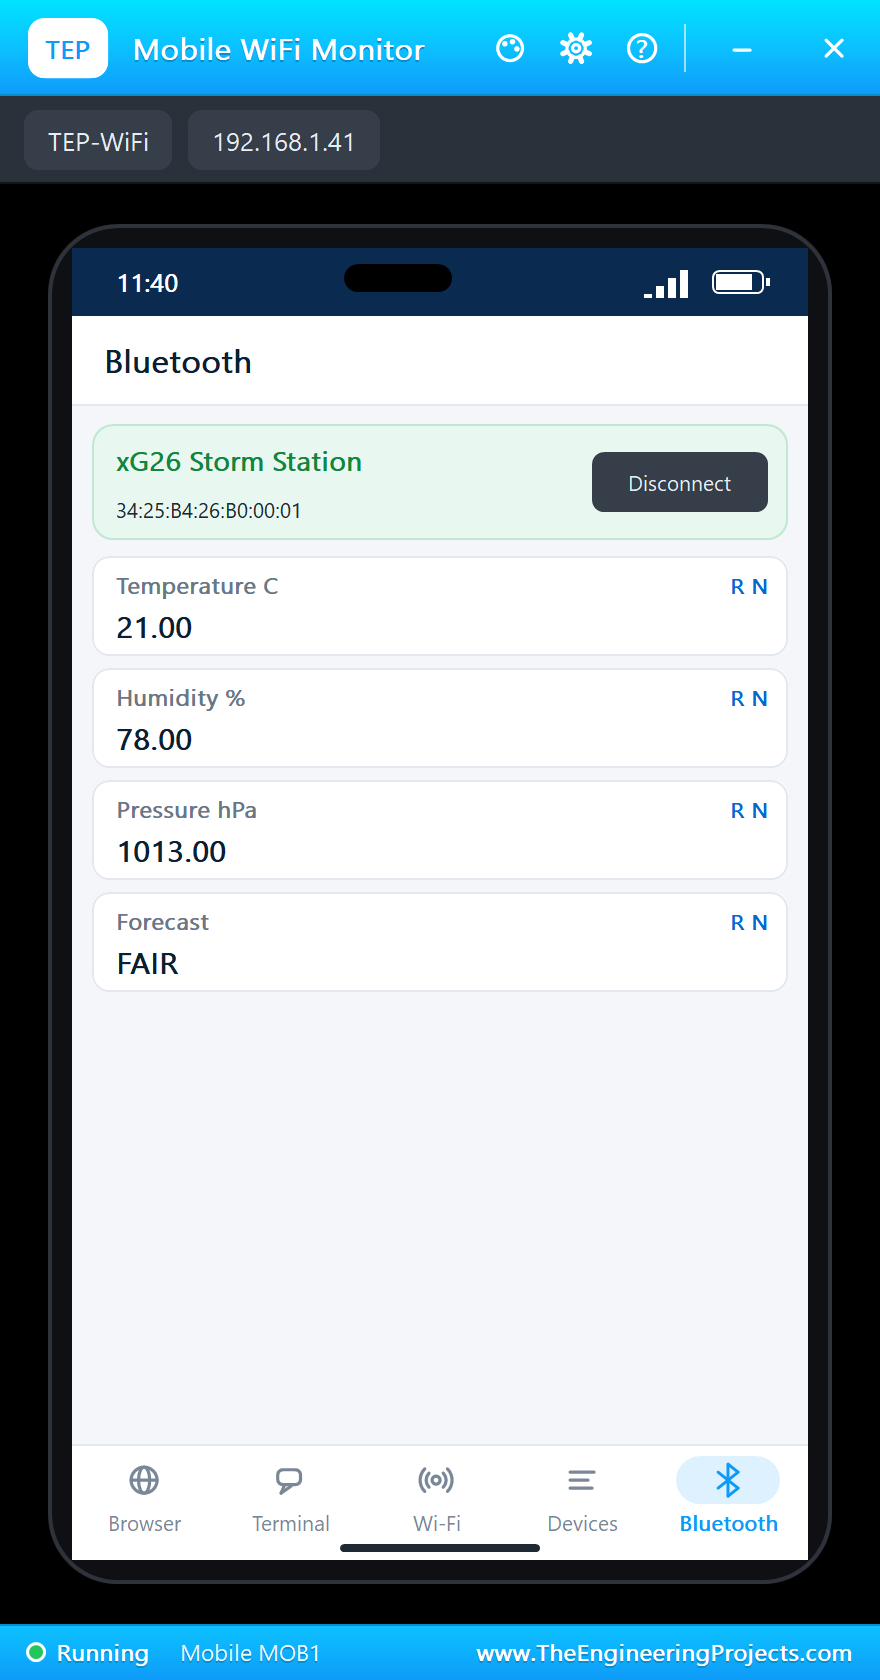
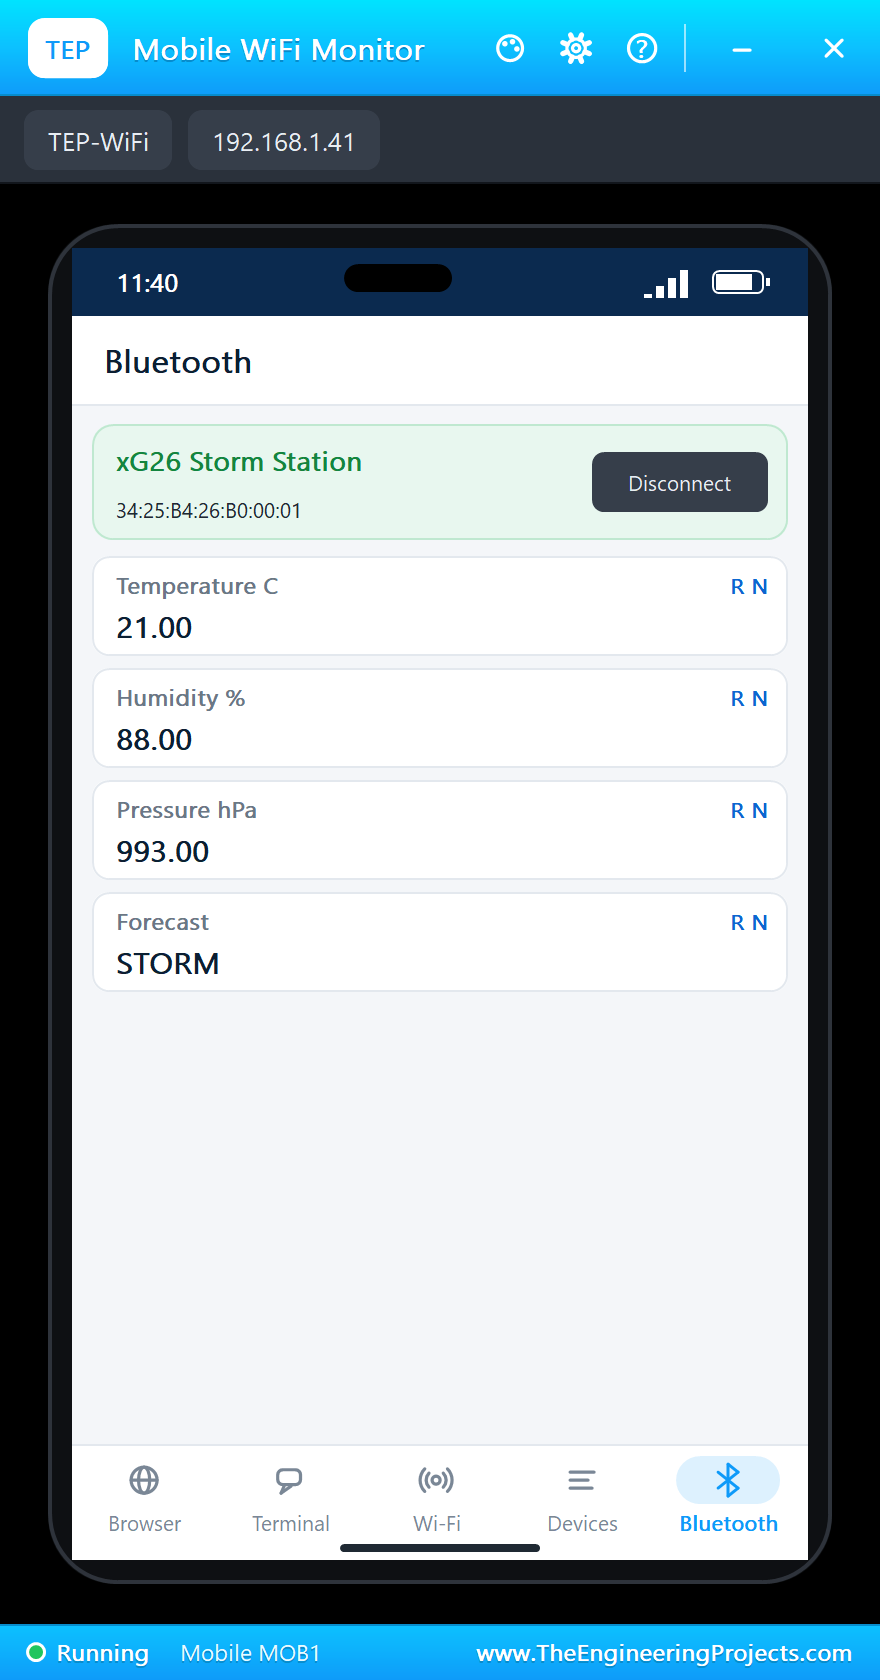
Click the phone, open its Bluetooth app, press SCAN and connect to "xG26 Storm Station". The app lists the temperature, the humidity, the pressure and the forecast:
The Pressure Falls
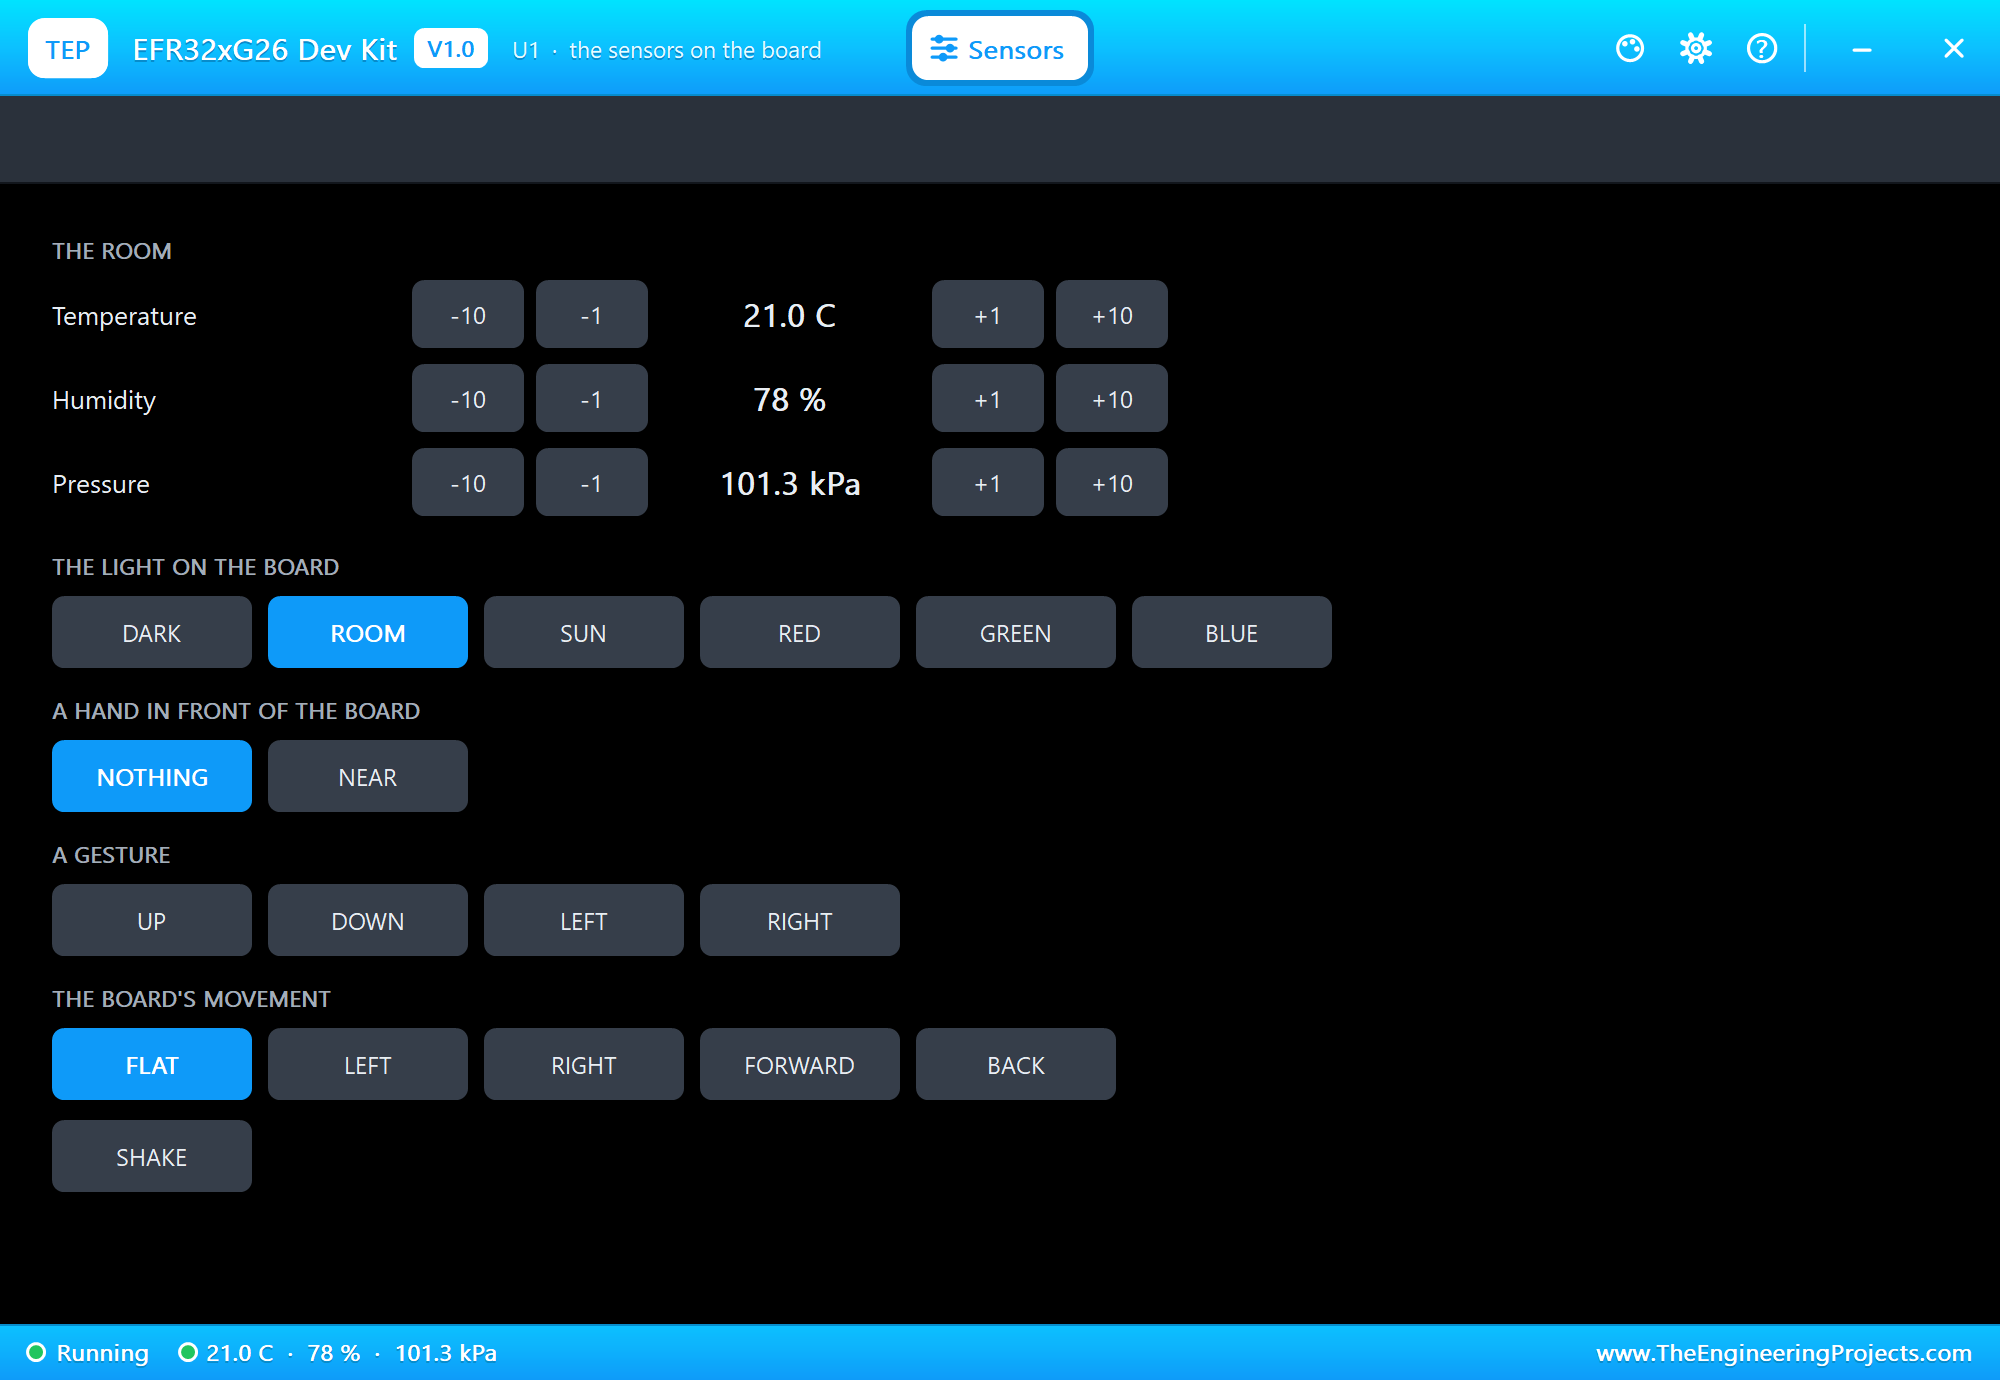
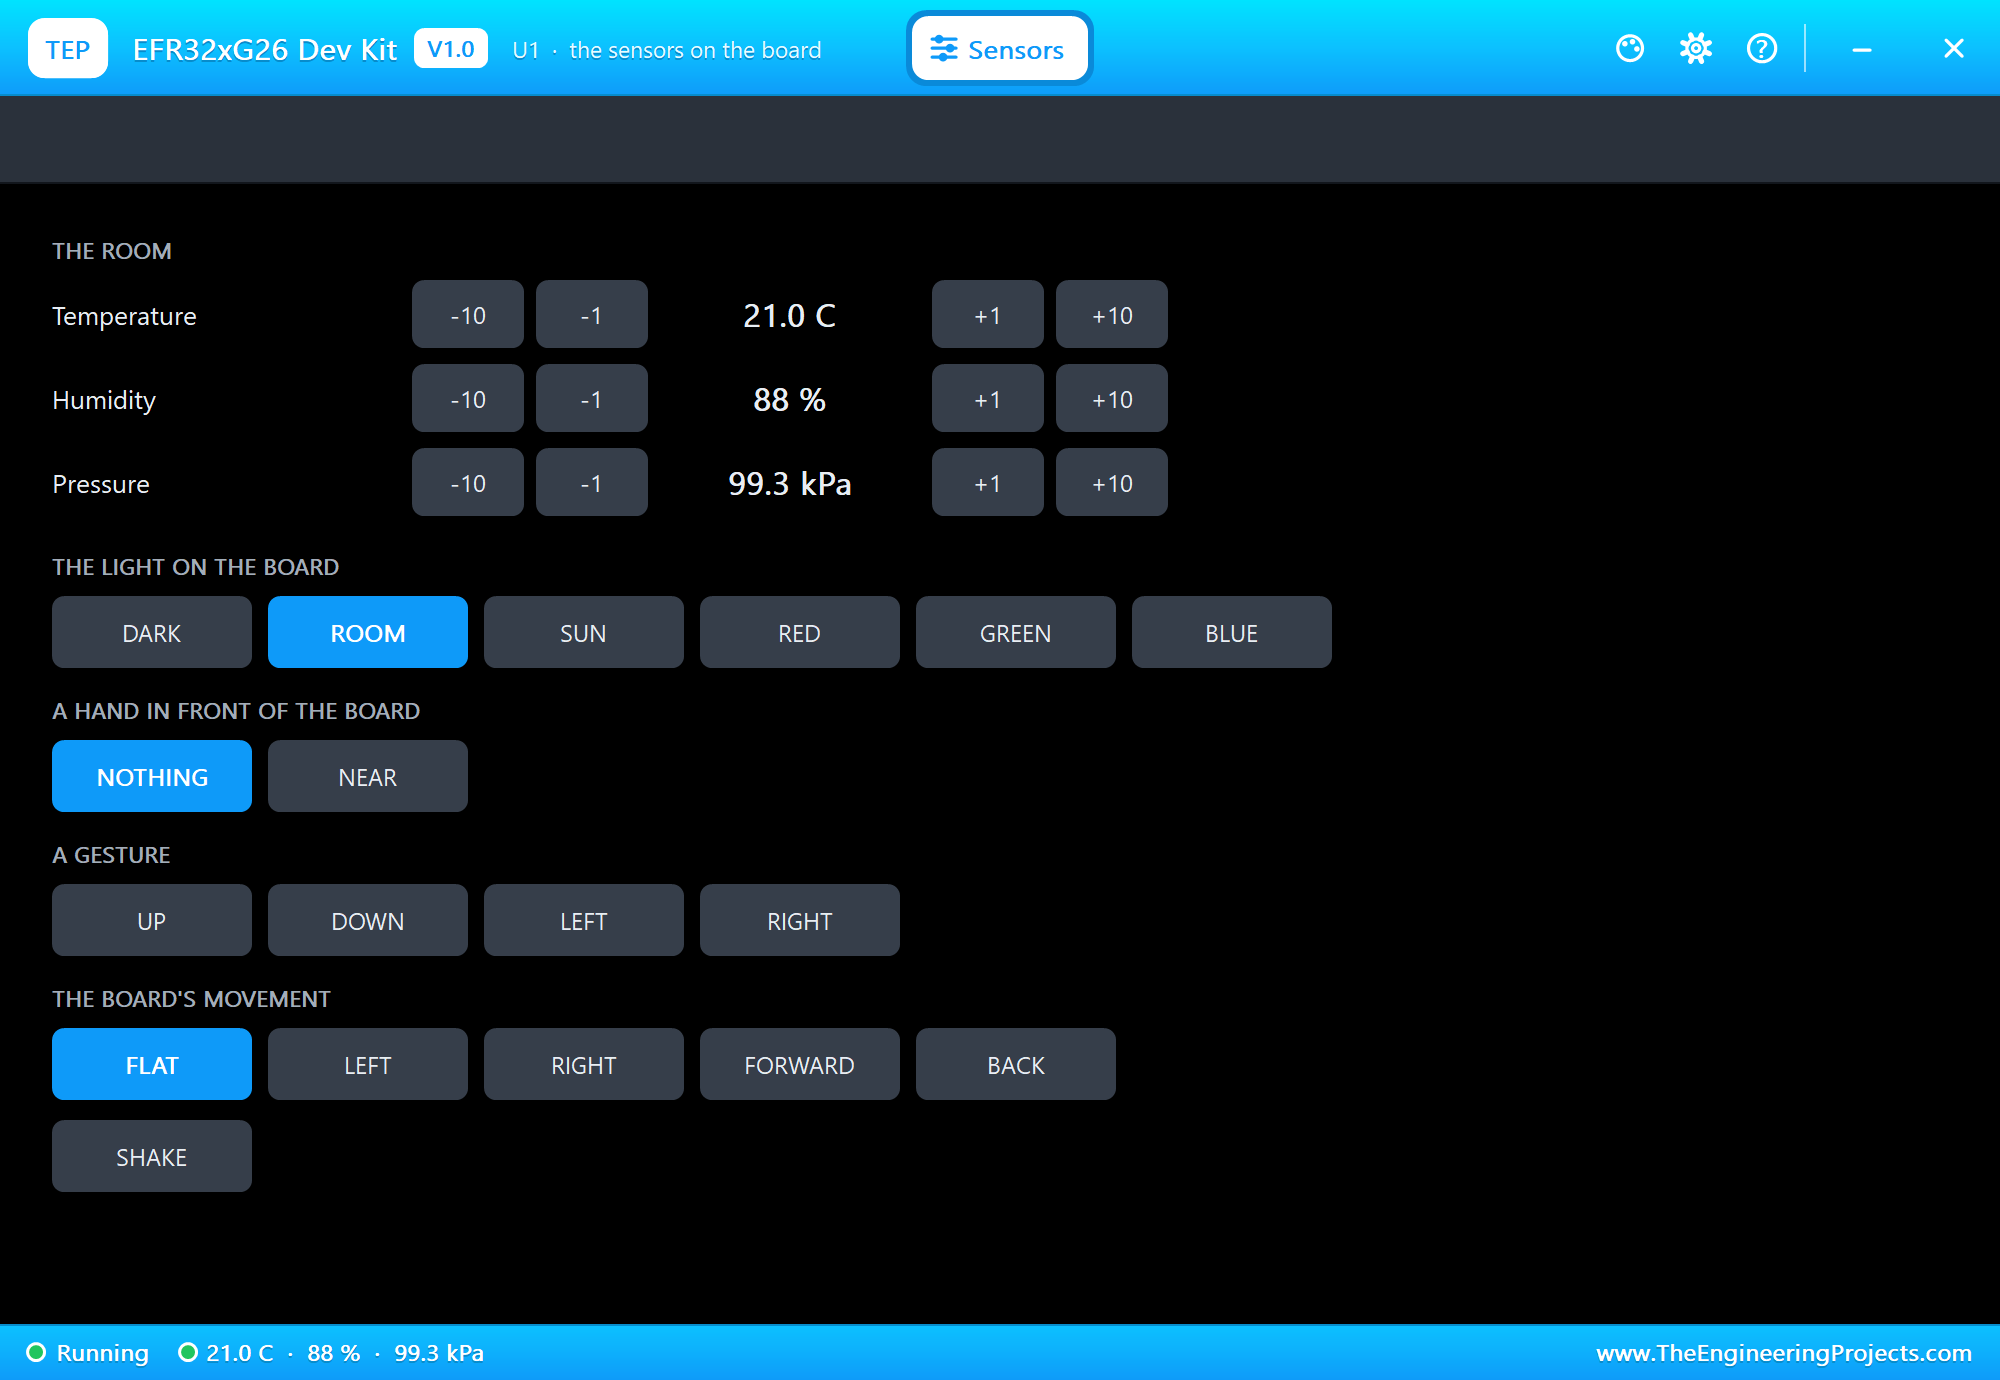
In the Sensors window click the pressure's -1: the air pressure drops by 1 kPa, which is 10 hPa. The forecast becomes CHANGING and the LED yellow. Then raise the humidity by 10 %: with the pressure falling and the air above 85 %, the kit says RAIN LIKELY:
A Storm Is Coming
Click -1 once more: the pressure is now 20 hPa below the baseline. STORM, and the LED turns red:
Here is the complete circuit while the simulation runs:
A New Baseline, Then Clearing
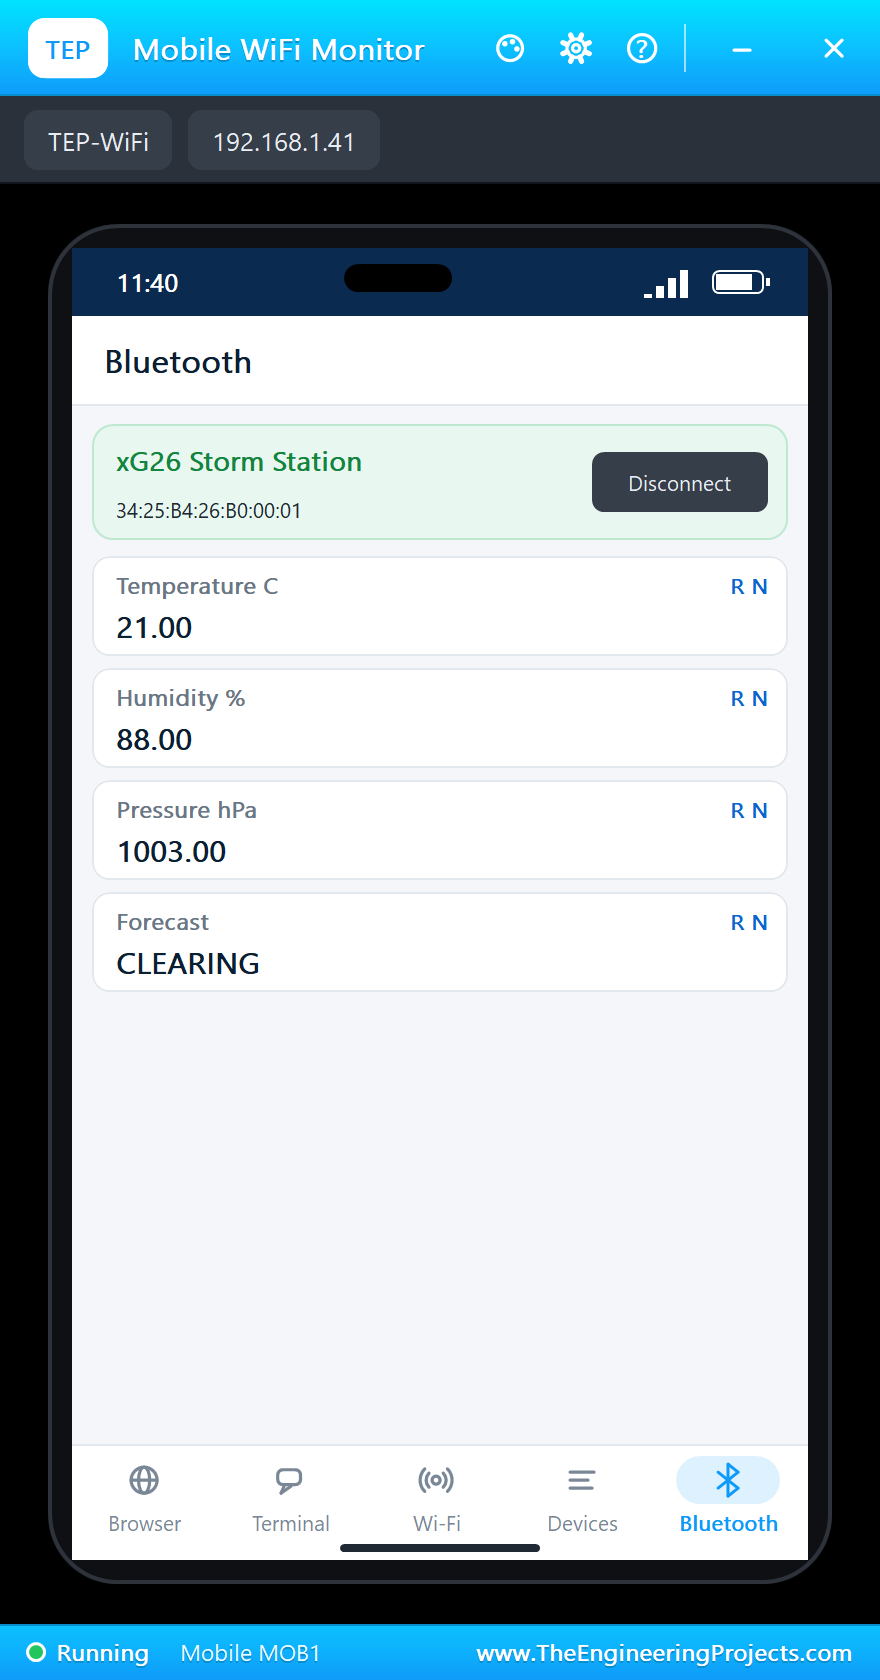
Press BTN0: the kit takes the pressure now as its new baseline and the forecast returns to FAIR. Then click the pressure's +1: 10 hPa higher means CLEARING, and the LED turns blue. BTN1 prints a report:
>> Forecast CHANGING: 1003.0 hPa (-10.0 hPa since the baseline)
>> Forecast RAIN LIKELY: 1003.0 hPa (-10.0 hPa since the baseline)
Weather: 21.0 C, 88 %, 1003.0 hPa, RAIN LIKELY
>> Forecast STORM: 993.0 hPa (-20.0 hPa since the baseline)
>> BTN0: new baseline 993.0 hPa
>> Forecast FAIR: 993.0 hPa (+0.0 hPa since the baseline)
>> Forecast CLEARING: 1003.0 hPa (+10.0 hPa since the baseline)
Weather: 21.0 C, 88 %, 1003.0 hPa, CLEARING
>> BTN1: the report
   now 21.0 C, 88 %, 1003.0 hPa
   today 21.0 .. 21.0 C
   baseline 993.0 hPa, forecast CLEARING, storm warnings 2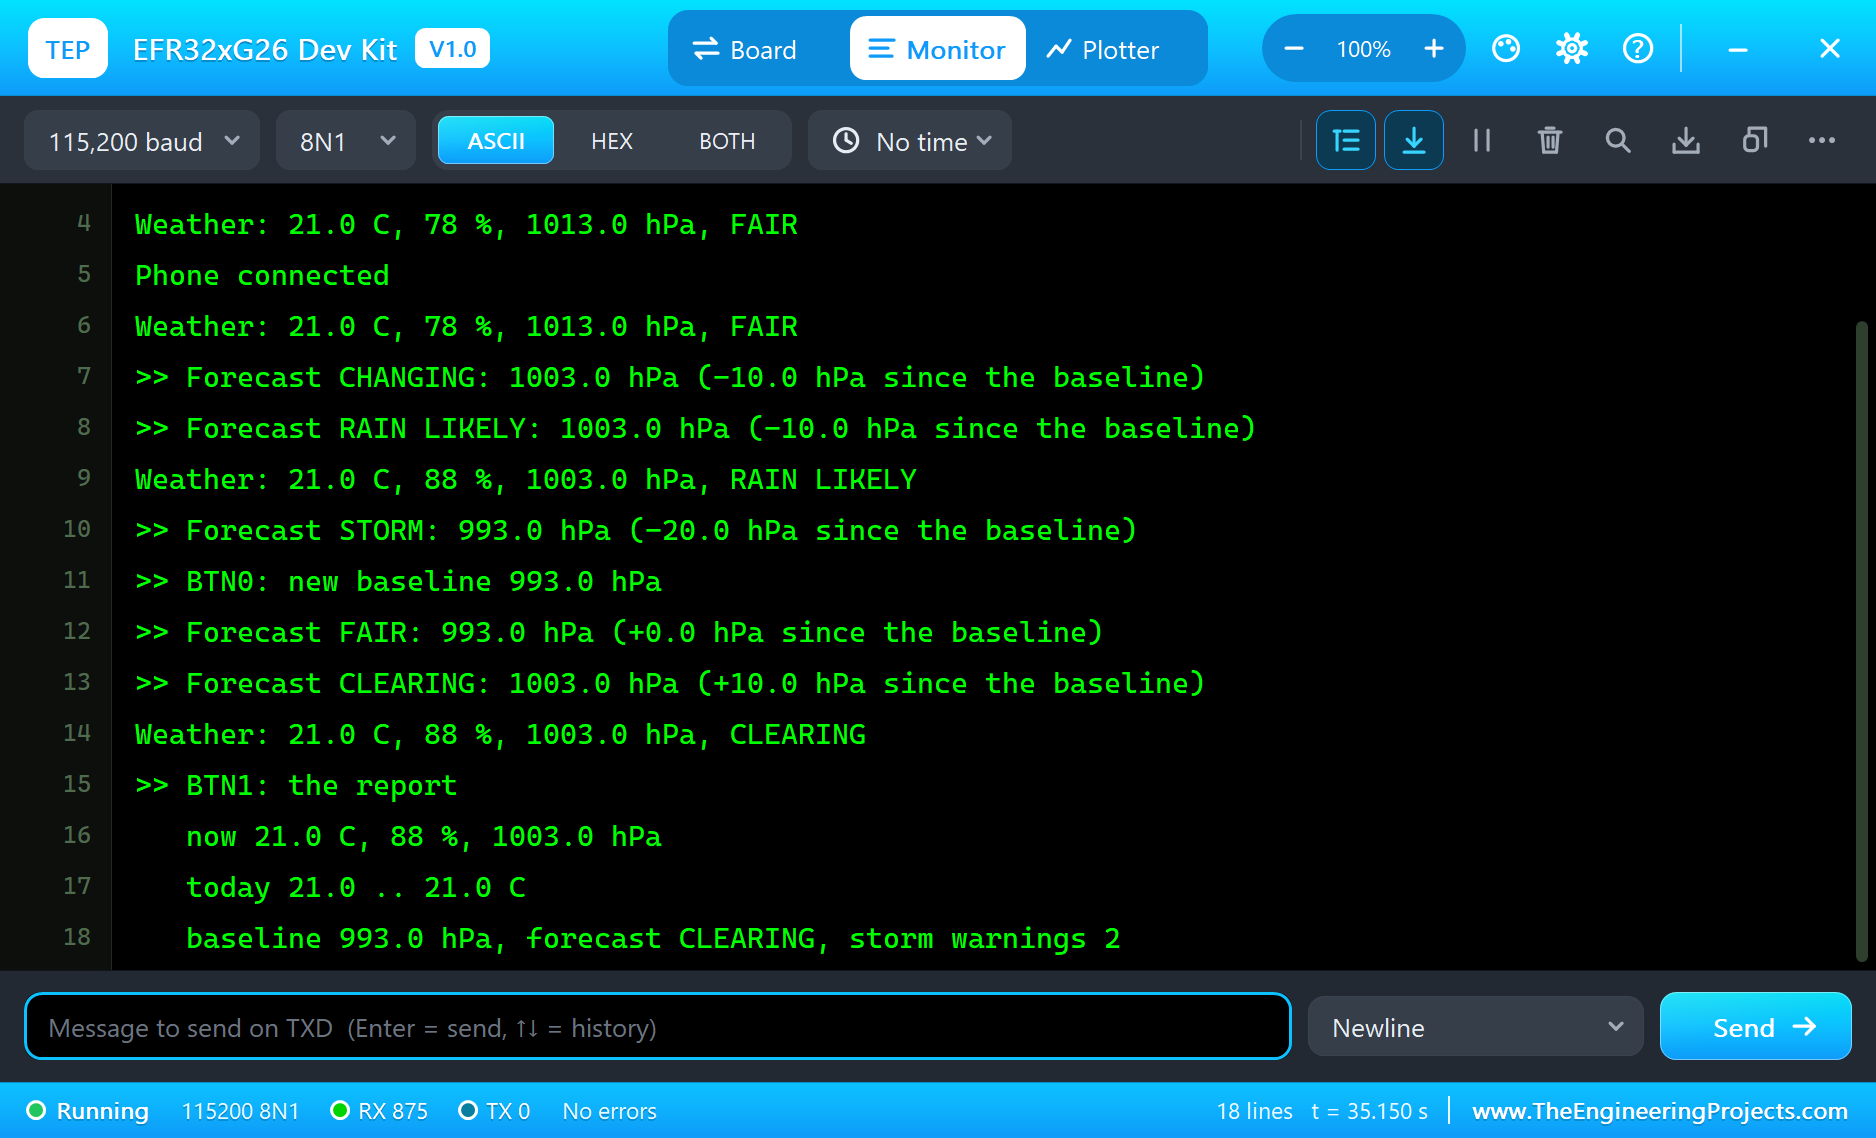
Why Pressure Predicts the Weather
Air pressure is the weight of the air above us. Low-pressure systems pull in moist air that rises, cools and forms clouds and rain; high-pressure systems push air down and dry it out. That is why a falling barometer warns of bad weather and a rising one promises better. The trend matters more than the value: 1000 hPa can be fine weather in one place and a storm in another.
hPa, kPa and Altitude
Weather maps use hectopascals (hPa); 1013 hPa is the average at sea level. Our sensor library returns kilopascals (kPa), so the sketch multiplies by 10. Pressure also falls with height - about 1 hPa for every 8 metres near the ground - so a weather station that moves up a hill would see a false storm. A real station stays in one place, or corrects for its altitude.
Why a Baseline?
Without a time stamp, the simplest trend is "now compared with a known moment". BTN0 sets that moment. A real weather station compares with the pressure three hours ago and keeps a history; the logic is the same, only the baseline moves by itself. The thresholds in the demo are large so that the simulation's 1 kPa steps show every forecast.
Standard Bluetooth Characteristics
Using the official Environmental Sensing service and characteristics means that many existing Bluetooth apps recognise the values without any custom code. The temperature, humidity and pressure UUIDs 0x2A6E, 0x2A6F and 0x2A6D are defined by the Bluetooth SIG, and only the forecast text needs a UUID of its own.
Humidity and Rain
Falling pressure alone says that the weather is changing, not how. Humid air is what turns a change into rain: when the air is already near saturation, the rising air of a low-pressure system condenses into clouds quickly. That is why the sketch only says RAIN LIKELY when both happen together - the pressure 5 hPa down and the humidity above 85 % - and why the Si7021 earns its place next to the barometer.
Try It Yourself
- Keep the pressure of the last three hours in a small array and use the real three-hour trend.
- Add the light: DAY and NIGHT on the phone from the VEML6035's reading.
- Blink the LED red while a STORM is forecast.
- Send the minimum and maximum temperature as two more characteristics.
Ideas to Extend the Station
- Add a rain gauge on a breakout pad and count its pulses with attachInterrupt.
- Show the forecast on a small display connected to the Qwiic connector.
- Log the readings every minute and send the history to the phone on request.
- Use the motion sensor to ignore readings while the kit is being carried.
Your Own Sketches
Write the sketch in the Arduino IDE with the board Silicon Labs xG26 Dev Kit (TEP Proteus), use Sketch > Export Compiled Binary and set the part's PROGRAM property to the .hex.
Moving to a Real xG26 Dev Kit
- Install Simplicity Studio (or Zephyr with the xg26_dk2608a board).
- Start from Silicon Labs' Bluetooth environmental sensing example and the kit's sensor drivers.
- Move the logic of the demo across: the baseline, the forecast, the LED colours and the buttons.
- Program the kit through the J-Link USB and open its virtual COM port at 115200 baud.
- Connect from a phone with a Bluetooth LE app and watch the values.
The logic and the Bluetooth service stay the same; on the real kit Silicon Labs' SDK takes the place of the Arduino calls.
Things to Know Before Using a Real xG26 Dev Kit
- Sensor power: the sensors sit behind an enable line on the real kit; the drivers switch it on.
- 3.3 V logic: the breakout pads are 3.3 V; check every module before you connect it.
- The antenna: the kit has a printed antenna and a U.FL connector for an external one.
- A coin cell: the kit can run from a CR2032 for battery tests, away from the USB.
Properties of the xG26 Dev Kit
| Property | What it does |
|---|---|
| PROGRAM | the sketch: a .hex from TEP Boards for Proteus (board "Silicon Labs xG26 Dev Kit") |
| MONITOR, BAUD, AUTOOPEN | the built-in serial monitor: on, its baud rate (115200), open at Run |
| TEMPERATURE, HUMIDITY, PRESSURE | the air at Run (the demo: 21 C, 78 %, 101.3 kPa) |
Troubleshooting
- The phone finds nothing: press SCAN after "Advertising as" is printed; the sketch must call
BLE.advertise(). - A sensor reads 0: call its
begin()first. - The pressure looks 10 times too small:
BARO.readPressure()is in kPa; multiply by 10 for hPa. - The LED looks inverted: on this kit each colour lights when its pin is LOW.
- A number goes wrong above 32767: int is 16 bits in the simulation - use long.
Limitations of the Simulation
- Bluetooth LE: the kit is a peripheral only.
- The Hall-effect sensor, the microphones, the SPI flash, the Qwiic and U.FL connectors and the coin cell are drawn, not modelled.
- Your sketch gets 8 KB of RAM in the simulation, and int is 16 bits there.
- EFR32, xG26 and Silicon Labs are names of Silicon Laboratories Inc. and Arduino of Arduino; the sensors' names belong to their makers, and the Bluetooth word mark belongs to Bluetooth SIG; this library is not made or endorsed by them or by Labcenter.
- Tested in Proteus 8.5 in November 2026 (the demo as shipped, about 33 s of simulation). Proteus 7 is not supported.
So, that was all about the xG26 Dev Kit Library for Proteus. I hope it helps you try your Bluetooth sensor ideas in a simulation before you buy the kit - the sensors, the LED, the buttons and the phone, all on one sheet. If you have any questions, ask in the comments and I will help you out. Till the next tutorial, take care and have fun!