Control Stepper Motor with Raspberry Pi 4 using Python


Hello friends, I hope you all are having fun. Welcome to the 10th tutorial of our Raspberry Pi programming course. In the last chapter, PWM was utilized to regulate the DC motor's speed and direction with a motor driver L293D. In this chapter, we'll advance our skills with PWM and use it to control a stepper motor using the same motor driver L293D.
Here's the video demonstration of this project:
Let's get started:
Components Required
Here's the list of components, which we will use to control the speed and direction of Raspberry Pi 4:
- Raspberry Pi 4.
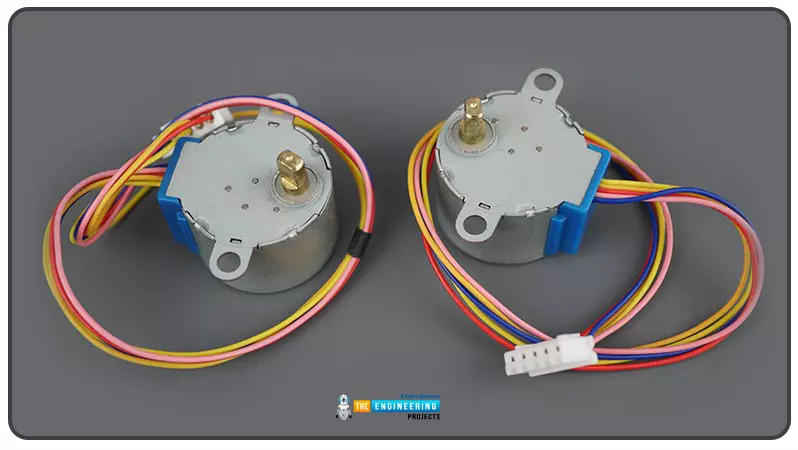
- Stepper Motor.
- Motor Driver IC(L293D).
- Jumper wires.
- 9V Battery.
- Breadboard.
The Raspberry Pi with desktop is required for this project. An SSH connection can be made, or the RPi can be shown on an LCD screen with a keyboard, and mouse. (We discussed this in previous chapters)
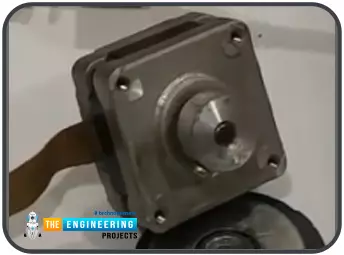
What is Stepper Motor?
- A stepper motor(step motor or stepping motor) is an asynchronous, brushless DC motor having electromagnets(stator) to rotate the rotor in a number of equal steps.
- The Stepper motor gives precise movement and its precision increases with the increase in electromagnets used.
- The Stepper motor has normally 4 or 6 wires to control the motion.
- The electromagnets are turned ON and OFF in a sequence in order to make the rotor rotate.
- Stepper motors are used in applications where high torque at low speed is required.
- Because of its precise & accurate movement, its normally used in open-loop projects.
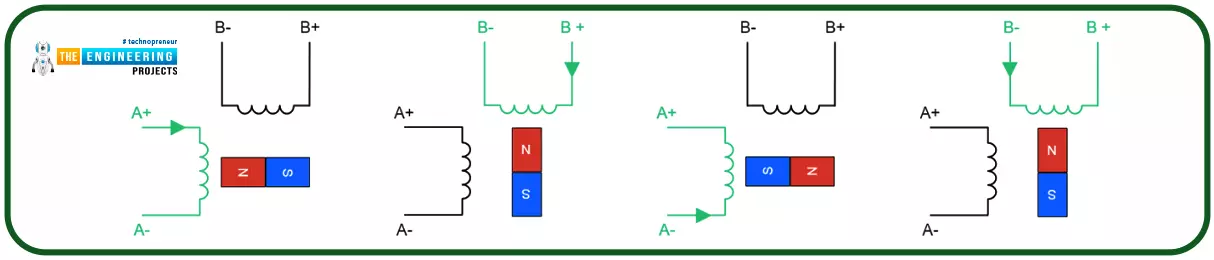
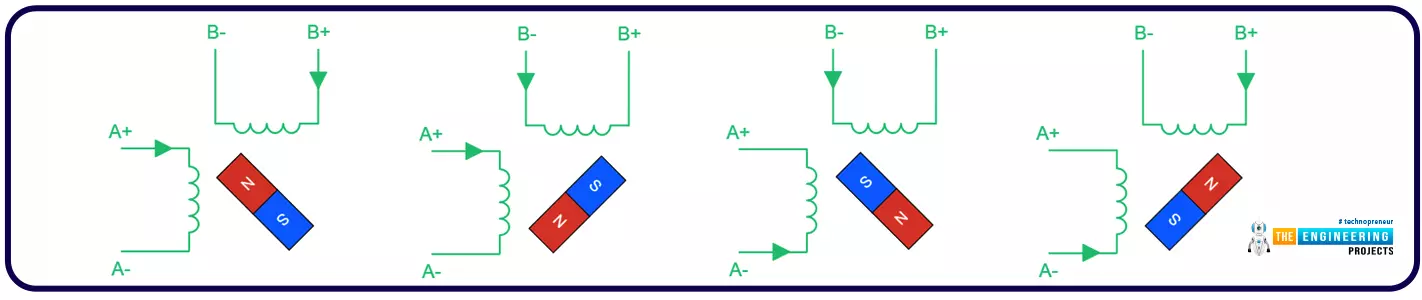
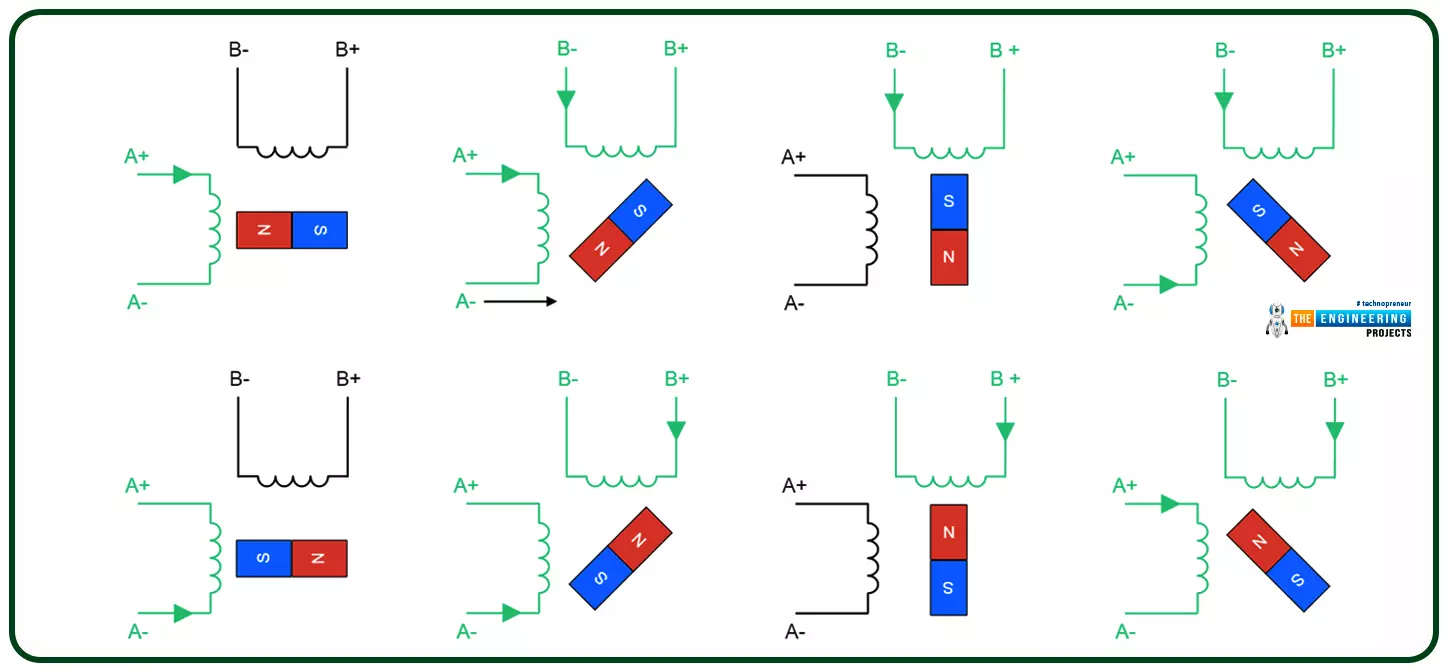
Stepper Motor Working Principle
- The below image shows the internal structure of a simple stepper motor, I have designed it for explaining the stepper working.
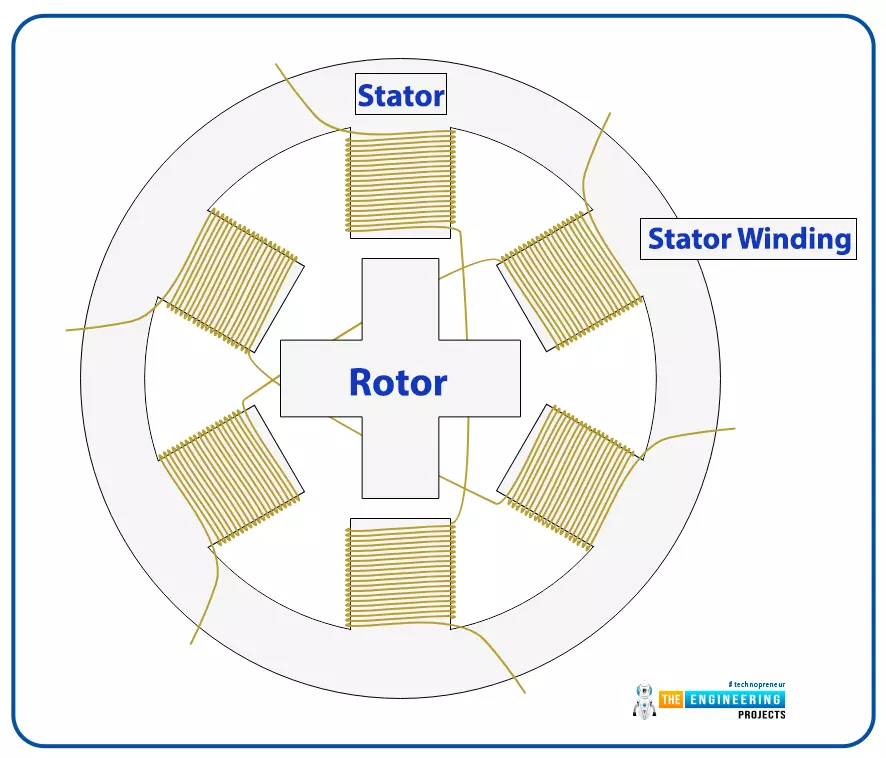
- As you can see in the above figure, it has a rotor in the center surrounded by 4 pairs of stator coils(electromagnets).
- When current passes through this stator coil, a magnetic field is generated around it.
- This magnetic field attracts the rotor towards it.
- In the first figure of the below image, pair A stator coil got energized and aligned the rotor.

- In the second figure, the coil A pair got de-energized, while the coil B pair got energized and the rotor aligned itself with pair B by taking a rotation of 60 degrees.
- In the third figure, the coil B pair got de-energized, while the coil C pair got energized and the rotor now aligned with coil C and thus covered another 60 degrees.
- That's how the rotor completes its rotations in the stepper motor.
- This switching of coils is carried out in nanoseconds.

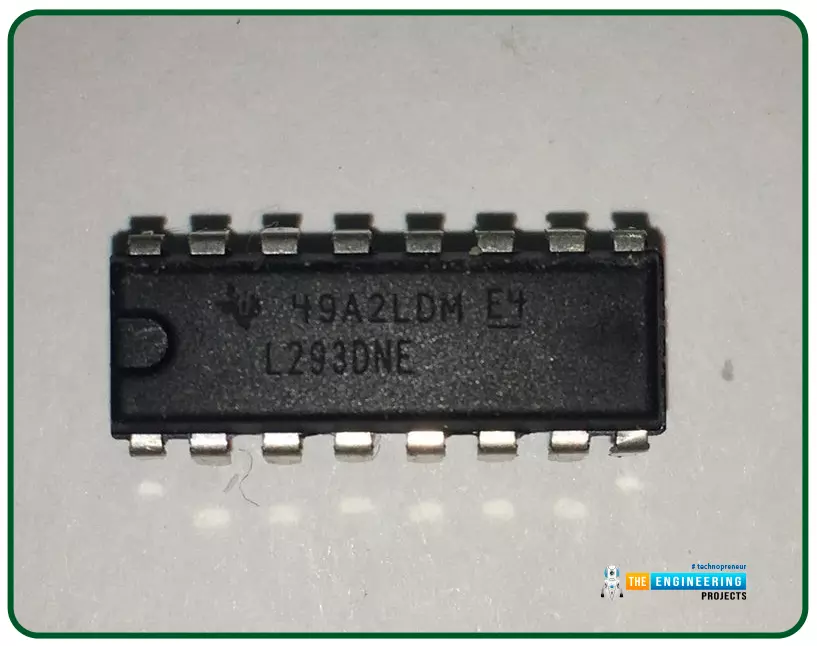
L293D Motor Driver IC
We will use an L293D motor driver to control the direction and speed of the stepper motor. In our last lecture, we controlled the DC motor with the same driver i.e. L293D and I explained it's working & why we use it? in detail there. So, please check that tutorial out, if you are new to this motor driver.
- L293D Pinout is shown in the below figure:
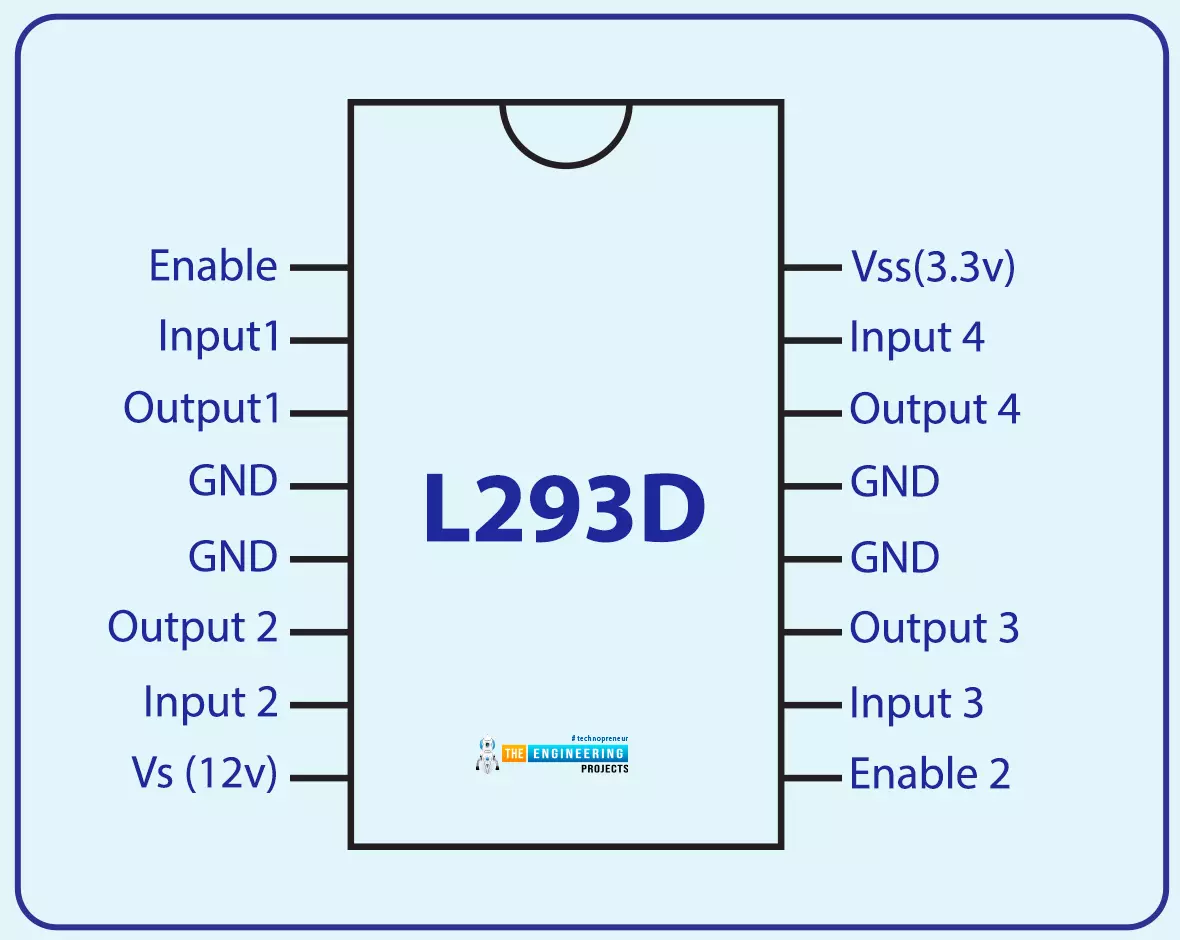
- In the last lecture, we discussed that 2 DC motors can be controlled by a single L293D chip at the same time because a normal DC motor has 2 pins in total.
- But Stepper motors have either 4 or 6 pins to control their rotation.
- So, we can control only 1 Stepper Motor from a single chip of L293D.
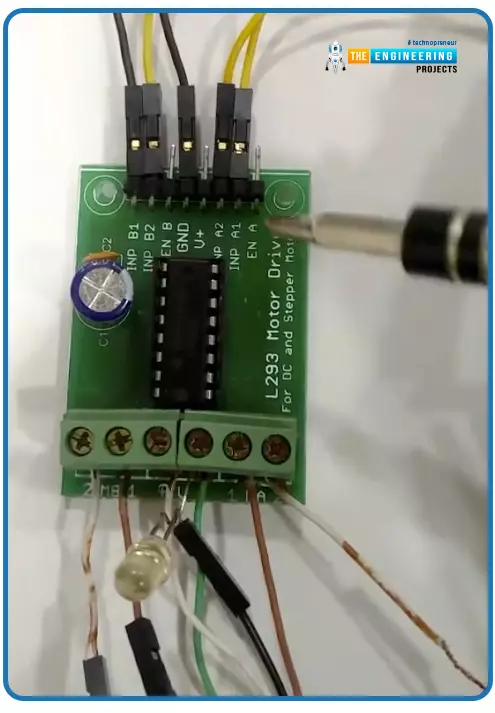
- Four controlling pins of stepper motors are connected to the Output pins of L293D.
Stepper Motor with RPi4 Circuit Diagram
The below figure shows the circuit diagram of Stepper motor interfacing with Raspberry Pi4:
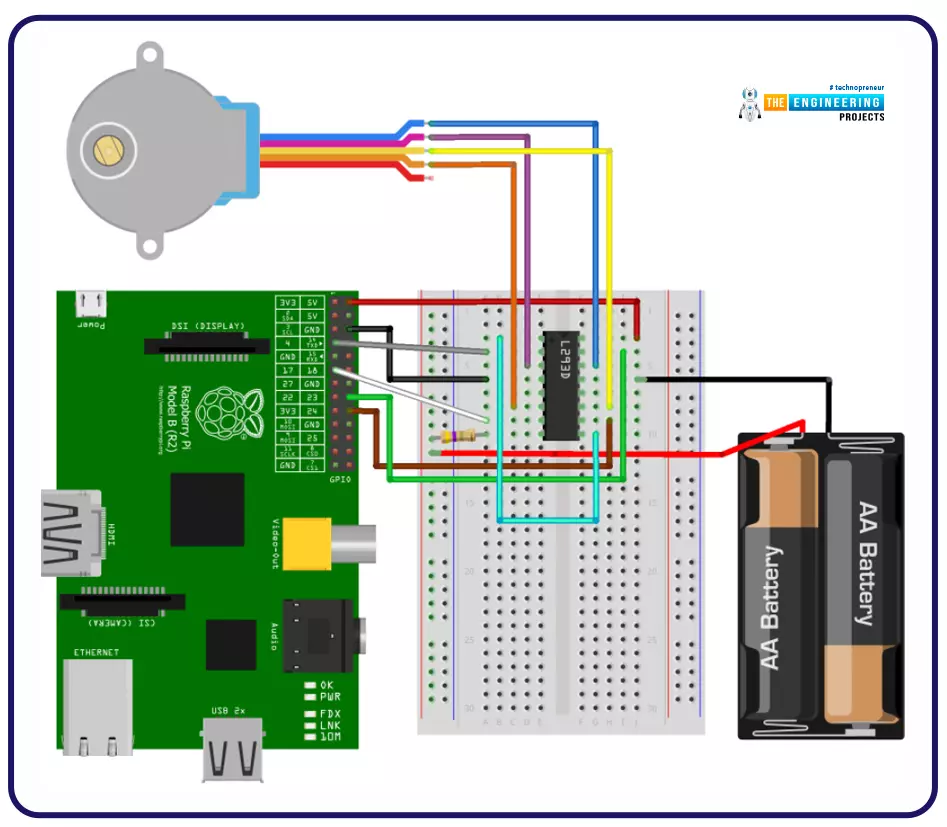
- As you can see in the above figure, we have used all 4 input pins of L293D to control a single stepper motor.
- The rest of the circuit is the same as that of the DC Motor Control i.e. Vss is provided with 3.3V, Vs is connected to the +9V from the battery, GND of battery & Rpi4 is connected to the GND of L293D motor driver.
- Moreover, both the Enable Pins of L293D are connected to Rpi4 GPIOs.
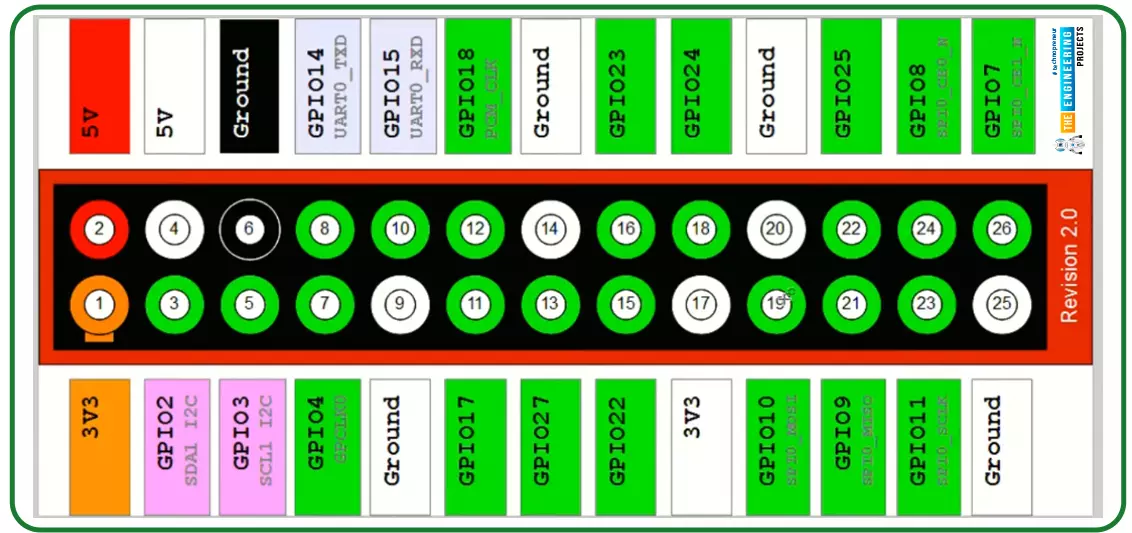
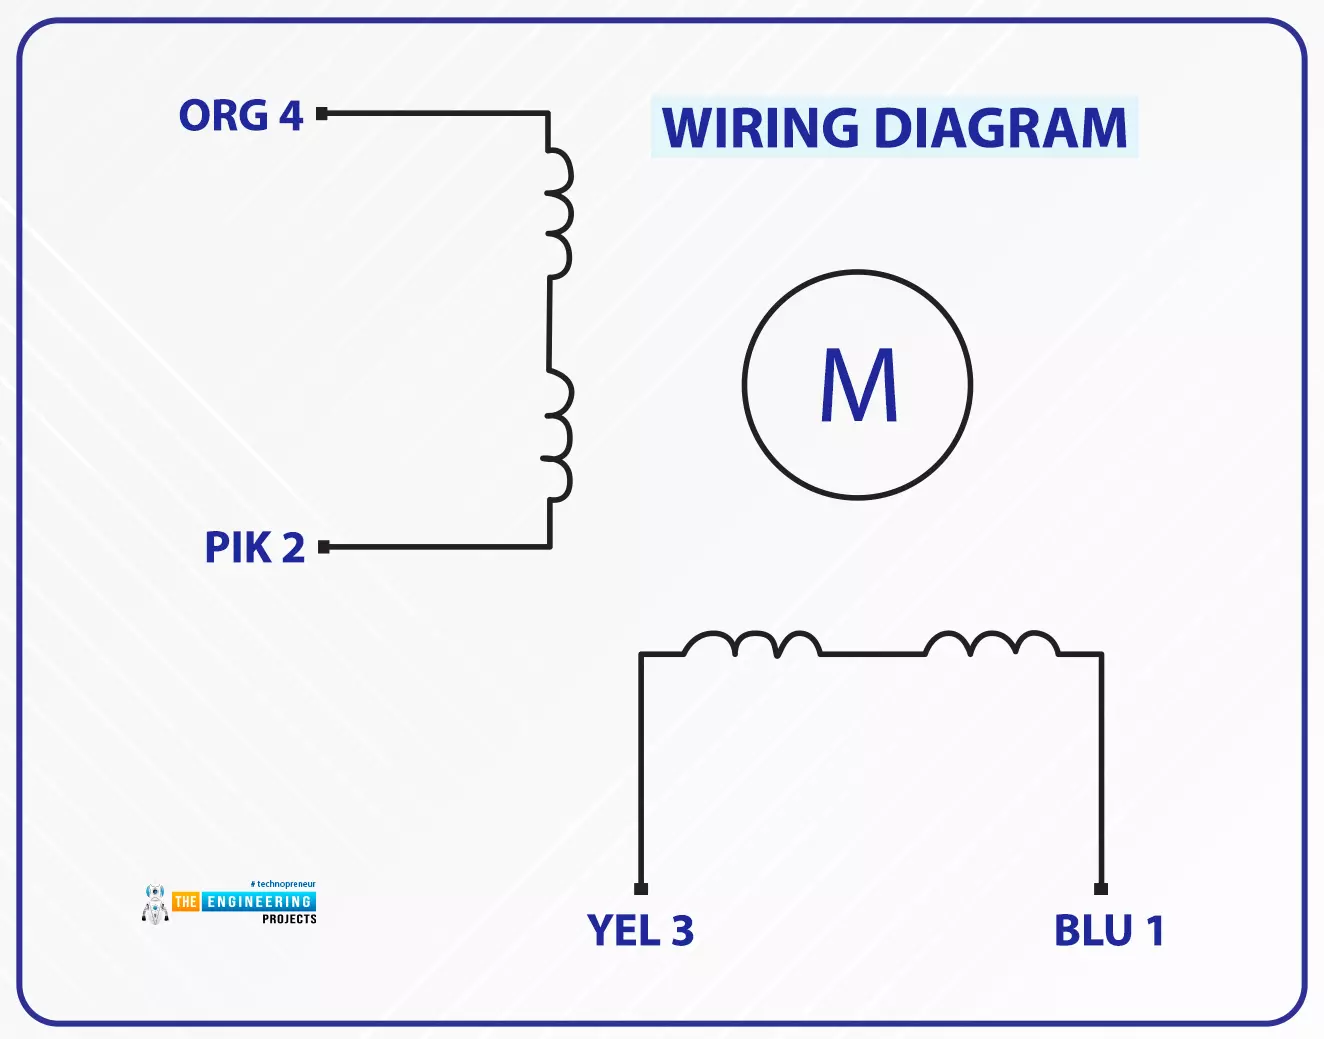
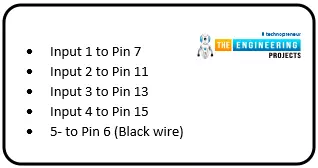
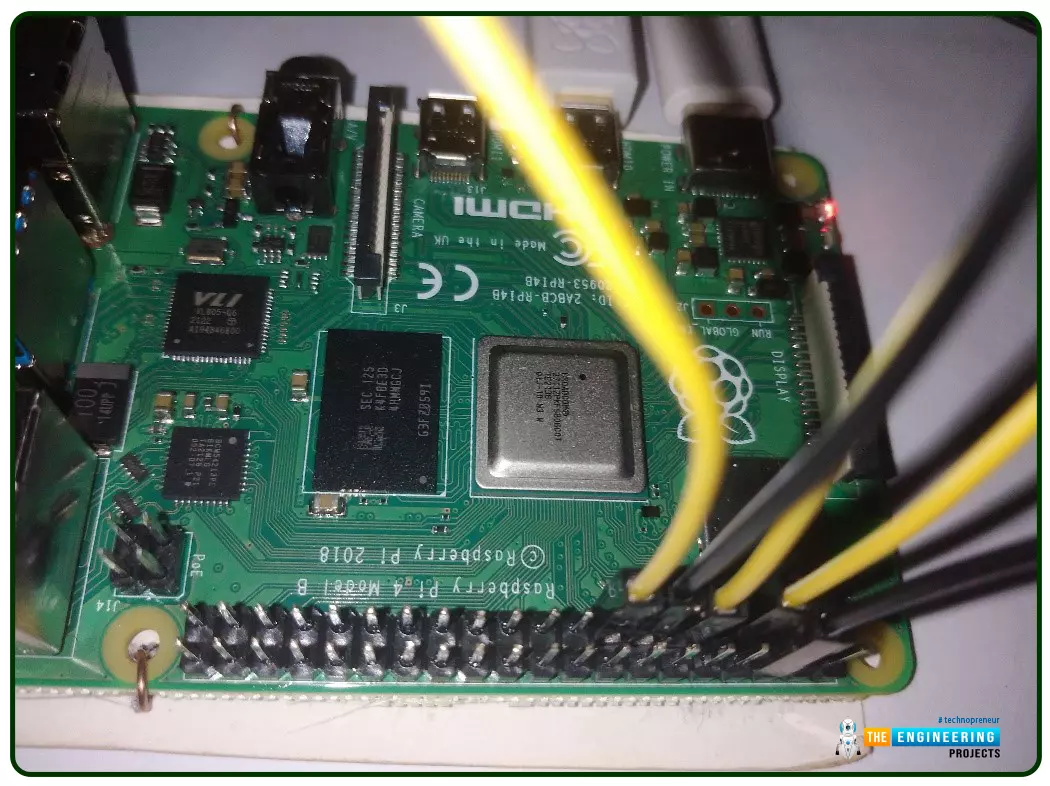
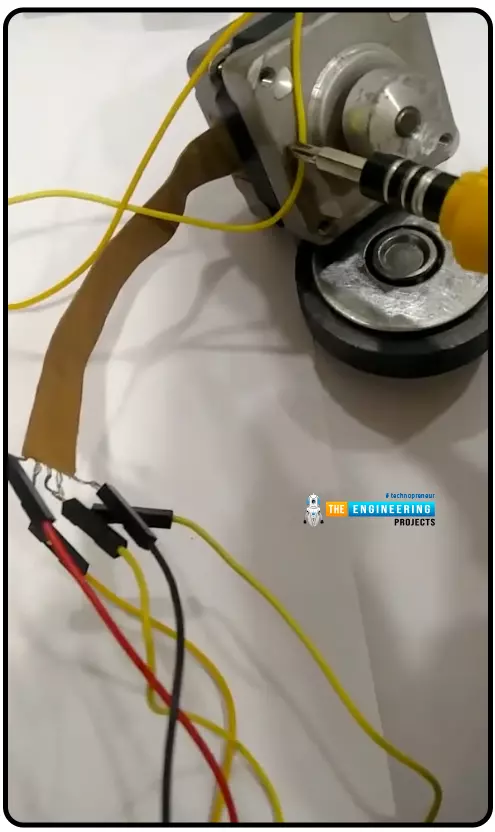
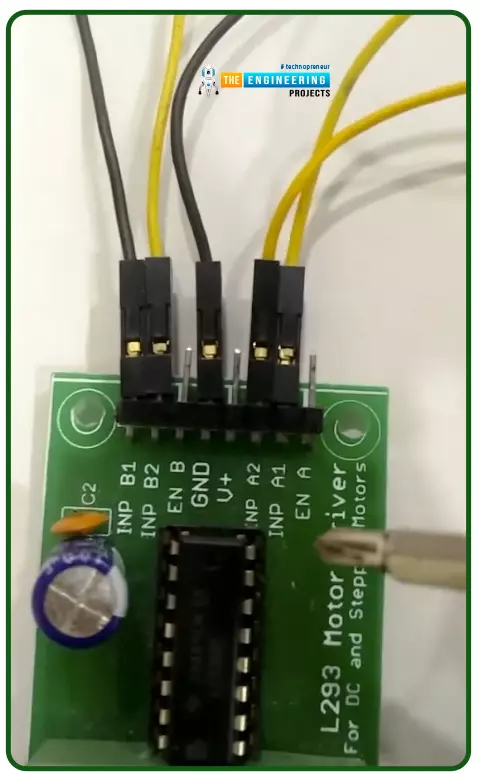
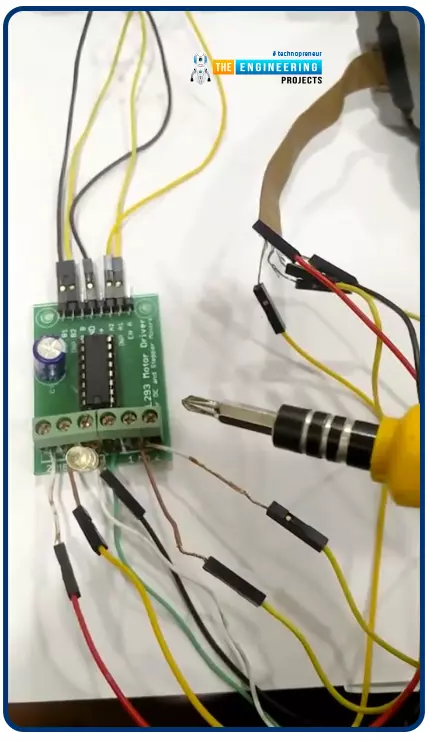
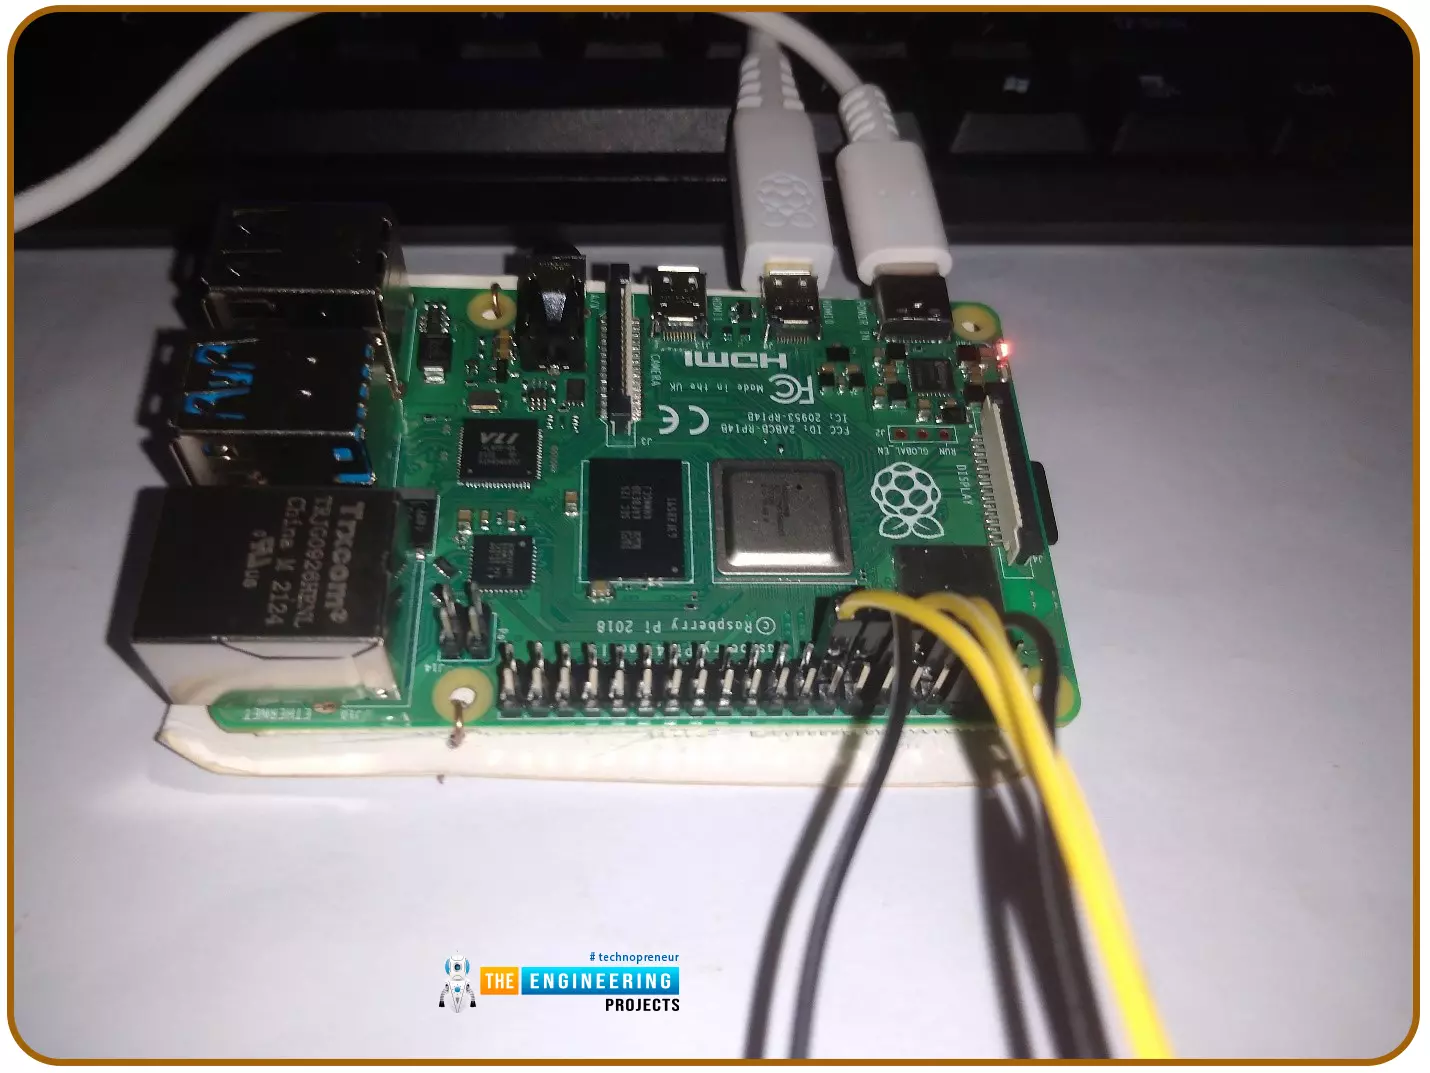
The wire mappings from my Raspberry Pi 4 to a stepper motor driver are shown in the below diagrams:
Python Code for Stepper Control with RPi4
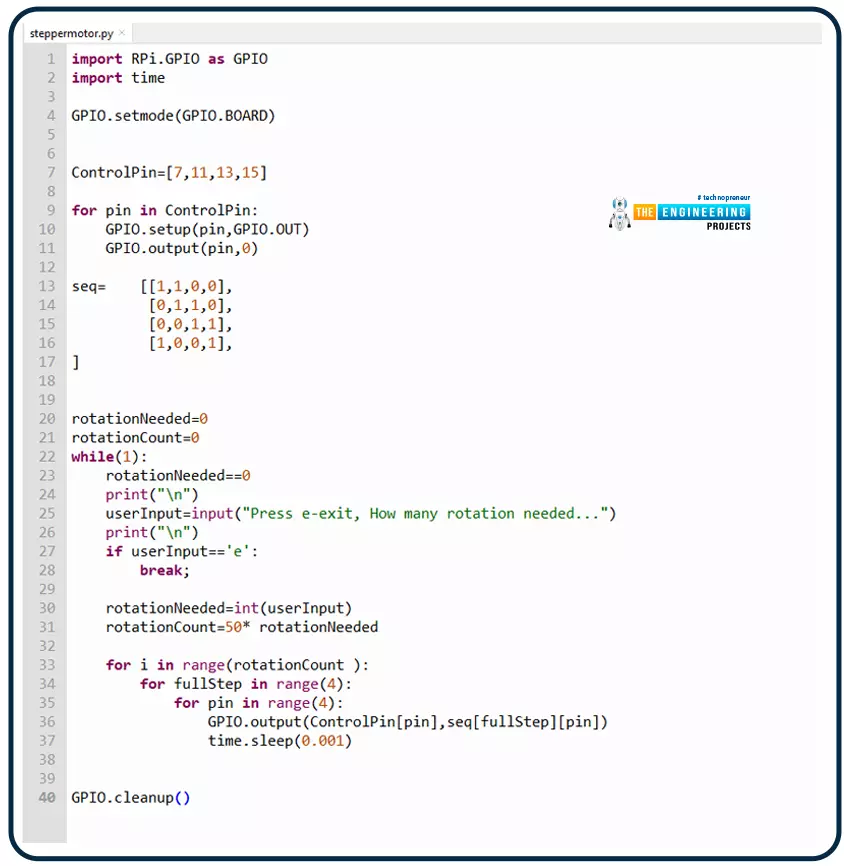
Open Thonny text editor. Importing the GPIO and time modules is the first step. Make sure you type the GPIO module's name exactly, case-sensitively, on the first line.

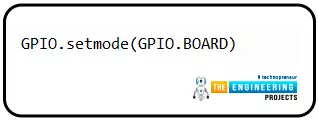
- Set the mode of GPIO pins to the board:
- Set up the control pins, which are going to connect to the Input pins of L293D:

- Use a for loop to set all the pins as output:

- Create a sequence list, 1 being high and 0 being low.
- As you can see in the below code, this sequence is turning ON the consecutive coils.

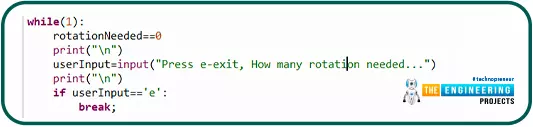
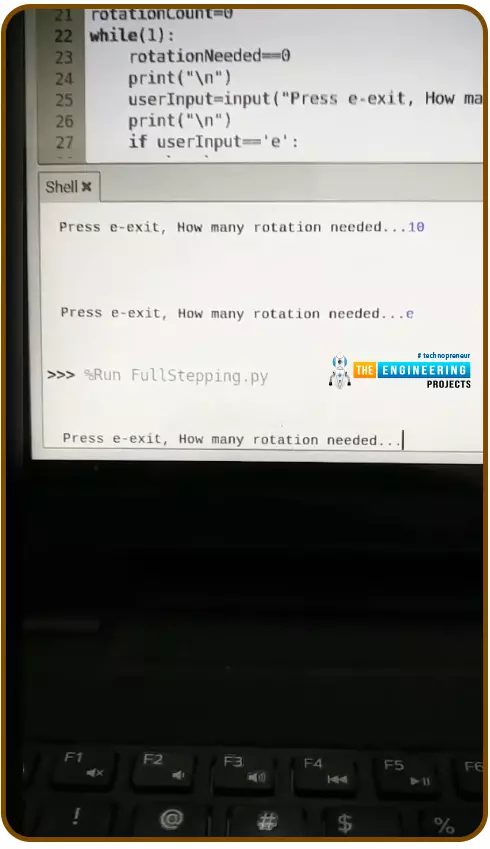
- Take user input for the number of rotations:
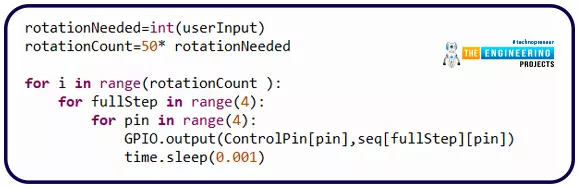
- Substitute the input value for the rotation and place a for loop to move the stepper motor in steps using this code.
- Finally, clean up the pins after the code execution is complete:

Conclusion
Congratulations! You have made it to the end of this tutorial. We have seen how PWM is used with a motor driver IC to control a stepper motor. We have also seen different stepper motor control techniques, how to set up our circuit diagram, and how to write a Python program that controls the steps for our motor. In the next tutorial, we will have a look at how to control a Servo Motor with Raspberry Pi 4 using Python. Till then, take care and have fun !!!