Installation of Raspbian in Raspberry Pi 4


How to Install Raspbian using an imager
The next step is to make sure you have your board and SD card. The Raspberry Pi has an operating system because it is a full computer. For those who prefer a GUI desktop experience, a headless mode is still an option. Most people use Raspbian, a Debian-based operating system tailored specifically for the Raspberry Pi. However, there are other options. An excellent starting point is this operating system, which is likely to support other Linux packages that you are already familiar with.
Other means to install and run an operating system on the Raspberry Pi are also available. The imager installer is the most convenient method. As long as you're familiar with the operating system ISO, you may download it to your SD card, format your SD card and mount the ISO, and then boot the Pi. Follow the imager installation option if that's all gibberish to you.
Download imager
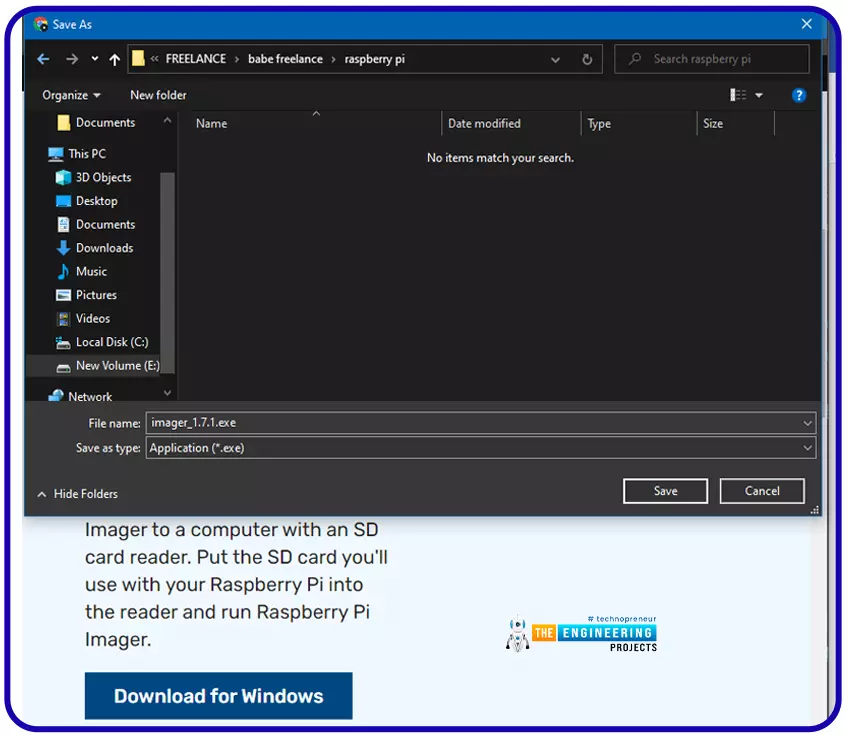
For this process, we will open our browser and navigate to the raspberry pi website and down to the software option, you will see a download for windows. This button allows you to download the imager for windows which in my case I am using. If you are using another operating system like mac and ubuntu there are also imagers for those particular operating systems.

The executable imager file will be downloaded to your computer as seen below.
This software allows us to flash our operating system into the micro-SD card which will be used in the mini-computer.
Flashing the operating system into the storage card
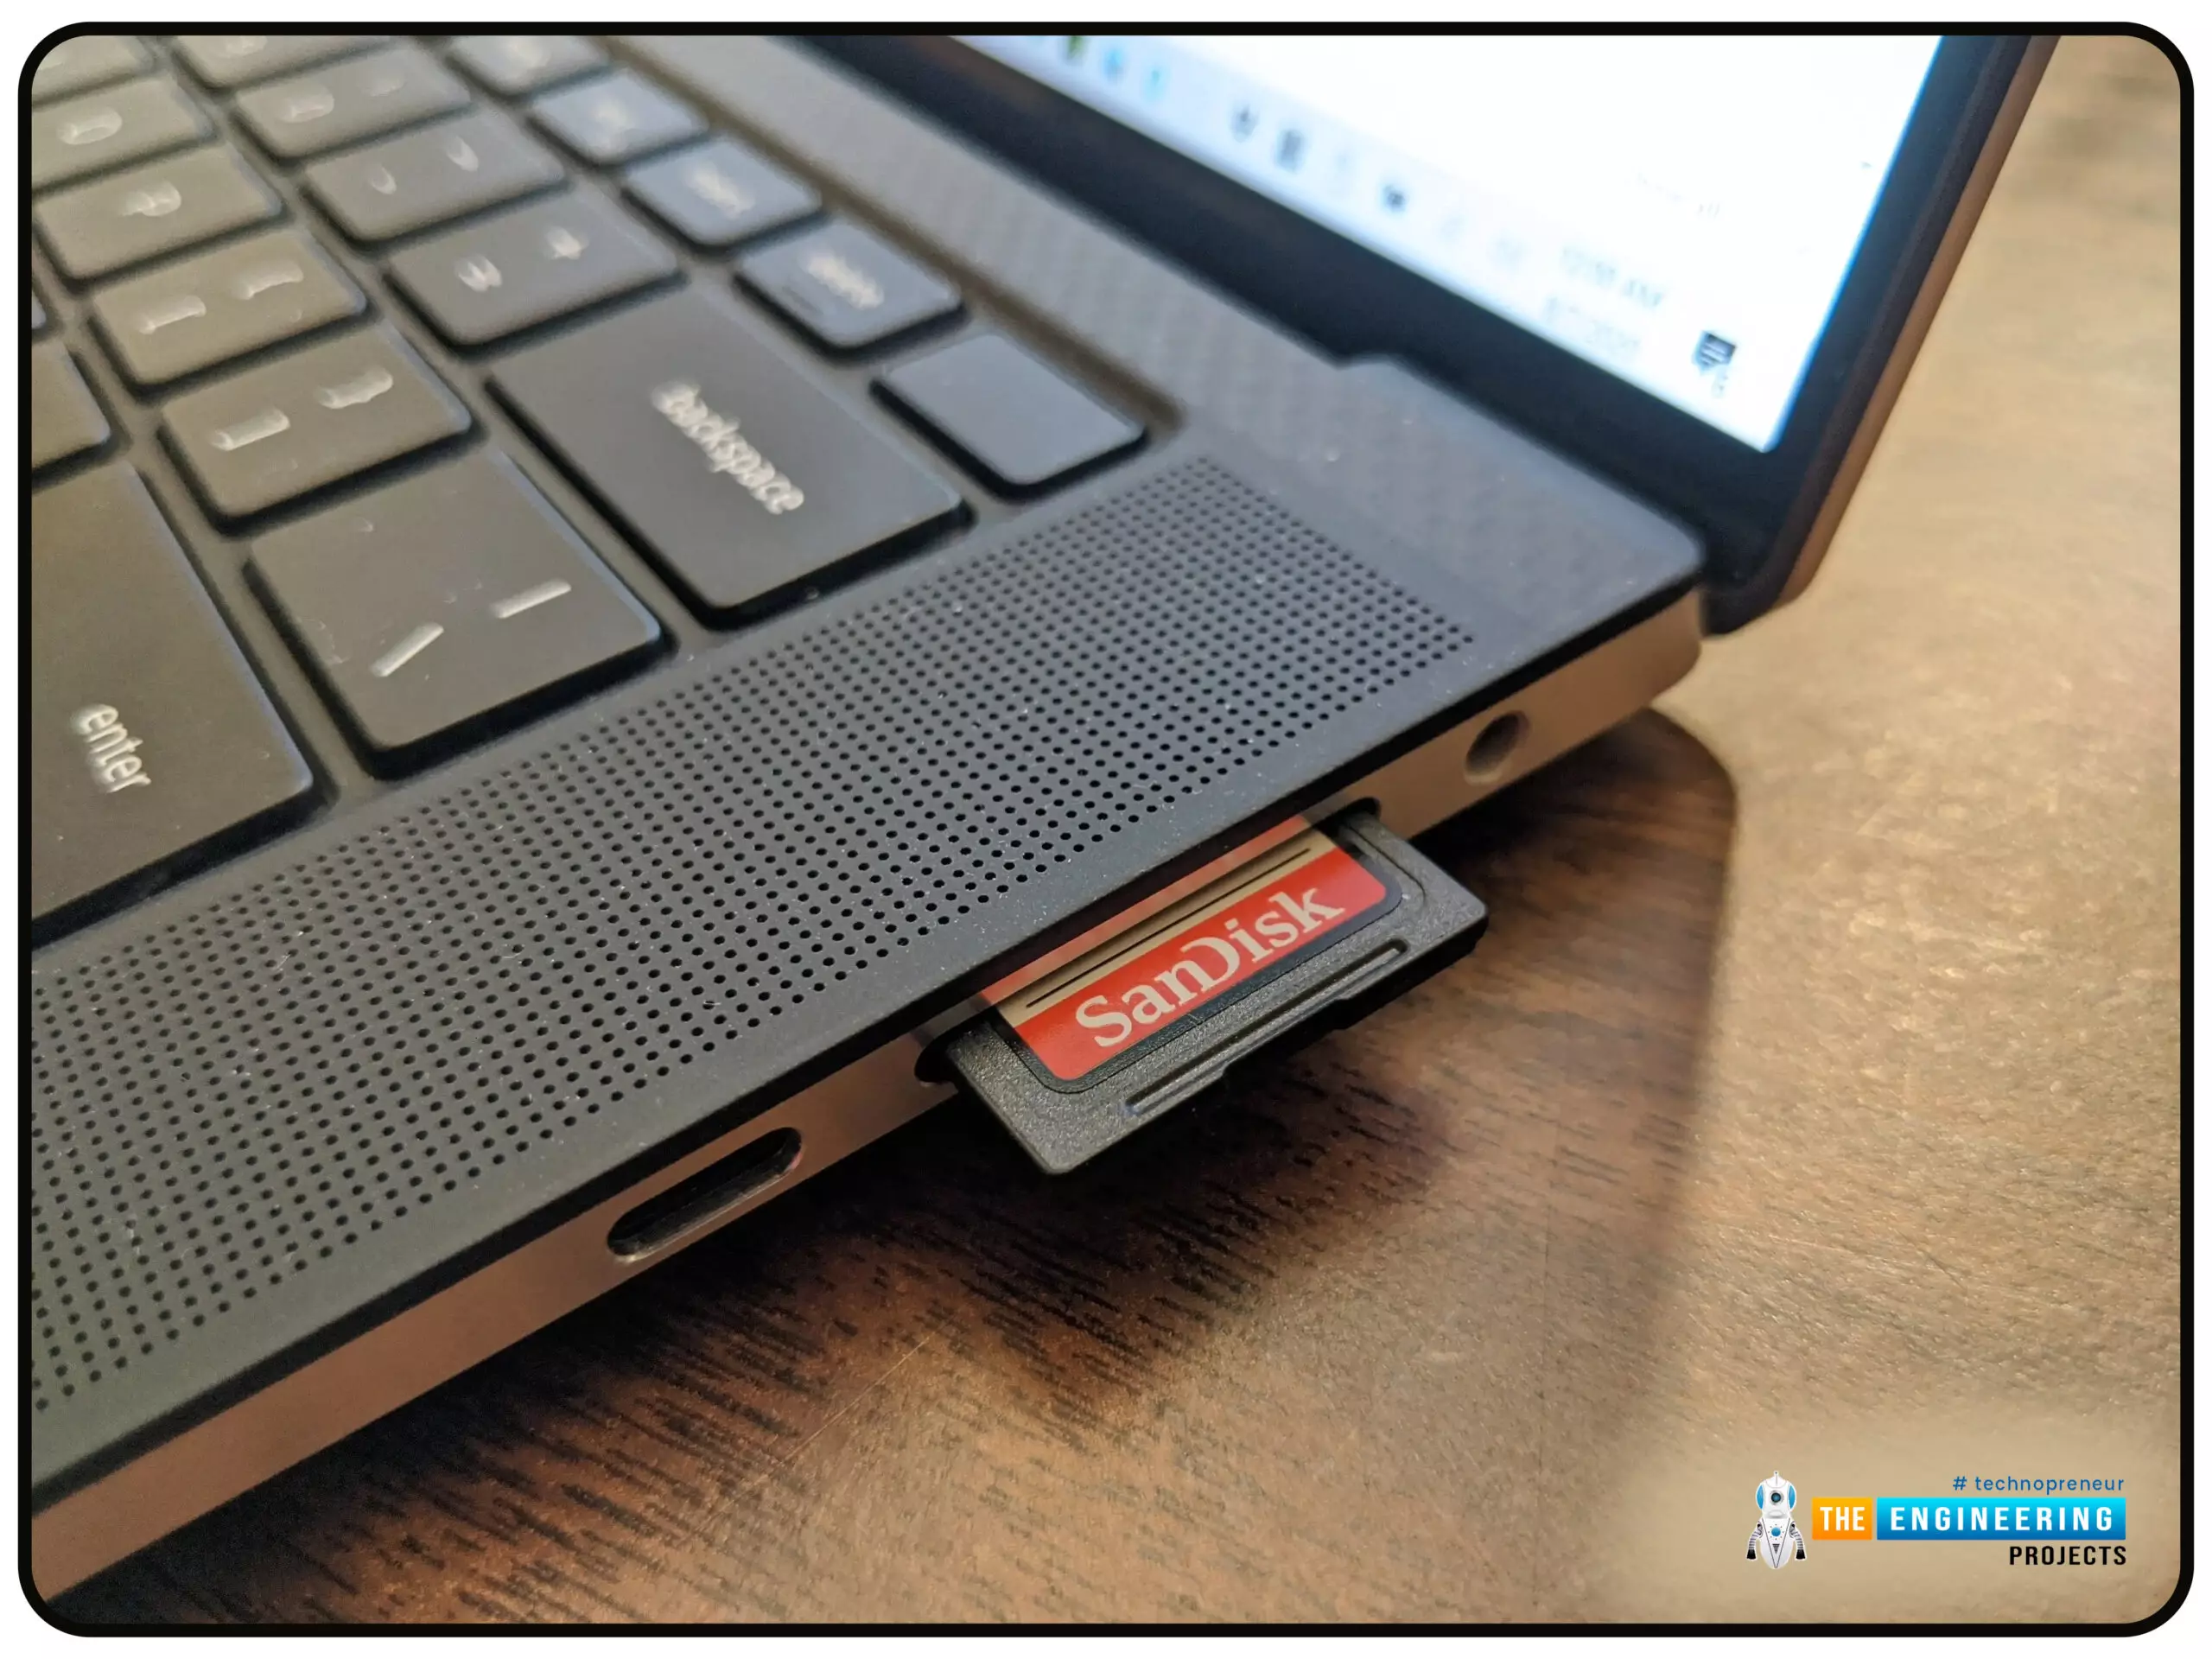
Connect the card reader with an sd card in it to your computer through USB or a regular card slot.
Launch the imager
On your computer, navigate to the location you downloaded the imager software and run it. In windows just double-click on it and it should startup.
Once the installation is done, go ahead and run the application:
Selecting the SD card
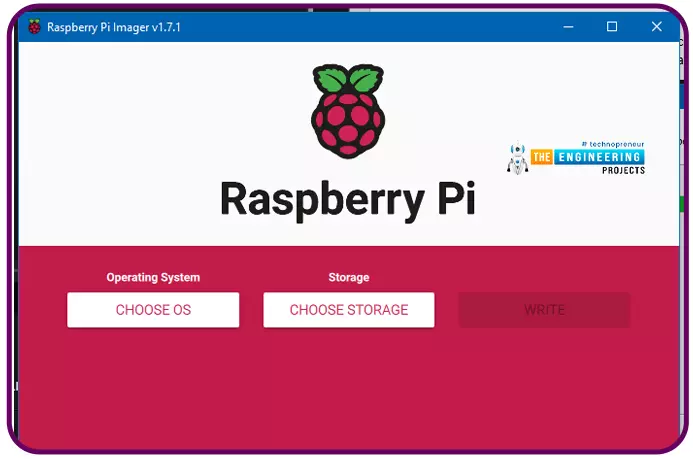
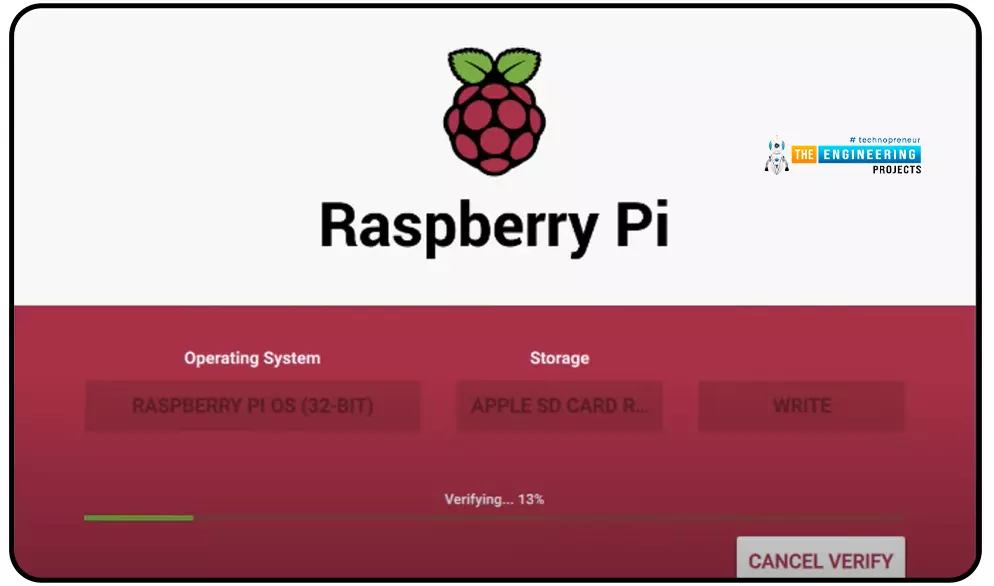
On the pi imager window, there are two options and when we click the choose storage, our SD card is detected since we plugged it into our pc.
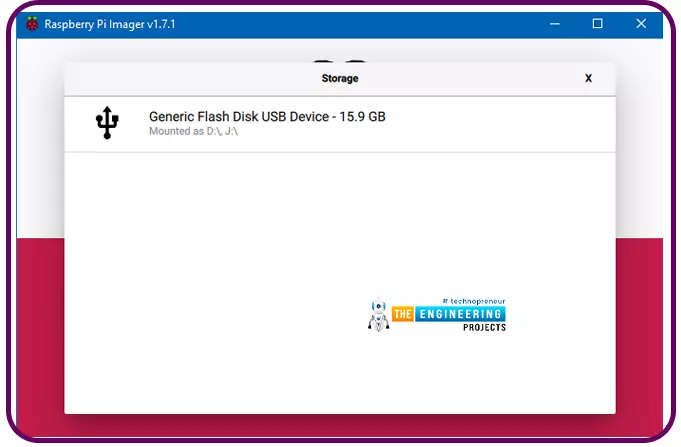
If you have any other drive plugged into your pc, they will also appear on the window therefore be careful to select the right one otherwise you will override the wrong drive and lose your saved files.
Select the operating system
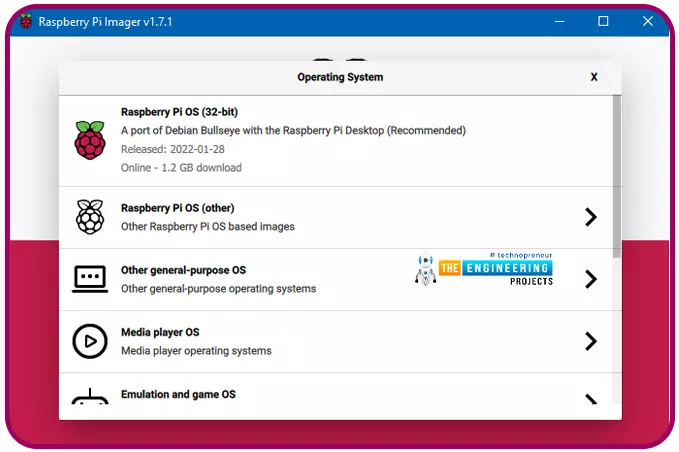
We will click on the other button "choose os" that is on the pi imager window to select the operating system we want to flash into our SD card. You will see different types of operating systems available for installation and we will go ahead and select the 32-bit raspberry pi os.
Write to SD card
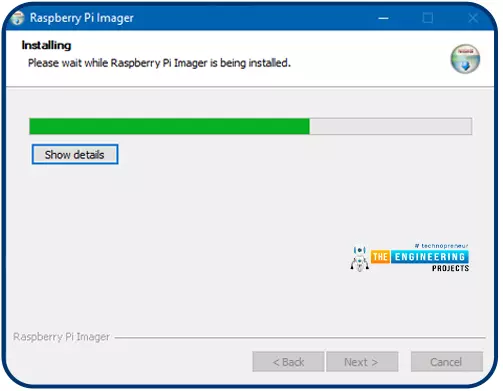
Once all the required parameters are set, i.e., the os and storage, go ahead and click the write button. The flashing process begins and it takes a minimum of 5 minutes to complete.
How to Install Raspbian with etcher
NOOBS (New Out of the Box Software) is an automated installer provided by the Pi Foundation, but for this article, we're going to forego it for now.
To complete numerous projects, it is a good idea for you to learn about "flashing" the SD card yourself. Despite NOOBS's reputation as a beginner's tool, I found this one to be easier to use.
You'll need an image file and an application to put it to your SD card to install an operating system. However, you can use any operating system of your choice for this guide. For example LibreELEC for a media box; RetroPie for retro gaming; and so on.
Because it's accessible for Windows, macOS, and Linux, Etcher is my go-to tool for writing to the SD card. There may be partitions that aren't visible in Windows, but these may be cleaned out with diskpart if you've previously used the SD card in a Pi.)
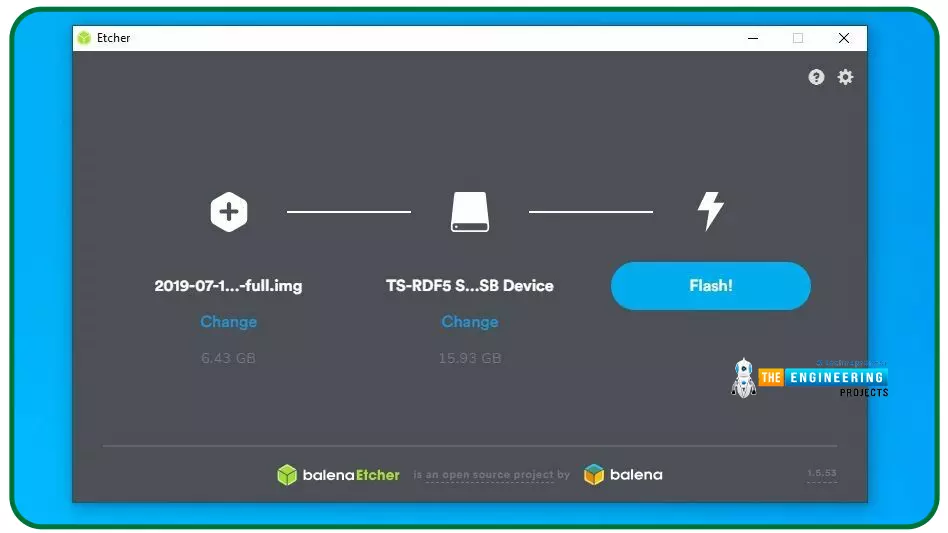
The full Raspbian image with suggested software is what I'm running, so go ahead and download it if that's what your Pi model calls for. It will either be an IMG file or an IMG compressed into a ZIP file (which you don't have to do if you're using Etcher).
It's as simple as opening Etcher and clicking the Select Image button to select your downloaded file. Flash your SD card by selecting it as the target. Selecting a destination drive should only be done with extreme caution, as the operation will wipe whatever disk you select.
Once the SD card has been ejected, you can insert it into your Pi, connect the HDMI wire to a display or TV, and turn on the Pi by plugging it into the wall. Once you've landed on the Raspbian desktop, you can begin fiddling with your Wi-Fi and software installations with apt.
Booting the raspberry pi
Now that flashing is complete, with the pi powered off, we will go ahead and eject the storage SD from the pc and put it back to the raspberry pi SD slot. Then we will go ahead and plug the power cord back in and our mini computer should start. If you mouse, keyboard and screen go ahead in the previous tutorial and see how they are connected since they are necessary for this step.
The mini-computer boots up into the os and you will find a window with instructions on what to do. Follow through the graphical user interface, provide a password, location, screen, and Wi-Fi connection.
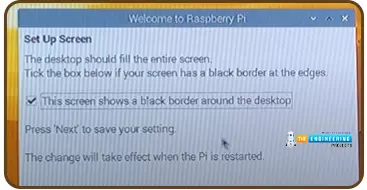
Then go ahead and install updates and the raspberry pi will reboot. A couple of issues will be solved when it boots up such as window dimensions and resolution.
We will do some more configurations in the terminal, therefore go ahead and start the terminal.
Configuration
Preferences on the menu can be found in the Configuration tool, which enables you to change most of your Pi's settings, including the password.
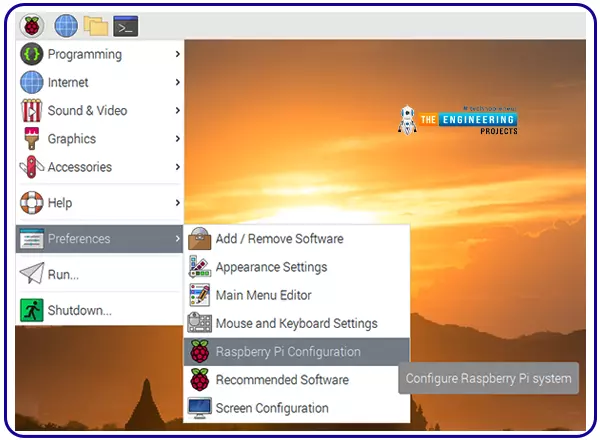
Several options are available, as illustrated in the screenshots below. We'll enable vnc and ssh for the time being. The Raspberry Pi's fundamental system settings can be modified in this area.
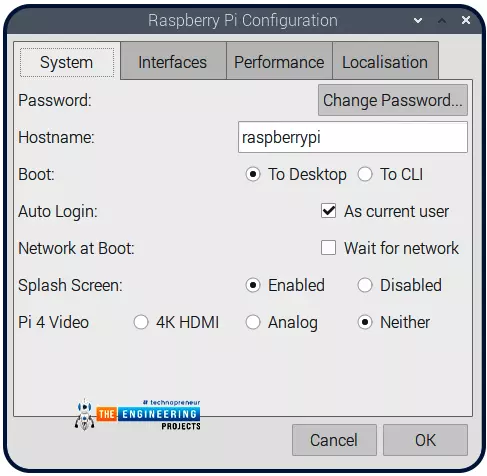
It's a good idea to change the factory default "raspberry" password for the pi user. When your Raspberry Pi boots up, choose between using Desktop or CLI (command line interface), and enable Auto Login.
You can set your Raspberry Pi to wait until a network connection is available before starting up, by selecting network at boot.
You can choose whether or not your Raspberry Pi boots up with a splash screen.
Interfaces
There are numerous ways to connect your Raspberry Pi to other devices and components. For your Raspberry Pi to recognize that a specific type of connection has been made to it, you must use the Interfaces tab to enable or disable the various connections.
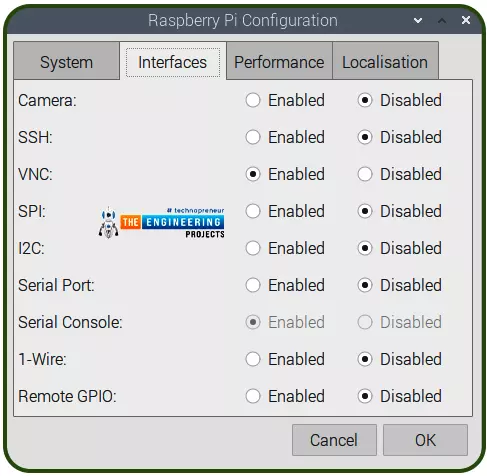
To use the camera on the Raspberry Pi, you must first enable it.
A Raspberry Pi can be accessed remotely through SSH or VNC.
To enable the SPI, I2C, and Serial (Rx, Tx) GPIO pins, go to the SPI menu. To enable the 1-Wire GPIO pins, go to the 1-Wire menu. To enable the 1-Wire GPIO pin, go to the 1-Wire menu. To enable Remote GPIO, go to the Remote GPIO menu.
Performance
We can alter the performance settings of our Raspberry Pi on this tab if we need to do so for any specific project.
Caution: Changing the performance parameters on your Raspberry Pi could cause it to behave strangely or stop working altogether.
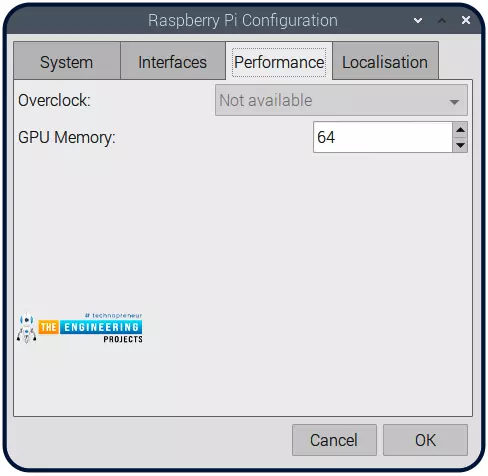
If you want to boost your computer's performance, you can overclock the CPU and adjust its voltage.
Localization
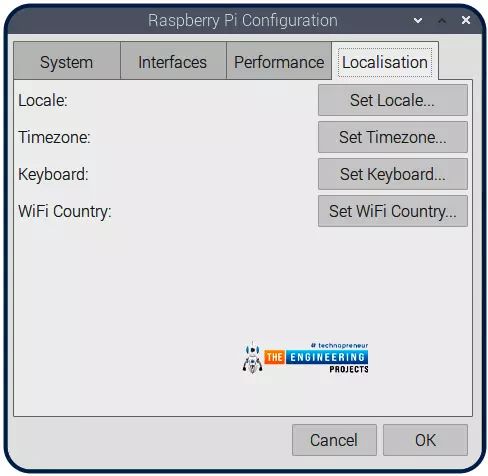
This enables you to customize your Raspberry Pi's settings based on where you live.
To configure your Raspberry Pi's locale, select the language, nation, and character set you want to use.
For example, you may want to change your time zone, or you may want to switch to a different type of keyboard layout.
Go ahead and finalize the configuration and reboot now that you've completed the setup.
Setting up remote connections
- On Windows, connecting to the Raspberry Pi via RDP is a straightforward process.
You don't need much more than a remote desktop program and the IP address of your Raspberry Pi to get started.
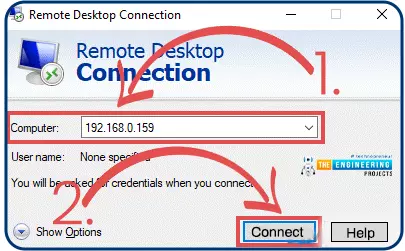
Open Remote Desktop Connection on your Windows computer to get started. The app will appear as seen in the image below.
In the "Computer:" field, type in the local IP address of your Raspberry Pi (1.), and then click the "Connect" button (2.).
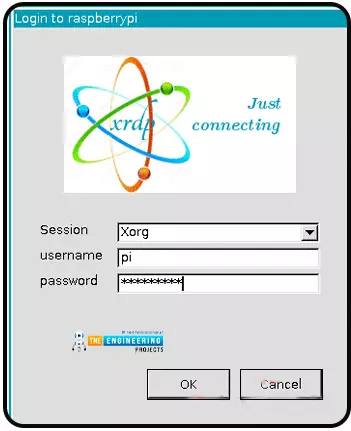
- After connecting to your Raspberry Pi, the xrdp software will present you with this screen.
Enter the account's "username" and "password" from your Raspberry Pi.
If you're logging in as the default pi user, your username and password should be "pi" and "raspberry," respectively.
- You should now be able to connect to your Raspberry Pi using the Windows remote desktop program.
Have trouble connecting to the Raspberry Pi? Double-check that your IP address is accurate. TeamViewer or TightVNC are two other options.
I hope you can now access the Raspberry Pi's remote desktop using the tool of your choice.
Installing Python on the Raspberry Pi
Python will be installed on your Raspberry Pi, and you'll see how simple it is to do so. This can be accomplished in a few simple steps thanks to Python's default package repository.
- We should check our package list and existing packages for updates before we install Python. The following instructions can be used to update both of these on your device. Let's go on to the next phase now that we've completed this one.

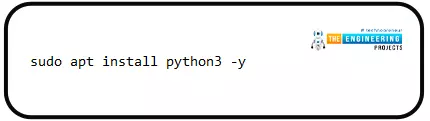
- Next, we'll set up our Raspberry Pi with the Python package we downloaded earlier. Python 3 will be the focus of this guide because it is the most recent version that is still widely supported. Installing Python is as simple as running the following command.
- Once this process completes, you will now have Python installed on your Raspberry Pi. This will provide you with the minimal essentials of Python, but that is all you will need for now. Later on, you will end up using package management such as pip to extend the capabilities of Python.
Using the Thorny Desktop IDE
Thonny, a Python IDE, is pre-installed on desktop versions of Raspberry Pi OS. It is much easier, faster, and more pleasant to write code when using an IDE. Open Thonny on your Raspberry Pi, and then learn a little bit of Python in the process.
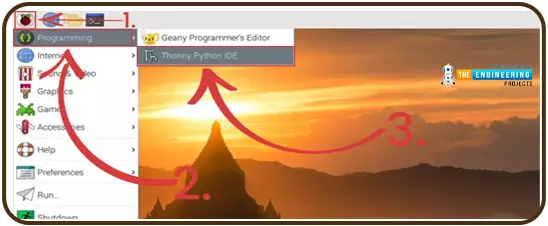
- The Thonny IDE must first be opened before we can proceed. On your computer's desktop, go to Start, and then click "Raspberry". Next, you'll need to click on the "Programming" option on the left-hand side of the page. Lastly, select the "Thonny Python IDE" option to launch the Python editor on your Raspberry Pi".
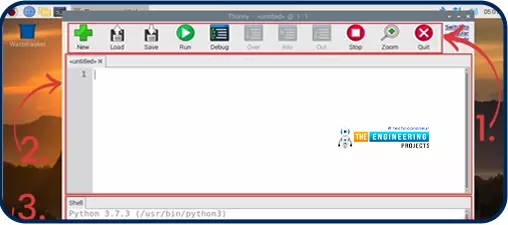
- Since you're probably using Thonny for the first time, let's go through the basics of how it works.
The toolbar is located at the very top of the screen. All the buttons you'll ever need to work with the editor are right here. The "Save" and "Run" buttons are the only ones you'll need (1.)
It's time for the center box. All of your Python code can be written here. (2.)
Finally, the Python shell is at the bottom. You can use this to directly communicate with Python. The output of your code can also be found here (3.).
Conclusion
You should now have a better understanding of how to get started with Python on your Raspberry Pi. This instruction explains how to install the Raspbian operating system, configure its interface, and install the Python interpreter with a few basic command lines. On the Raspberry Pi, we also demonstrated how to start a Python code editor to develop code.