Smart Security System using Facial Recognition with Raspberry Pi 4


Components
- Raspberry Pi
- Breadboard
- L293 or SN755410 motor driver chip
- Jumper wires
- DC motor
- 5v power supply
A growing number of us already use face recognition software without realizing it. Facial recognition is used in several applications, from basic Fb Tag suggestions to advanced security screening surveillance. Chinese schools employ facial recognition to track students' adherence and behaviour for the first time. Retail stores use face recognition to classify their clients and identify those who have a history of crime. There's no denying that this tech will be all over soon, especially with so many other developments in the works.
How does facial recognition work?
When it comes to facial recognition, biometric authentication goes well beyond simply being able to identify human faces in images or videos. An additional step is taken to identify the person's identity. A facial recognition software compares an image of a person's face to a database to see if the features match another person's. Since facial expressions and hair do not affect the technology's ability to identify matches, it has been built to do so.
How can face recognition be used when it comes to smart security systems?
The first thing you should do if you want to make your home "smart" is to focus on security. Your most prized possessions are housed at this location, and protecting them is a must. You can monitor your home security status from your computer or smartphone thanks to a smart security system when you're outdoors.
Installing a system that is not wireless in your house and signing you up for professional monitoring was traditionally done by a security company. The plot has been rewritten. When setting up a smart home system, you can even do it yourself. In addition, your smart smartphone acts as a professional monitor, providing you with real-time information and notifications.
Face recognition is the ability of a smart camera in your house to identify a person based on their face. Consequently, you will have to inform the algorithm what face goes with what name for face recognition to operate. Facial detection in security systems necessitates the creation of user accounts for family members, acquaintances, and others you want to be identified by the system. Your doors or the inside of your house will be alerted when they arrive.
Face-recognition technology allows you to create specific warning conditions. For example, you can configure a camera to inform you when an intruder enters your home with a face the camera doesn't recognize.
Astonishing advancements in smart tech have been made in recent years. Companies are increasingly offering automatic locks with face recognition. You may open your doors just by smiling at a face recognition system door lock. You could, however, use a passcode or a real key to open and close the smart door. You may also configure your smart house lock to email you an emergency warning if someone on the blacklist tries to unlock your smart security door.
How to install OpenCV for Raspberry Pi 4.
OpenCV, as previously stated, will be used to identify and recognize faces. So, before continuing, let's set up the OpenCV library. Your Pi 4 needs a 2A power adapter and an HDMI cable because we won't be able to access the Pi's screen through SSH. The OpenCV documentation is a good place to learn how image processing works, but I'm not going to go into it here.
Installing OpenCV using pip
pip is well-known for making it simple to add new libraries to the python language. In addition, there is a technique to install OpenCV on a Raspberry Pi via PIP, but it didn't work for me. We can't obtain complete control of the OpenCV library when using pip to install OpenCV; however, this might be worth a go if time is of the essence.
Ensure pip is set up on your Raspberry Pi. Then, one by one, execute the lines of code listed below into your terminal.

sudo apt-get install libhdf5-dev libhdf5-serial-dev
sudo apt-get install libqtwebkit4 libqt4-test
sudo pip install opencv-contrib-python?
How OpenCV Recognizes Face
Facial recognition and face detection are not the same things, and this must be clarified before we proceed. When simply a user's face is detected using Face detection, the program has no clue who that person is. Only the face will be detected in facial recognition software, but the program will also recognize it. At this point, it's pretty evident that facial detection comes before facial recognition. To explain how OpenCV recognizes a person or other objects, I will have to go into detail.
Essentially, a webcam feed is like a long series continuously updating still photos. And every image is nothing more than a jumble of pixels with varying values arranged in a specific order. So, how does a computer software identify a face among all of these random pixels? Trying to describe the underlying techniques is outside the scope of this post, but since we're utilizing the OpenCV library, facial recognition is a straightforward process that doesn't necessitate a deeper understanding of the underlying principles.
Using Cascade Classifiers for Face Detection
We can only recognize a person if we can see it. Detection of an item, including a face, Classifiers are a feature of OpenCV. They are pre-trained datasets that may be utilized to recognize a certain item, such as a face. Classifiers may also detect additional objects, such as the mouth, the eyebrows, the number plate of a vehicle, and smiles.
Alternatively, OpenCV allows you to design your custom Classifier for detecting any objects in images by retraining the cascade classifier. For the sake of this tutorial, we'll be using the classifier named "haarcascade_frontalface_default.xml" to identify faces from the camera. We'll learn more about image classifiers and how to apply them in code in the following sections.
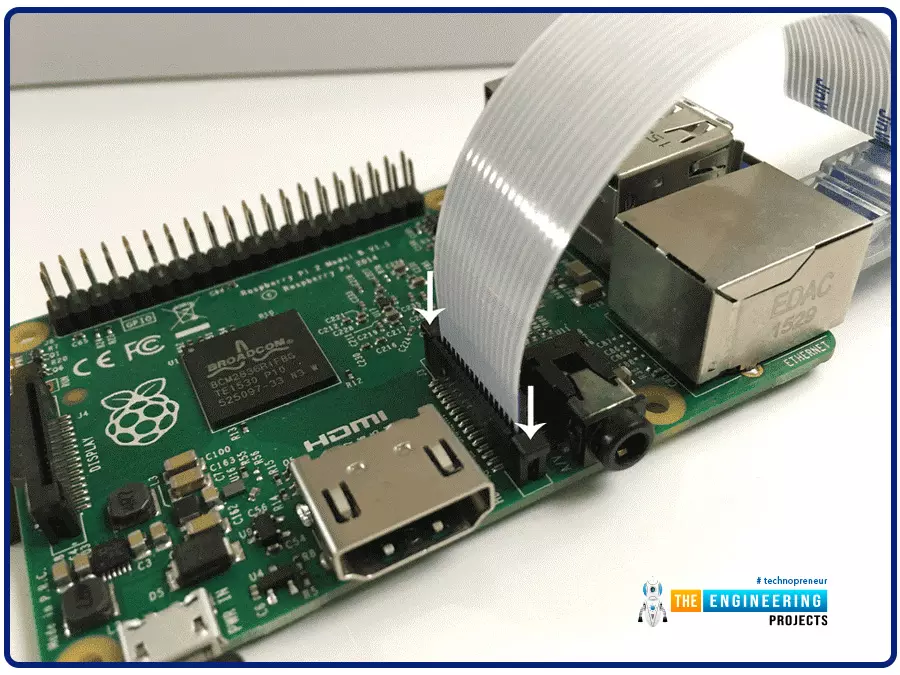
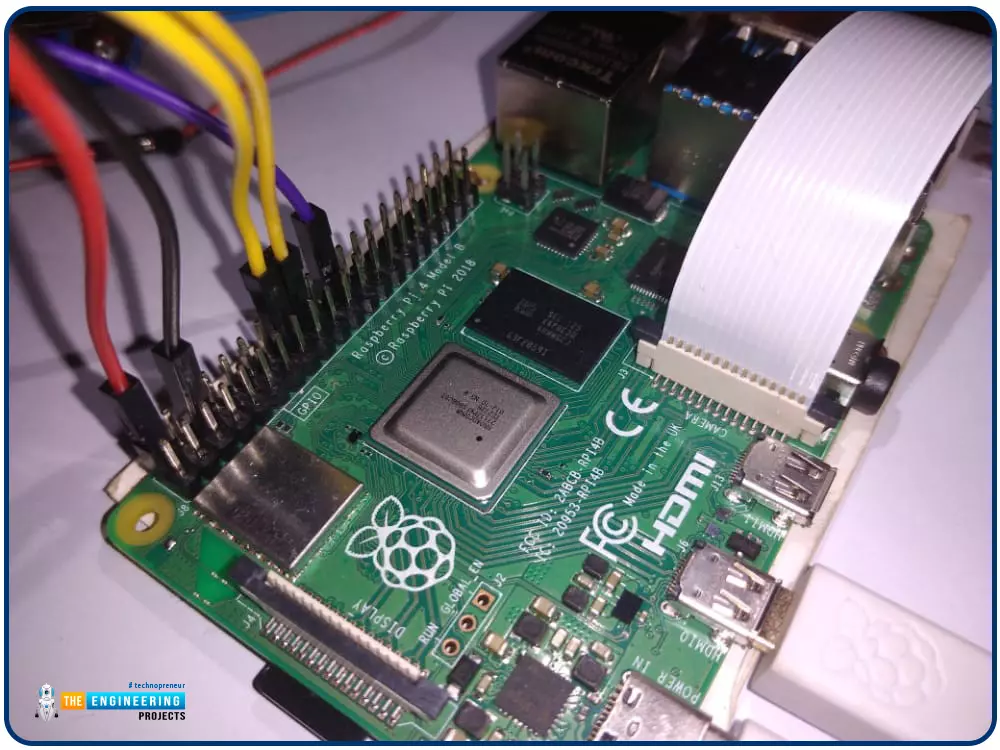
Setup the raspberry pi camera
For the face training and detection, we only need the pi camera, and to install this, insert the raspberry pi camera in the pi camera slot as shown below. Then go to your terminal, open the configuration window using "sudo raspi-config", and press enter. Navigate to the interface options and activate the pi camera module. Accept the changes and finish the setup. Then reboot your RPi.
How to Setup the Necessary Software
First, ensure pip is set up, and then install the following packages using it.
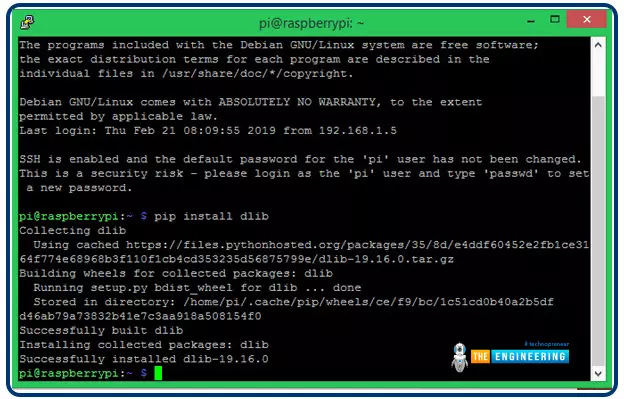
Install dlib: Dlib is a set of libraries for building ML and data analysis programs in the real world. To get dlib up and running, type the following command into your terminal window.

Pip install dlib
If everything goes according to plan, you should see something similar after running this command.
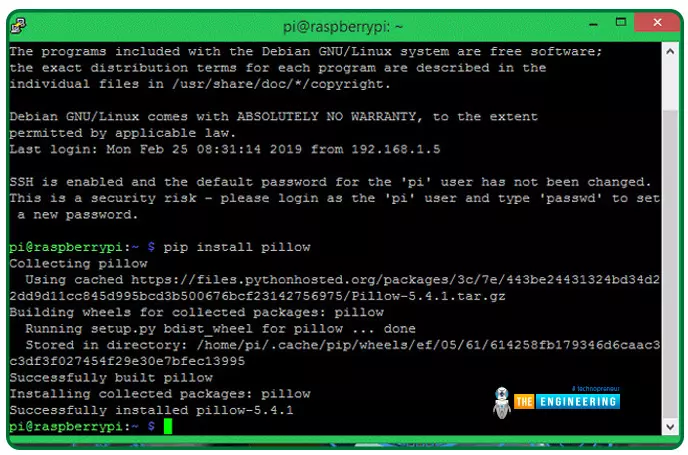
Install pillow: The Python Image Library, generally known as PIL, is a tool for opening, manipulating, and saving images in various formats. The following command will set up PIL for you.

pip install pillow
You should receive the message below once this app has been installed.
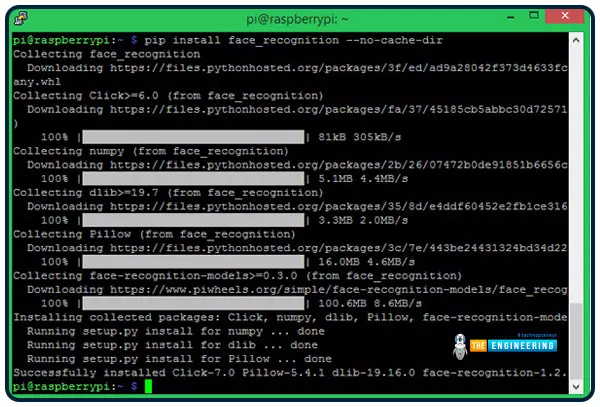
Install face_recognition: The face recognition package is often the most straightforward tool for detecting and manipulating human faces. Face recognition will be made easier with the help of this library. Installing this library is as simple as running the provided code.

Pip install face_recognition –no –cache-dir
If all goes well, you should see something similar to the one shown below after the installed software. Due to its size, I used the "—no –cache-dir" command-line option to configure the package without keeping any of its cache files.
Face Recognition Folders
A script named "haarcascade_frontalface_default.xml" is for detecting faces using a Classifier. It will also build a "face-trainner.yml" file using the training script based on the photos found in the face images directory.

Start the face images folder with a collection of face images.
The face images folder indicated above should contain subdirectories with the names of each person to be identified and several sample photographs of them. Esther and x have been identified for this tutorial. As a result, I've just generated the two sub-directories shown below, each containing a single image.
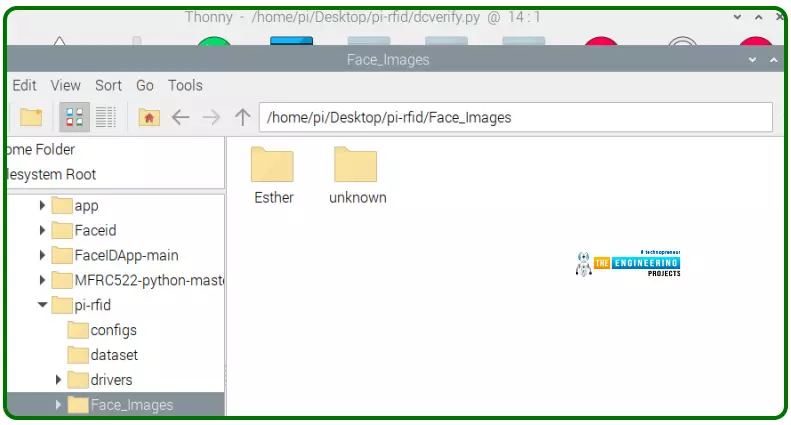
You must rename the directory and replace the photographs with the names of the people you are identifying. It appears that a minimum of five images for each individual is optimal. However, the more participants, the slower the software will run.
Face trainer program
Face Trainer.py is a Python software that may be used to train a new face. The purpose of the software is to access the face photographs folder and scan for faces. As soon as it detects a face, it crops it, turns it to grayscale, and saves it in a file named face-trainner.yml using the face recognition package we had previously loaded. The information in this script can be used to identify the faces later. In addition to the whole Trainer program provided at the conclusion, we'll go over some more critical lines.
The first step is to import the necessary modules. The cv2 package is utilized to process photos. The NumPy library can be used for image conversion, the operating system package is used for directory navigation, and PIL will be used to process photos.

import cv2
import numpy as np
import os
from PIL import Image
Ensure that the XML file in question is located in the project directory to avoid encountering an issue. The LBPH Facial recognizer is then constructed using the recognizer parameter.

face_cascade = cv2.CascadeClassifier('haarcascade_frontalface_default.xml')
recognizer = cv2.createLBPHFaceRecognizer()
Face_Images = os.path.join(os.getcwd(), "Face_Images")
In order to open all of the files ending in.jpg,.jpg, or .png within every subfolder in the face images folder, we must traverse the tree with for loops. In a variable named path, we record the path to every image, and in a variable named person name, we store the file location name (the name of the user who uploaded the images).

For root, dirs, files in os.walk(Face_Images):
for file in files: #check every directory in it
if file.endswith("jpeg") or file.endswith("jpg") or file.endswith("png"):
path = os.path.join(root, file)
person_name = os.path.basename(root)
As a result, in case the name of the person changes, we increase a variable named Face_ID that will allow us to have a unique Face_ID for each individual.

if pev_person_name!=person_name:
Face_ID=Face_ID+1 #If yes increment the ID count
pev_person_name = person_name
Because the BGR values may be ignored, grayscale photos are simpler for OpenCV to deal with than colourful ones. We transform the data to grayscale and afterwards lower the image size by 50% so that all the pictures are the same size. To avoid having your face cut out, place it in the centre of the photo. To get a numerical number for these photos, transform them into NumPy arrays. Afterwards, a classifier identifies a face in a photo and saves the results in variable named faces.

Gery_Image = Image.open(path).convert("L")
Crop_Image = Gery_Image.resize( (550,550) , Image.ANTIALIAS)
Final_Image = np.array(Crop_Image, "uint8")
faces = face_cascade.detectMultiScale(Final_Image, scaleFactor=1.5, minNeighbors=5)
Our Area of Attention will be the portion of the image where the face may be found after being cropped. It will be utilized to train the face-recognition system in the ROI area. Every area of attention face must be appended to a variable named x train. We then feed the recognizer with our training data using the area of attention values and Face ID data. The information gathered will be archived.
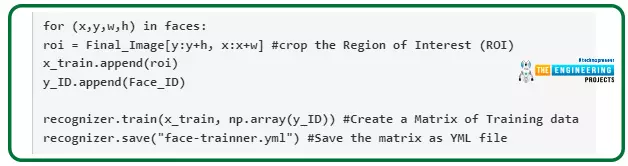
for (x,y,w,h) in faces:
roi = Final_Image[y:y+h, x:x+w]
x_train.append(roi)
y_ID.append(Face_ID)
recognizer.train(x_train, np.array(y_ID))
recognizer.save("face-trainner.yml")
You'll notice that the face-trainner.yml script is modified whenever you run this program. If you make any modifications to the photographs in the Face Images folder, ensure to recompile this code. Debugging purposes include printing out the Face ID, name of the path, name of a person, and NumPy arrays.
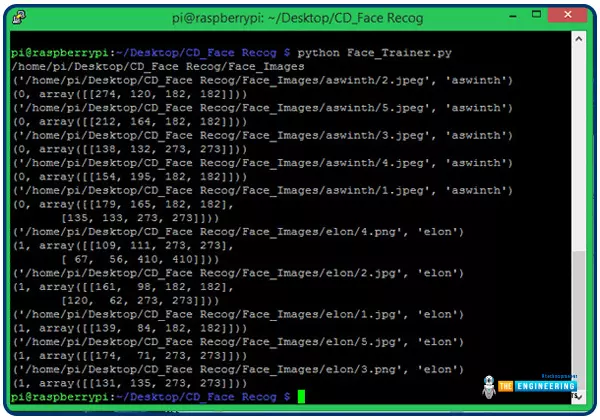
Face recognition program
We can begin using our trained data to identify people now that it has been prepared. We'll use a USB webcam or pi camera to feed video into the Face recognizer application, turning it into an image. Once we've found the faces in those images, we'll find similarities to all of our previously developed Face IDs. Finally, we output the identified person’s name in boxes around their face. Afterwards, the whole program is presented, and the explanation is below.
Import the required module from the training program and use the classifier because we need to do more facial detection in this program.

import cv2
import numpy as np
import os
from time import sleep
from PIL import Image
face_cascade = cv2.CascadeClassifier('haarcascade_frontalface_default.xml')
recognizer = cv2.createLBPHFaceRecognizer()
The people listed in the folder should be entered in the variable named labels. Insist on performing each step in the same order. It is "Esther" and "Unknown" in my situation.

labels = ["Esther", "Unknown"]
We need the trainer file to detect faces, so we import it into our software.

recognizer.load("face-trainner.yml")
The camera provides the video stream. It's possible to access any second pi camera by replacing 0 with 1.

cap = cv2.VideoCapture(0)
In the next step, we separate the footage into images and transform it into grayscale, and afterwards, we search for a face in the photo. To save the area of attention grey image, we must first detect the face and then crop the image to remove them.
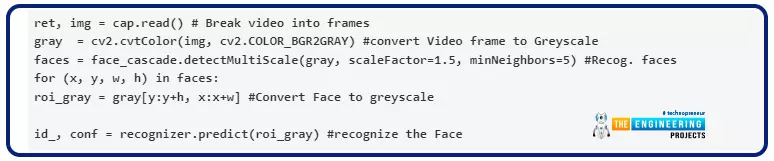
ret, img = cap.read()
gray = cv2.cvtColor(img, cv2.COLOR_BGR2GRAY)
faces = face_cascade.detectMultiScale(gray, scaleFactor=1.5, minNeighbors=5)
for (x, y, w, h) in faces:
roi_gray = gray[y:y+h, x:x+w]
id_, conf = recognizer.predict(roi_gray)
It informs us how sure the program is in its ability to identify the person. We write the code below to get the person's name based on their Identification number. A square should be drawn around the user's head, written outside their name.
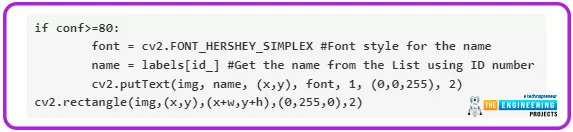
if conf>=80:
font = cv2.FONT_HERSHEY_SIMPLEX
name = labels[id_]
cv2.putText(img, name, (x,y), font, 1, (0,0,255), 2)
cv2.rectangle(img,(x,y),(x+w,y+h),(0,0,255),2)
We must playback and afterwards break the video stream we just evaluated, which is done by pressing a wait key.

cv2.imshow('Preview',img)
if cv2.waitKey(20) & 0xFF == ord('q'):
break
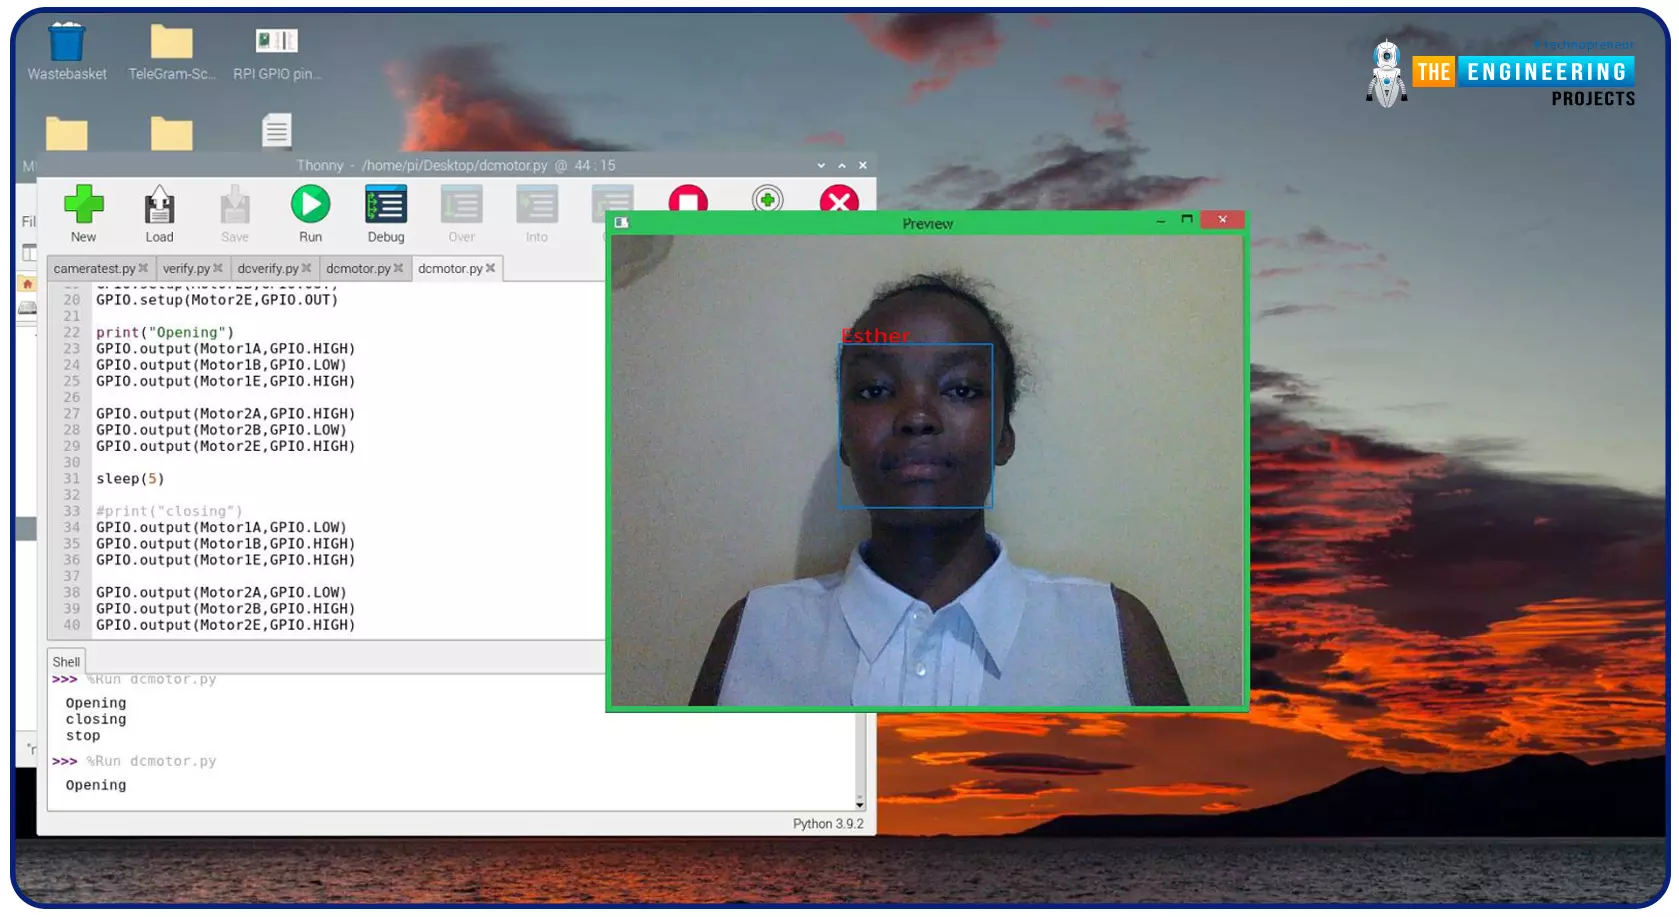
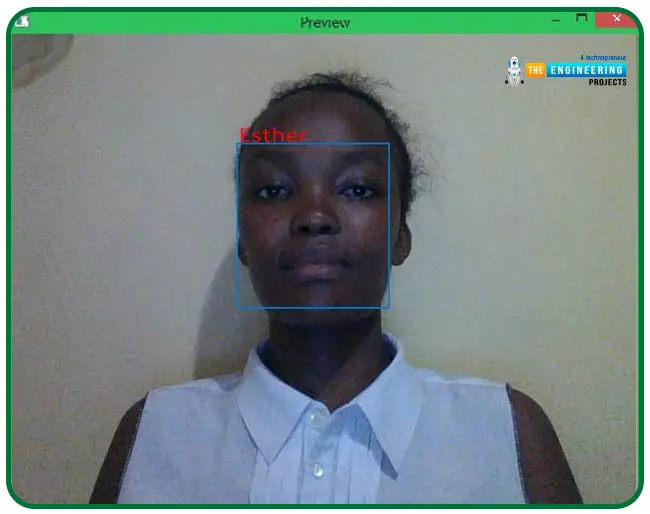
While running this application, ensure the Raspberry is linked to a display via HDMI. A display with your video stream and the name will appear when you open the application. There will be a box around the face identified in the video feed, and if your software recognizes the face, it displays that person’s name. As evidenced by the image below, we've trained our software to identify my face, which shows the recognition process in action.
The face recognition code
import cv2
import numpy as np
import os
from PIL import Image
labels = ["Esther", "Unknown"]
face_cascade = cv2.CascadeClassifier('haarcascade_frontalface_default.xml')
recognizer = cv2.createLBPHFaceRecognizer()
recognizer.load("face-trainner.yml")
cap = cv2.VideoCapture(0)
while(True):
ret, img = cap.read()
gray = cv2.cvtColor(img, cv2.COLOR_BGR2GRAY)
faces = face_cascade.detectMultiScale(gray, scaleFactor=1.5, minNeighbors=5) #Recog. faces
for (x, y, w, h) in faces:
roi_gray = gray[y:y+h, x:x+w]
id_, conf = recognizer.predict(roi_gray)
if conf>=80:
font = cv2.FONT_HERSHEY_SIMPLEX
name = labels[id_]
cv2.putText(img, name, (x,y), font, 1, (0,0,255), 2)
cv2.rectangle(img,(x,y),(x+w,y+h),(0,255,0),2)
cv2.imshow('Preview',img)
if cv2.waitKey(20) & 0xFF == ord('q'):
break
cap.release()
cv2.destroyAllWindows()
Face detection code
import cv2
import numpy as np
import os
from PIL import Image
face_cascade = cv2.CascadeClassifier('haarcascade_frontalface_default.xml')
recognizer = cv2.createLBPHFaceRecognizer()
Face_ID = -1
pev_person_name = ""
y_ID = []
x_train = []
Face_Images = os.path.join(os.getcwd(), "Face_Images")
print (Face_Images)
for root, dirs, files in os.walk(Face_Images):
for file in files:
if file.endswith("jpeg") or file.endswith("jpg") or file.endswith("png"):
path = os.path.join(root, file)
person_name = os.path.basename(root)
print(path, person_name)
if pev_person_name!=person_name:
Face_ID=Face_ID+1
pev_person_name = person_name
Gery_Image = Image.open(path).convert("L")
Crop_Image = Gery_Image.resize( (550,550) , Image.ANTIALIAS)
Final_Image = np.array(Crop_Image, "uint8")
faces = face_cascade.detectMultiScale(Final_Image, scaleFactor=1.5, minNeighbors=5)
print (Face_ID,faces)
for (x,y,w,h) in faces:
roi = Final_Image[y:y+h, x:x+w]
x_train.append(roi)
y_ID.append(Face_ID)
recognizer.train(x_train, np.array(y_ID))
recognizer.save("face-trainner.yml")
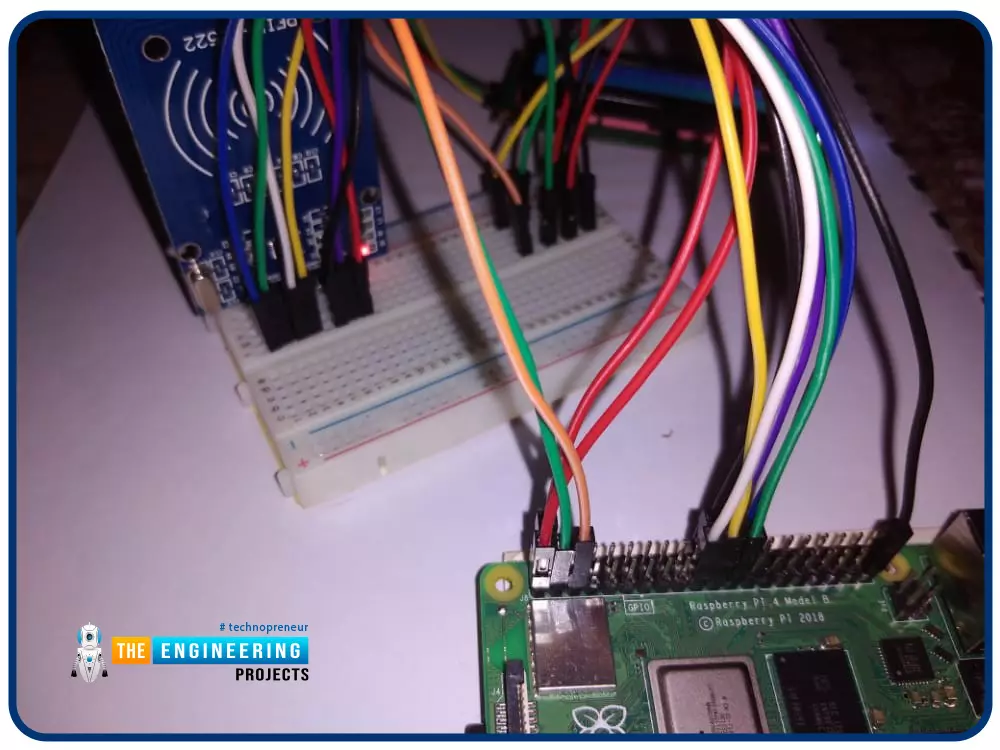
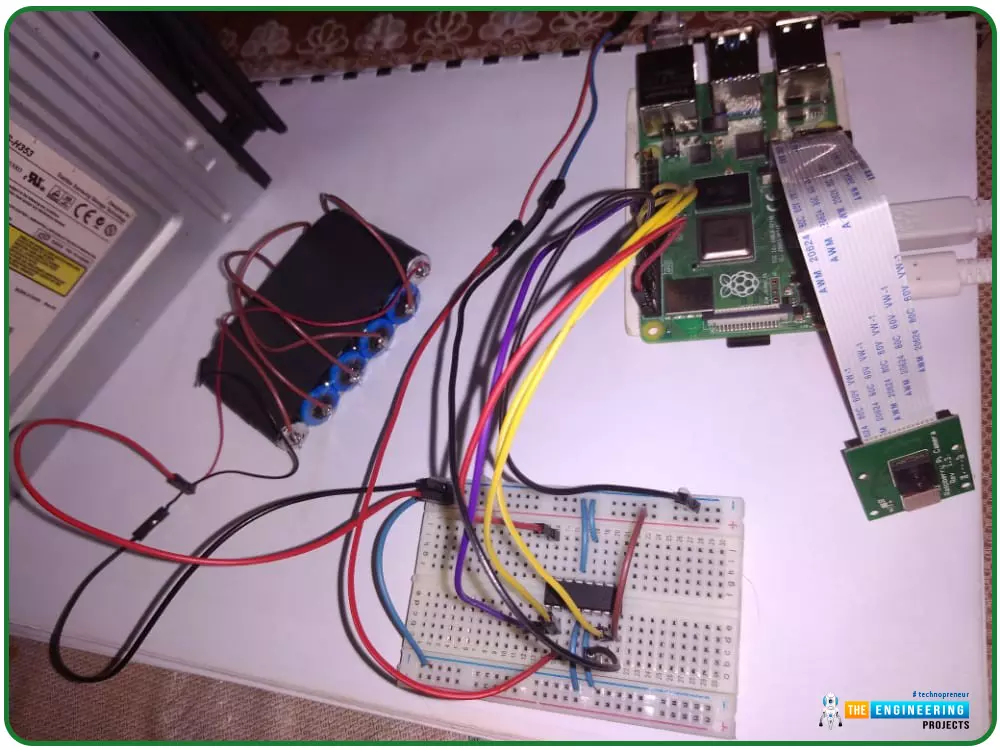
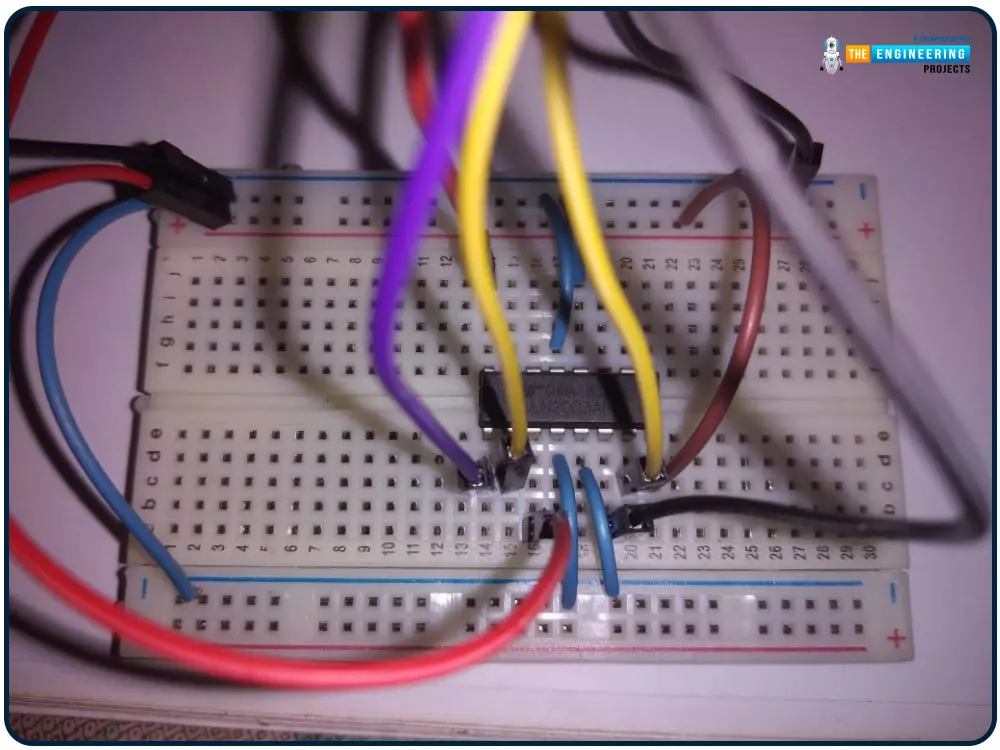
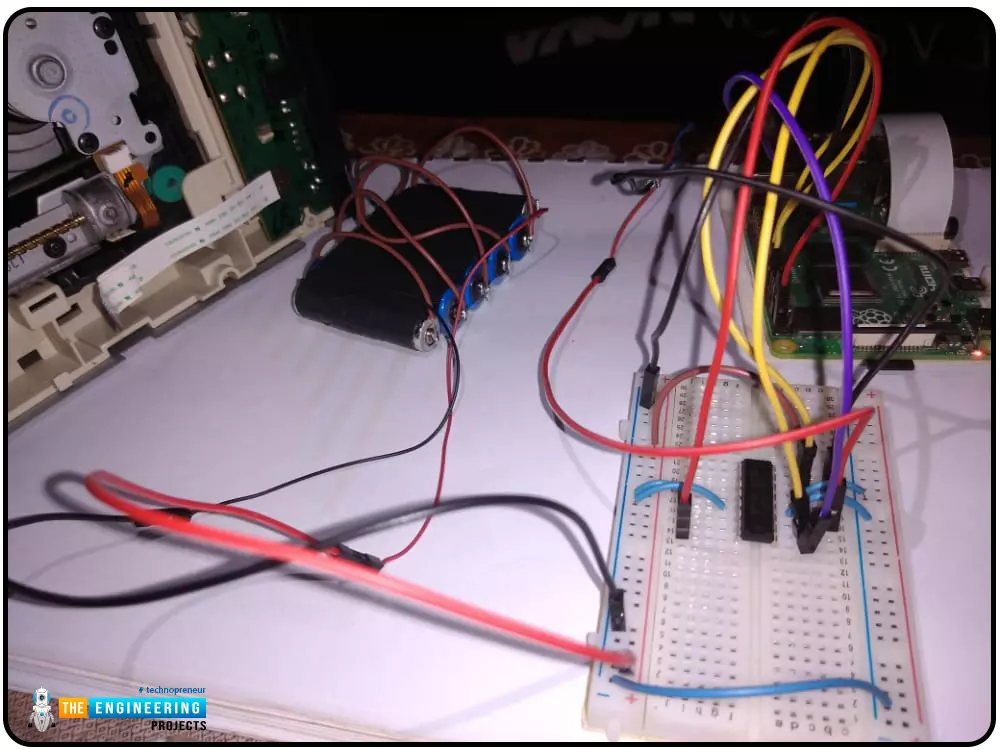
DC motor circuit

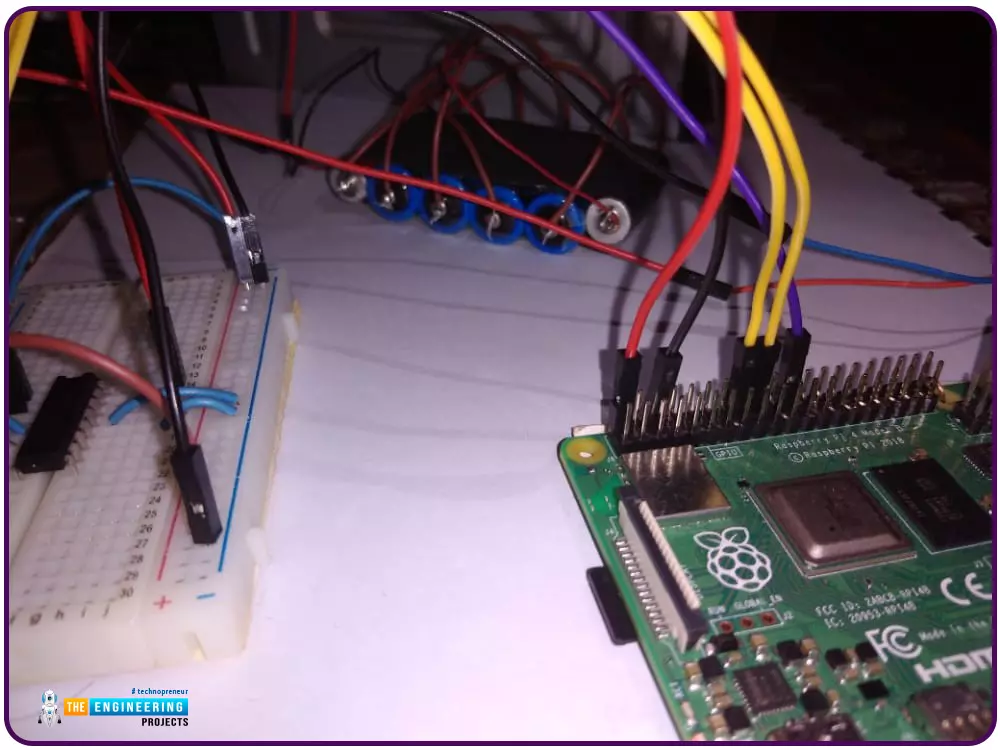
Since the "How to operate DC motor in Rpi 4" guide has covered the basics of controlling a DC motor, I won't provide much detail here. Please read this topic if you haven't already. Check all the wiring before using the batteries in your circuit, as outlined in the image above. Everything must be in place before connecting your breadboard's power lines to the battery wires.
Testing
To activate the motors, open the terminal because you'll use the Python code-writing program called Nano in this location. For those of you who aren't familiar with the command-line text editor known as Nano, I'll show you how to use some of its commands as we go.
This code will activate the motor for two seconds, so try it out.
import RPi.GPIO as GPIO
from time import sleep
GPIO.setmode(GPIO.BOARD)
Motor1A = 16
Motor1B = 18
Motor1E = 22
GPIO.setup(Motor1A,GPIO.OUT)
GPIO.setup(Motor1B,GPIO.OUT)
GPIO.setup(Motor1E,GPIO.OUT)
print "Turning motor on"
GPIO.output(Motor1A,GPIO.HIGH)
GPIO.output(Motor1B,GPIO.LOW)
GPIO.output(Motor1E,GPIO.HIGH)
sleep(2)
print "Stopping motor"
GPIO.output(Motor1E,GPIO.LOW)
GPIO.cleanup()
The very first two lines of code tell Python whatever the program needs.
The RPi.GPIO package is what the first line is looking for. The RPi GPIO pins are controlled by this module, which takes care of all the grunt work.
It is necessary to delay the script for a few seconds to provide the package time to operate, therefore leaving a motor to run for a while.
The method set mode is used to leverage the RPi's board numbers. We'll tell Python that the pins 16 through 22 correspond to the motors.
Pin A is used to steer the L293D in one way, and pin B is used to direct it in the opposite direction. You can turn on the motor using an Enable pin, referred to as E, inside the test file.
Finally, use GPIO.OUT to inform the RPi that all these are outputs.
The RPi is ready to turn the motor after the software is set up. After a 2-second pause, some pins will be turned on and subsequently turned off, as seen in the code.
Save and quit by hitting CTRL-X, and a confirmation notice appears at the bottom. To acknowledge, tap Y and Return. You can now run the program in the terminal and watch as the motor begins to spin up.
sudo python motor.py
If the motor doesn't move, check the cabling or power supply. The debug process might be a pain, but it's an important phase in learning new things!
Now turn in the other direction.
I'll teach you how to reverse a motor's rotation to spin in the opposite direction.
There's no need to touch the wiring at this point; it's all Python. Create a new script called motorback.py to accomplish this. Using Nano, type the command:
./script
Please type in the given program:
import RPi.GPIO as GPIO
from time import sleep
GPIO.setmode(GPIO.BOARD)
Motor1A = 16
Motor1B = 18
Motor1E = 22
GPIO.setup(Motor1A,GPIO.OUT)
GPIO.setup(Motor1B,GPIO.OUT)
GPIO.setup(Motor1E,GPIO.OUT)
print "Going forwards"
GPIO.output(Motor1A,GPIO.HIGH)
GPIO.output(Motor1B,GPIO.LOW)
GPIO.output(Motor1E,GPIO.HIGH)
sleep(2)
print "Going backwards"
GPIO.output(Motor1A,GPIO.LOW)
GPIO.output(Motor1B,GPIO.HIGH)
GPIO.output(Motor1E,GPIO.HIGH)
sleep(2)
print "Now stop"
GPIO.output(Motor1E,GPIO.LOW)
GPIO.cleanup()
Save by pressing CTRL, then X, then Y, and finally Enter key.
For reverse compatibility, we've set Motor1A low in the script.
Programmers use the terms "high" and "low" to denote the state of being on or off, respectively.
Motor1E will be turned off to halt the motor.
Irrespective of what A is doing; the motor can be turned on or off using the Enable switch.
Take a peek at the Truth Table to understand better what's going on.
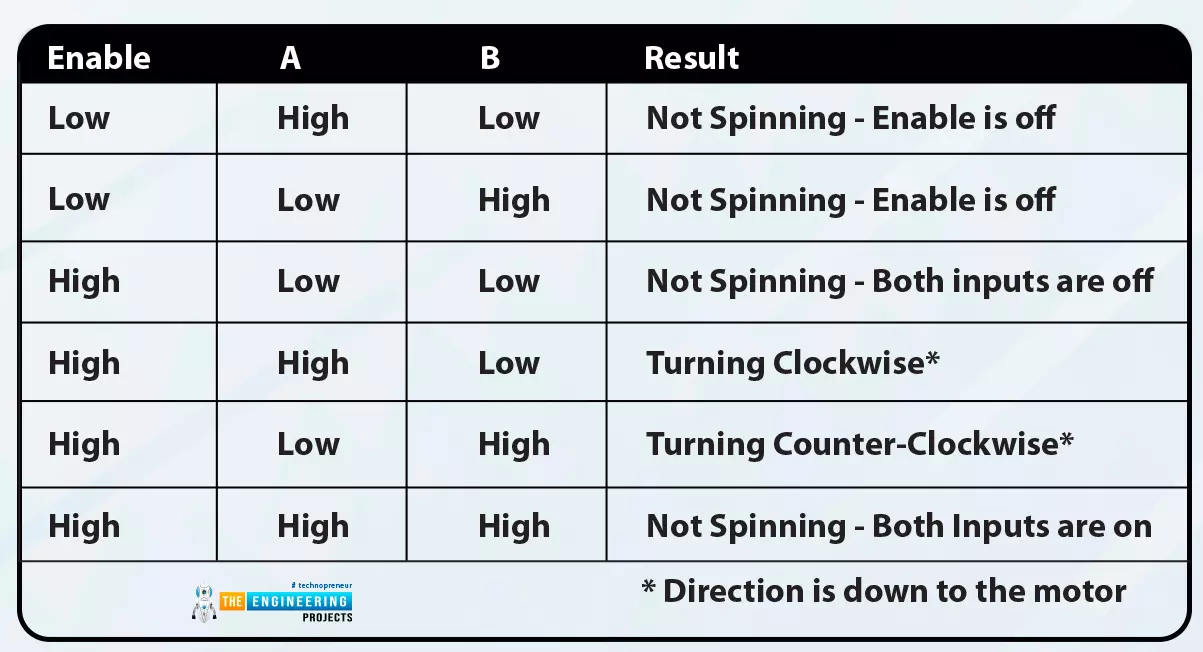
When Enabled, only two states allow the motor to move; A or B is high, and not both high at the same time.
Putting it all together
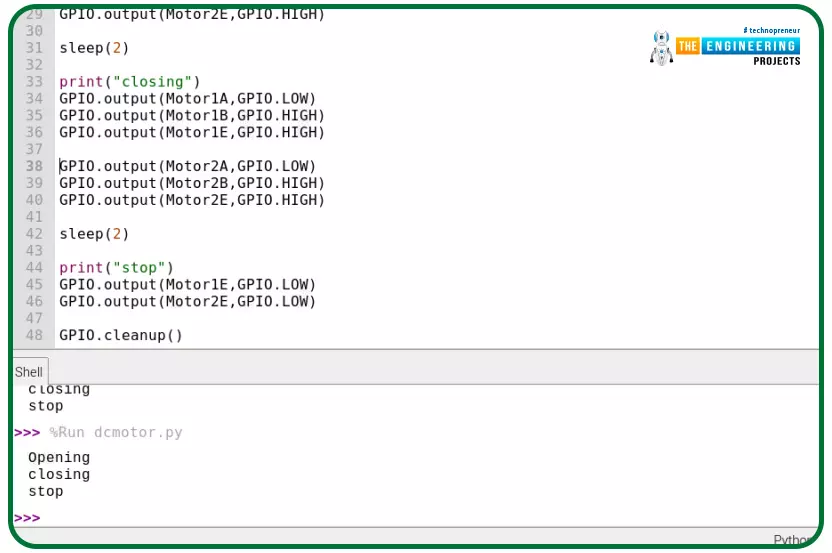
At this point, we have designed our face detection system and the dc motor control circuit; now, we will put the two systems to work together. When the user is verified, the dc motor should run to open the cd rom drive and close after a few seconds.
In our verify code, we will copy the code below to spin the motor in one direction “open the door” when the user is verified. We will also increase the time to 5 seconds to simulate the door's time to open for the user to get through. This also allows the motor to spin long enough to open and close the cd room completely. I would also recommend putting a stopper on the cd room door so that it doesn't close all the war and get stuck.
if conf>=80:
font = cv2.FONT_HERSHEY_SIMPLEX
name = labels[id_] #Get the name from the List using ID number
cv2.putText(img, name, (x,y), font, 1, (0,0,255), 2)
#place our motor code here
GPIO.setmode(GPIO.BOARD)
Motor1A = 16
Motor1B = 18
Motor1E = 22
GPIO.setup(Motor1A,GPIO.OUT)
GPIO.setup(Motor1B,GPIO.OUT)
GPIO.setup(Motor1E,GPIO.OUT)
Print("Openning")
GPIO.output(Motor1A,GPIO.HIGH)
GPIO.output(Motor1B,GPIO.LOW)
GPIO.output(Motor1E,GPIO.HIGH)
sleep(5)
print("Closing")
GPIO.output(Motor1A,GPIO.LOW)
GPIO.output(Motor1B,GPIO.HIGH)
GPIO.output(Motor1E,GPIO.HIGH)
sleep(5)
print("stop")
GPIO.output(Motor1E,GPIO.LOW)
GPIO.cleanup()
cv2.rectangle(img,(x,y),(x+w,y+h),(0,255,0),2)
Output
The advantages of face recognition over alternative biometric verification methods for home security
An individual's biometric identity can be verified by looking at various physical and behavioural characteristics, such as a person's fingerprint, keystrokes, facial characteristics, and voice. Face recognition seems to be the winner because of the precision, simplicity, and lack of contact detection.
Face-recognition technology will continue and will get better over time. The tale has evolved, and your alternatives have grown due to smart tech.
What are the advantages of employing Facial Recognition when it comes to smart home security?
Using an RPi as a surveillance system means you can take it with you and use it wherever you need it.
-
High accuracy rate
For the most part, the face-recognition software employed in security systems can reliably assess whether or not the individual attempting entry matches your record of those authorized to enter. On the other hand, certain computer programs are more precise when it comes to identifying faces from diverse angles or different countries.
Concerned users may be relieved to learn that some programs have the option of setting custom confidence criteria, which can significantly minimize the likelihood of the system giving false positives. Alternatively, 2-factor authentication can be used to secure your account.
-
Automation
When your smart security system discovers a match between a user and the list of persons you've given access to, it will instantly let them in. Answering the doorbell or allowing entry isn't necessary.
-
Smart integration
Face recognition solutions can be readily integrated into existing systems using an API.
Cons of Facial Recognition
-
Privacy of individuals and society as a whole is more at risk
A major drawback of face recognition technology is that it puts people's privacy at risk. Having one's face collected and stored in an unidentified database does not sit well with the average person.
Confidentiality is so important that several towns have prohibited law enforcement from using real-time face recognition monitoring. Rather than using live face recognition software, authorities can use records from privately-held security cameras in certain situations.
-
can infringe on one's liberties
Having your face captured and stored by face recognition software might make you feel monitored and assessed for your actions. It is a form of criminal profiling since the police can use face recognition to put everybody in their databases via a virtual crime lineup.
-
It's possible to deceive modern technology.
Conclusion
This article walked us through creating a complete Smart Security System using a facial recognition program from the ground up. Our model can now recognize faces with the help of OpenCV image manipulation techniques. There are several ways to further your knowledge of supervised machine learning programming with raspberry pi 4, including adding an alarm to ring whenever an individual's face is not recognized or creating a database of known faces to act like a CCTV surveillance system. We'll design a security system with a motion detector and an alarm in the next session.