Create PWM Signal in Raspberry Pi 4 using Python


Hello friends, I hope you all are doing great. It's the 8th tutorial in our Raspberry Pi programming course. In the previous lectures, we interfaced LCD 16x2 and Keypad 4x4 with Raspberry Pi 4. In this chapter, we are not going to interface any external module with Pi, instead, we'll create a PWM signal in the raspberry pi using Python. Let's get started:
Components Required
We are going to use the below components in today's PWM project:
- Raspberry Pi 4.
- LED.
- A resistor of 330 ohms.
- Breadboard.
- Jumper wires.
Before going forward, let's first understand what is PWM:
What is PWM?

- In PWM(Pulse Width Modulation), we simply turn on and off our power supply at regular intervals and thus reduce the average power of the signal.
- We have shared a detailed tutorial on Introduction to PWM(Pulse Width Modulation), you should read it once to understand PWM.
Let's understand the working of PWM with an LED example. We can change the brightness of an LED using PWM. If we provide +5V, the LED will have full brightness, but if we provide +2.5V to the LED, its brightness will fade. We achieve +2.5V from a +5V signal by turning it ON and OFF continually. So, in a signal of 1 sec, if we turn it ON and OFF 100 times, the overall power of the signal will be halved as it's in an OFF state for 50% of the duration. This process is called Pulse Width Modulation(PWM).

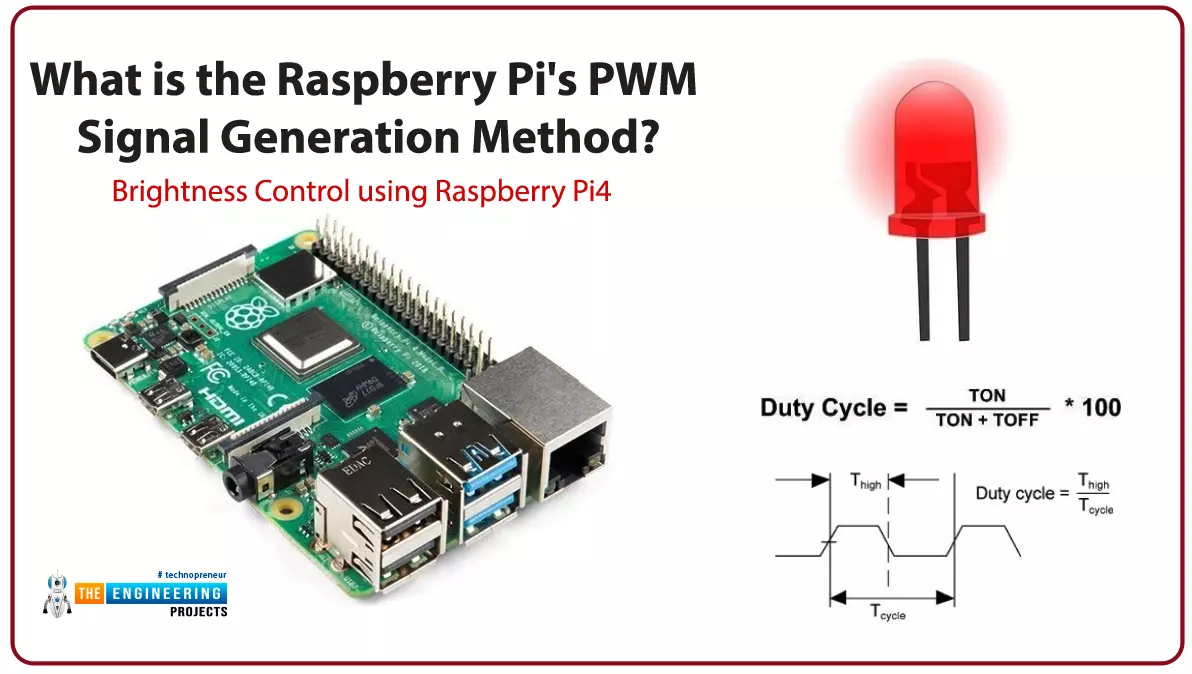
What is a "duty cycle"?
The percentage for which the signal remains in the ON state during one cycle is called the duty cycle.

To get an ideal square wave, you need a duty cycle of 50%. The signal is always on(full-scale) with a 100% duty cycle, while the signal is always off(Ground) with a 0% duty cycle.
PWM Signal's Frequency

The inverse of the period is the frequency of the signal, which is the number of times a periodic change is accomplished per unit of time. Speed is determined by how quickly a signal goes from high to low i.e. how quickly a PWM completes a cycle. Constant voltage output is achieved by continually turning the digital signal on and off at a high frequency.
PWM Resolution
The 'PWM resolution' refers to the degree of control over the duty cycle. The more 'brightness' levels we can display, the greater our PWM resolution needs to be. Pprecise microcontroller timing is required because the duty cycle is normally around 50Hz. The more powerful the microcontroller, the shorter the time intervals it can keep track of. The microcontroller must not only time the 'interrupt,' which generates the pulse but also run the code that controls the LED output, which must be completed before the next interrupt is called, which is another limiting issue. It's also likely that you'll want your microcontroller to accomplish activities other than controlling the brightness of the LEDs, so you'll need some spare execution time between interrupts.
The fundamental benefit of greater PWM resolutions for LED PWM control is that it reduces the difference between 'off' and the LED's lowest achievable brightness. Suppose we have a duty cycle of 20,000 microseconds and a resolution of 10,000 microseconds. In that case, the difference in brightness between "off" and the lowest possible brightness will be 50 percent of the total brightness. The difference would be 10% at a resolution of 2,000 microseconds. The "PWM resolution" determines the number of brightness levels that we can support between 0% and 100% when it comes to brightness levels. (100 percent). Again, the better the resolution, the more precise the timing, and the more computing power is needed to process the information.

The above diagram shows a PWM resolution of 10%.
Depending on the nature of your application, the resolution and overall duty cycle requirements may be different. There is no need for precision control for simple displays; nevertheless, the ability to manage the brightness level may be crucial (think of the issue of mixing colors using an RGB LED, for example). More control and accuracy necessitate more microcontroller resources; thus, the trade-off is straightforward.
Applications of PWM
- Using PWM, you may adjust the screen's brightness.
- Use a variety of loudness levels for the buzzer.
- Control the motor's speed i.e. DC, Servo, Stepper etc.
- Provide a physical outlet for analog signals.
- Create an audio output.
- Communication: encoding of the message.

Raspberry Pi PWM Signal
- Raspberry Pi 4 has two PWM channels, PWM0 and PWM1.
- Four PWM pins are available on the Raspberry Pi, GPIO12 and GPIO18 share the PWM0 channel, whereas GPIO13 and GPIO19 share the PWM1 channel.
- The following are the pinouts for the PWM channels on the 40-pin header:
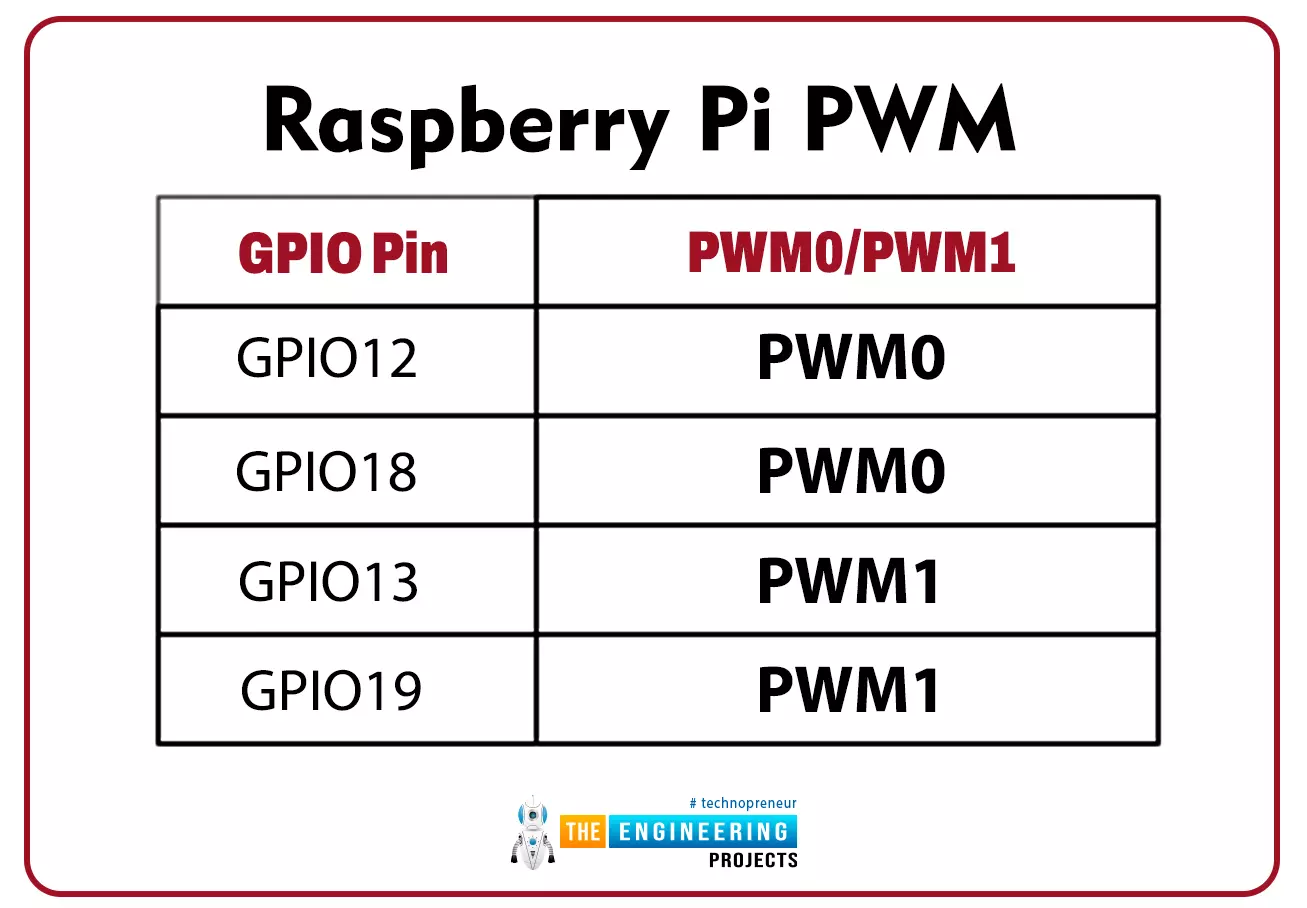
- The Raspberry Pi 40-pin Header's PWM pins are illustrated in the following figure.

- On a Raspberry Pi, all of the PWM pins are used by the audio subsystem. As a result, we can choose either PWM or Audio output.
- Hardware PWM signals can only be generated by importing the Pigpio library. The RPi.GPIO library, on the other hand, can be used to generate PWM signals.
Software PWM in Raspberry Pi
- There are two ways to generate PWM signals with the Raspberry Pi i.e. hardware PWM and software PWM.
- It is possible to use all 26 GPIO pins on the RPi to generate PWM frequencies of up to a few thousand Hertz using software PWM. The software PWM signals' duty cycle can be adjusted anywhere from 0% to 100%.
- Software PWM is more adaptable than hardware PWM. However, software-based PWM has the major disadvantage of being less accurate than a hardware-based PWM channel. Because software PWM generation consumes CPU resources, your Raspberry PI's processing capacity will be limited.
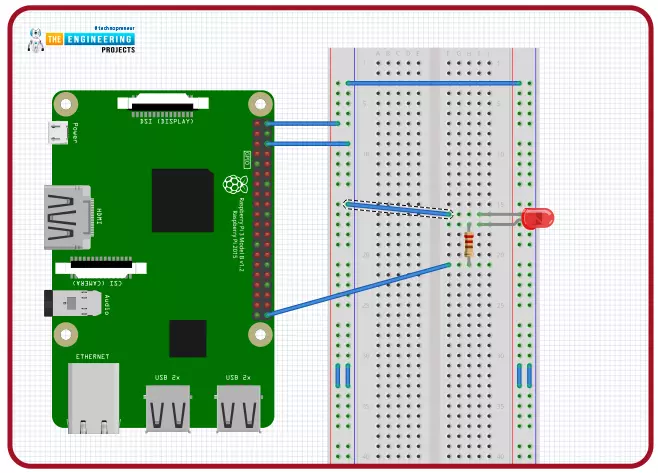
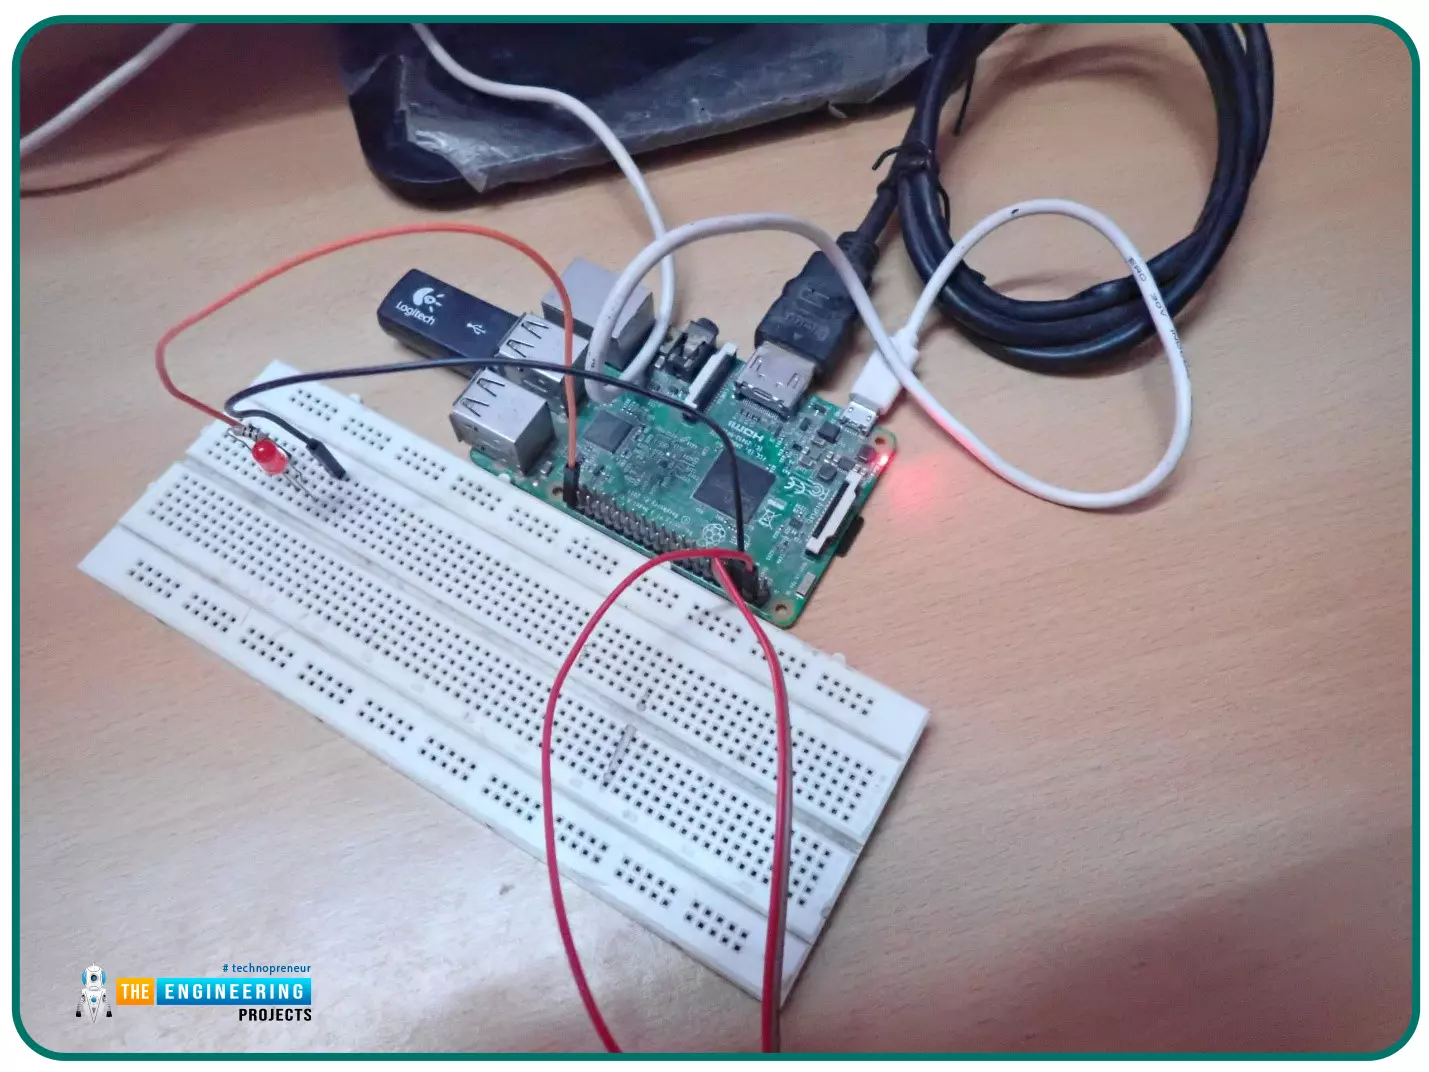
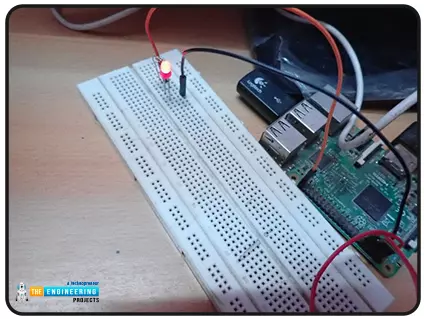
Raspberry Pi PWM Circuit Diagram
Even though hardware PWM is the preferred approach for generating PWM from the Raspberry Pi, we will use software PWM in this article.
- Connect the anode of the LED with GPIO21. After that, connect the LED's cathode to a 330 Ohm series resistor and ground the resistor's other end.
Pins 2 and 6 of the Pi board can be used to supply the circuit with Vcc and ground.
Python Code for PWM Signal Generation
The thorny Python IDE on raspberry pi will be used here to write our Python script. If you haven't already done so, please go back to Chapter 4 and read about how to get started with this IDE before reading on.
To keep things simple, we'll create a file called PMW.py and save it to our desktop.
Putting the project into action
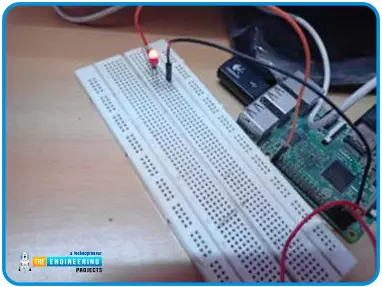
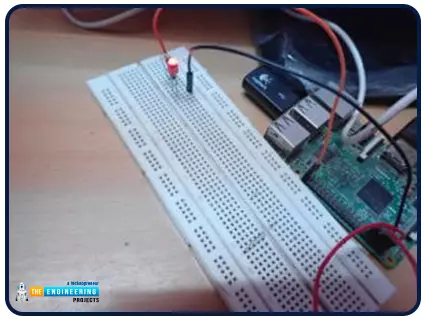
We're using a 50 Hz software PWM signal to generate a customized sine wave with RPi. It has a 20-millisecond window at this frequency. During the application, the frequency does not fluctuate.
Increasing the software PWM duty cycle from 0 to 100 is required to produce a rectified sine wave. The PWM signal is applied to the LED in five-pulse trains every 0.1 seconds, with each train lasting 0.1 seconds.
As a result, the duty cycle is lowered from 100 to 1 in steps of minus one. Five PWM pulse trains, each lasting 0.1 seconds, are applied to each increment. Iteration continues indefinitely until a keyboard interrupt is received, at which point the user program terminates.
Code
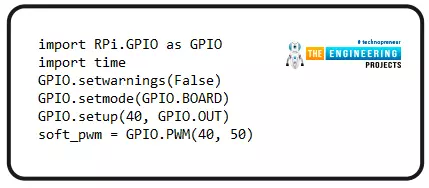
Import RPi.GPIO then time libraries. Then a simple script is run to begin. The GPIO.setwarnings() method is used to disable the warnings.
To set the RPi's PINs to the number of board, use the GPIO.setmode() function to set the pin numbering. The GPIO.setup() method configures pin 40 of the board as an output. However, the GPIO.PWM() technique is used to instantiate board pin 40 as a software PWM.
It is possible to write a user-defined setup() function to ensure that the software PWM has no duty cycle when it is first started. Only one instance of this function is ever called.

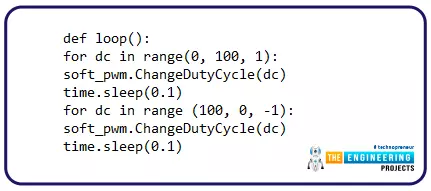
The duty cycle of the PWM signal is altered from 0 to 100 and then back to 0 in a user-defined loop() function. This occurs in increments of one, with a 0.1-second gap between each. For an endless number of times, the LED lights up and fades back down.
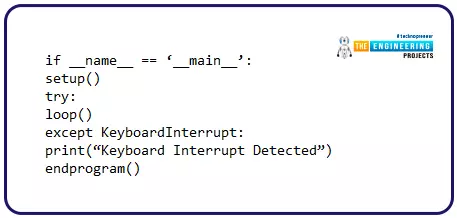
The PWM signal is turned off when a keyboard interrupt is received by calling the endprogram() method. The GPIO of the Raspberry Pi is then wiped clean.

Setup() and loop() are the two methods in a try-exception statement, and they are each called once.
Code Syntax
The GPIO.PWM() method
A PWM instance can be created with the help of this function. This is a two-step process:
- PWM signal must be generated on a specific channel number
- The frequency in Hertz of the PWM signal. The method must be assigned to a variable before an instance can be generated.
The syntax for this method is:
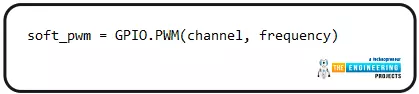
The number of the channel must be given in accordance with the user-Board program or BCM numbering.
The start() method
This technique can be used with a PWM software instance. PWM duty cycle is all you need to know about this.
PWM instances can be accessed by calling this method from a Python program. A software PWM signal with the specified duty cycle is started at the supplied channel.
The syntax is as follows:

The ChangeFrequency() method
This technique can be used with a PWM software instance. There's only one thing needed: a new Hertz value for the PWM signal's frequency.
The frequency of the PWM output is changed when this method is used on a PWM object in Python.
The syntax is as follows:

The ChangeDutyCycle() method
An instance of PWM software can use this technique. One reason is all that is required: the launch of a new cycle of service.
The duty cycle ranges from 0.0 to 100.0. The duty cycle of the PWM signal is changed when this method is called on a PWM instance in Python.
Here is the syntax of the method:

The stop() method
This technique can be used with a software PWM instance. It doesn't need a response. An instance's PWM signal is paused when this method is called on it.
The syntax for this method is:

Output
Conclusion
Congratulations! You have made it to the end of this tutorial. We have seen how PWM is generated in the raspberry pi. We have also seen how to set up our raspberry pi pins with LEDs to be controlled and wrote a python program that controls the output of these pins. The following tutorial will learn how to control a DC motor with Raspberry Pi 4 using Python.