Hello friends, I hope you all are doing great. Today, I am going to share the nRF54H20 DK Library for Proteus, so you can run a Bluetooth LE simulation of the development kit for Nordic Semiconductor's most powerful wireless chip so far. The nRF54H20 packs an Arm Cortex-M33 application core at up to 320 MHz, a second Cortex-M33 for the radio and RISC-V cores that look after the peripherals - a small multicore computer with Bluetooth LE built in. With this library the kit runs your Arduino sketch in Proteus 8.5, reads its four buttons, lights its four LEDs and talks to a phone over Bluetooth LE.
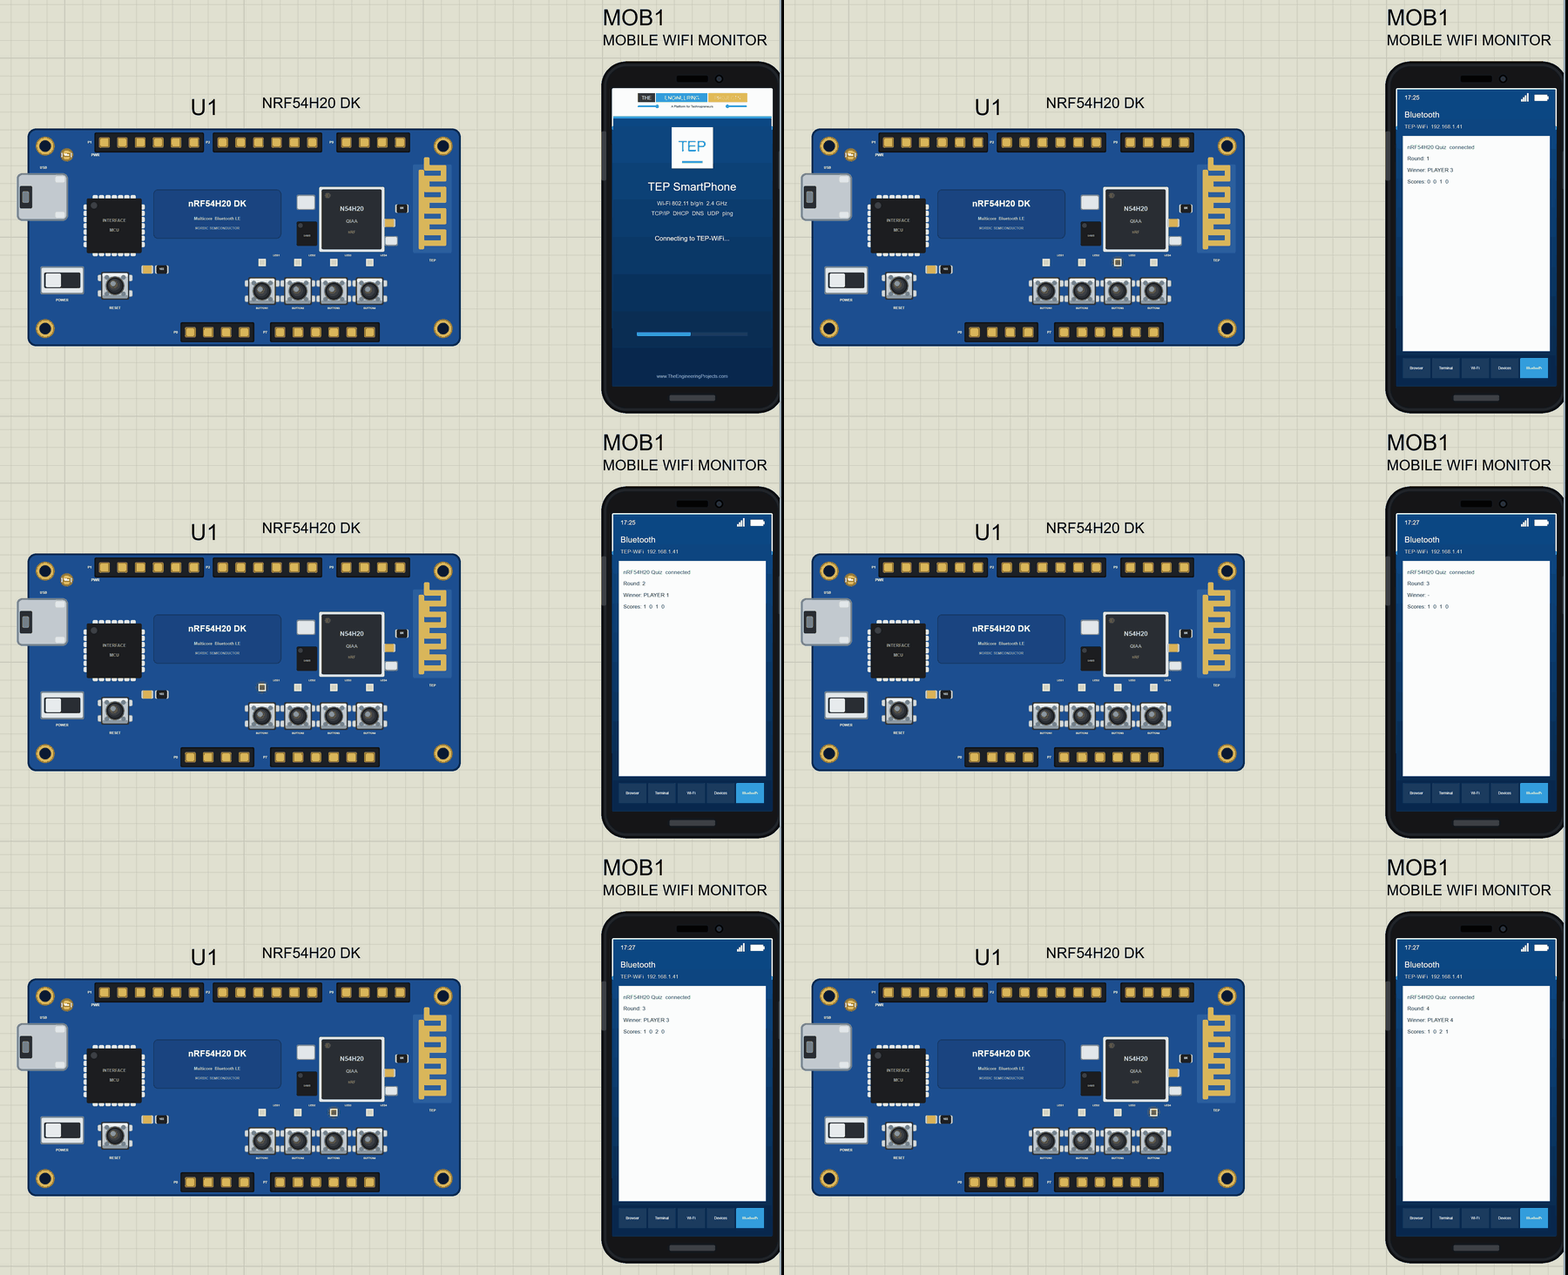
nRF54H20 DK Library for Proteus
Latest version: V1.0 (November 2026, this tutorial)
Other new Arduino boards: UNO R4 WiFi · Nano ESP32 · UNO WiFi Rev2 · Nano 33 IoT · UNO Q · UNO R4 Minima · Nano Every · MKR WiFi 1010 · Nano RP2040 Connect · STM32 Black Pill · Nucleo-F401RE · STM32 Blue Pill · Teensy 4.1 · Arduino Due · Arduino Leonardo · Arduino Micro · BBC micro:bit V2 · GIGA R1 WiFi · MKR WAN 1310 · Nano 33 BLE Sense · XIAO nRF52840 Sense · RAK4631 WisBlock · Nano Matter · nRF52840 DK · nRF5340 DK · nRF9151 DK · nRF7002 DK · Nordic Thingy:53 · xG24 Dev Kit · xG24 Explorer Kit · Thunderboard BG22 · SiWx917 Dev Kit · B-L475E-IOT01A · NUCLEO-WB55RG · NUCLEO-WL55JC1 · NUCLEO-H743ZI2 · SAM R21 Xplained Pro · FRDM-MCXN947 · Portenta H7 · LP-CC2652R7 · PSoC 6 WiFi-BT · Feather nRF52840 · Thingy:91 X · xG26 Dev Kit · nRF52 DK · nRF52833 DK · nRF52840 Dongle · nRF5340 Audio DK
RF modules: nRF24L01 · nRF24L01 PA LNA · CC1101 · RFM69HCW · HC-12 · 433MHz RF · XBee
Temperature and weather sensors: DHT11 / DHT22 · DS18B20 · BME280 · BMP280 · SHT31 · AHT20 · BME680 · MLX90614 · MAX6675
Helping Tools
- Laptop WiFi Monitor: a laptop on the Wi-Fi of your design: a browser, a TCP / UDP terminal and ping
- Mobile WiFi Monitor: a smartphone that opens the pages of your board and sends it commands
- Serial Monitor Advance: a serial terminal window for the UART of your board
For the demo we built a Bluetooth quiz buzzer for four players. Each player has one of the kit's buttons; the first to press wins the round and lights an LED, and the quiz master's phone shows the winner and the scores.
NOTICE: Proteus has no nRF54H20 model, so our team has put a lot of effort into building this board ourselves: the four buttons, the four LEDs and Bluetooth LE are all our own model, and your sketch compiles with our free TEP Boards for Proteus add-on. Your feedback is the fuel that keeps us going, so please tell us what you think in the comments below. And if our free libraries help you, you can buy us a coffee. So, let's get started with the nRF54H20 DK Library for Proteus:
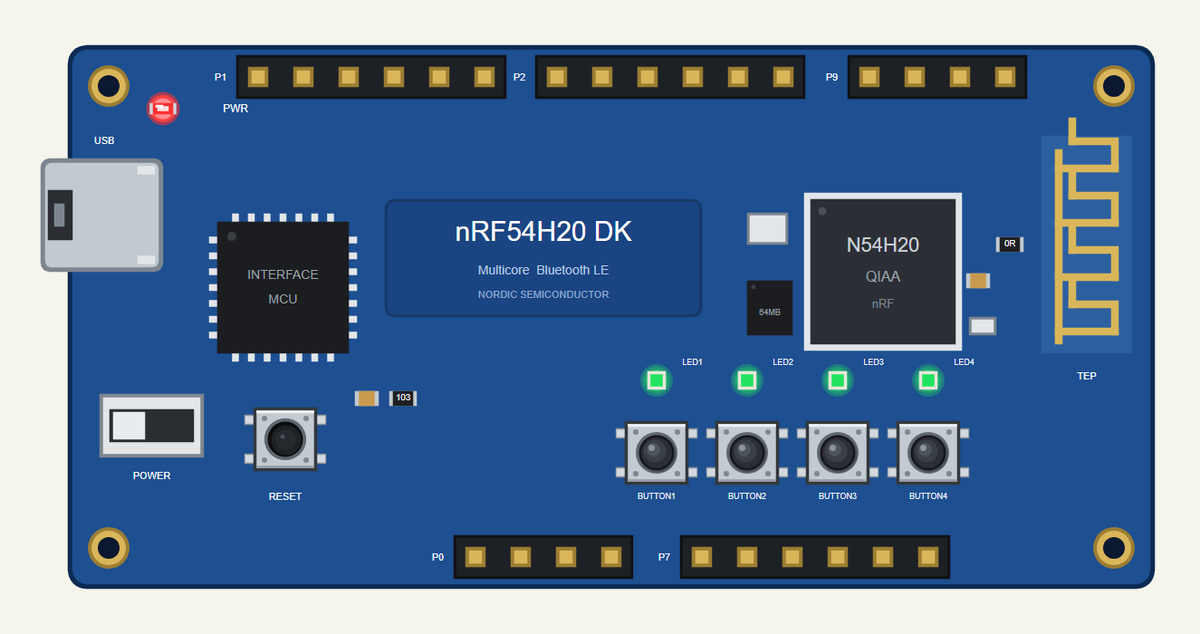
What is the nRF54H20 DK?
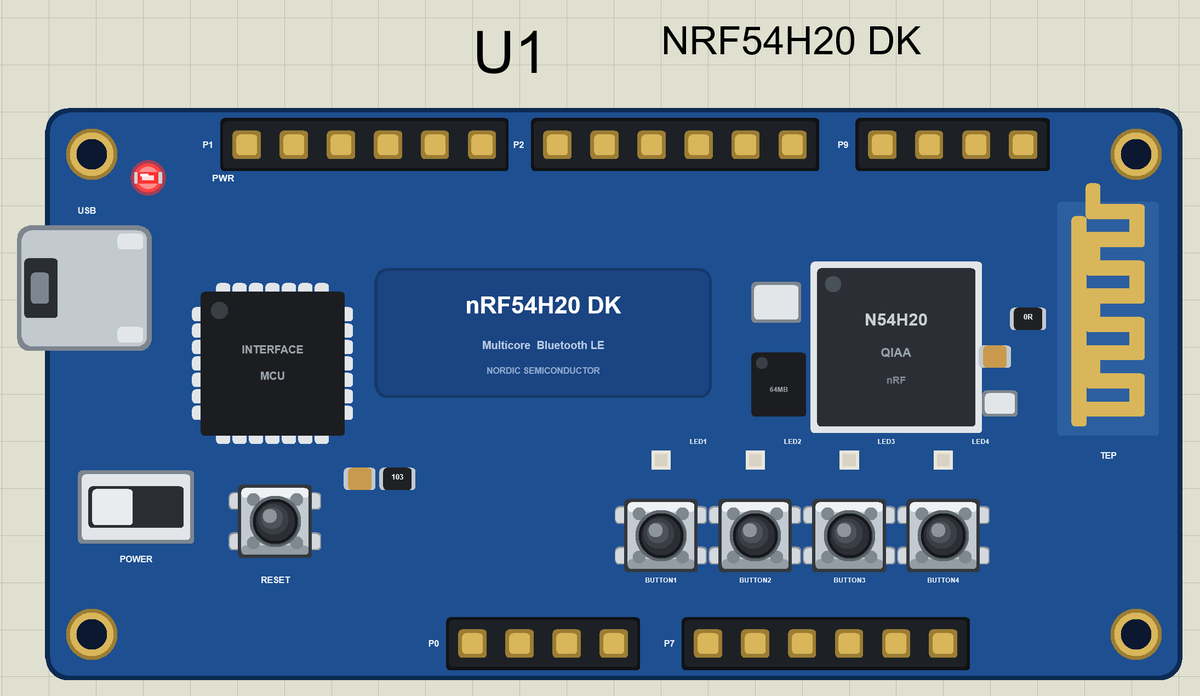
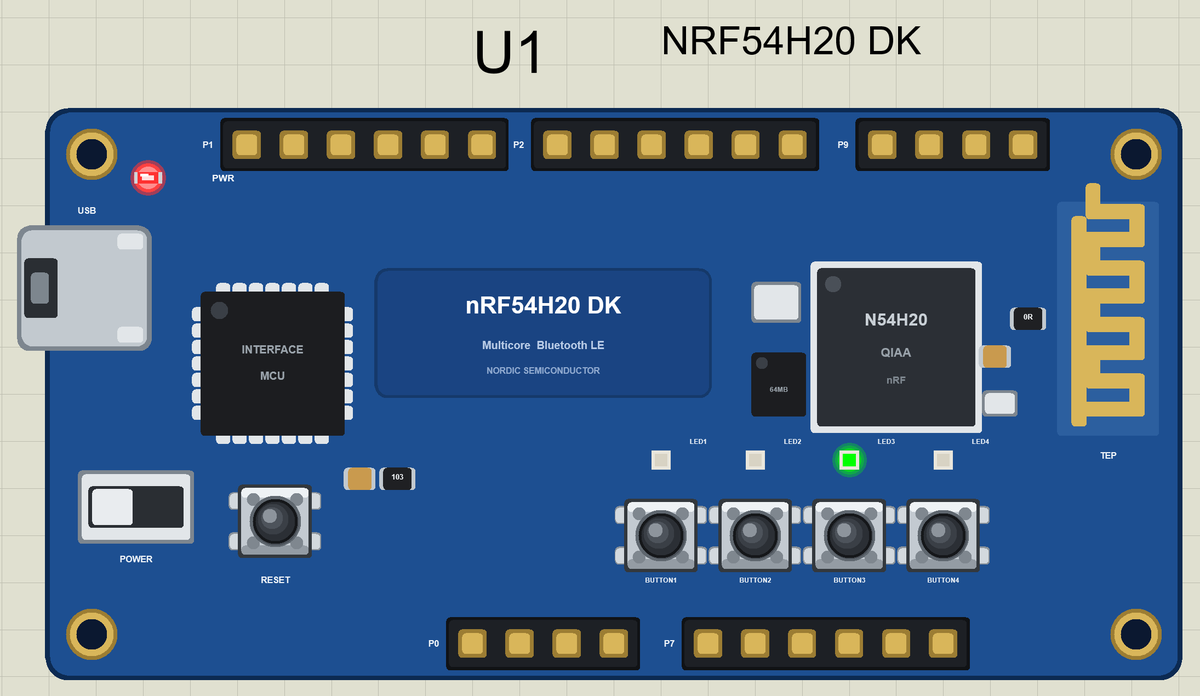
The nRF54H20 DK is Nordic Semiconductor's development kit for the nRF54H20, the first member of the nRF54H series. Where earlier Nordic chips had one processor, the nRF54H20 has several: an application core for your code, a radio core that runs the Bluetooth stack, and RISC-V peripheral processors that handle fast I/O jobs on their own. The kit carries the chip with its antenna, an external octal flash, an interface MCU that programs it over USB, four buttons, four green LEDs and pin headers for its ports.
| Part | The real nRF54H20 DK | In the library |
|---|---|---|
| SoC | nRF54H20: application Cortex-M33 up to 320 MHz | your Arduino sketch |
| Other cores | radio Cortex-M33 up to 256 MHz, RISC-V peripheral processors | part of the model |
| Radio | Bluetooth LE, 802.15.4 | ArduinoBLE |
| LEDs | LED1 to LED4 on P9.00 to P9.03, active HIGH | LED1 to LED4 |
| Buttons | BUTTON1 to BUTTON4 on P0.08 to P0.11 | BUTTON1 to BUTTON4 |
| USB | interface MCU, virtual COM port | the serial monitor |
Many Cores, One Chip
Splitting the work across cores has a clear purpose. The radio core keeps the Bluetooth timing exact no matter what your program does. The RISC-V peripheral processors can, for example, generate an unusual serial protocol in software while the main core sleeps. And the application core is free for your logic - at up to 320 MHz it is several times faster than the nRF52 chips. Our model runs your sketch on the application side, and the Bluetooth side is part of the model, so you can focus on the program.
LEDs That Light When HIGH
The nRF52 kits light their LEDs when the pin is LOW. The nRF54H20 DK is different: its LEDs light when the pin is HIGH, so digitalWrite(LED1, HIGH) switches LED1 on. The buttons work as usual: they read LOW while pressed, with a pull-up.
No Arduino Header
The nRF54H20 DK has pin headers for its ports, but Zephyr's board files for the kit define no Arduino header. Our library draws the port headers and keeps the part simple: the sketch uses the four buttons, the four LEDs, Serial and Bluetooth LE - exactly what the kit offers without any wiring. For a Nordic kit with an Arduino header, see our nRF52840 DK Library for Proteus.
Where Is It Used?
The nRF54H series aims at products that need more than a simple sensor node: smart watches, advanced hearing aids, wireless gaming controllers, industrial gateways and devices with on-chip machine learning. The DK is where those products start.
A simulation lets you try the logic before the kit is on the desk: the buttons, the LEDs, the timing and the Bluetooth service. When the sketch works in the Proteus simulation, the real kit only has to confirm it.
Features of the nRF54H20 DK Library for Proteus
- The board as it looks: the blue kit with the nRF54H20 and its antenna, the external flash, the interface MCU with its USB port, the power switch, RESET, the four buttons, the four LEDs and the port headers, drawn compact, with our small TEP signature.
- Your sketch: a .hex for "Nordic nRF54H20 DK (TEP Proteus)" with LED1 to LED4 and BUTTON1 to BUTTON4.
- Animated buttons and LEDs: click the four buttons; the LEDs glow.
- Bluetooth LE: ArduinoBLE, with our phone as the central.
- A complete package: about 3.4 MB with the part, the add-on, the phone and the demo, without the source code of the models.
The nRF54H20 DK in Proteus Simulation
Search NRF54H20 in Pick Devices; the device NRF54H20 DK is in TEPNRF54H20DK.LIB (Microprocessor ICs, Bluetooth Boards), with the prefix U. There is nothing to wire: drop it on the sheet, set its PROGRAM and press Run. A click on the USB port opens the serial monitor.
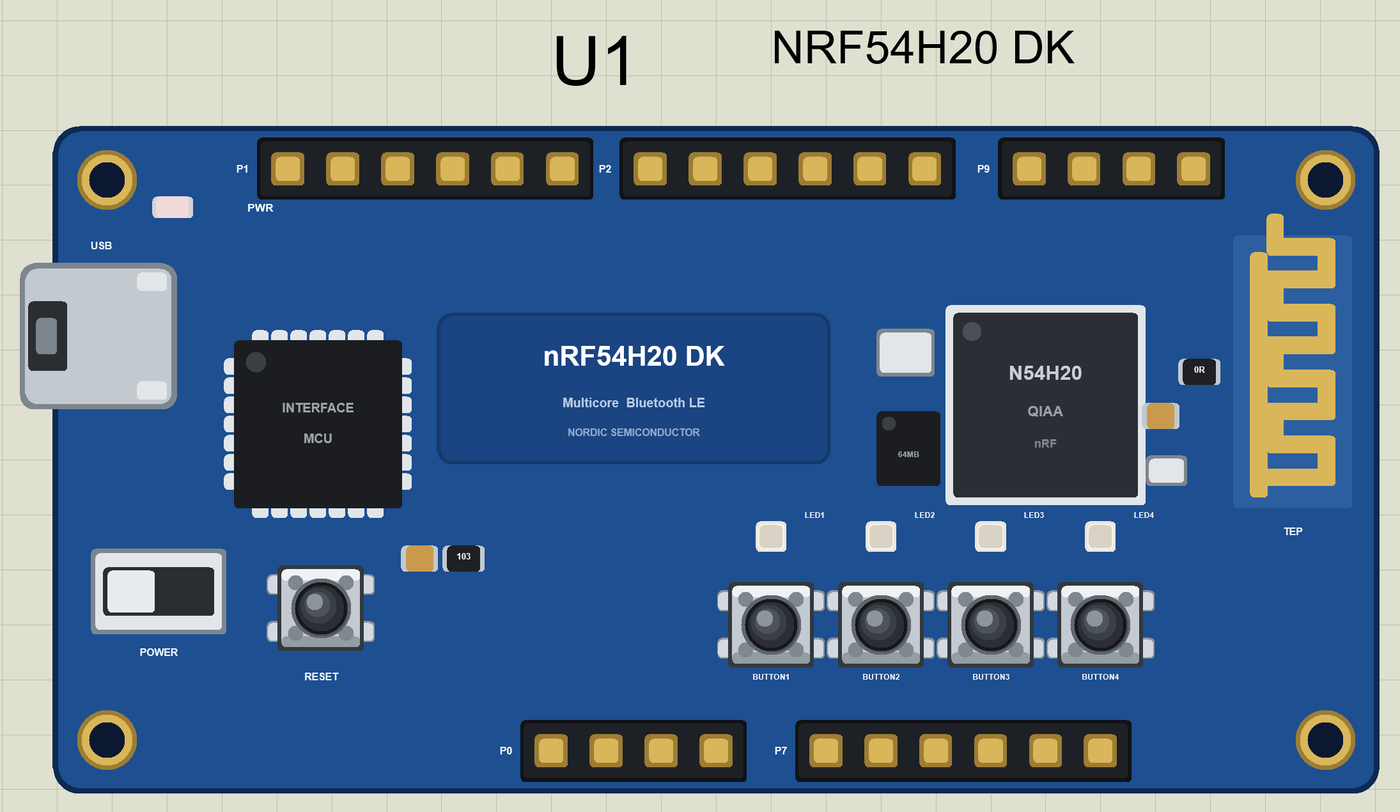
The LEDs and the Buttons
| Name | Number | The real kit | What it does |
|---|---|---|---|
| LED1 to LED4 | 0 to 3 | P9.00 to P9.03 | the green LEDs, lit when HIGH; LED_BUILTIN is LED1 |
| BUTTON1 to BUTTON4 | 4 to 7 | P0.08 to P0.11 | the buttons, LOW when pressed; BTN_BUILTIN is BUTTON1 |
| RESET | - | - | restarts the sketch |
Download nRF54H20 DK Library for Proteus
Click the button below to download nRF54H20-DK-Library-for-Proteus-v1.0.zip (about 3.4 MB, without the source code of the models):
nRF54H20 DK Library for Proteus V1.0- README.txt: installation, the demo, the pins, the properties, troubleshooting and the limits.
- Proteus Library Files:
TEPNRF54H20DK.LIBand the phone and laptop (TEPMOBILE.LIB,TEPLAPTOP.LIB). - Proteus Model Files:
TEPNET.DLL. - Arduino Code: the demo sketch and the TEP Boards for Proteus add-on 1.85.0, with ArduinoBLE.
- Proteus Simulation: the demo project, its HEX file and a copy of the DLL.
No Proteus yet? Read How to Download and Install Proteus 7 and 8. New to libraries? Follow How to Install a New Library in Proteus.
How to Install nRF54H20 DK Library for Proteus
- Close Proteus and extract the whole zip file, for example to your Desktop.
- Copy the files from Proteus Library Files into the LIBRARY folder of Proteus.
- Copy
TEPNET.DLLfrom Proteus Model Files into the MODELS folder, replacing an older one. - Delete
TEPNRF54H20DK.IDXfrom the LIBRARY folder if it is there. - For your own sketches, copy Arduino Code\TEP Boards for Proteus\hardware into your Arduino sketchbook (Documents\Arduino) and restart the Arduino IDE; the board is Nordic nRF54H20 DK (TEP Proteus).
- Start Proteus, press P and search for NRF54H20.
Demo: a Bluetooth Quiz Buzzer in Simulation
Every quiz show needs buzzers: the first player to press gets to answer, and nobody can argue about who was first. The kit's four buttons make four buzzers, its four LEDs show the winner, and the quiz master follows the round and the scores on a phone.
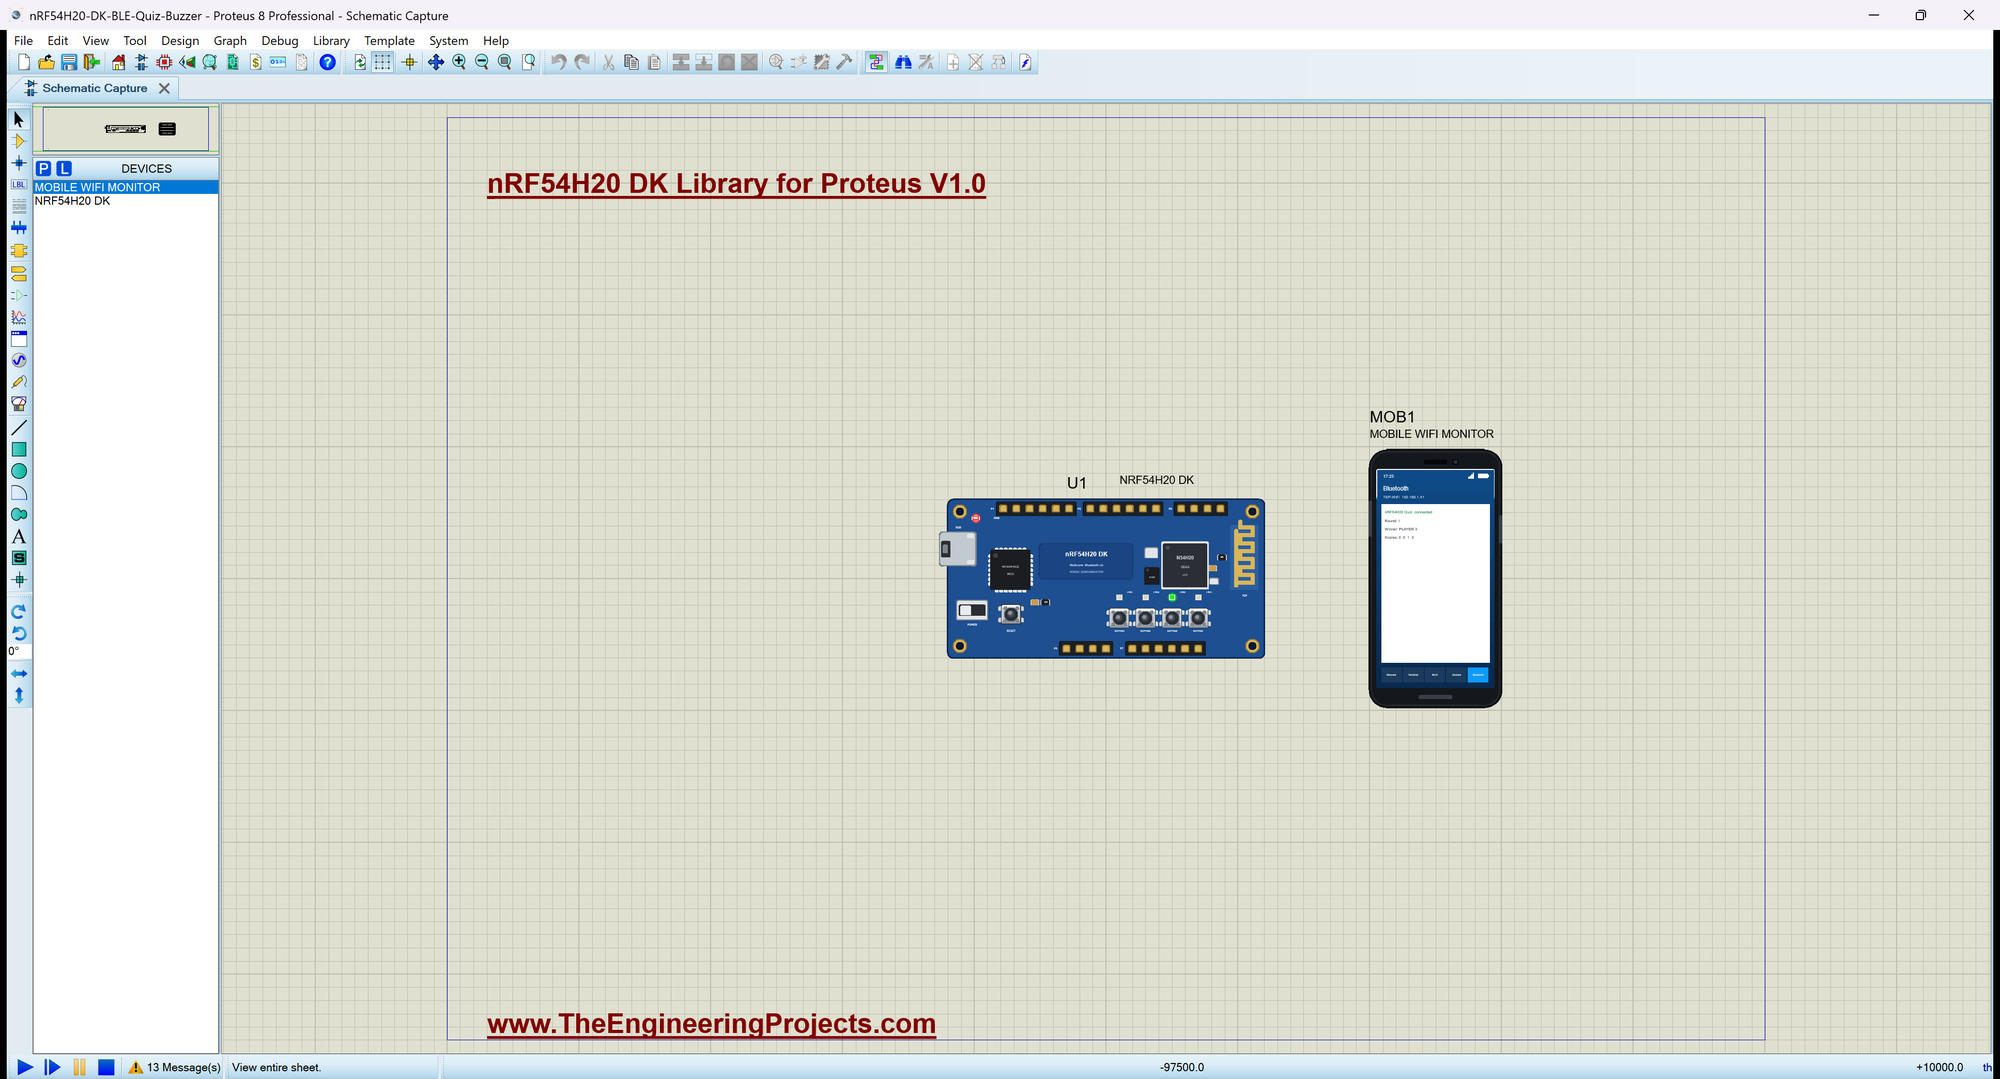
Open nRF54H20-DK-BLE-Quiz-Buzzer.pdsprj. U1 runs DK54H_Quiz_Buzzer.hex; MOB1 is our Mobile WiFi Monitor, the phone.
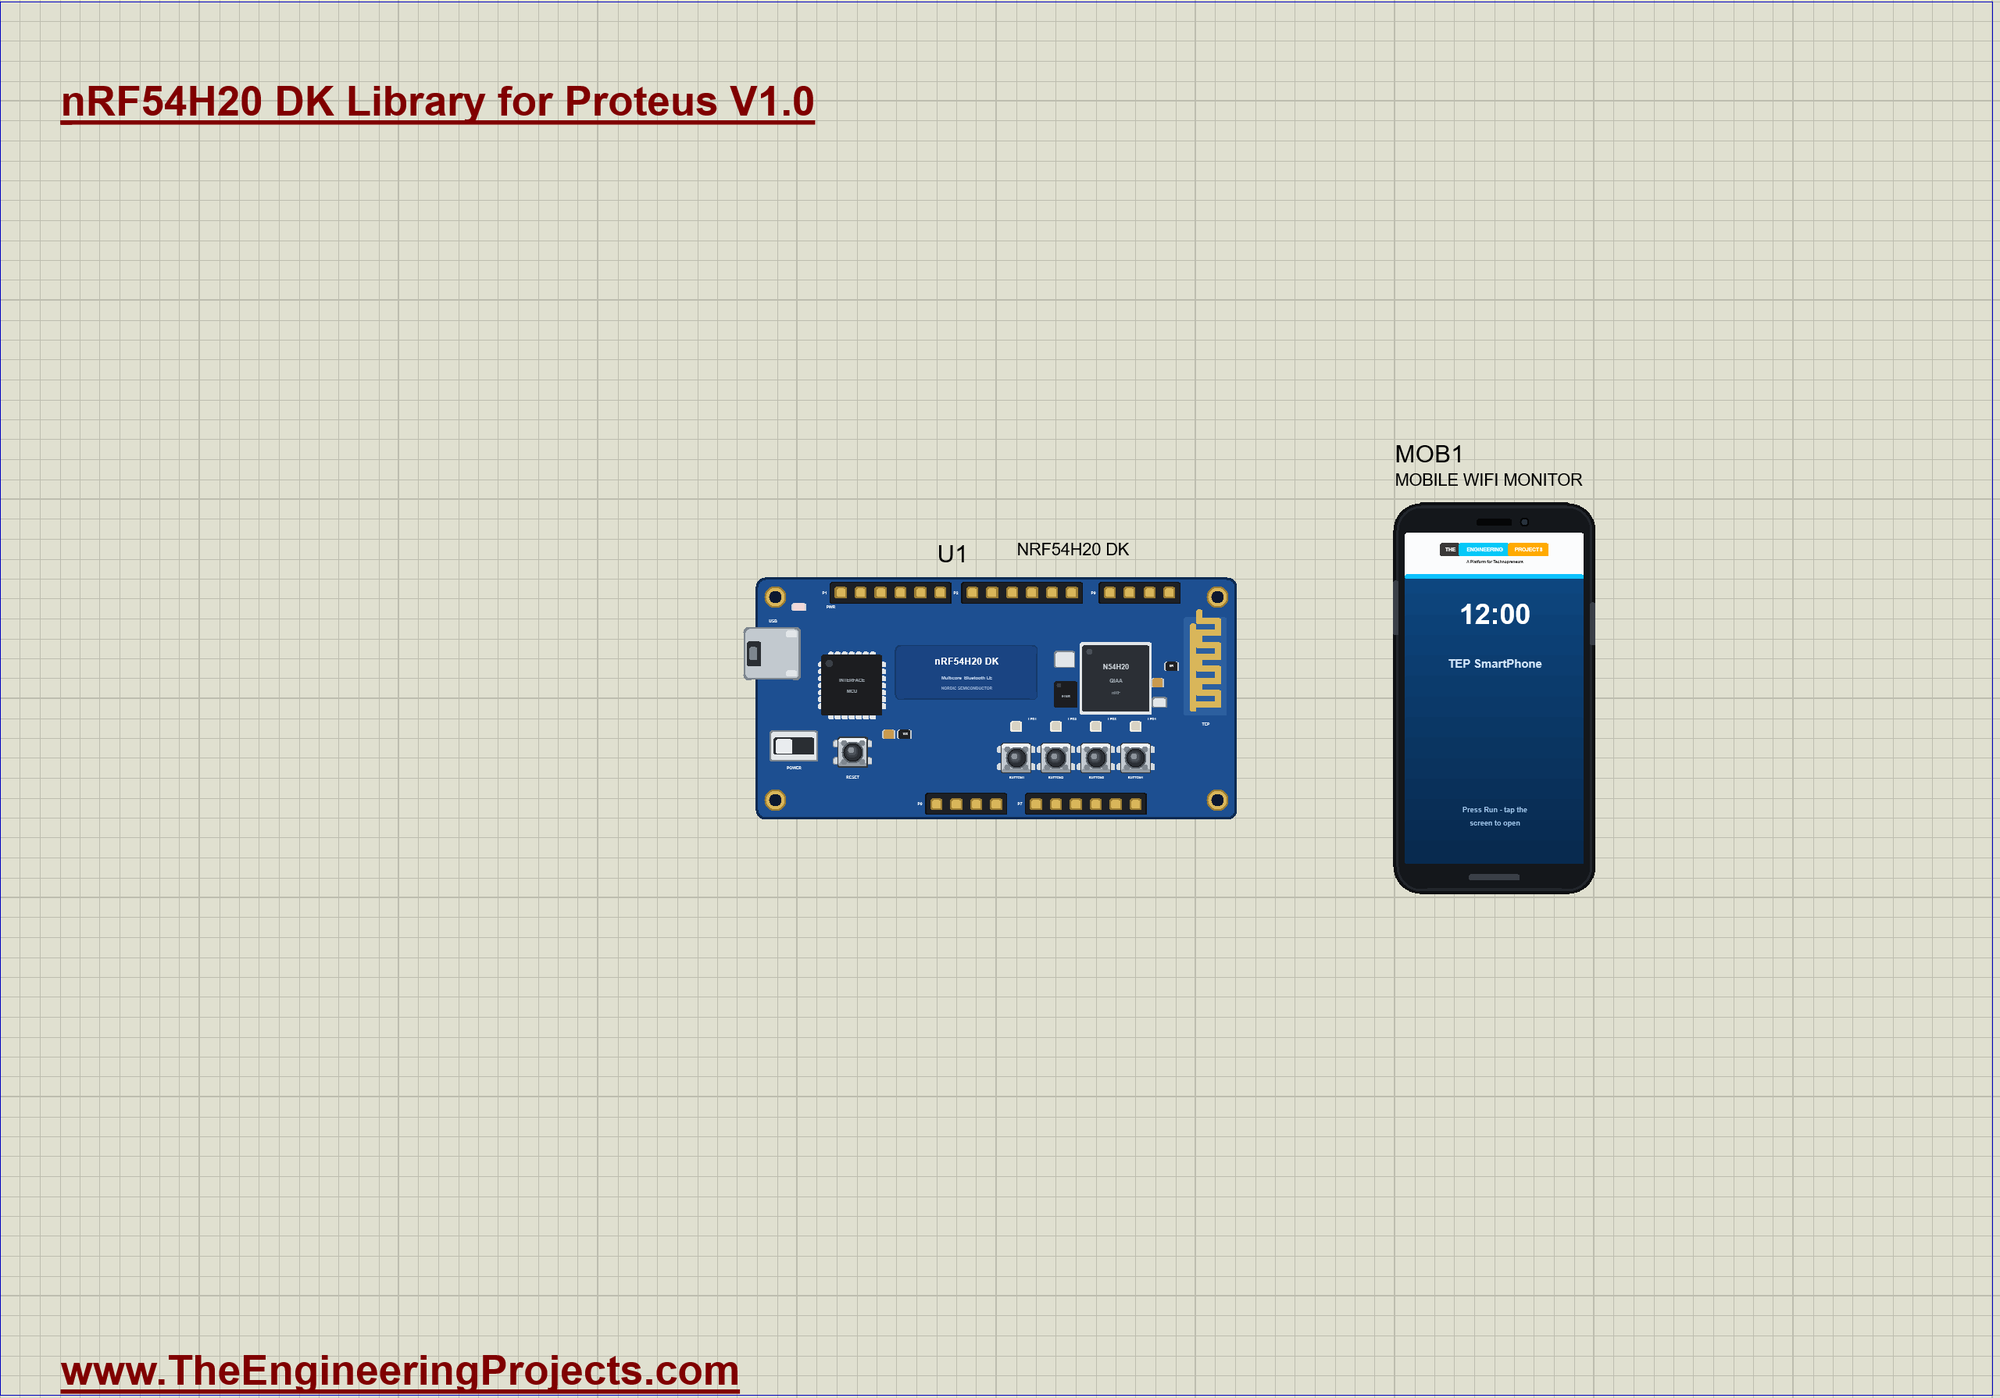
| Step | What happens | LEDs |
|---|---|---|
| Round open | all four buttons count | all off |
| First press | that player wins and scores a point | the winner's LED on |
| Locked (3 s) | other presses count nothing | the winner's LED on |
| Next round | the round number goes up | all off |
Players, LEDs and the Show Time
Two tables connect each player's button to the player's LED, and one constant sets how long the winner is shown:
const byte BUTTONS[4] = {BUTTON1, BUTTON2, BUTTON3, BUTTON4};
const byte LEDS[4] = {LED1, LED2, LED3, LED4};
const unsigned long SHOW_MS = 3000;                         // how long the winner's LED stays on
Opening a Round
openRound() clears the winner, switches the LEDs off and tells the phone and the monitor:
void openRound() {
  winner = -1;
  for (byte k = 0; k < 4; k++) digitalWrite(LEDS[k], LOW);
  roundChar.writeValue(round_);
  winnerChar.writeValue("-");
  Serial.print(F(">> ROUND ")); Serial.print(round_); Serial.println(F(": press your button!"));
}
The First Press Wins
win() remembers the winner and the time, adds the point, lights the LED and sends the news:
void win(byte k) {
  winner = k;
  wonAt = millis();
  scores[k]++;
  digitalWrite(LEDS[k], HIGH);                              // HIGH = on
  char w[12];
  snprintf(w, sizeof w, "PLAYER %d", k + 1);
  winnerChar.writeValue(w);
  sendScores();
  Serial.print(F(">> PLAYER ")); Serial.print(k + 1); Serial.print(F(" first in round ")); Serial.print(round_);
  Serial.print(F("   scores ")); Serial.print(scores[0]); Serial.print(' '); Serial.print(scores[1]); Serial.print(' ');
  Serial.print(scores[2]); Serial.print(' '); Serial.println(scores[3]);
}
The Loop
The loop keeps Bluetooth running, reads the four buttons and acts only on a press while the round is open. Three seconds after a win the next round opens:
void loop() {
  BLE.poll();
  const bool connected = BLE.connected();
  if (connected != wasConnected) {
    wasConnected = connected;
    Serial.println(connected ? F("Phone connected") : F("Phone disconnected"));
  }
  for (byte k = 0; k < 4; k++) {
    const bool now = digitalRead(BUTTONS[k]);
    if (now != lastBtn[k]) {
      lastBtn[k] = now;
      if (now == LOW && winner < 0) win(k);                 // only the first press of an open round counts
    }
  }
  if (winner >= 0 && millis() - wonAt >= SHOW_MS) { round_++; openRound(); }
}
The Bluetooth Service
Three characteristics carry the round, the winner and the scores, each with a readable 0x2901 name for the phone:
BLEService quizService("19B100B0-E8F2-537E-4F6C-D104768A1214");
BLEIntCharacteristic roundChar("19B100B1-E8F2-537E-4F6C-D104768A1214", BLERead | BLENotify);
BLEStringCharacteristic winnerChar("19B100B2-E8F2-537E-4F6C-D104768A1214", BLERead | BLENotify, 12);
BLEStringCharacteristic scoresChar("19B100B3-E8F2-537E-4F6C-D104768A1214", BLERead | BLENotify, 20);
Run the Simulation
Press Run. The four LEDs flash once - a lamp test - and the serial monitor, the same window as our TEP Serial Monitor Advance for Proteus, shows the name the kit advertises and the first round:
nRF54H20 DK Bluetooth Quiz Buzzer - The Engineering Projects
Advertising as "nRF54H20 Quiz"   BUTTON1 .. BUTTON4 = the players
>> ROUND 1: press your button!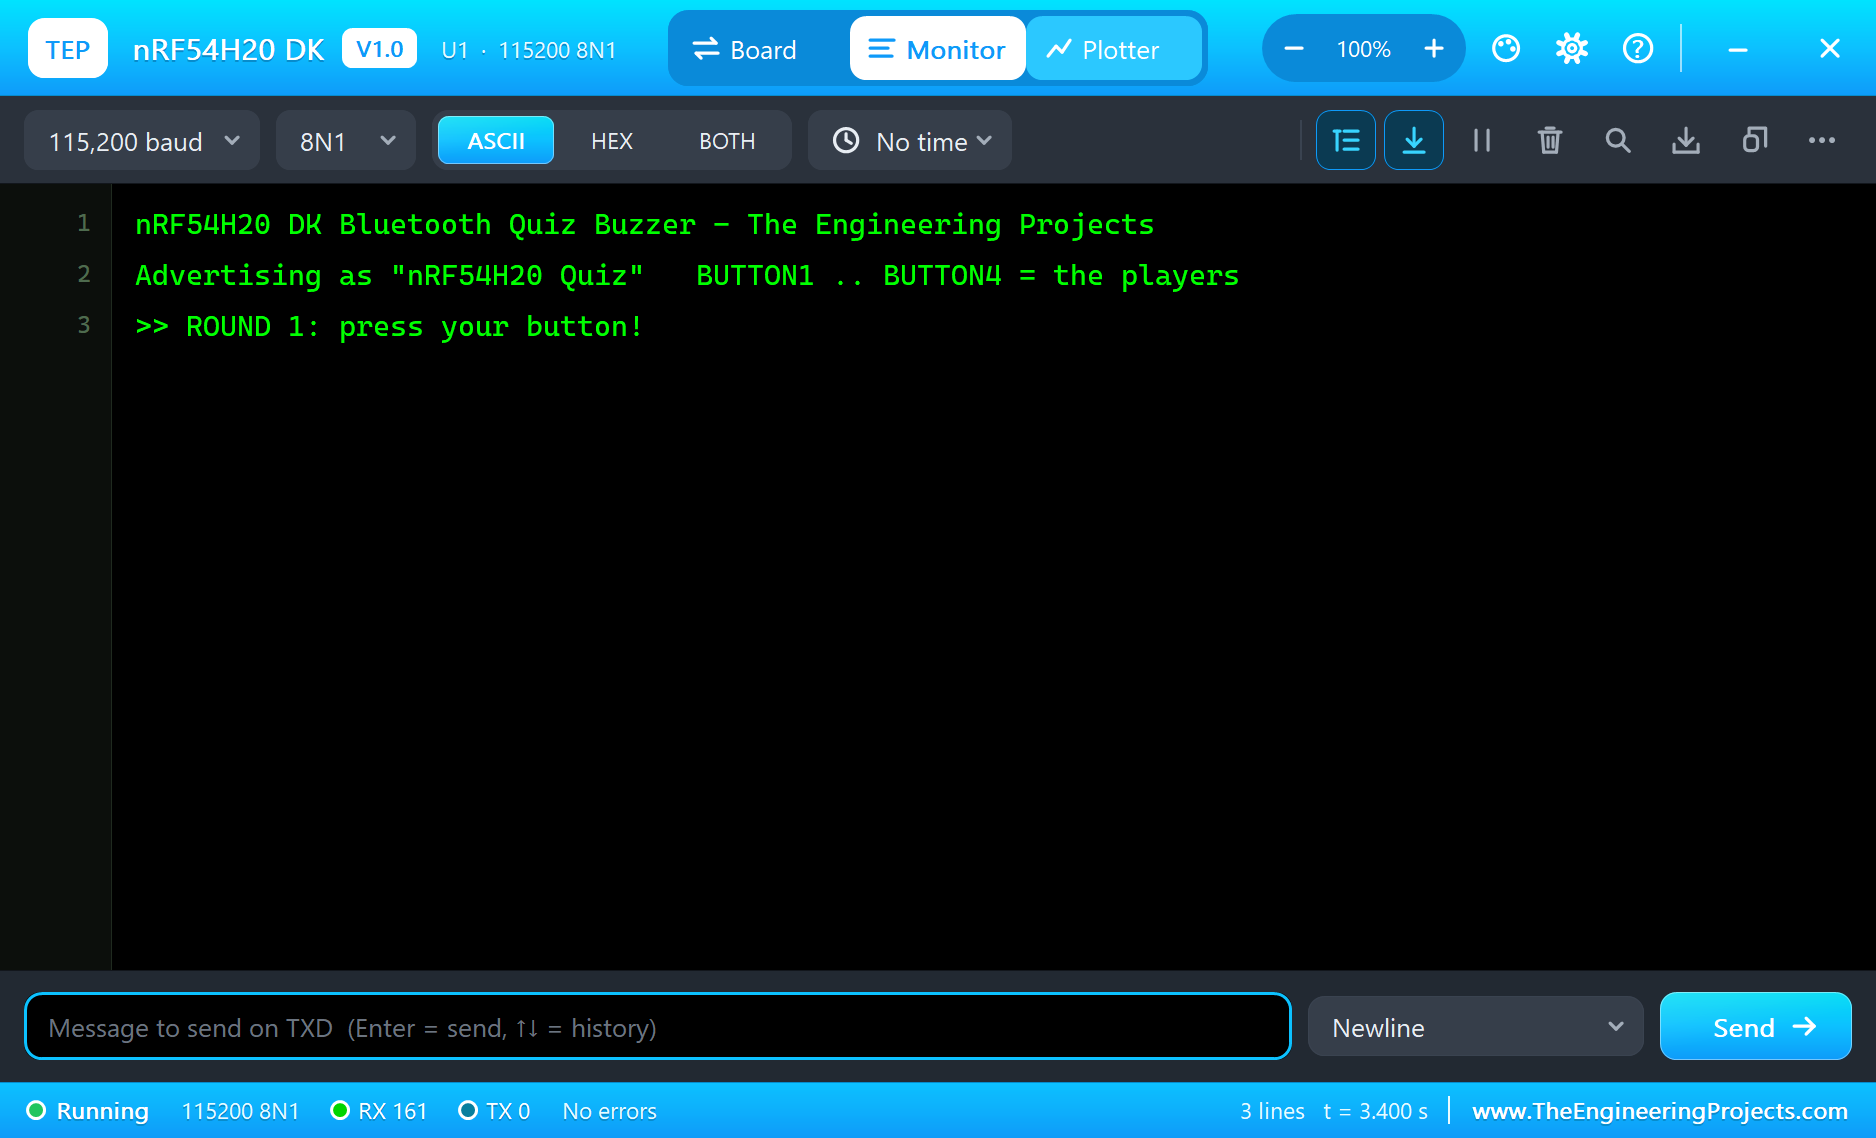
Connect the Phone
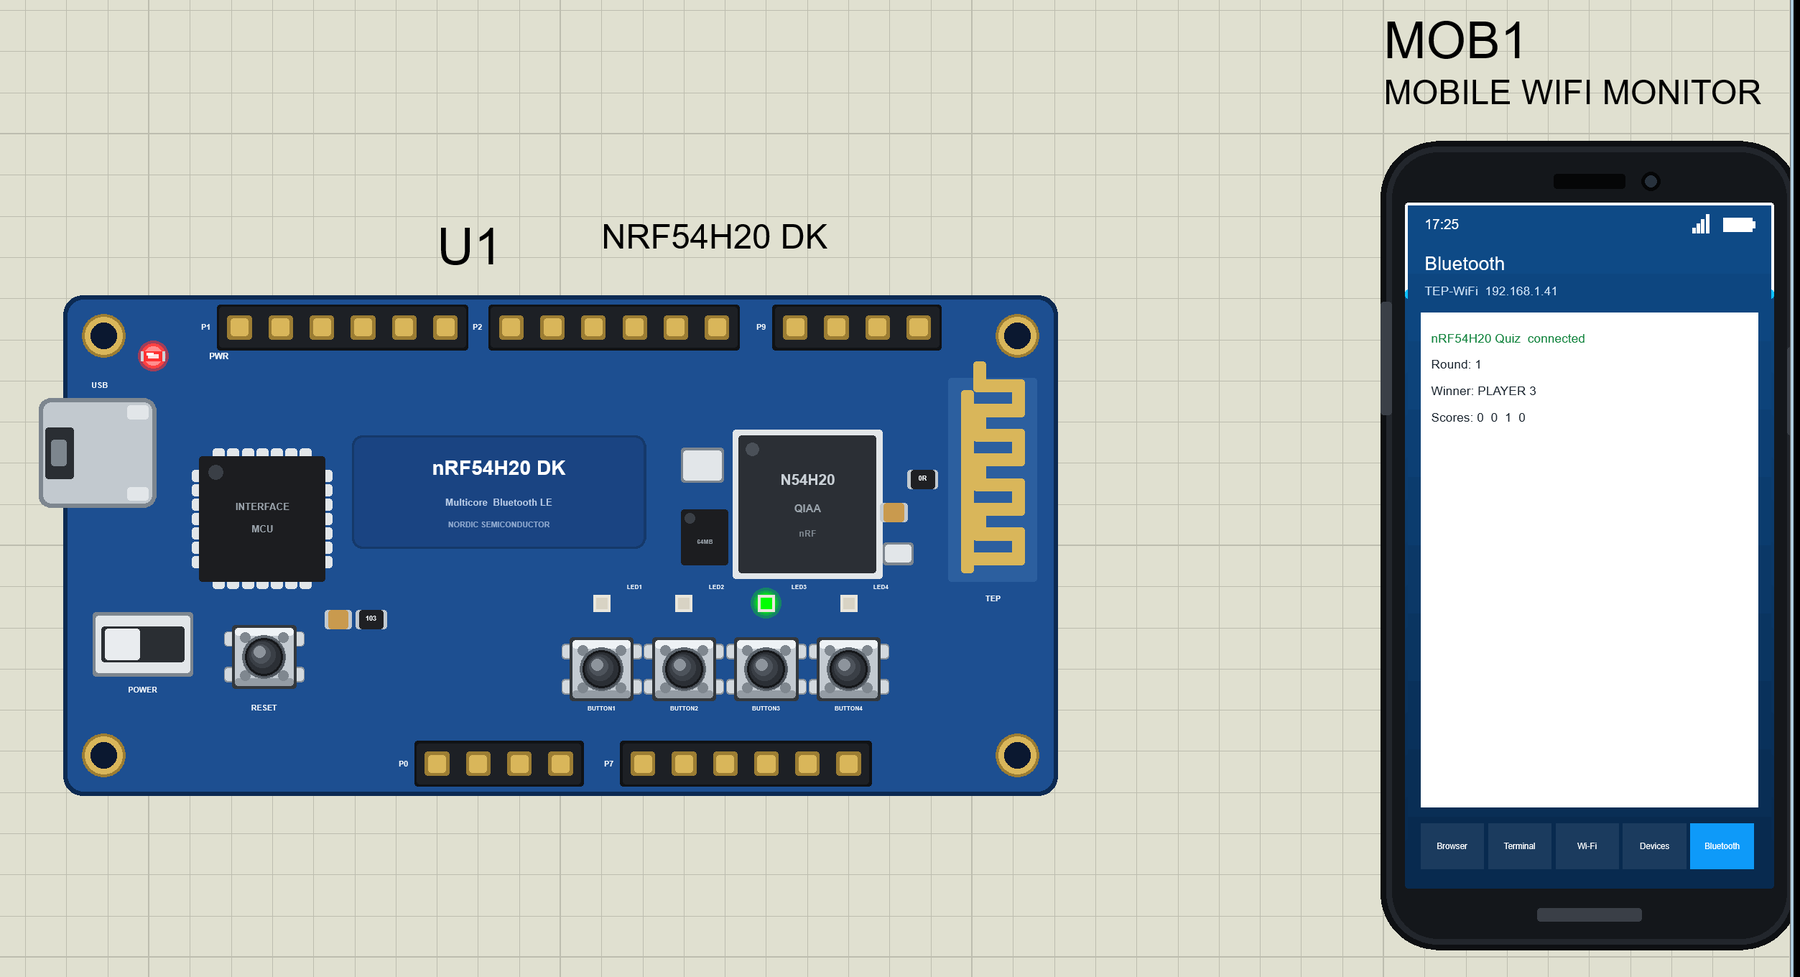
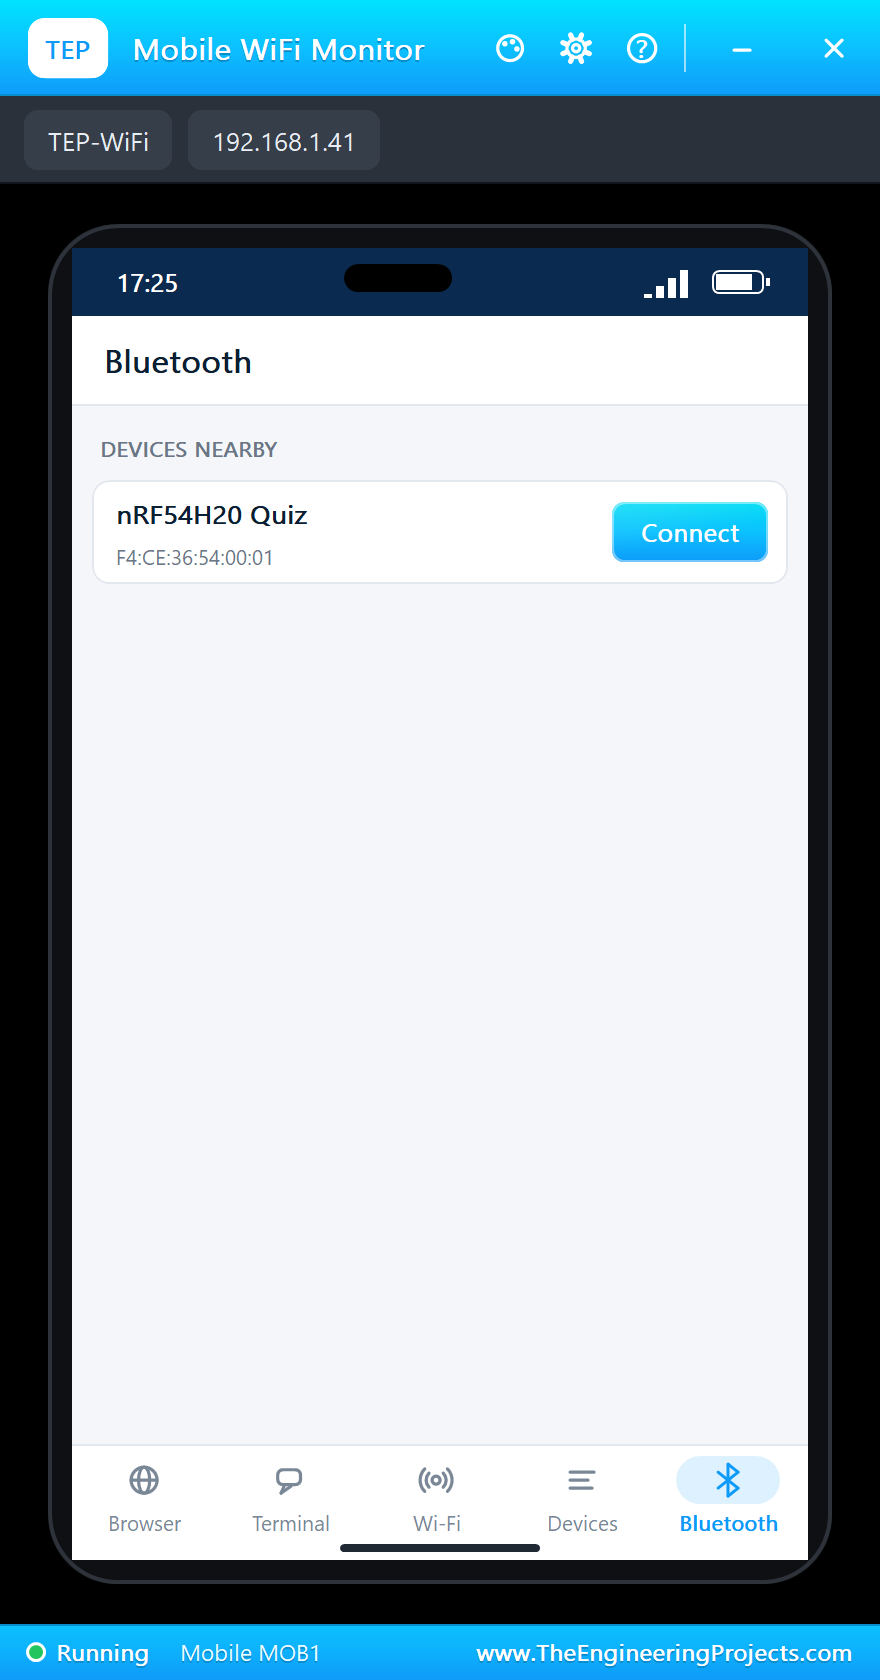
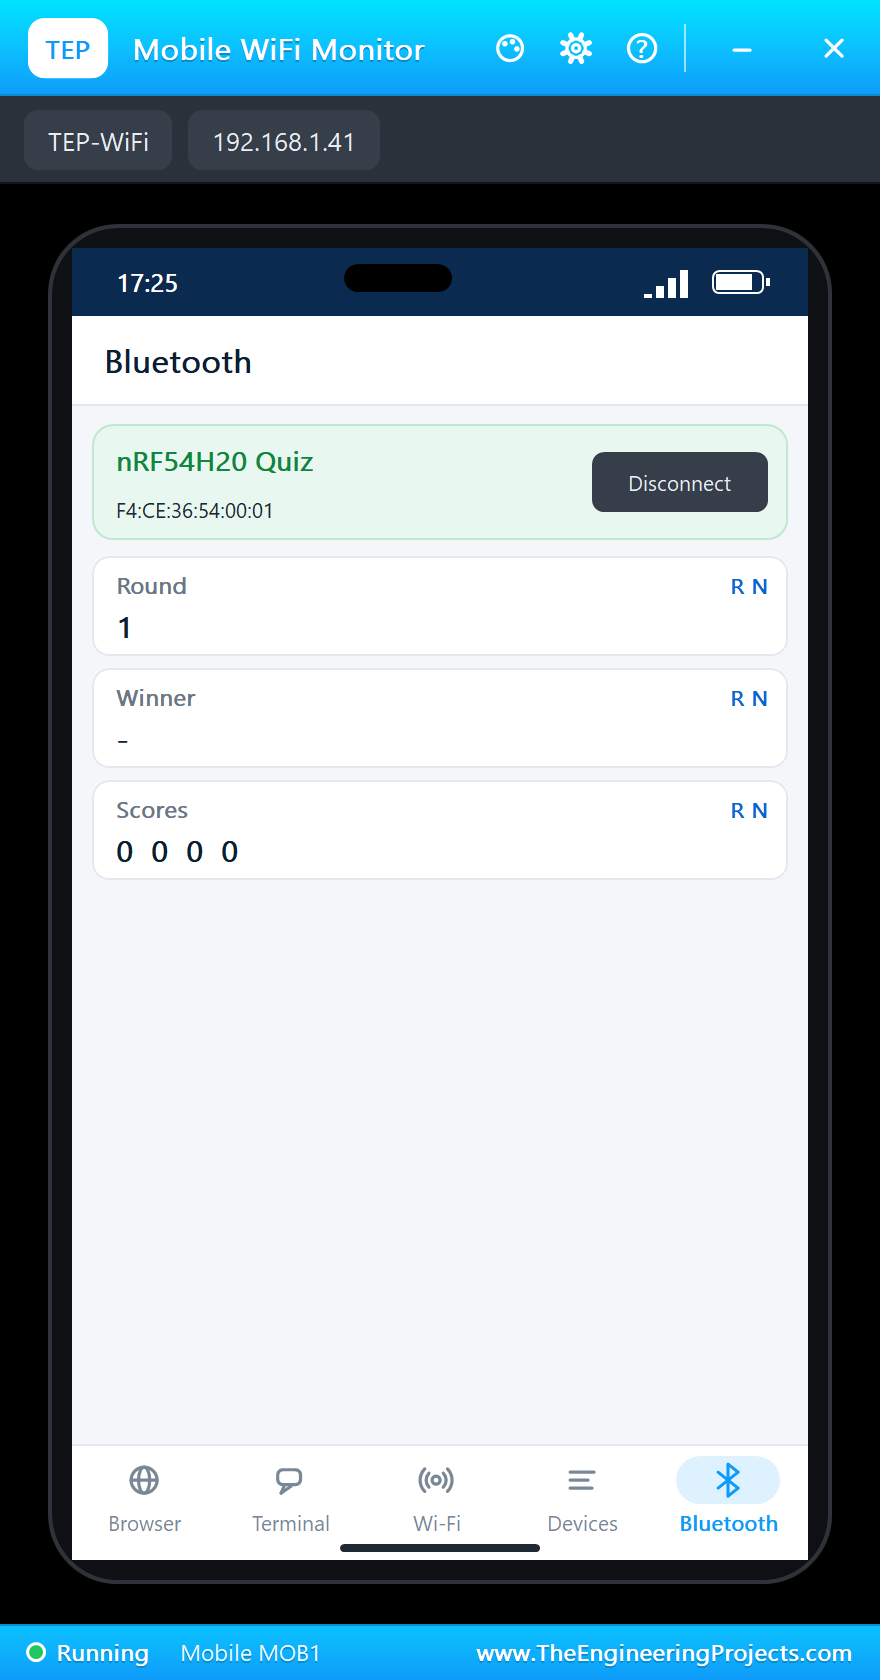
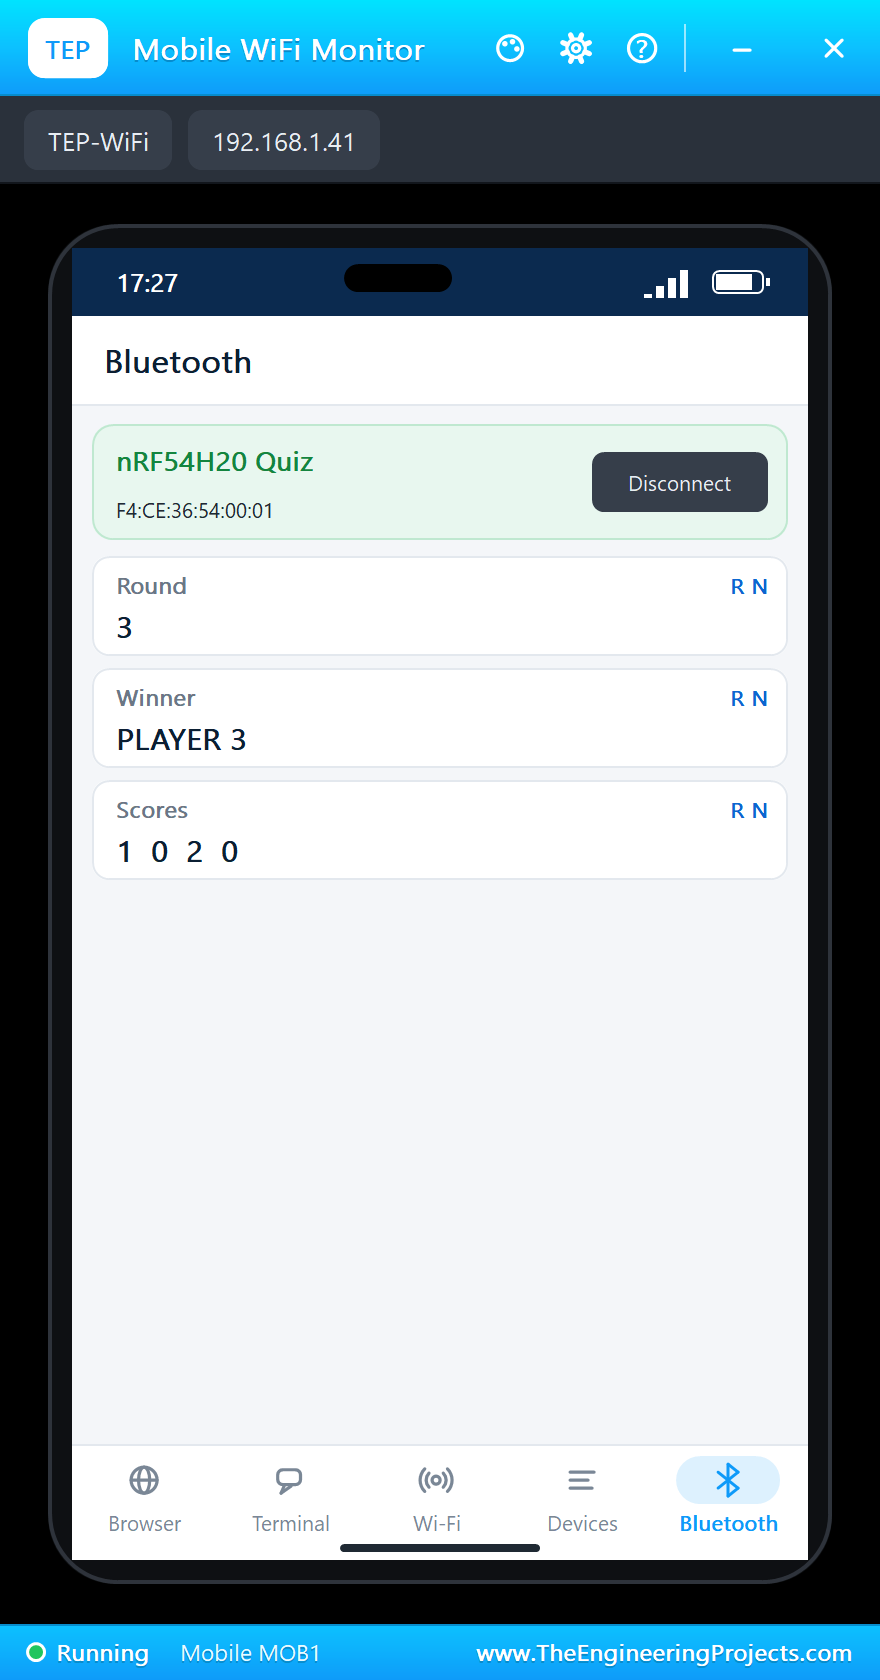
On the phone open the Bluetooth app, press SCAN and connect to "nRF54H20 Quiz". The phone shows the round, the winner and the scores:
Player 3 Is First
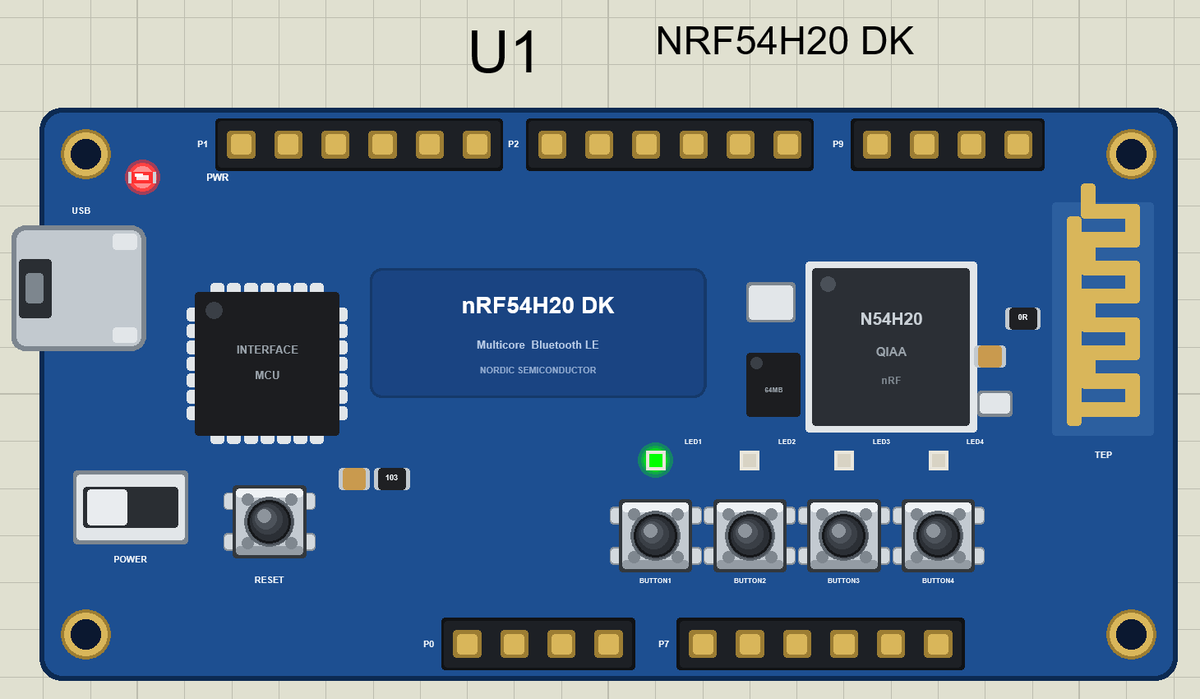
Click BUTTON3: player 3 wins the round, LED3 lights and the phone shows it at once. Here is the complete circuit while the simulation runs:
The Next Round
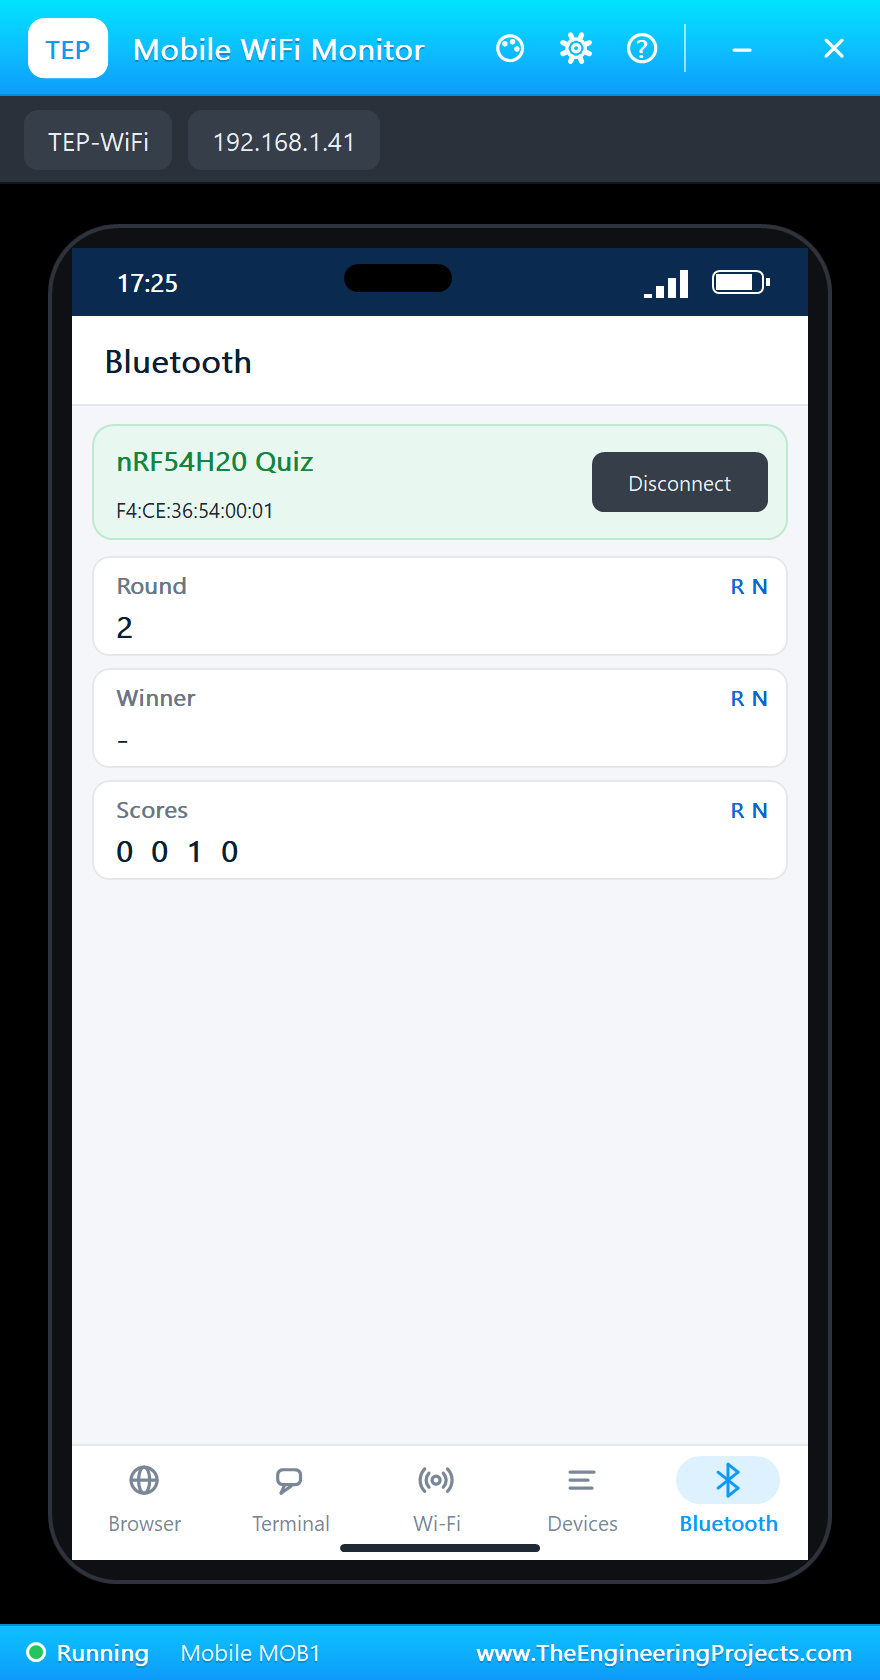
While LED3 is on, the round is locked: a press counts nothing. Three seconds after the win, round 2 opens and this time player 1 is first:
More Rounds
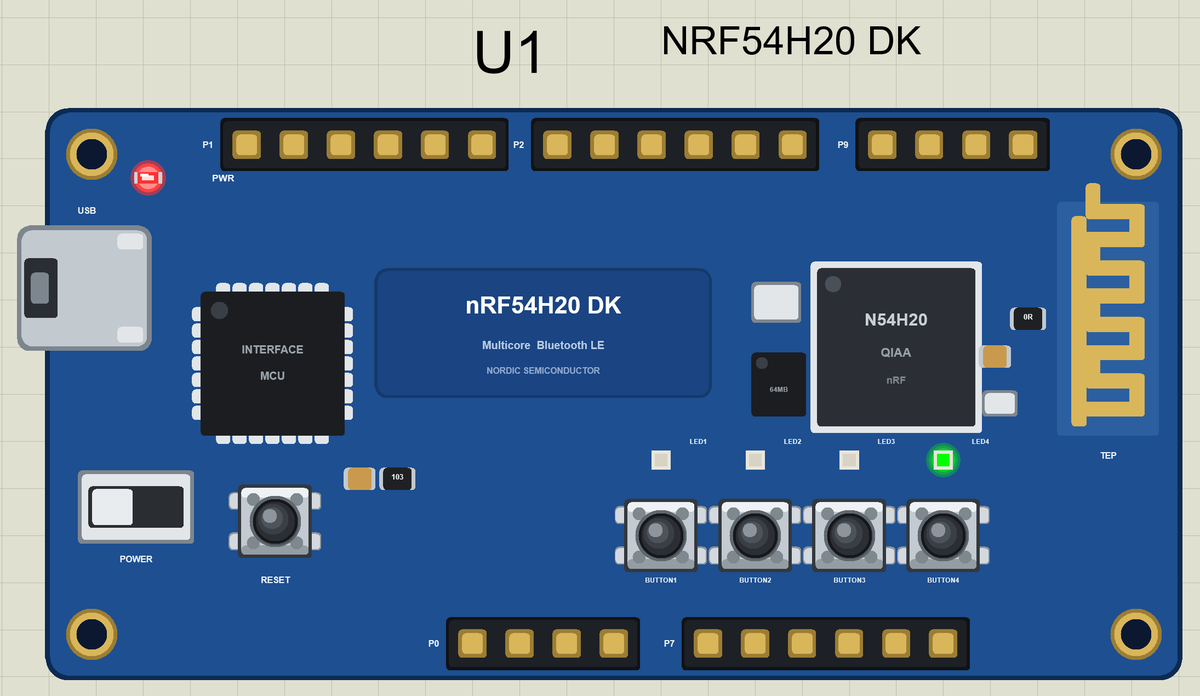
In round 3 player 3 wins again, in round 4 player 4. The phone keeps the scores:
>> PLAYER 3 first in round 1   scores 0 0 1 0
>> ROUND 2: press your button!
>> PLAYER 1 first in round 2   scores 1 0 1 0
>> ROUND 3: press your button!
>> PLAYER 3 first in round 3   scores 1 0 2 0
>> ROUND 4: press your button!
>> PLAYER 4 first in round 4   scores 1 0 2 1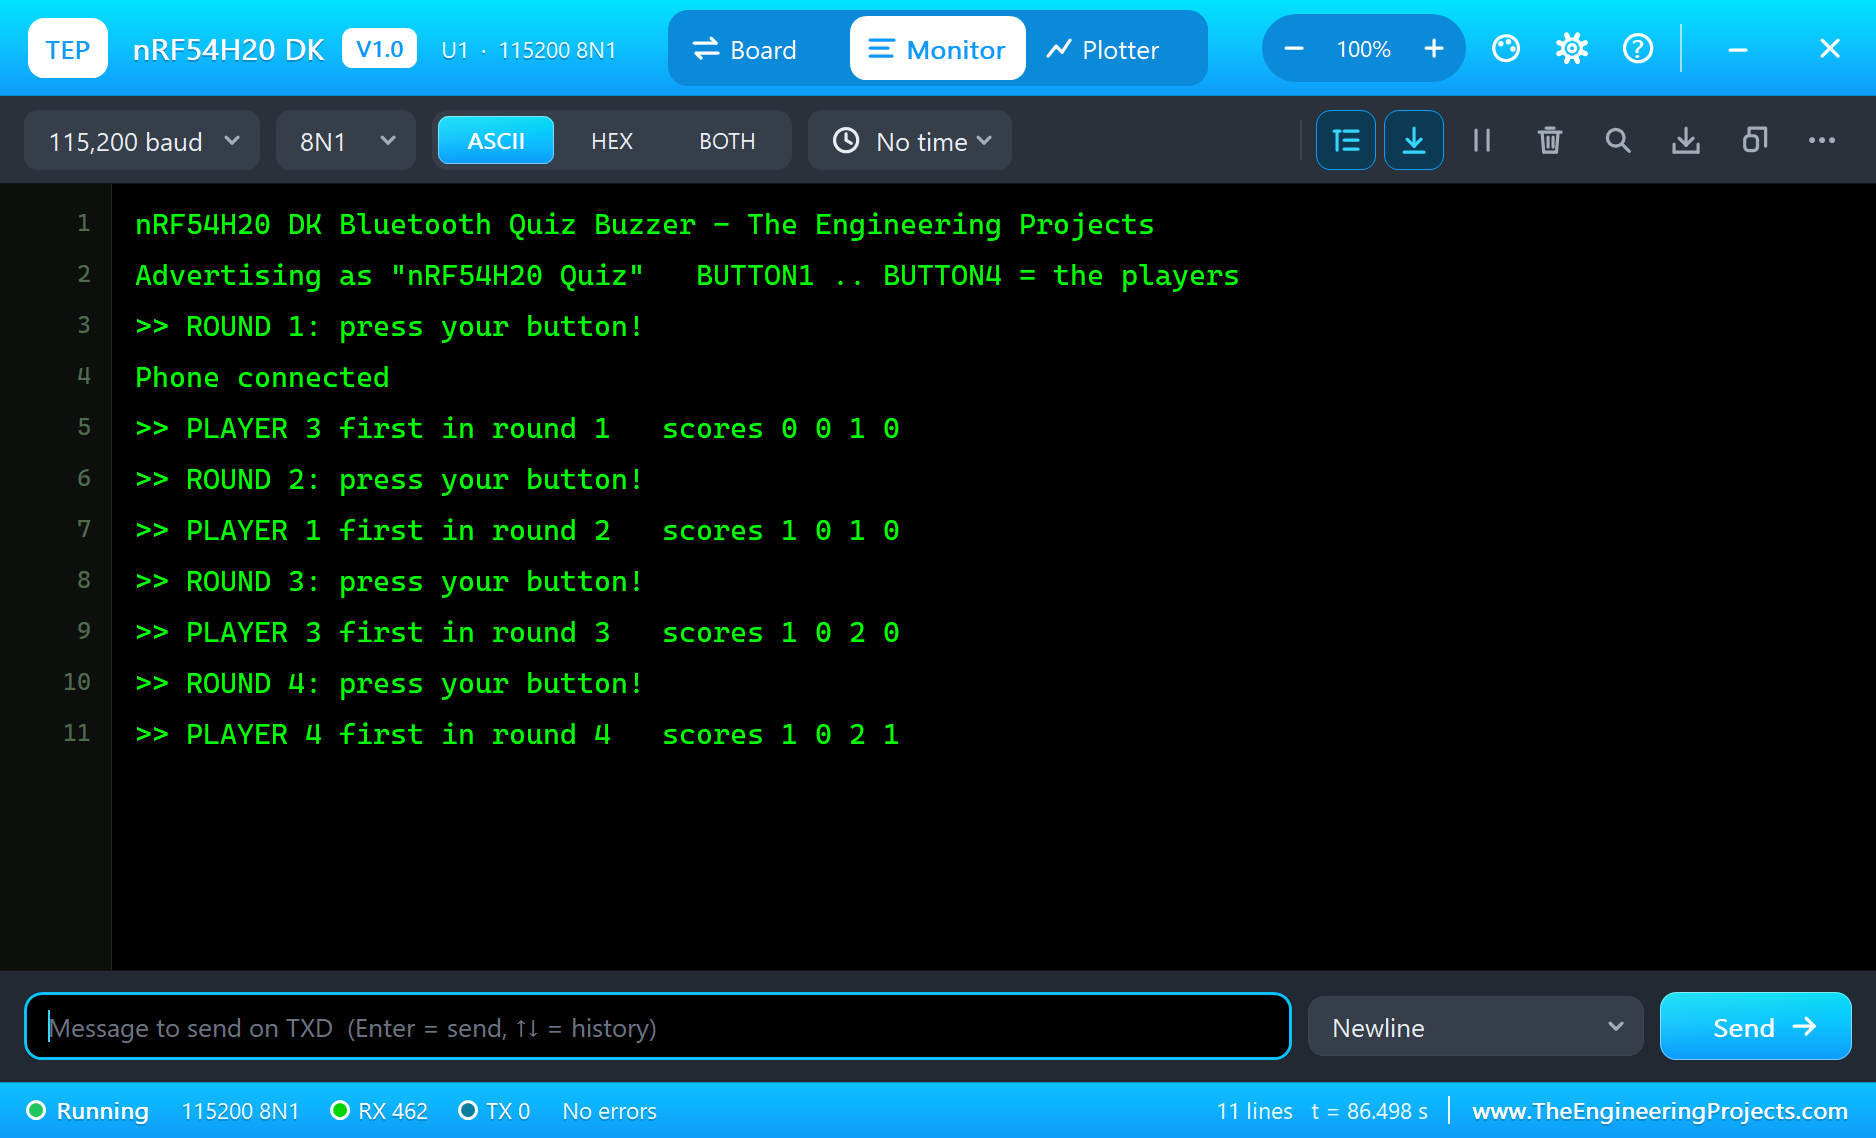
Who Was Really First?
The loop reads the four buttons one after the other, thousands of times a second. Two players who press within the same pass of the loop are decided by the order in which the loop reads them - in our sketch the lower player number wins. Real quiz systems either accept that tiny unfairness, rotate the reading order every round, or use interrupts with time stamps so the earliest edge wins even if it arrives during other work.
Why Lock the Round?
Without the lock, every press would count and the fastest finger would get several points for one question. The sketch keeps the winner in a variable: while it is not -1, presses are ignored. The same pattern - a state that changes what inputs mean - is behind vending machines, door locks and game controllers.
Timing Without delay()
The winner is shown for three seconds, but the sketch never stops: it compares millis() with the moment of the win. Bluetooth keeps working, the buttons are still read, and the phone gets its updates on time.
The nRF54 Family
Nordic's nRF54 generation comes in two lines: the nRF54L series, a single-core successor of the nRF52 chips with a RISC-V coprocessor, and the nRF54H series with several cores for heavier work. Both bring a newer radio, lower power and more security features than the nRF52. For a kit built around a different idea - sound - see our nRF5340 Audio DK Library for Proteus.
Reaction Times
A quick person needs about 200 to 250 milliseconds to react to a question, and quiz contestants are often within a few milliseconds of each other. The loop reads all four buttons many thousands of times a second, so the kit decides fairly even between two fast players. A nice addition is to measure the winner's reaction time from the moment the round opens and send it to the phone - the quiz master can then announce it.
Debouncing Real Buttons
A real push button does not switch cleanly: the contacts bounce for a few milliseconds and the pin flips between HIGH and LOW. In a quiz buzzer that is harmless, because the first edge already decides the round and the lock ignores the rest. In other sketches, such as a counter, a short wait after each change - 20 to 50 ms - or a check that the reading has been stable keeps one press from counting twice.
UUIDs and Readable Names
Every Bluetooth LE service and characteristic has a UUID. Standard ones from the Bluetooth SIG are short, such as 0x2901 for the user description; our own quiz service uses 128-bit UUIDs that nobody else uses. The 0x2901 descriptors give the characteristics readable names - Round, Winner and Scores - so the phone can show them without knowing our UUIDs in advance.
The Peripheral Processors
Besides its Cortex-M33 cores the nRF54H20 has small RISC-V processors that look after the peripherals. They can run time-critical jobs, for example reading many buttons or driving an unusual serial protocol, while the big cores sleep. In a battery-powered quiz remote that would mean a long battery life: the main core wakes only when a player presses.
Scores on the Phone
The scores travel as one short text, such as "1 0 2 1", in a single characteristic. That keeps the service small: one notification after each round carries all four players. A bigger game could send a byte array instead, or one characteristic per player, so the phone can draw a bar chart of the scores.
The Interface MCU
The chip next to the USB port is the kit's interface MCU. It programs and debugs the nRF54H20 and turns its UART into a virtual serial port on the PC, so one cable does everything. In our simulation the USB port opens the serial monitor, where the buzzer prints every round.
Try It Yourself
- Rotate the reading order each round so no player has an advantage.
- Blink all four LEDs when a player reaches five points.
- Add a writable characteristic so the quiz master can reset the scores from the phone.
- Punish an early press: a player who presses before the question gets locked out for a round.
Ideas to Extend the Buzzer
- Show the reaction time of the winner in milliseconds.
- Keep a high-score table across games.
- Use several kits, one per team, with the same service.
- Add a "question" timer that ends the round if nobody presses.
Your Own Sketches
Write the sketch in the Arduino IDE with the board Nordic nRF54H20 DK (TEP Proteus), use Sketch > Export Compiled Binary and set the part's PROGRAM property to the .hex.
Moving to a Real nRF54H20 DK
- Install Nordic's nRF Connect SDK with the board nrf54h20dk/nrf54h20/cpuapp.
- Start from Nordic's Bluetooth peripheral samples and Zephyr's button and LED samples.
- Move the logic of the demo across: the rounds, the lock, the scores and the service.
- Program the kit through the interface MCU's USB and test with a phone app.
The buttons, the LEDs and the Bluetooth service stay the same; on the real kit Nordic's SDK takes the place of the Arduino calls.
Things to Know Before Using a Real nRF54H20 DK
- Multicore build: the SDK builds images for several cores; start from Nordic's samples.
- Active-HIGH LEDs: unlike the nRF52 kits, HIGH switches an LED on.
- Port headers: the GPIOs are on the kit's port headers; check Nordic's documentation before wiring.
- New silicon: the nRF54H20 is recent, so keep the SDK up to date.
Properties of the nRF54H20 DK
| Property | What it does |
|---|---|
| PROGRAM | the sketch: a .hex from TEP Boards for Proteus (board "Nordic nRF54H20 DK") |
| MONITOR, BAUD, AUTOOPEN | the built-in serial monitor: on, its baud rate (115200), open at Run |
Troubleshooting
- The phone finds nothing: call
BLE.begin(), set a local name andBLE.advertise(); callBLE.poll()in loop(). - A button does nothing: use
pinMode(BUTTONx, INPUT_PULLUP)and act whendigitalRead()is LOW. - An LED stays dark: the nRF54H20 DK's LEDs light when the pin is HIGH.
- A number goes wrong above 32767: int is 16 bits in the simulation - use long.
Limitations of the Simulation
- Bluetooth LE: the kit is a peripheral only, with one phone as the central.
- The port headers, the radio and peripheral cores, 802.15.4 / Thread, the external flash and USB device classes are drawn, not modelled.
- Your sketch gets 8 KB of RAM in the simulation, and int is 16 bits there.
- nRF54H20 and Nordic Semiconductor are names of Nordic Semiconductor ASA and Arduino of Arduino, and the Bluetooth word mark belongs to Bluetooth SIG; this library is not made or endorsed by them or by Labcenter.
- Tested in Proteus 8.5 in November 2026 (the demo as shipped, about 87 s of simulation). Proteus 7 is not supported.
So, that was all about the nRF54H20 DK Library for Proteus. I hope it helps you try your Bluetooth ideas in a simulation before the kit is on your desk - the buttons, the LEDs and the phone, all on one sheet. If you have any questions, ask in the comments and I will help you out. Till the next tutorial, take care and have fun!