Hello friends, I hope you all are doing great. Today, I am going to share the Nordic Thingy:52 Library for Proteus, so you can run a Bluetooth LE sensor simulation of Nordic Semiconductor's Thingy:52. The Thingy:52 is a small battery-powered IoT sensor kit: an nRF52832 with temperature, humidity, pressure, gas, colour and motion sensors, a speaker, a microphone, an RGB LED and one big button, all in a rubber case. With this library it runs your Arduino sketch in Proteus 8.5, reads its sensors and talks to a phone over Bluetooth LE.
Nordic Thingy:52 Library for Proteus
Latest version: V1.0 (November 2026, this tutorial)
Other new Arduino boards: UNO R4 WiFi · Nano ESP32 · UNO WiFi Rev2 · Nano 33 IoT · UNO Q · UNO R4 Minima · Nano Every · MKR WiFi 1010 · Nano RP2040 Connect · STM32 Black Pill · Nucleo-F401RE · STM32 Blue Pill · Teensy 4.1 · Arduino Due · Arduino Leonardo · Arduino Micro · BBC micro:bit V2 · GIGA R1 WiFi · MKR WAN 1310 · Nano 33 BLE Sense · XIAO nRF52840 Sense · RAK4631 WisBlock · Nano Matter · nRF52840 DK · nRF5340 DK · nRF9151 DK · nRF7002 DK · Nordic Thingy:53 · xG24 Dev Kit · xG24 Explorer Kit · Thunderboard BG22 · SiWx917 Dev Kit · B-L475E-IOT01A · NUCLEO-WB55RG · NUCLEO-WL55JC1 · NUCLEO-H743ZI2 · SAM R21 Xplained Pro · FRDM-MCXN947 · Portenta H7 · LP-CC2652R7 · PSoC 6 WiFi-BT · Feather nRF52840 · Thingy:91 X · xG26 Dev Kit · nRF52 DK · nRF52833 DK · nRF52840 Dongle · nRF5340 Audio DK · nRF54H20 DK · nRF54LM20 DK · nRF9160 DK · nRF9161 DK · nRF21540 DK
RF modules: nRF24L01 · nRF24L01 PA LNA · CC1101 · RFM69HCW · HC-12 · 433MHz RF · XBee
Temperature and weather sensors: DHT11 / DHT22 · DS18B20 · BME280 · BMP280 · SHT31 · AHT20 · BME680 · MLX90614 · MAX6675
Helping Tools
- Laptop WiFi Monitor: a laptop on the Wi-Fi of your design: a browser, a TCP / UDP terminal and ping
- Mobile WiFi Monitor: a smartphone that opens the pages of your board and sends it commands
- Serial Monitor Advance: a serial terminal window for the UART of your board
For the demo we built a cold-chain shipping monitor: the Thingy:52 travels in a box of medicine that must stay between 2 and 8 C. It records the time out of range, the minimum, the maximum and every shock, shows the state on its RGB LED, and a phone reads it all at the end of the trip.
NOTICE: Proteus has no nRF52832 model and no model of the Thingy's sensors, so our team has put a lot of effort into building this board ourselves: the RGB LED, the button, the sensors and Bluetooth LE to the phone are all our own model, and your sketch compiles with our free TEP Boards for Proteus add-on. Your feedback is the fuel that keeps us going, so please tell us what you think in the comments below. And if our free libraries help you, you can buy us a coffee. So, let's get started with the Nordic Thingy:52 Library for Proteus:
What is the Nordic Thingy:52?
The Thingy:52 (PCA20020) is Nordic Semiconductor's first Thingy: a ready-made sensor device for trying Bluetooth LE ideas without designing any hardware. Inside the rubber case are the nRF52832 (an Arm Cortex-M4F with Bluetooth 5, 512 KB of flash and 64 KB of RAM), a 1440 mAh battery charged over USB, and a ring of sensors. The Thingy has no pin headers for wiring - everything the sketch needs is already inside.
| Part | The real Thingy:52 | In the library |
|---|---|---|
| SoC | nRF52832: Cortex-M4F, Bluetooth 5, 512 KB flash, 64 KB RAM | your Arduino sketch, ArduinoBLE |
| Temperature, humidity | HTS221 | Arduino_HS300x calls |
| Pressure | LPS22HB | Arduino_LPS22HB calls |
| Colour, light | a colour sensor | Arduino_APDS9960 calls |
| Motion | a nine-axis motion sensor | Arduino_BMI270_BMM150 calls |
| Gas | CCS811 (eCO2, TVOC) | drawn, not modelled |
| RGB LED | behind an SX1509B expander, lit when LOW | LEDR, LEDG, LEDB, lit when LOW |
| Button | the big top button on P0.11 | BUTTON, clickable |
Thingy:52, Thingy:53 and Thingy:91 X
The Thingy:52 started the family; Nordic no longer develops new software for it, but many are still in labs and classrooms. The Thingy:53 moved to the dual-core nRF5340 and added machine learning, and the Thingy:91 X is the cellular one. See our Nordic Thingy:53 Library for Proteus and our Nordic Thingy:91 X Library for Proteus - the same Sensors window drives all three.
Where Is It Used?
A Thingy is a quick way to prove an idea: a room climate logger, a fall detector, a sports sensor, a smart-home button, a teaching kit for Bluetooth LE. A simulation goes one step earlier: the whole application - the sensor logic, the LED, the button and the phone - works in Proteus before the Thingy is out of its box.
Features of the Nordic Thingy:52 Library for Proteus
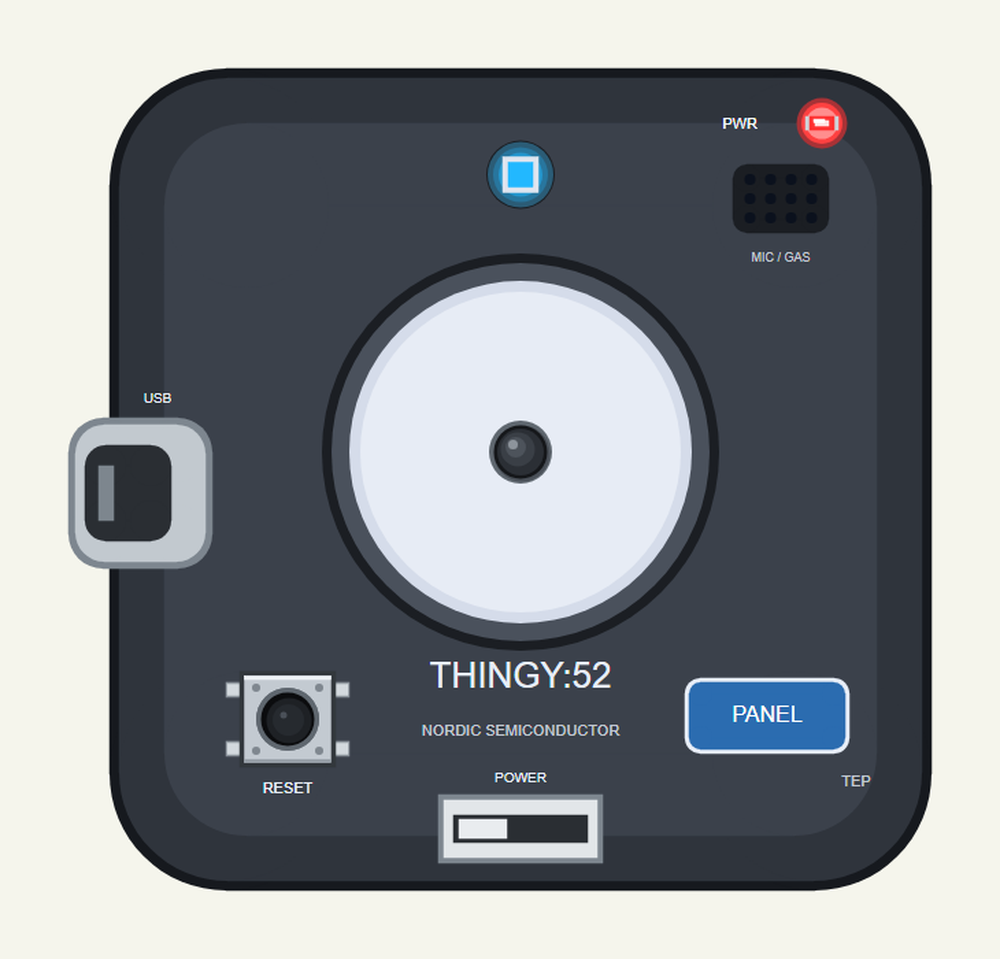
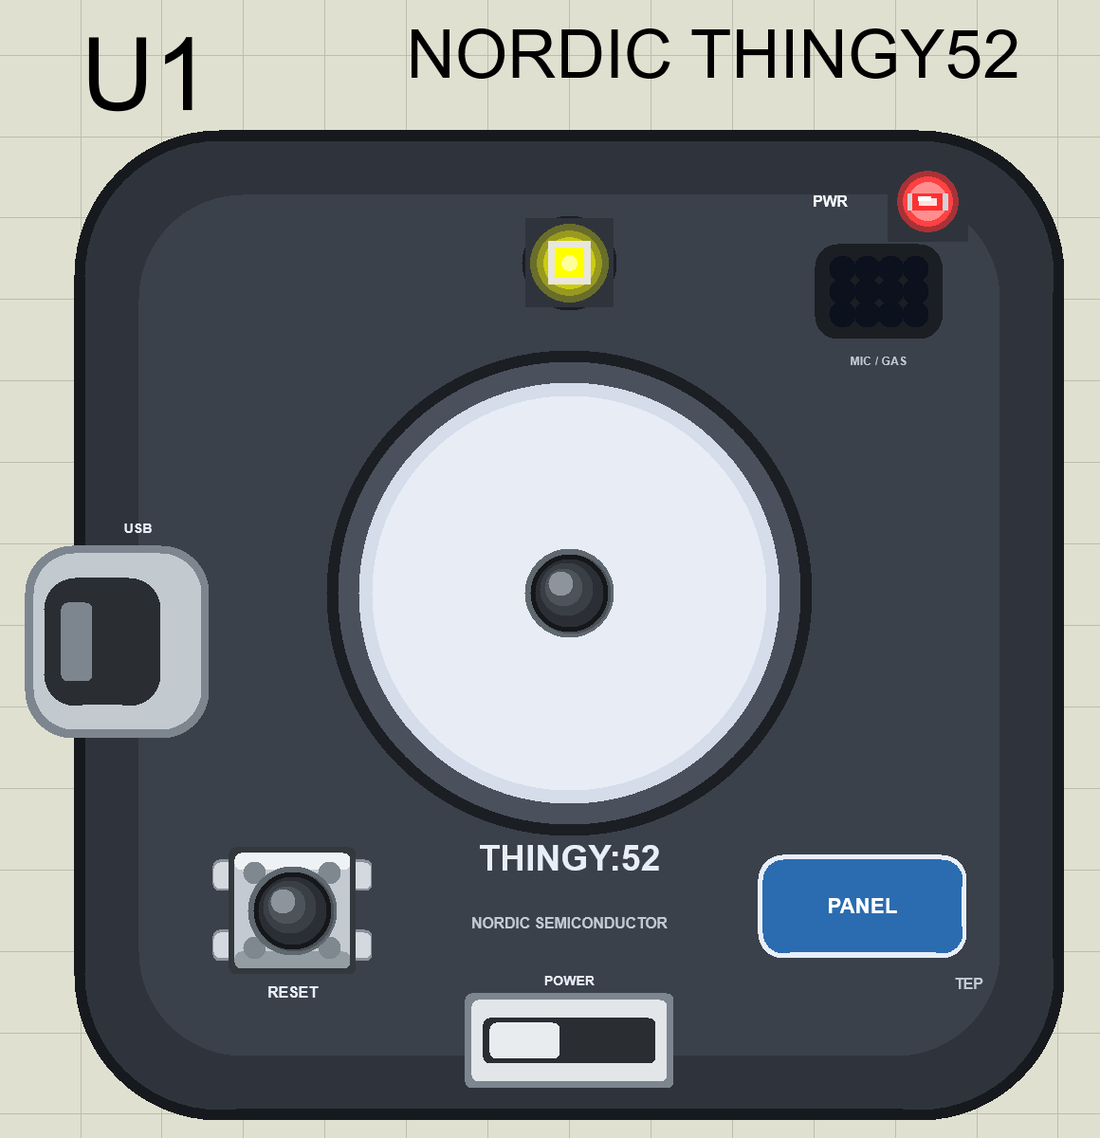
- The device as it looks: the charcoal rubber case, the big top button, the RGB lightwell LED, the USB port, the power switch, RESET, the vent and our PANEL pad, drawn compact, with our small TEP signature.
- Your sketch: a .hex for "Nordic Thingy:52 (TEP Proteus)" with LEDR, LEDG, LEDB and BUTTON.
- The sensors: temperature, humidity, pressure, colour, light and motion through the board package's sensor libraries, set from the Sensors window.
- Bluetooth LE: ArduinoBLE with services, characteristics, descriptors and notifications; our Mobile WiFi Monitor is the phone.
- A complete package: about 3.4 MB with the part, the add-on, the phone and the demo, without the source code of the models.
The Thingy:52 in Proteus Simulation
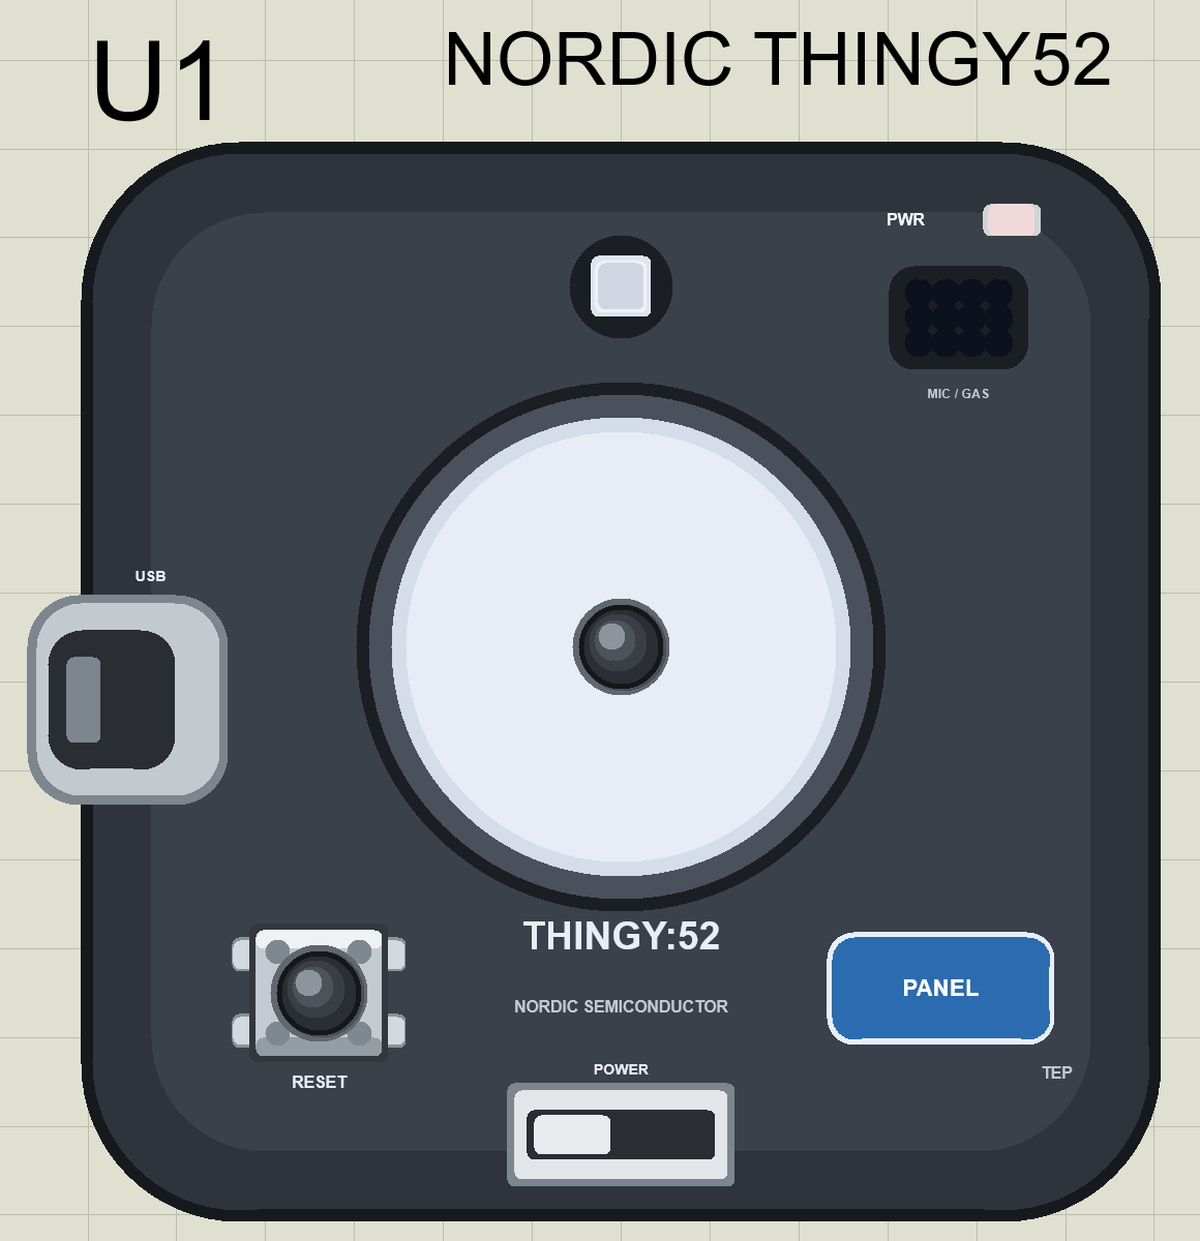
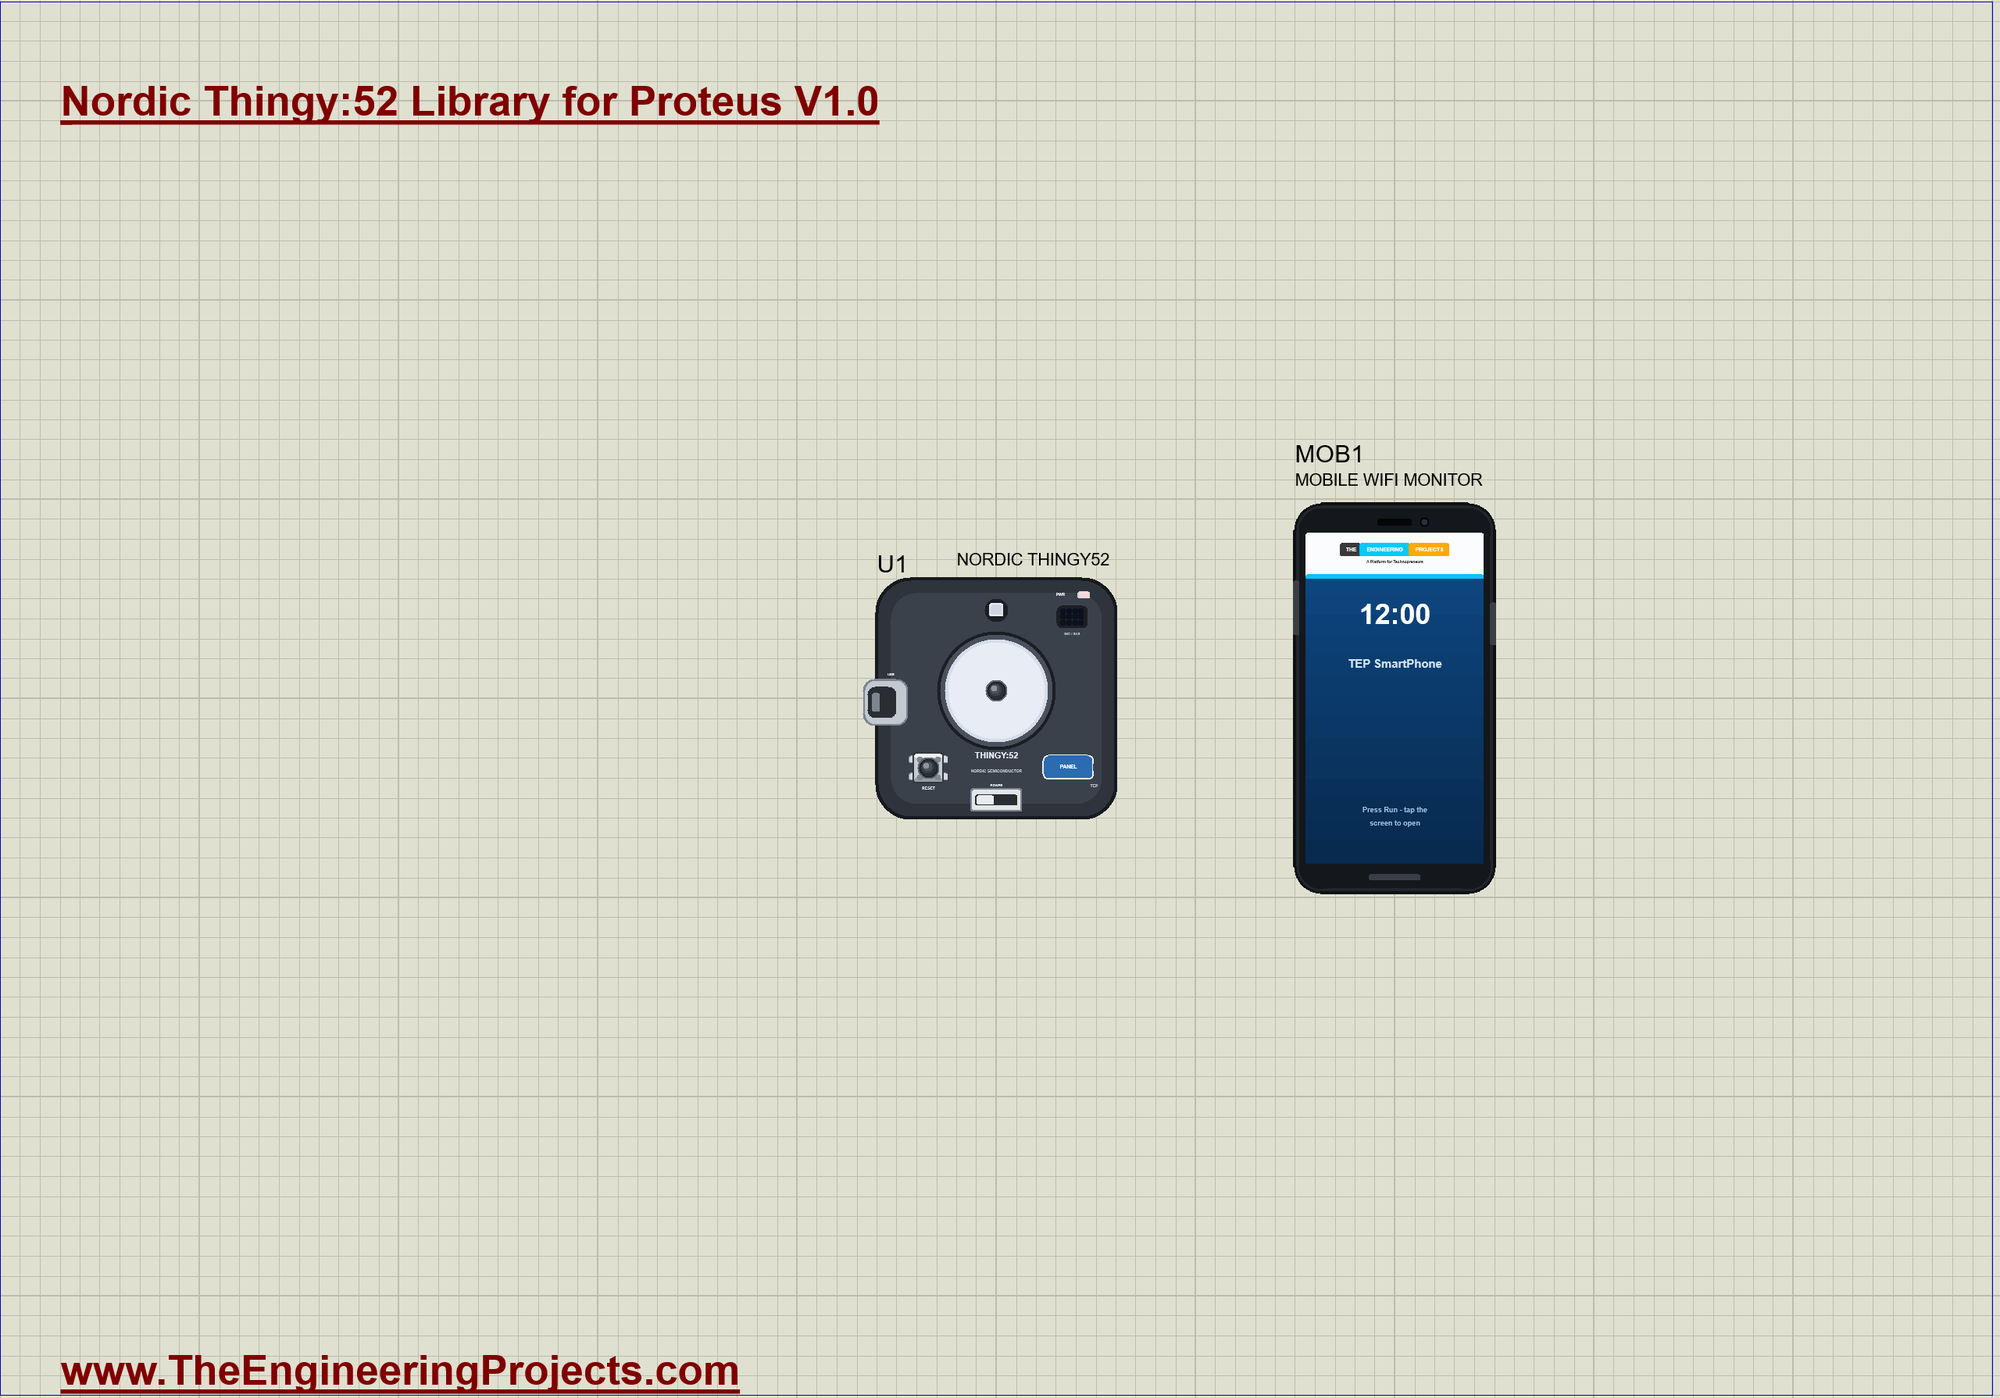
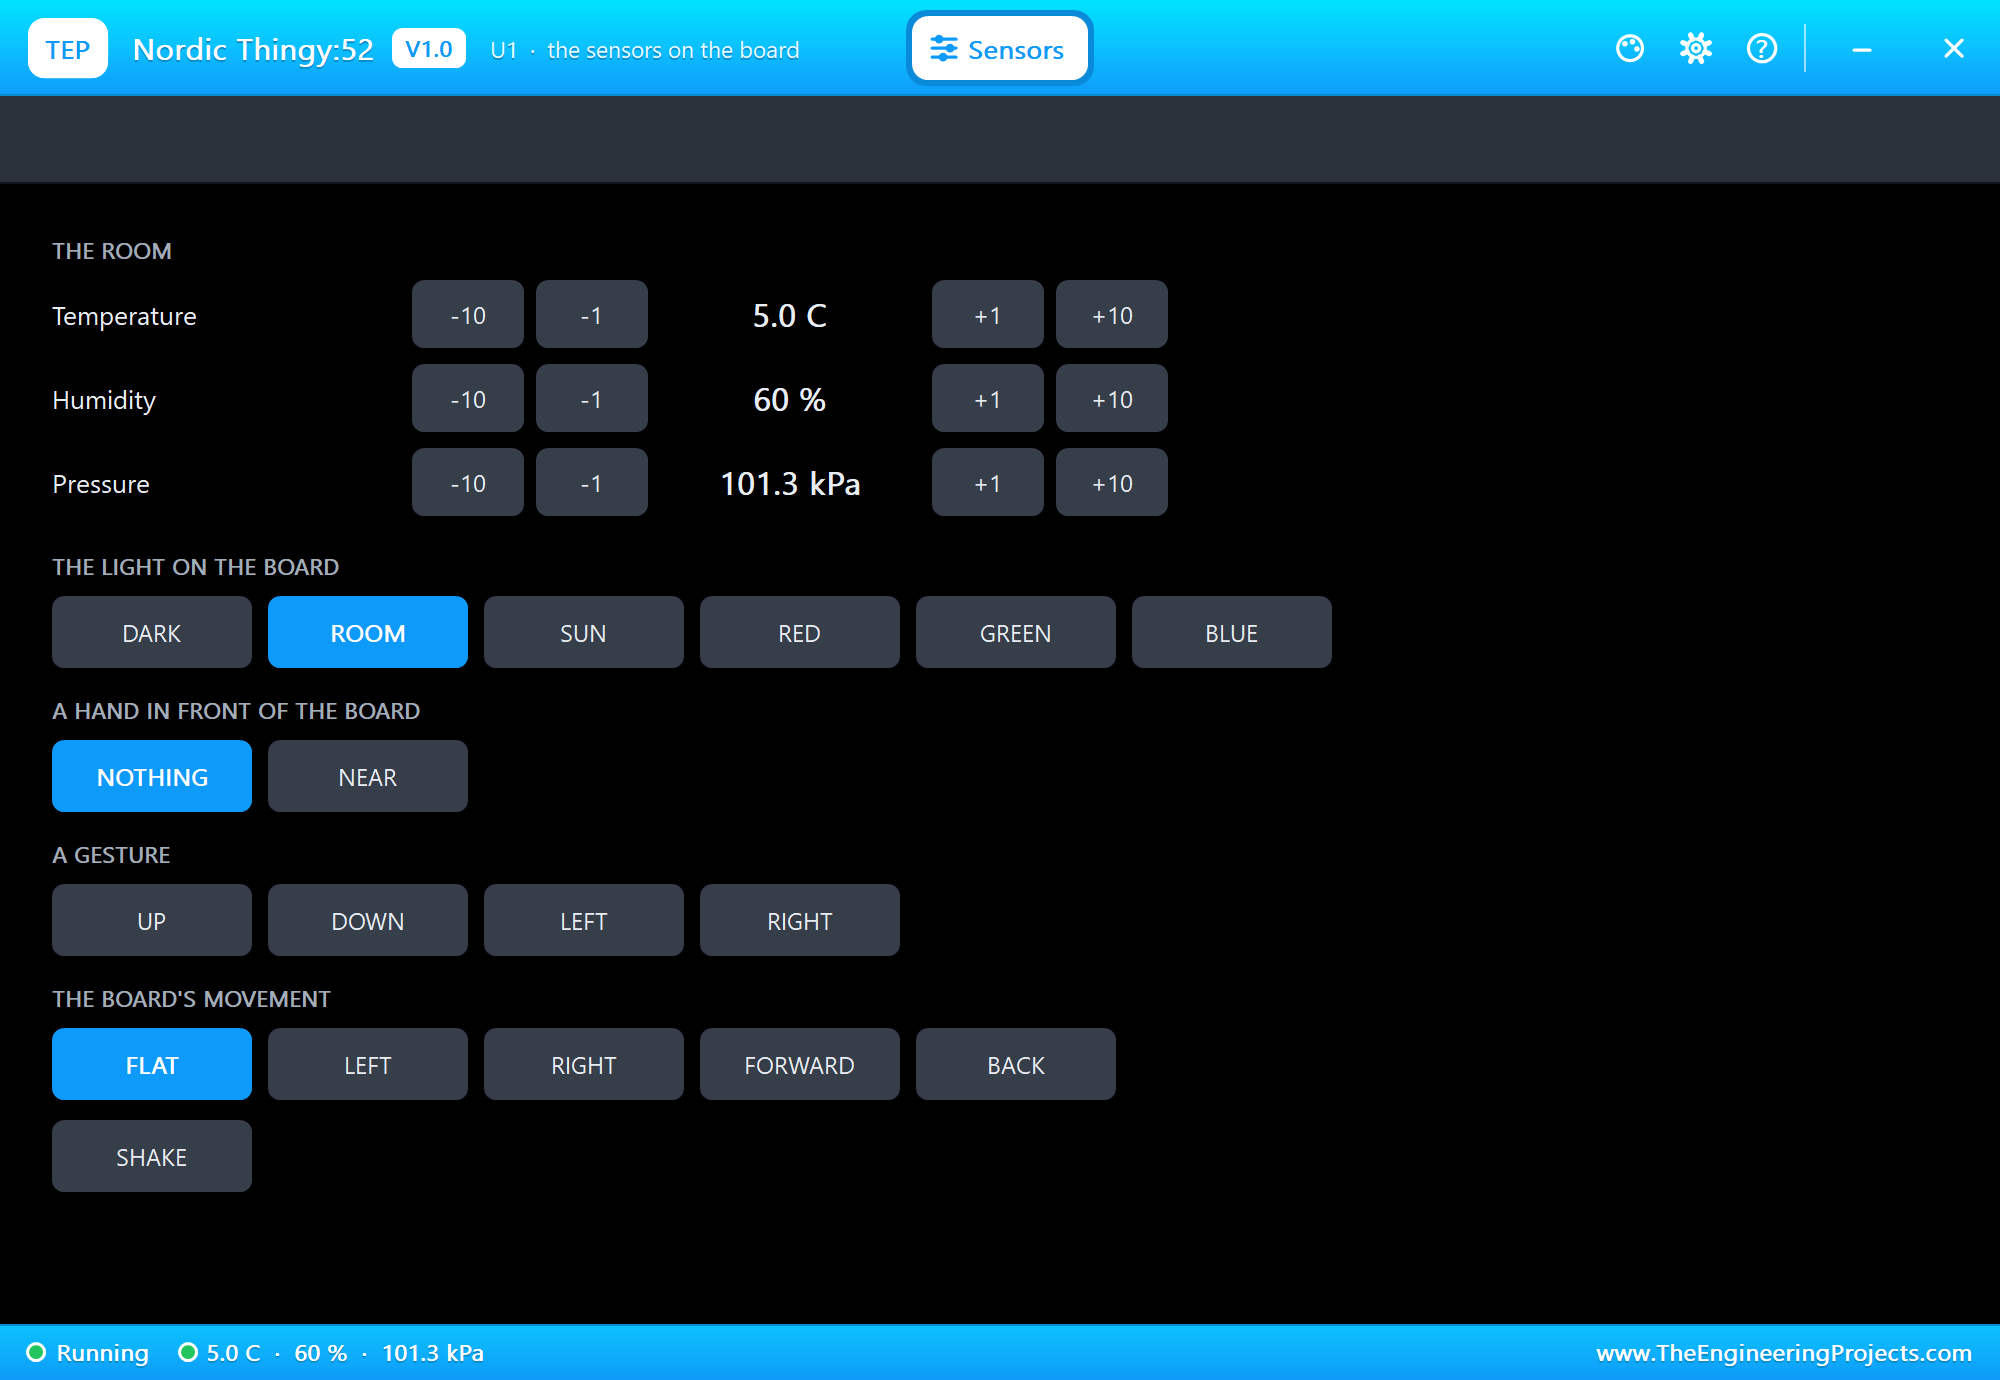
Search THINGY in Pick Devices; the device NORDIC THINGY52 is in TEPTHINGY52.LIB (Microprocessor ICs, Bluetooth Boards), with the prefix U. The USB port opens the serial monitor, the PANEL pad the Sensors window.
The Parts the Sketch Uses
| Name | What it is |
|---|---|
| LEDR, LEDG, LEDB | the RGB LED, lit when LOW; LED_BUILTIN is LEDR |
| BUTTON | the big button, LOW when pressed; BTN_BUILTIN |
| HS300x, BARO, APDS, IMU | the sensors through the sensor libraries |
| Serial | the USB port: the built-in monitor |
Download Nordic Thingy:52 Library for Proteus
Click the button below to download Nordic-Thingy52-Library-for-Proteus-v1.0.zip (about 3.4 MB, without the source code of the models):
Nordic Thingy:52 Library for Proteus V1.0- README.txt: installation, the demo, the parts, the properties, troubleshooting and the limits.
- Proteus Library Files:
TEPTHINGY52.LIBand the phone and laptop libraries. - Proteus Model Files:
TEPNET.DLL. - Arduino Code: the demo sketch and the TEP Boards for Proteus add-on 1.90.0, with ArduinoBLE and the sensor libraries.
- Proteus Simulation: the demo project, its HEX file and a copy of the DLL.
No Proteus yet? Read How to Download and Install Proteus 7 and 8. New to libraries? Follow How to Install a New Library in Proteus.
How to Install Nordic Thingy:52 Library for Proteus
- Close Proteus and extract the whole zip file, for example to your Desktop.
- Copy the files from Proteus Library Files into the LIBRARY folder of Proteus.
- Copy
TEPNET.DLLfrom Proteus Model Files into the MODELS folder, replacing an older one. - Delete
TEPTHINGY52.IDXfrom the LIBRARY folder if it is there. - For your own sketches, copy Arduino Code\TEP Boards for Proteus\hardware into your Arduino sketchbook (Documents\Arduino) and restart the Arduino IDE; the board is Nordic Thingy:52 (TEP Proteus).
- Start Proteus, press P and search for THINGY.
Demo: a Cold-Chain Shipping Monitor in Simulation
Vaccines, insulin and many other medicines must stay between 2 and 8 C from the factory to the patient. A shipment that got too warm on a sunny loading dock may look perfect and still be useless. A small logger in the box answers the question at the end of the trip: was it ever out of range, for how long, and was the box dropped?
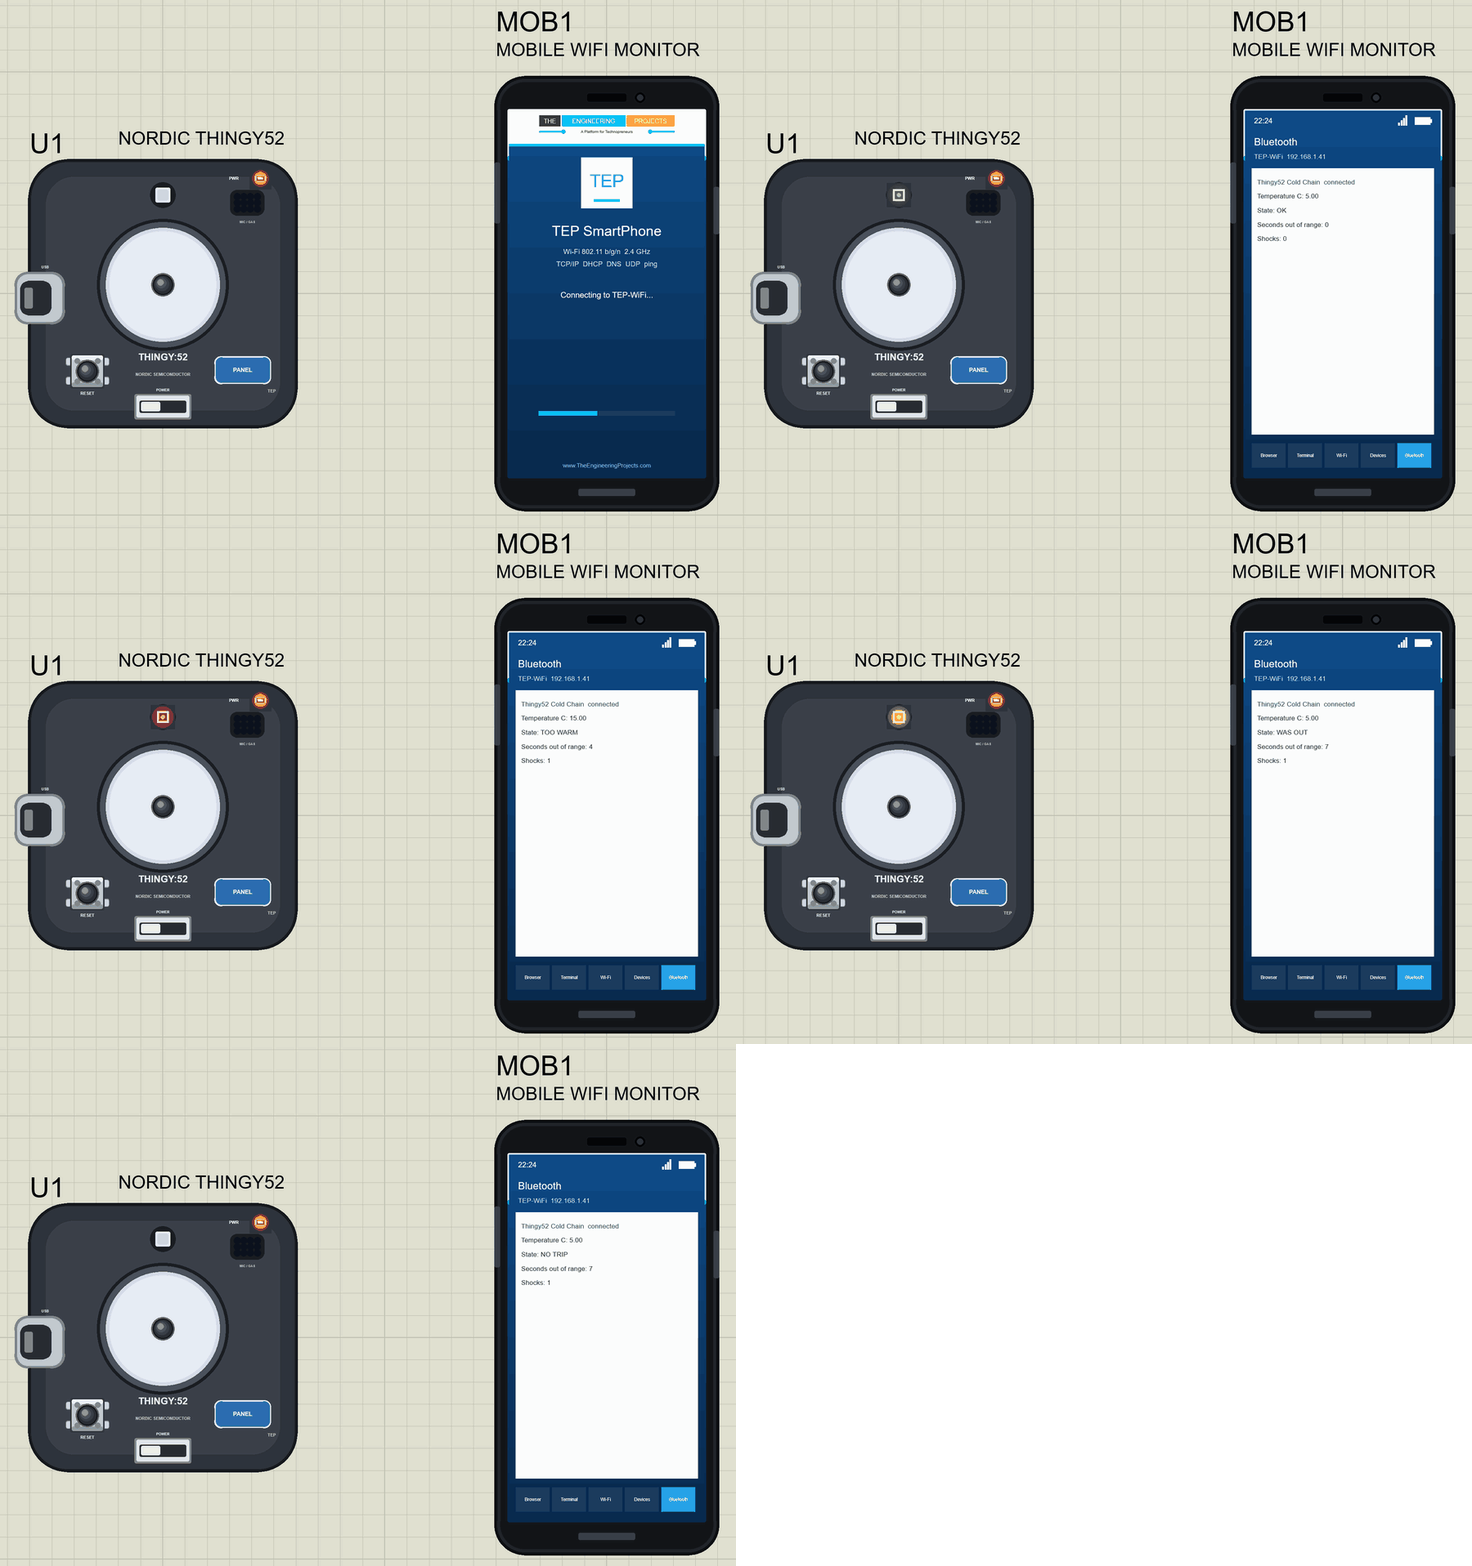
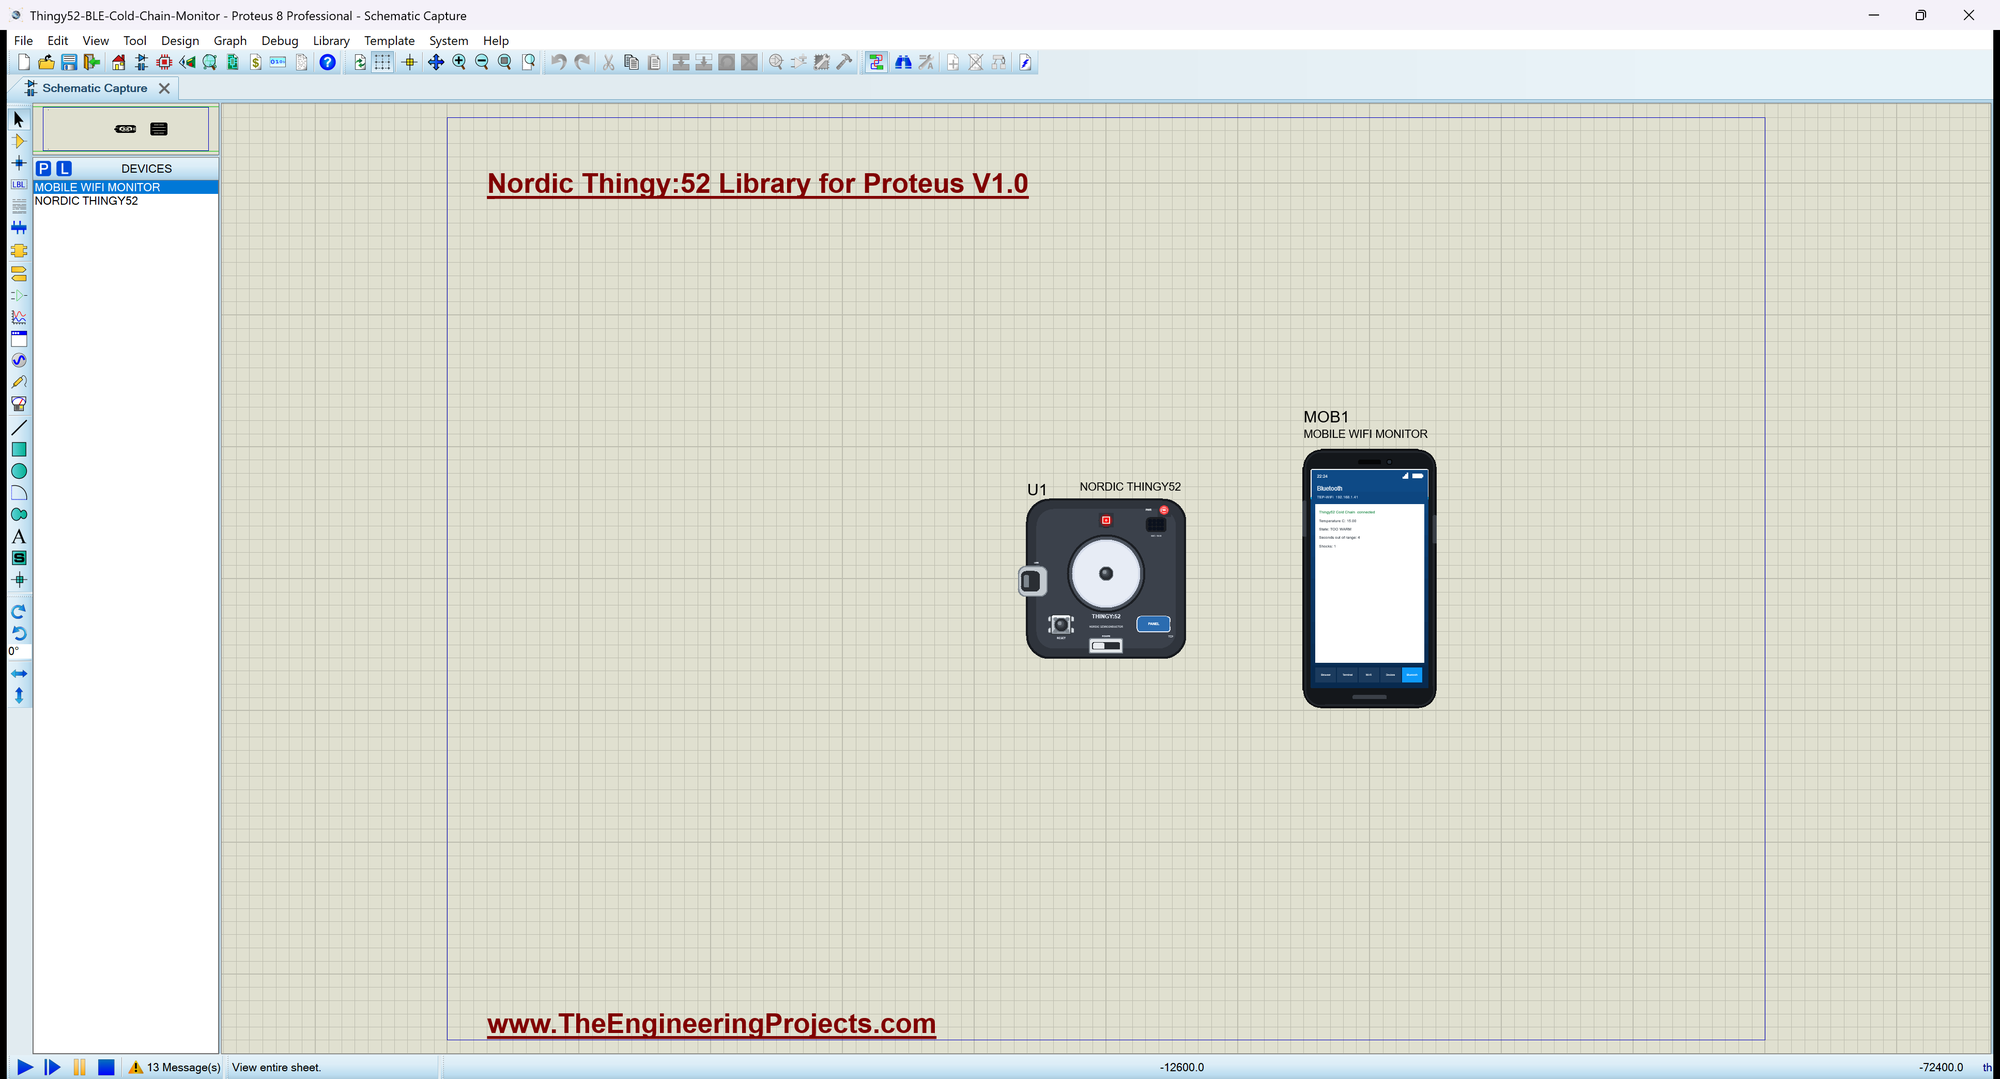
Open Thingy52-BLE-Cold-Chain-Monitor.pdsprj. U1 runs Thingy52_Cold_Chain.hex; its TEMPERATURE property starts the box at 5 C. MOB1 is the phone. There are no wires - the Thingy has none.
| LED | State |
|---|---|
| off | NO TRIP |
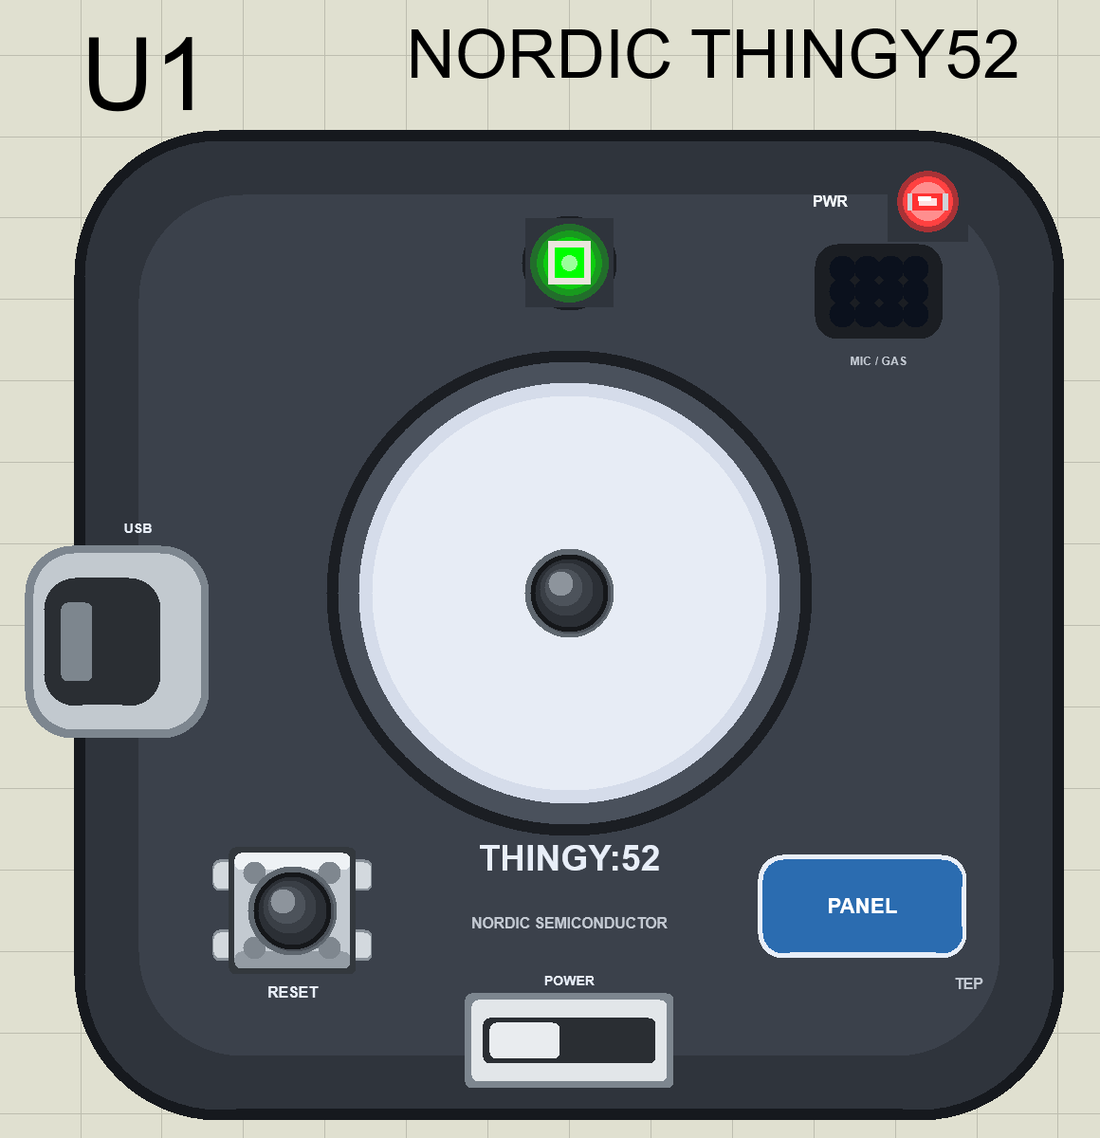
| green | OK: 2 to 8 C |
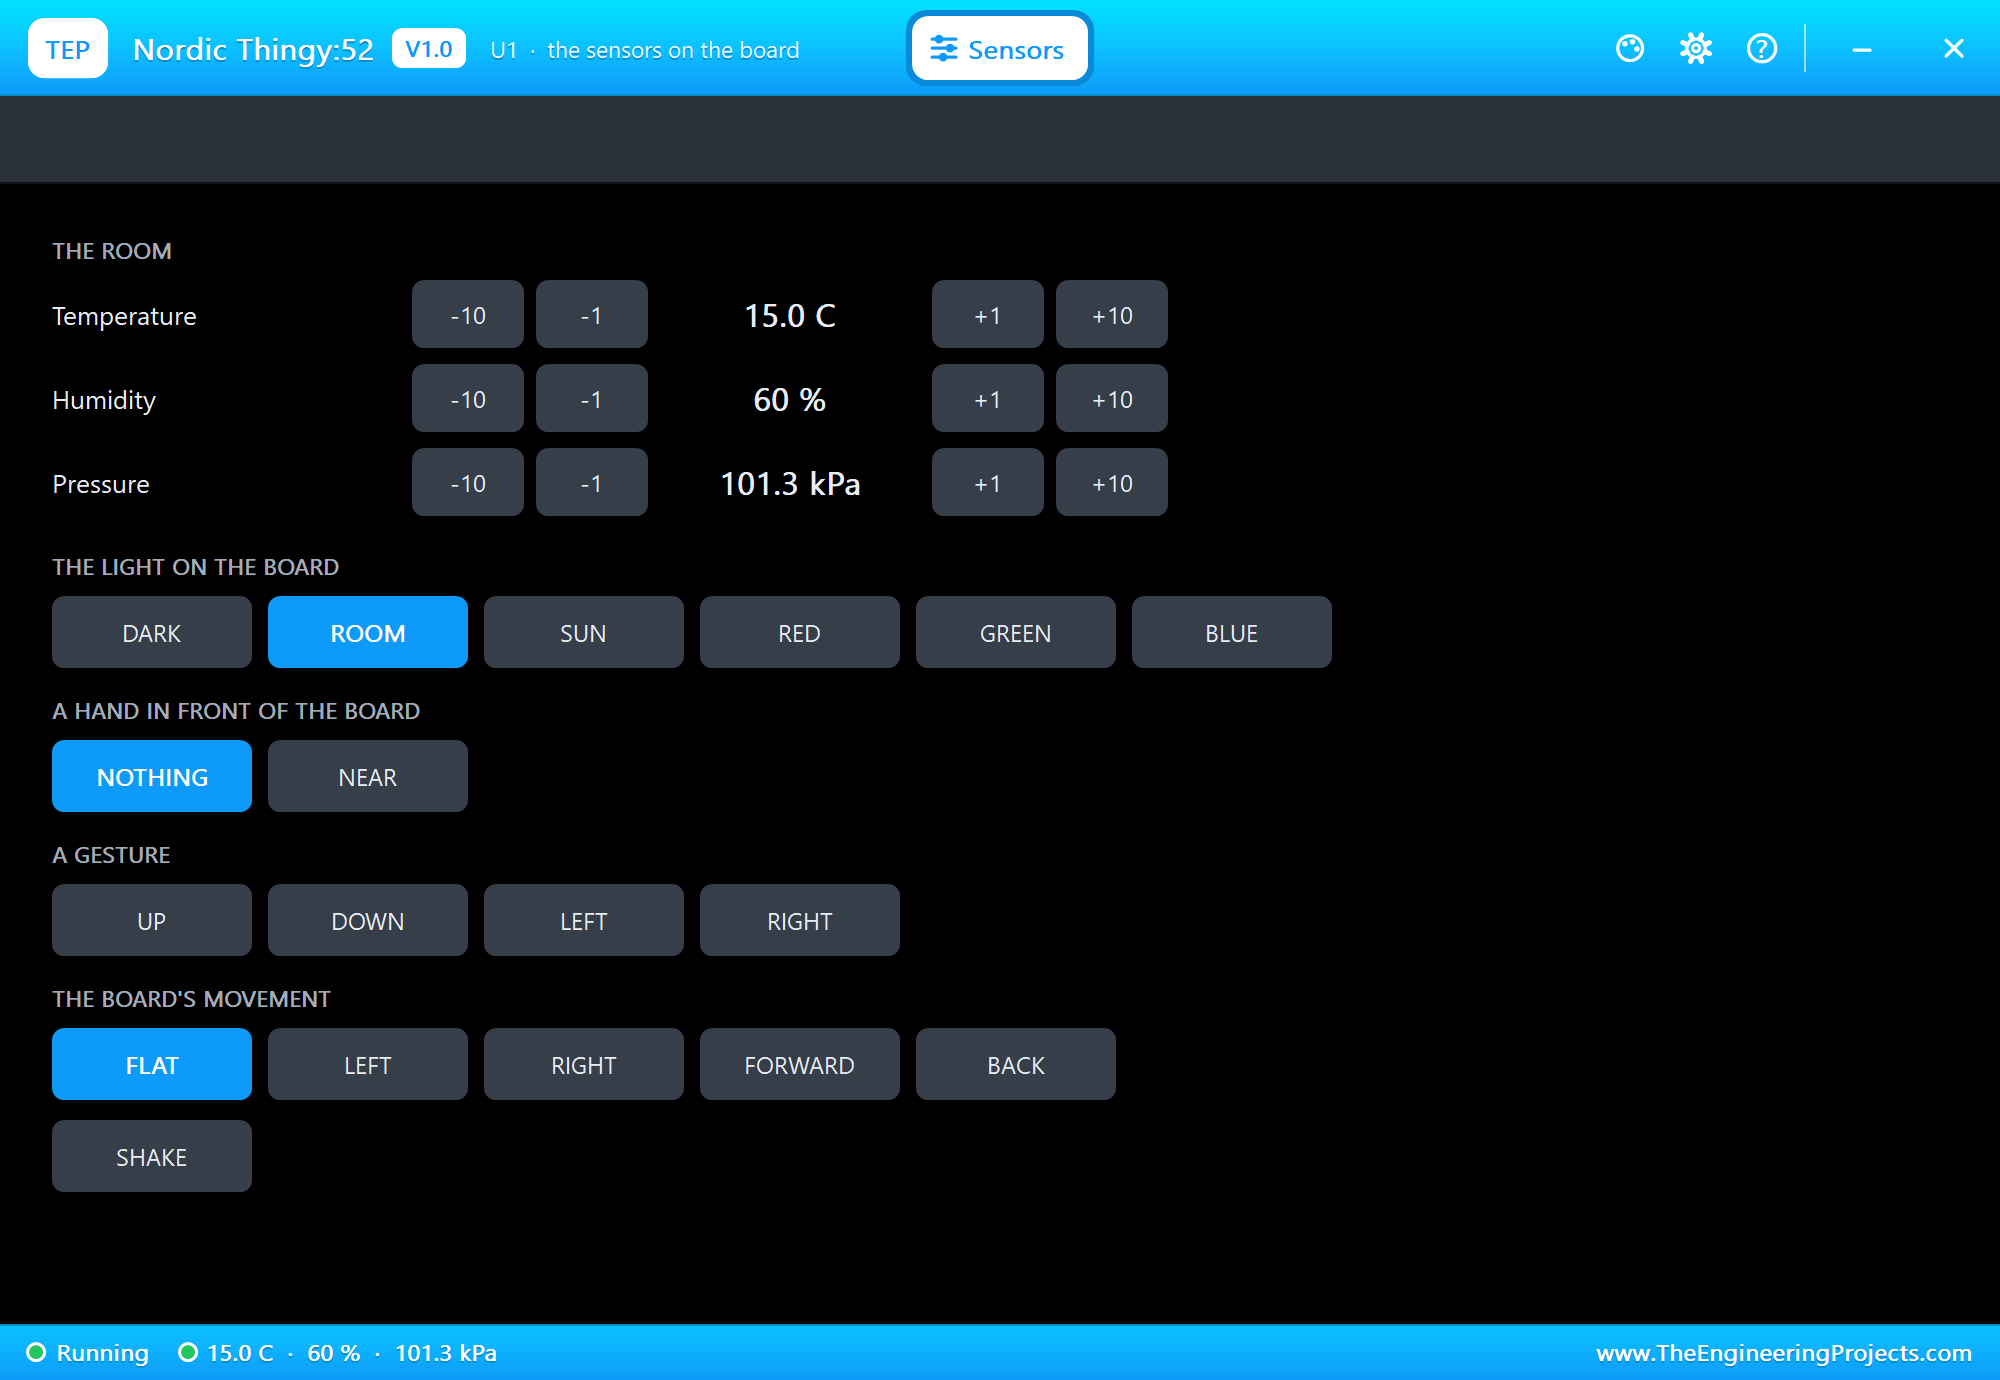
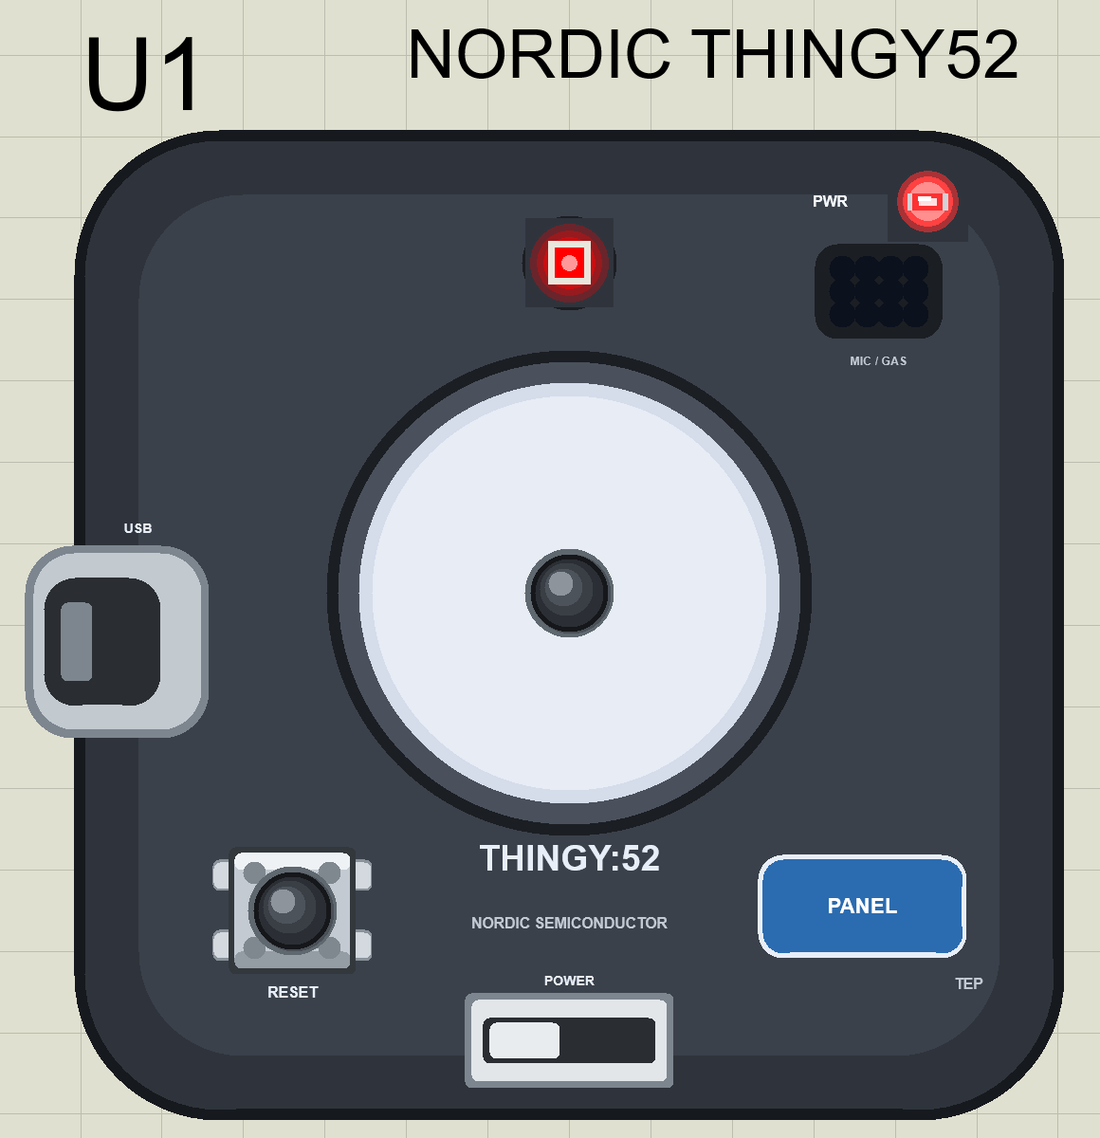
| red | TOO WARM or TOO COLD now |
| yellow | WAS OUT: back in range after an excursion |
| a blue flash | a shock |
The State
stateFor() names the state from the temperature and the trip so far:
String stateFor(float c) {
  if (!trip) return "NO TRIP";
  if (c > HIGH_C) return "TOO WARM";
  if (c < LOW_C) return "TOO COLD";
  return wasOut ? "WAS OUT" : "OK";
}
Once a Second
readClimate() reads the temperature, keeps the minimum and the maximum, counts the seconds out of range and tells the phone when the state changes:
void readClimate() {                                        // once a second: the range, the time out of it, the minimum and maximum
  tempC = HS300x.readTemperature();
  humidity = HS300x.readHumidity();
  tempChar.writeValue(tempC);
  if (trip) {
    if (tempC < minC) minC = tempC;
    if (tempC > maxC) maxC = tempC;
    if (tempC < LOW_C || tempC > HIGH_C) { wasOut = true; outSeconds++; outChar.writeValue((int)outSeconds); }
  }
  const String now = stateFor(tempC);
  if (now != state) {
    state = now;
    stateChar.writeValue(state);
    Serial.print(F(">> ")); Serial.print(state); Serial.print(F(": ")); Serial.print(tempC, 1); Serial.println(F(" C"));
  }
  showState();
}
Shocks
At rest the motion sensor reads 1 g - gravity. checkShock() counts a shock when the reading is more than 1.5 g away from that, and waits until the box is calm again before it counts the next one:
void checkShock() {                                         // a shock = more than 1.5 g away from the 1 g of gravity, then calm again
  if (!IMU.accelerationAvailable()) return;
  float x, y, z;
  IMU.readAcceleration(x, y, z);                            // in g
  const float g = sqrt(x * x + y * y + z * z);
  if (fabs(g - 1.0) > SHOCK_G) {
    if (calm && trip) {
      shocks++; shockChar.writeValue(shocks);
      rgb(false, false, true); flashUntil = millis() + FLASH_MS;
      Serial.print(F(">> SHOCK ")); Serial.print(shocks); Serial.print(F(": ")); Serial.print(g, 1); Serial.println(F(" g"));
    }
    calm = false; calmSince = millis();
  } else if (!calm && millis() - calmSince > CALM_MS) calm = true;
}
The LED
showState() sets the colour; the Thingy:52's LED lights when its pin is LOW:
void showState() {
  if (millis() < flashUntil) return;                        // (a shock's blue flash is showing)
  if (!trip) rgb(false, false, false);
  else if (state == "OK") rgb(false, true, false);
  else if (state == "WAS OUT") rgb(true, true, false);
  else rgb(true, false, false);
}
Starting and Ending a Trip
The big button starts a trip - the records are cleared - and ends it with a report on the monitor:
void button() {                                             // the big button: start a trip / end it with a report
  const bool now = digitalRead(BUTTON);
  if (now == lastButton) return;
  lastButton = now;
  if (now != LOW) return;
  trip = !trip;
  if (trip) {
    minC = 99; maxC = -99; outSeconds = 0; shocks = 0; wasOut = false;
    outChar.writeValue(0); shockChar.writeValue(0);
    Serial.println(F(">> BUTTON: the trip starts"));
  } else {
    Serial.print(F(">> BUTTON: the trip ends - min ")); Serial.print(minC, 1); Serial.print(F(" C, max ")); Serial.print(maxC, 1);
    Serial.print(F(" C, ")); Serial.print(outSeconds); Serial.print(F(" s out of range, shocks ")); Serial.println(shocks);
  }
  state = "";                                               // (shown again at the next reading)
  readClimate();
}
Run the Simulation
Press Run. The serial monitor - the same window as our TEP Serial Monitor Advance for Proteus - shows the name the Thingy advertises and a climate line every 5 s. No trip yet, so the LED is off:
Nordic Thingy:52 Bluetooth Cold-Chain Monitor - The Engineering Projects
Advertising as "Thingy52 Cold Chain"   the button starts / ends a trip; the range is 2 .. 8 C
>> NO TRIP: 5.0 C
Climate: 5.0 C, 60 %, NO TRIP, out of range 0 s, shocks 0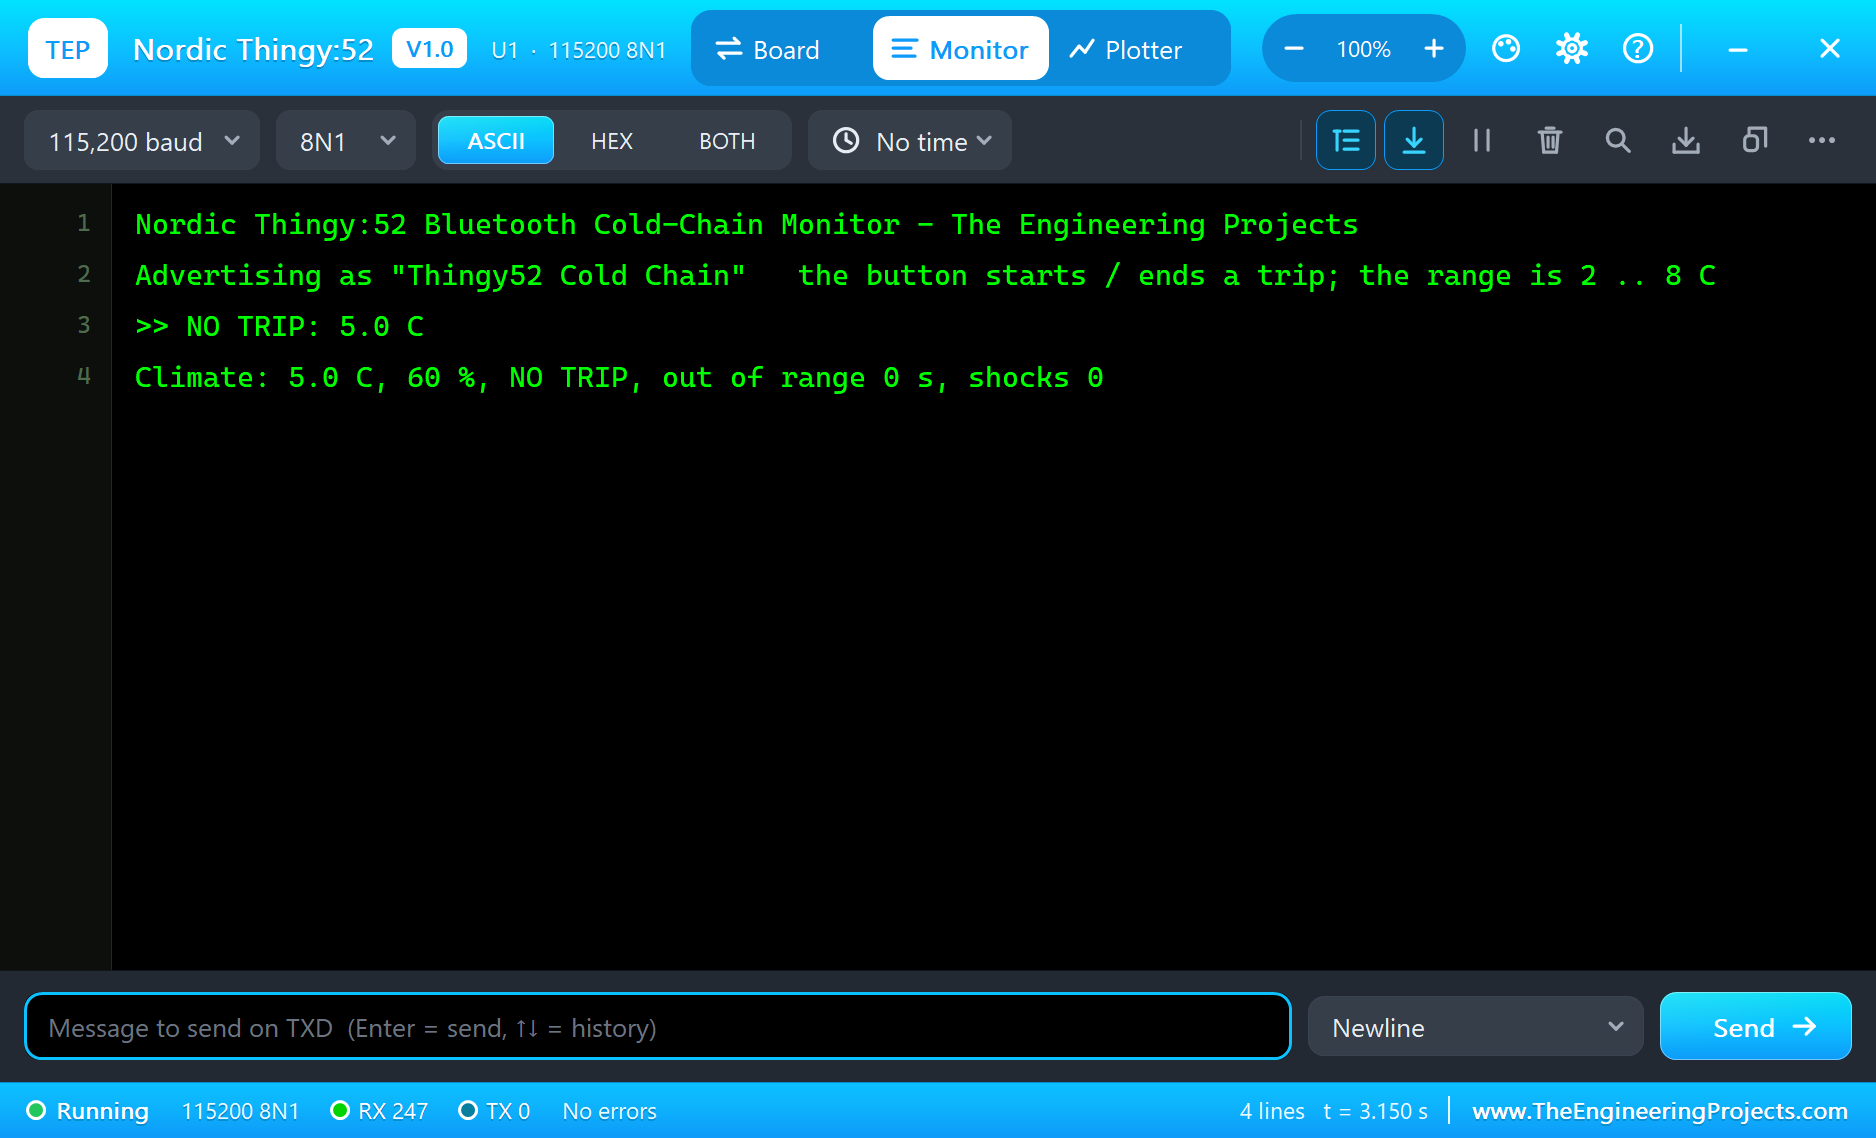
Connect the Phone and Start the Trip
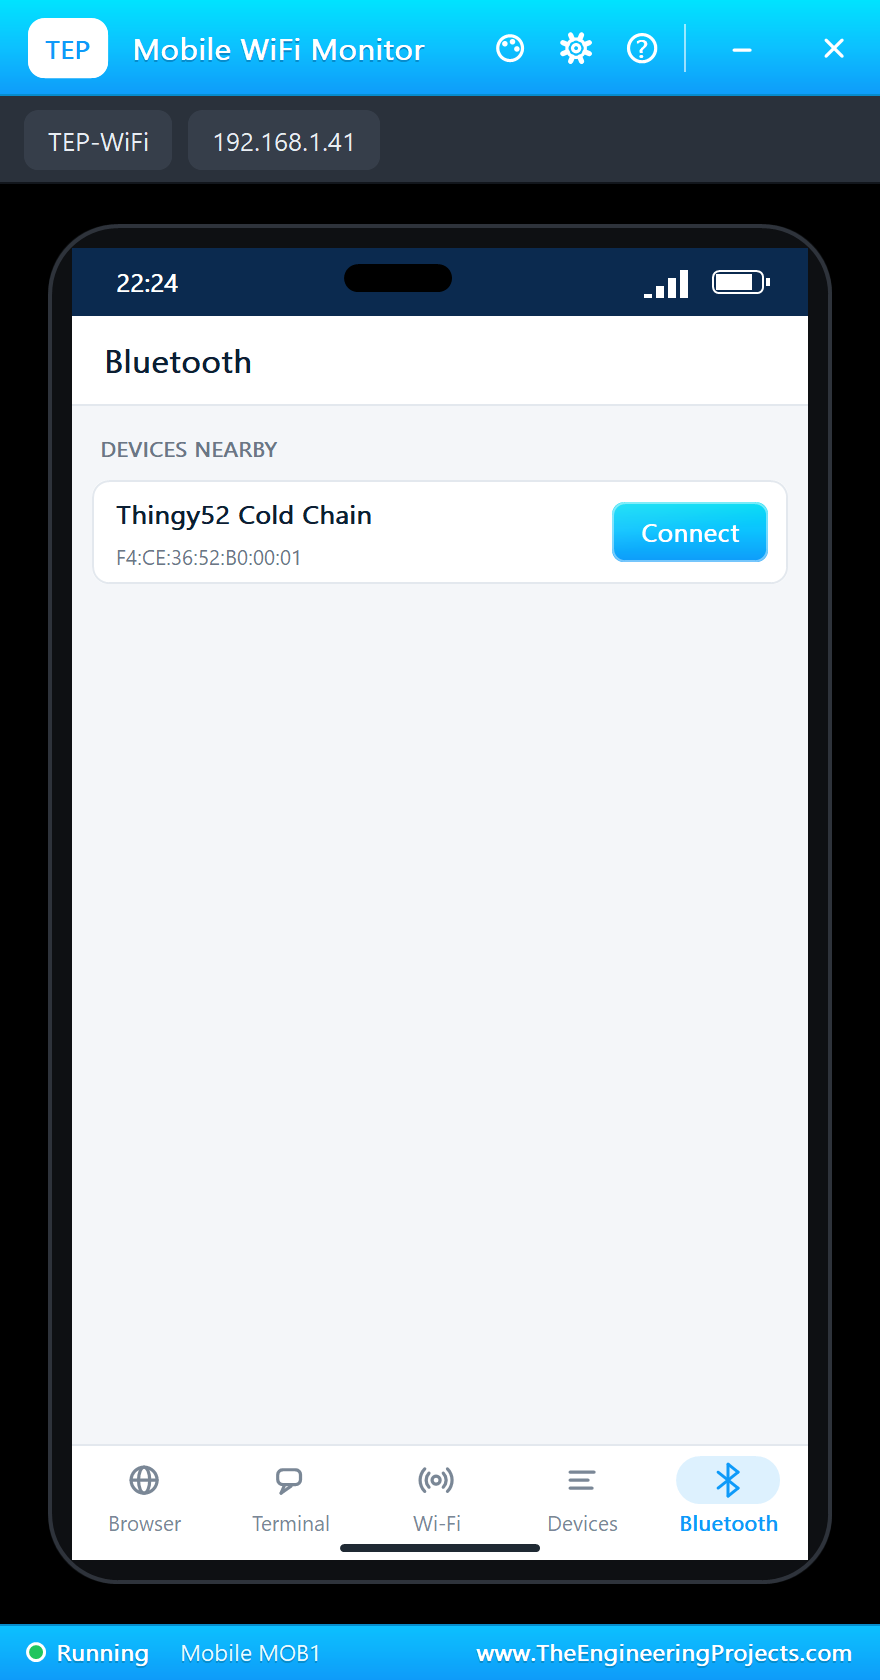
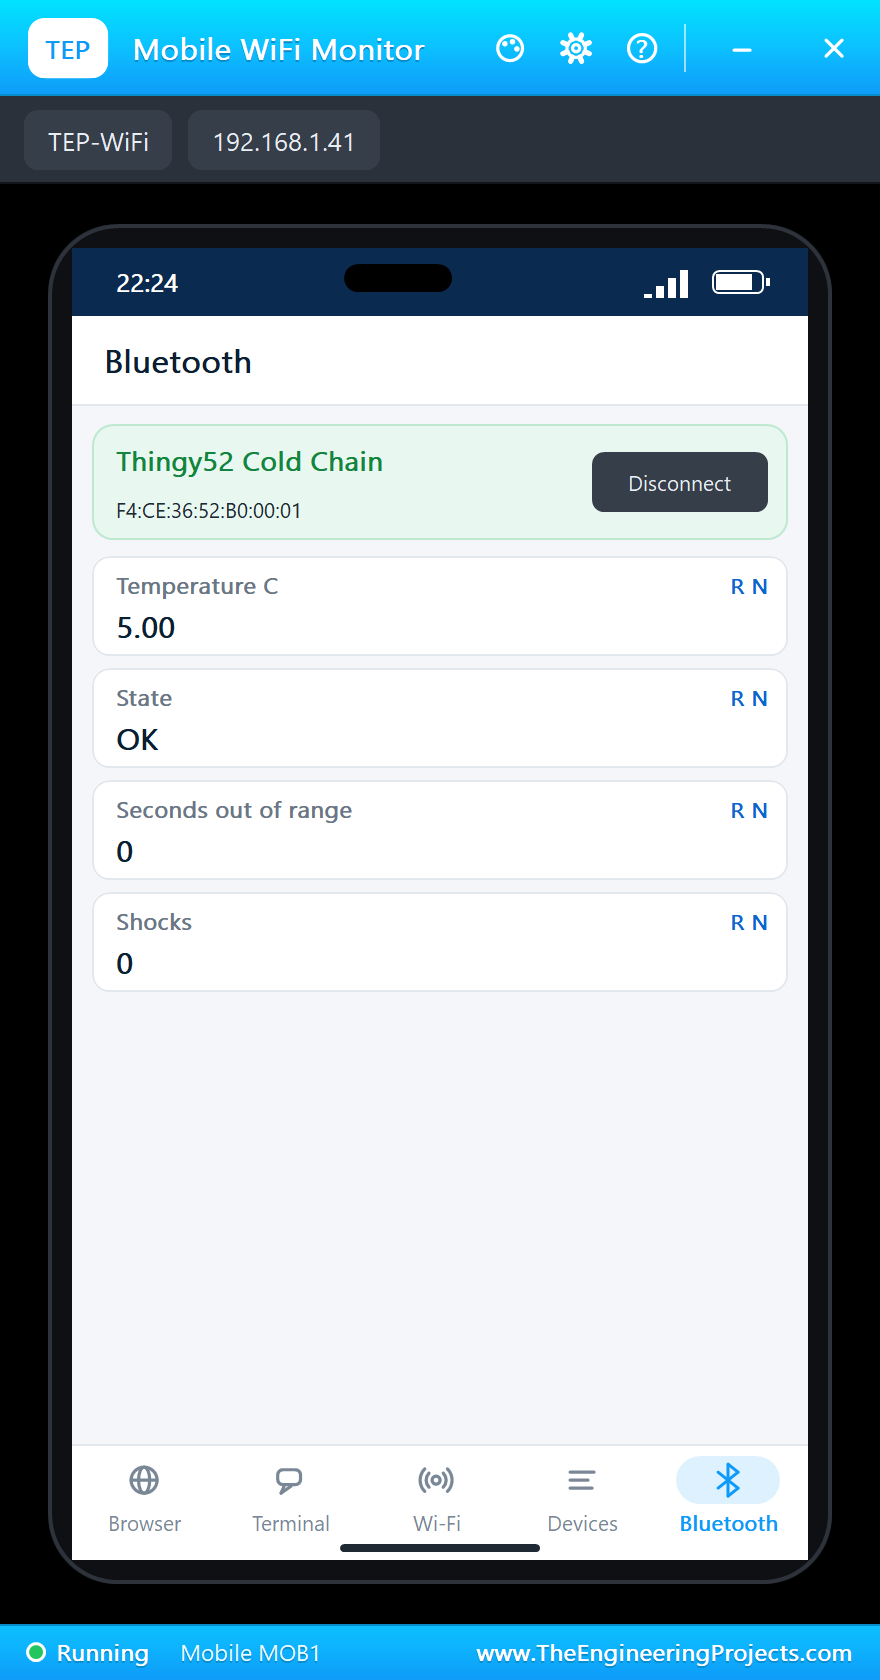
On the phone open the Bluetooth app, press SCAN and connect to "Thingy52 Cold Chain". Then click the big button: the trip starts, and at 5 C the LED turns green:
A Drop
In the Sensors window click SHAKE: the box is dropped. The motion sensor reads 3.0 g, the shock is counted and the LED flashes blue for a moment.
On a Sunny Loading Dock
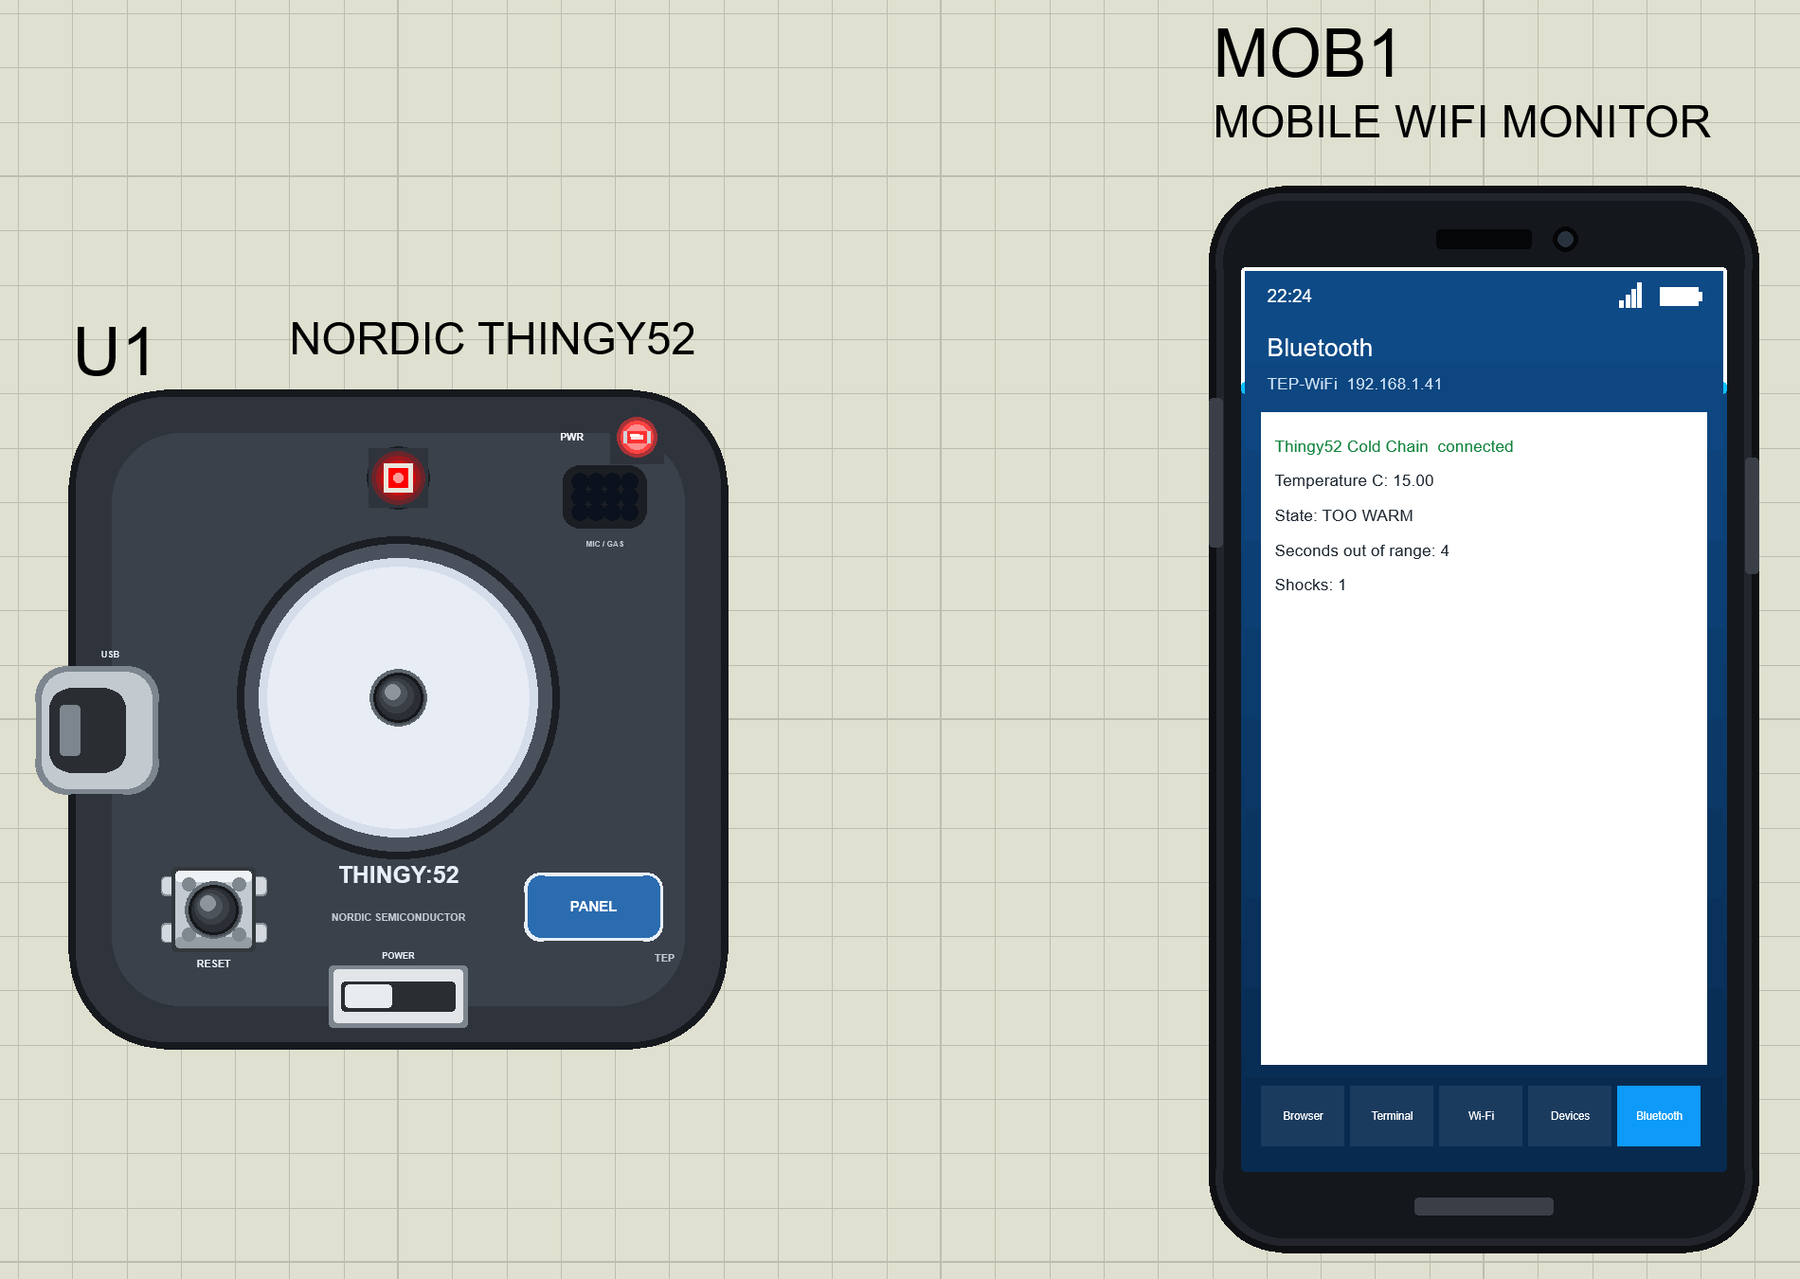
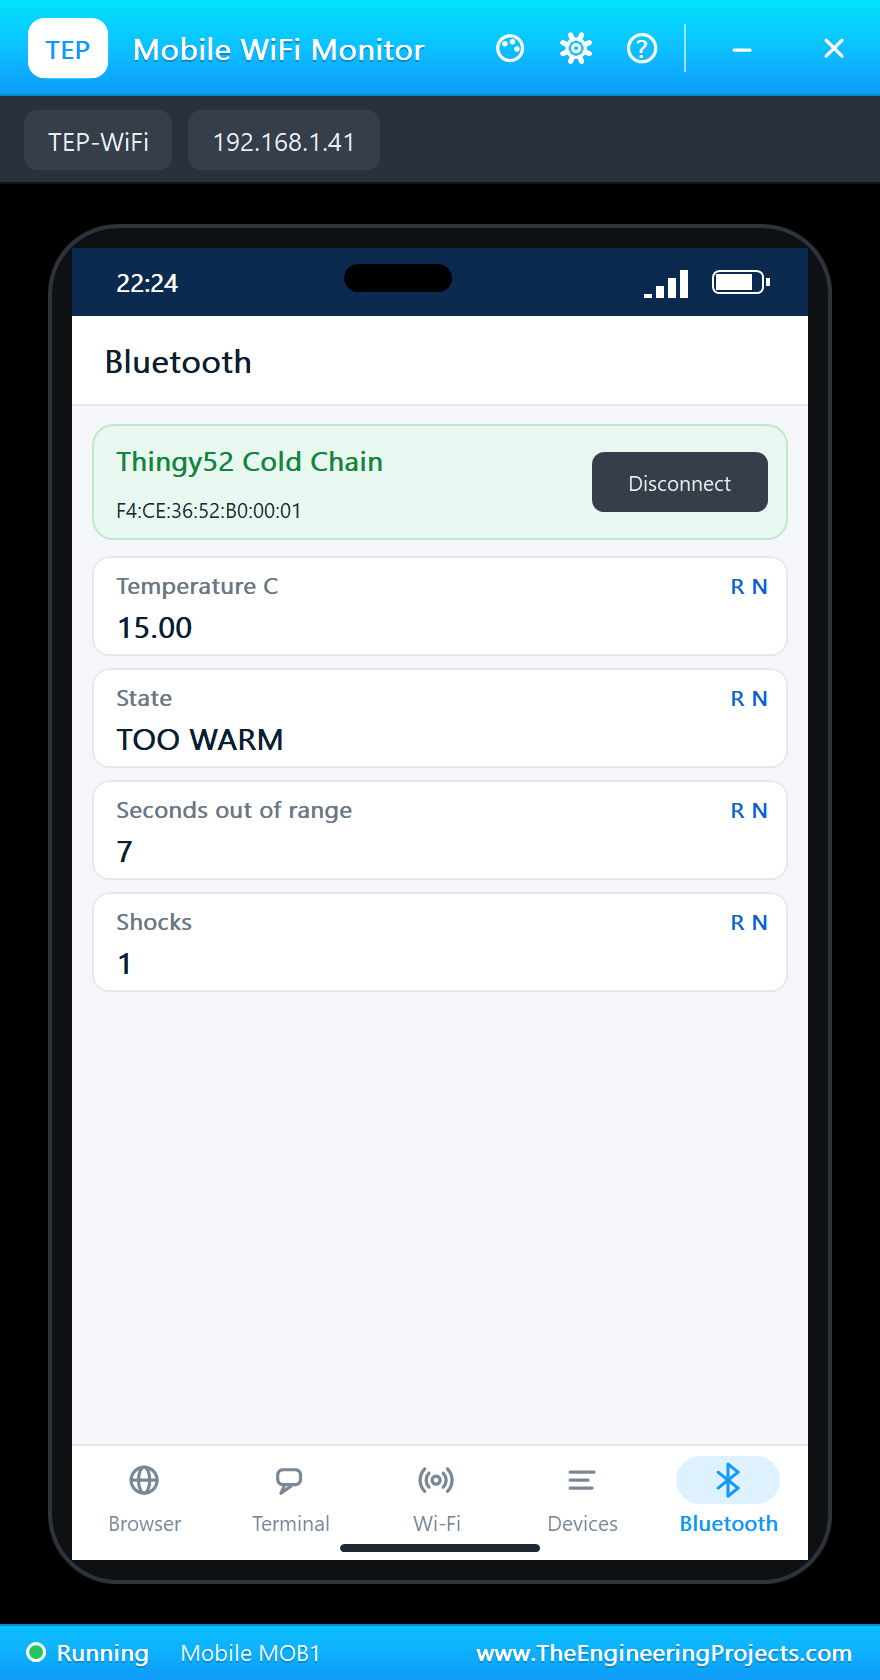
Make the box 10 C warmer: 15 C is out of range - TOO WARM, the LED red, and the seconds out of range count up. Here is the complete circuit while the simulation runs:
Back in the Cold Room
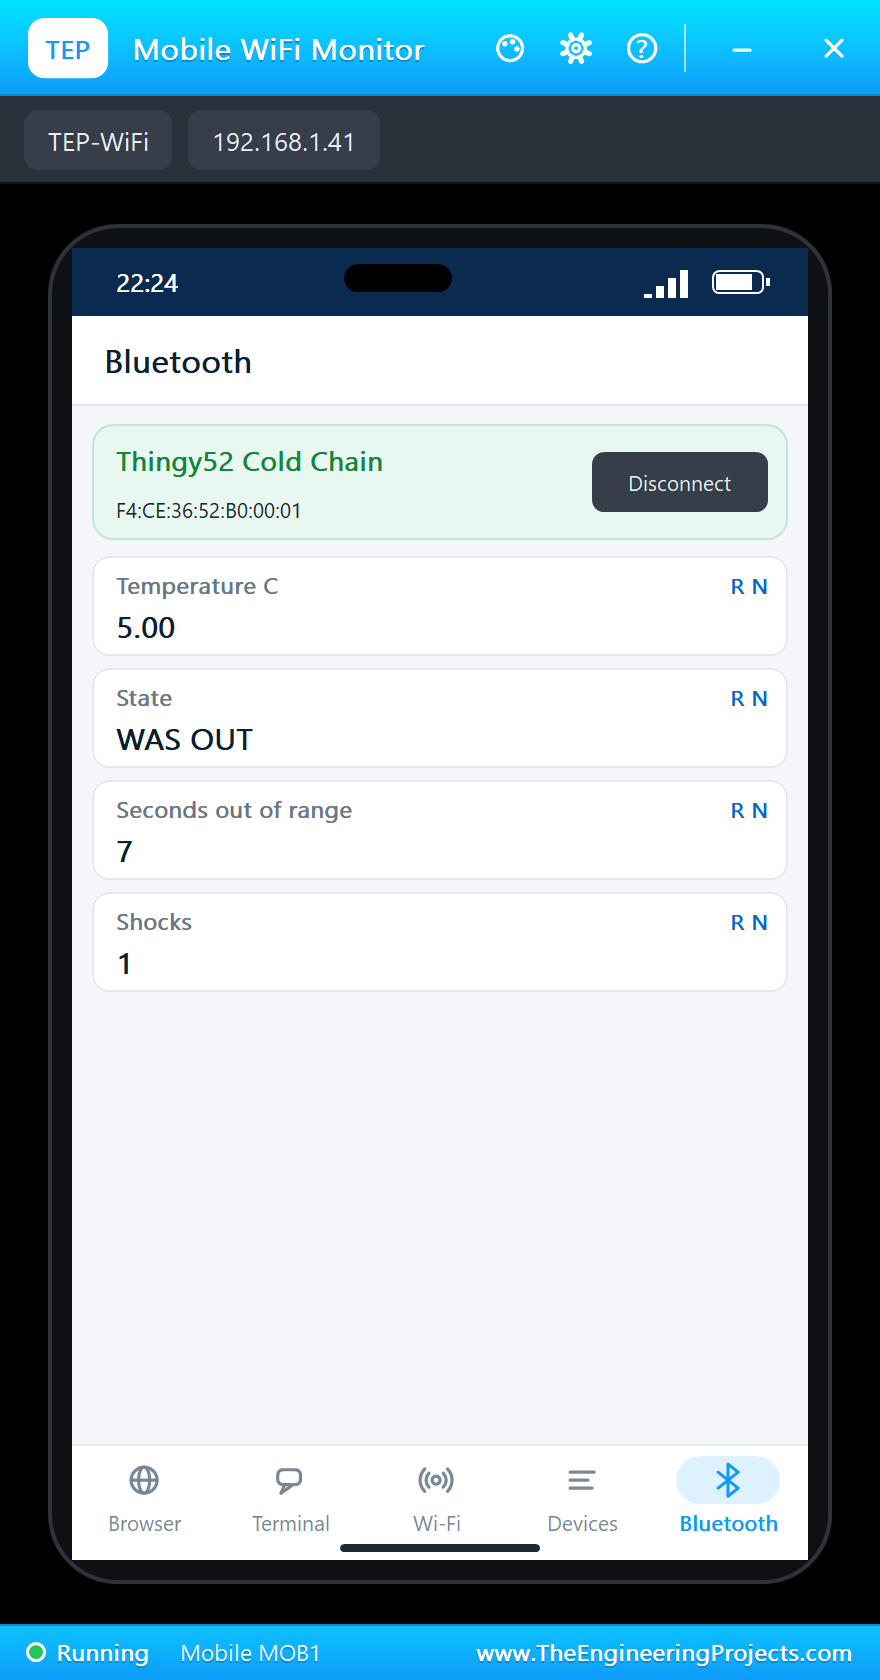
Make it 10 C colder again: back in range, but the excursion is remembered - WAS OUT, the LED yellow. The big button ends the trip with the report:
Phone connected
>> BUTTON: the trip starts
>> OK: 5.0 C
>> SHOCK 1: 3.0 g
>> TOO WARM: 15.0 C
Climate: 15.0 C, 60 %, TOO WARM, out of range 2 s, shocks 1
Climate: 15.0 C, 60 %, TOO WARM, out of range 7 s, shocks 1
>> WAS OUT: 5.0 C
Climate: 5.0 C, 60 %, WAS OUT, out of range 7 s, shocks 1
>> BUTTON: the trip ends - min 5.0 C, max 15.0 C, 7 s out of range, shocks 1
>> NO TRIP: 5.0 C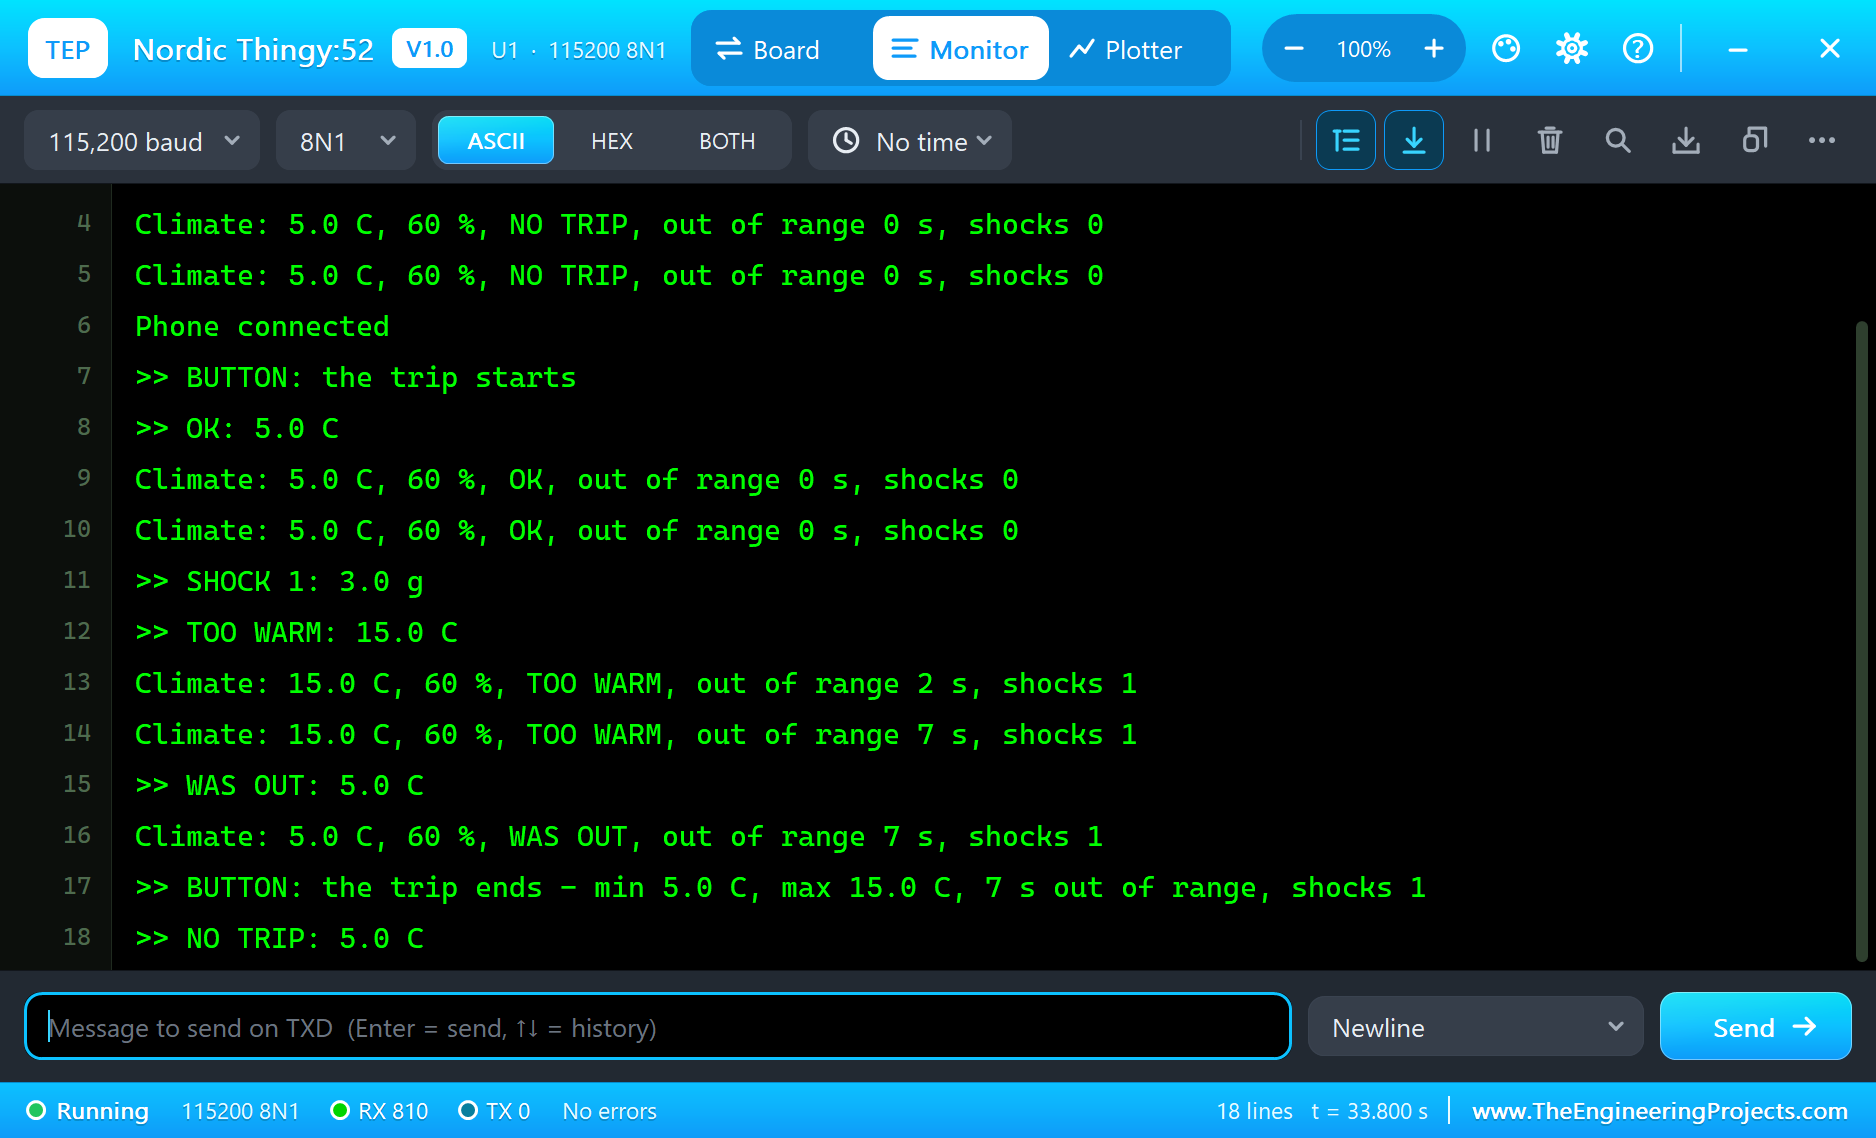
Why 2 to 8 C?
Most vaccines and biological medicines are made to be stored in a refrigerator between 2 and 8 C. Freezing can destroy them just as surely as heat, which is why the monitor watches both limits. Real loggers often allow short excursions - a few minutes during loading - and judge the shipment by the total time out of range, which is exactly what the sketch counts.
Measuring Shocks
An accelerometer at rest reads 1 g straight down. A drop reads close to 0 g while falling and a sharp peak of several g at the impact. Measuring the size of the whole vector - the square root of x, y and z squared - makes the reading independent of how the Thingy lies in the box. The calm time stops one bump from being counted many times.
Why Bluetooth LE for a Logger?
A logger in a box does not need to talk all the time. It records on its own and a phone reads it when the box arrives - at the pharmacy door, without opening the box. Bluetooth LE suits this perfectly: almost no power while waiting, and every phone can read it. Notifications keep the phone up to date while it is connected.
Battery Life
On the real Thingy:52 the 1440 mAh battery lasts a long time if the sketch reads the sensors only every few seconds and lets the nRF52832 sleep in between. The motion sensor can wake the chip on a shock, so even a drop between two readings is not missed.
Inside the Thingy:52: the Sensors
The HTS221 measures relative humidity with a small capacitor whose dielectric absorbs water vapour, and temperature with an on-chip sensor - about half a degree accurate in the room-temperature range. The LPS22HB is a MEMS pressure sensor for 260 to 1260 hPa, enough to notice an aircraft cabin or a mountain road. The CCS811 is a metal-oxide gas sensor that estimates eCO2 and total volatile organic compounds, and the motion sensor reports acceleration and rotation. In the simulation the board package's familiar sensor libraries answer for them, so a sketch reads them with the usual calls.
Mean Kinetic Temperature
Pharmacists judge a shipment not only by its minimum and maximum. They use the mean kinetic temperature, a weighted average in which warm periods count much more than cool ones, because chemical breakdown speeds up with heat. An hour at 15 C does more harm than an hour at 3 C does good. The seconds out of range in our demo are the simple version of the same idea; a real logger stores every reading so the full calculation can be made later.
Calibrating the Temperature
Every temperature sensor has a small offset. A simple check is a glass of ice water stirred well: it sits at 0 C. Read the sensor in a sealed bag in the water, note the difference and subtract it in the sketch. For a medicine logger the check is done against a certified reference thermometer, and the result is written on a calibration certificate.
Choosing the Shock Threshold
Walking with a box moves it by a few tenths of a g; setting it down firmly gives about one g more; a drop onto a hard floor gives several g in a few milliseconds. The demo counts a shock above 1.5 g away from gravity, which ignores normal handling but catches a fall. A fragile instrument would use a lower threshold, a rugged spare part a higher one.
Logging without a Phone
Most of a trip happens far from any phone: in a truck, a warehouse or an aircraft hold. The Thingy keeps working on its own and remembers what happened; the phone only reads the summary when somebody checks the box. That is why the state, the seconds out of range and the shocks are characteristics with notifications - a phone that connects late still sees the whole story at once.
From Prototype to Product
The Thingy:52 is a prototyping kit, not a certified medical logger. A product for the cold chain adds a sealed case, a calibrated sensor, a tamper-proof record of every reading and a report the pharmacy can print. The logic, however, is exactly what this demo shows - and it can be designed and tested in the Proteus simulation long before the hardware exists.
Why the LED Lights When LOW
On the real Thingy:52 the RGB LED is not wired to the nRF52832 directly: an SX1509B I/O expander on the I2C bus drives it, and its outputs sink the LED current, so a LOW line turns a colour on. Our part keeps that behaviour, so a sketch written for the simulation has the right logic for the real device.
Try It Yourself
- Allow a short excursion: count only the time beyond 5 minutes in a row.
- Add a "too cold" test: make the box 10 C colder twice and watch TOO COLD.
- Store the minimum and maximum in characteristics for the phone.
- Show the humidity too - condensation can ruin labels.
Ideas to Extend the Monitor
- Count the hours of the trip and send a summary every hour.
- Use the light sensor to notice when the box is opened.
- Use the pressure sensor to notice a flight in a cargo hold.
- Add a writable characteristic so the phone can set the limits.
Your Own Sketches
Write the sketch in the Arduino IDE with the board Nordic Thingy:52 (TEP Proteus), use Sketch > Export Compiled Binary and set the part's PROGRAM property to the .hex.
Moving to a Real Thingy:52
- Use Zephyr with the board thingy52/nrf52832, or Nordic's nRF5 SDK.
- Read the HTS221 and the motion sensor with Zephyr's sensor drivers.
- Drive the RGB LED through the SX1509B expander - its LEDs light when the line is LOW.
- Start from a Bluetooth peripheral sample and move the logic of the demo across.
- Program the Thingy over its programming connector.
The states, the limits and the Bluetooth service stay the same; on the real Thingy the SDK takes the place of the Arduino calls.
Properties of the Thingy:52
| Property | What it does |
|---|---|
| PROGRAM | the sketch: a .hex from TEP Boards for Proteus (board "Nordic Thingy:52") |
| MONITOR, BAUD, AUTOOPEN | the built-in serial monitor: on, its baud rate (115200), open at Run |
| TEMPERATURE, HUMIDITY, PRESSURE | the air at Run (the demo: 5 C, 60 %, 101.3 kPa) |
Troubleshooting
- The phone finds nothing: press SCAN after "Advertising as" is printed; the sketch must call
BLE.advertise(). - A sensor reads 0: call its
begin()first. - A shock counts many times: wait until the box is calm before counting the next one.
- The LED looks inverted: on the Thingy:52 it lights when the pin is LOW.
- A number goes wrong above 32767: int is 16 bits in the simulation - use long.
Limitations of the Simulation
- The CCS811 gas reading, the speaker, the microphone, the battery and charger, NFC and the extension connectors are not modelled.
- The Thingy is a Bluetooth LE peripheral only.
- Your sketch gets 8 KB of RAM in the simulation, and int is 16 bits there.
- Thingy:52, nRF52832 and Nordic Semiconductor are names of Nordic Semiconductor ASA and Arduino of Arduino; this library is not made or endorsed by them or by Labcenter.
- Tested in Proteus 8.5 in November 2026 (the demo as shipped, about 34 s of simulation). Proteus 7 is not supported.
So, that was all about the Nordic Thingy:52 Library for Proteus. I hope it helps you try your Bluetooth sensor ideas in a simulation before a Thingy is on your desk - the sensors, the LED, the button and the phone, all on one sheet. If you have any questions, ask in the comments and I will help you out. Till the next tutorial, take care and have fun!