Getting Started with Raspberry Pi Programming Series


to our new beginner’s course on Raspberry Pi. This course is appropriate for anyone using either a traditional Raspberry Pi board or the new Raspberry Pi 400 board that includes an integrated keyboard and display. Learning how to code, building robots, and doing plenty of other strange and exciting things are all possible with this low-cost computer setup. The Raspberry Pi can do everything a computer can do, from surfing the web to viewing movies and music, and playing video games.
Raspberry Pi is much more than a modern computer. It`s created to educate young people on how to program in languages such as Scratch and Python, and it comes with all of the major programming languages pre-installed. The world is in desperate need of programmers now more than ever, and Raspberry Pi has sparked a new generation's interest in computer science and technology. Raspberry Pi is used by people of all ages to build intriguing projects ranging from old-school gaming systems to internet-connected weather equipment.
What are the aims of this course?
In this course, we'll learn how to make games, build robots, or hack all kinds of fantastic projects. The Raspberry Pi 4 Model B will be covered in this course. In the event that you're working with a different model of Raspberry Pi, don't be worried. whatever is taught here can be applied to any other model in the family.
What is this mini-computer?
It is a small computer about the size of a credit card that can run the Linux operating system. It uses a "system on a chip," which combines the CPU, GPU, RAM, USB ports, and other components into a single chip.
To distinguish it from traditional computers that conceal their internal components behind a casing, the Raspberry Pi's ports and functions are fully exposed, a protective case is available to buy. If you want to know how different computer components work and where to put the various peripherals, this is a great resource.
Features
All Raspberry Pi models share one feature in common:
- Software written for one model can be used on another, as they are interchangeable.
- Raspberry Pi operating system can even run on a pre-release Model B prototype. Although it will take longer, still run.
With this, what are you able to accomplish?
Now you've got a little machine that runs a lot of free software, so that's good. Exactly what can you do with it? Fortunately, I've got a simple and fun Python project that I used to teach middle school children in a coding lesson.
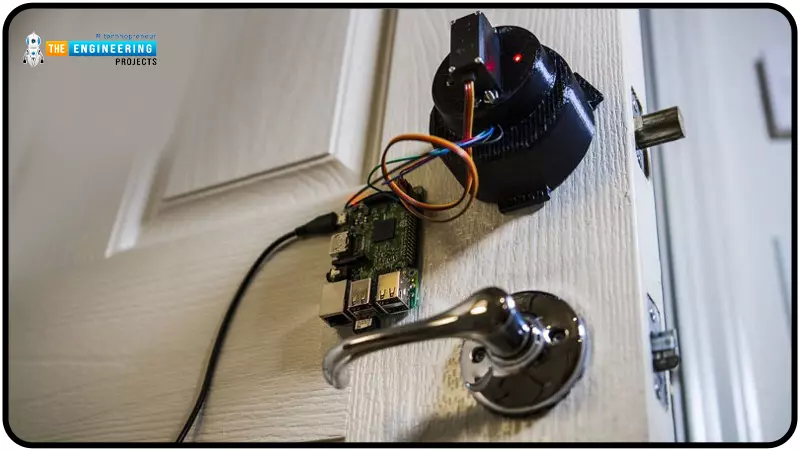
- It's possible to create a weather station, a calculator, a gaming gadget, and a lot more out of the same thing. If you have a Raspberry Pi, you can even make a customized espresso machine that is secure like a Raspberry Pi locked door lock, as this one.
- Can be used as a game server
- Controller for robots
- Webserver
- Cryptocurrency Mining
Advantages of using this mini-computer
- Low price
- High computing power in a small board
- Numerous interfaces
- Linux and Python are supported
Disadvantages
- Windows cannot be installed on the computer.
- Inconvenient to use as a Desktop PC.
- There is no graphics processor.
- Internal eMMC storage is not present.
- We can't attach external RAM as in a normal computer.
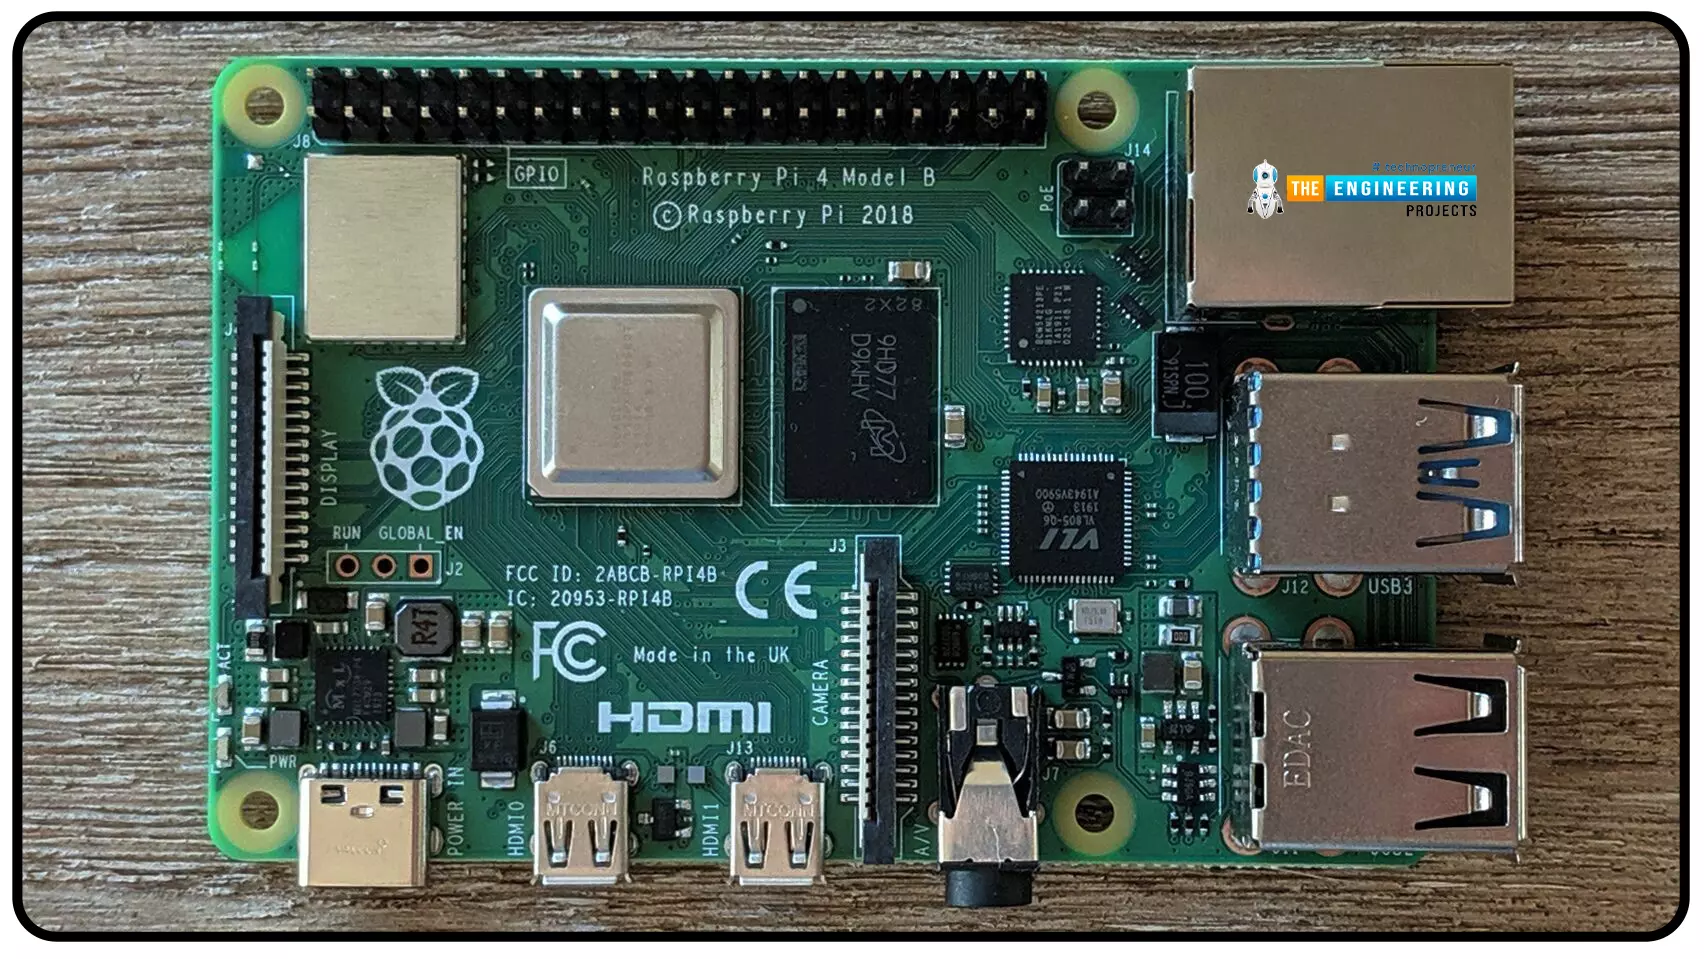
Components in a Raspberry pi
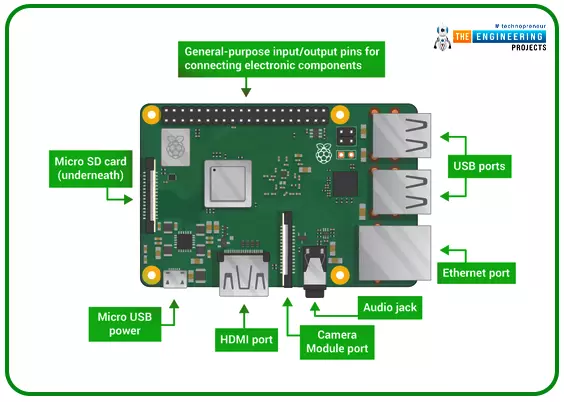
The Raspberry Pi features a number of parts that can be used to control the Raspberry Pi as well as other devices. The following ports will be available on your Raspberry Pi:
-
System-on-chip
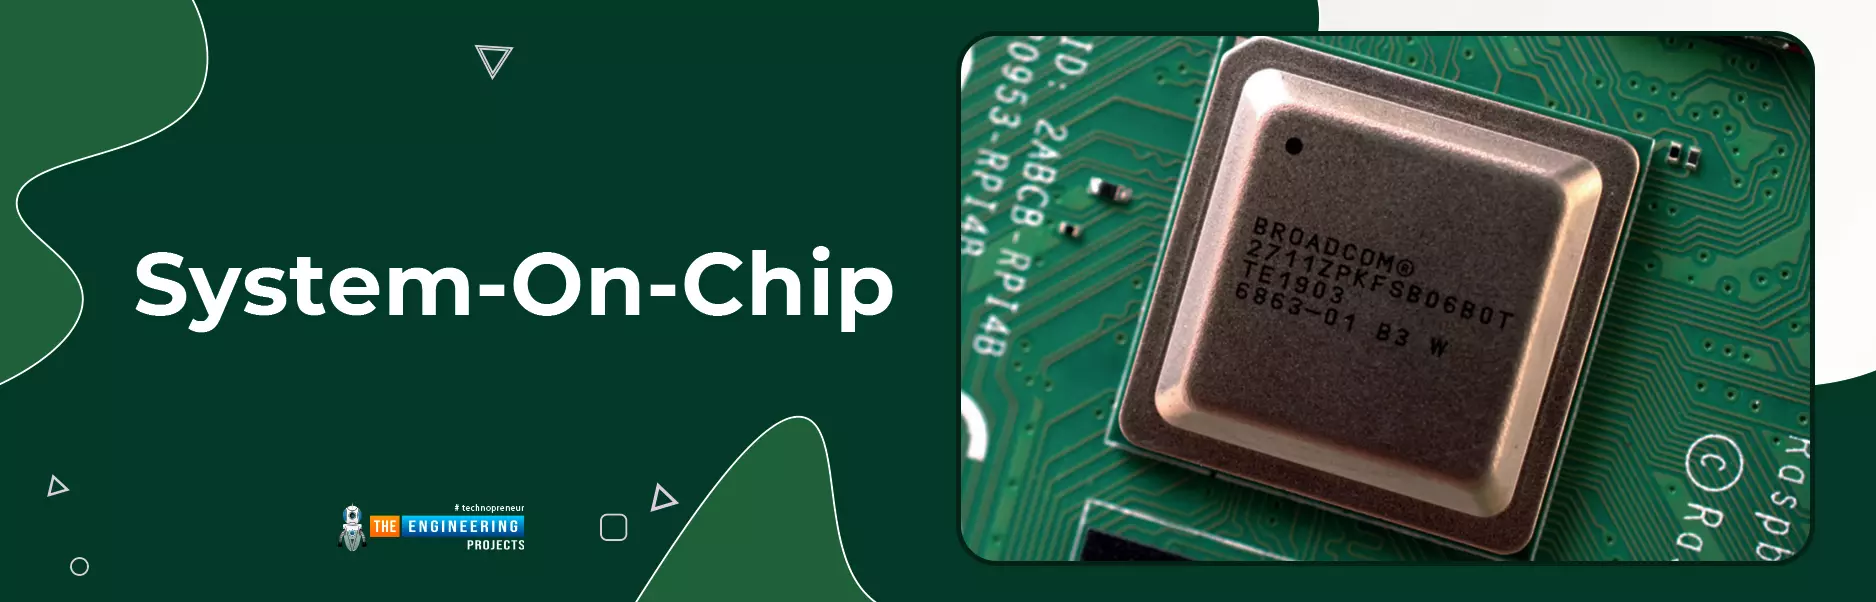
The majority of the Raspberry Pi's system resides on an integrated circuit, which is what the term "system-on-chip" refers to. Included in this is the CPU, which is referred to as a computer's 'brain,' as well as the graphics processing unit (GPU).
-
Random-access memory (RAM)
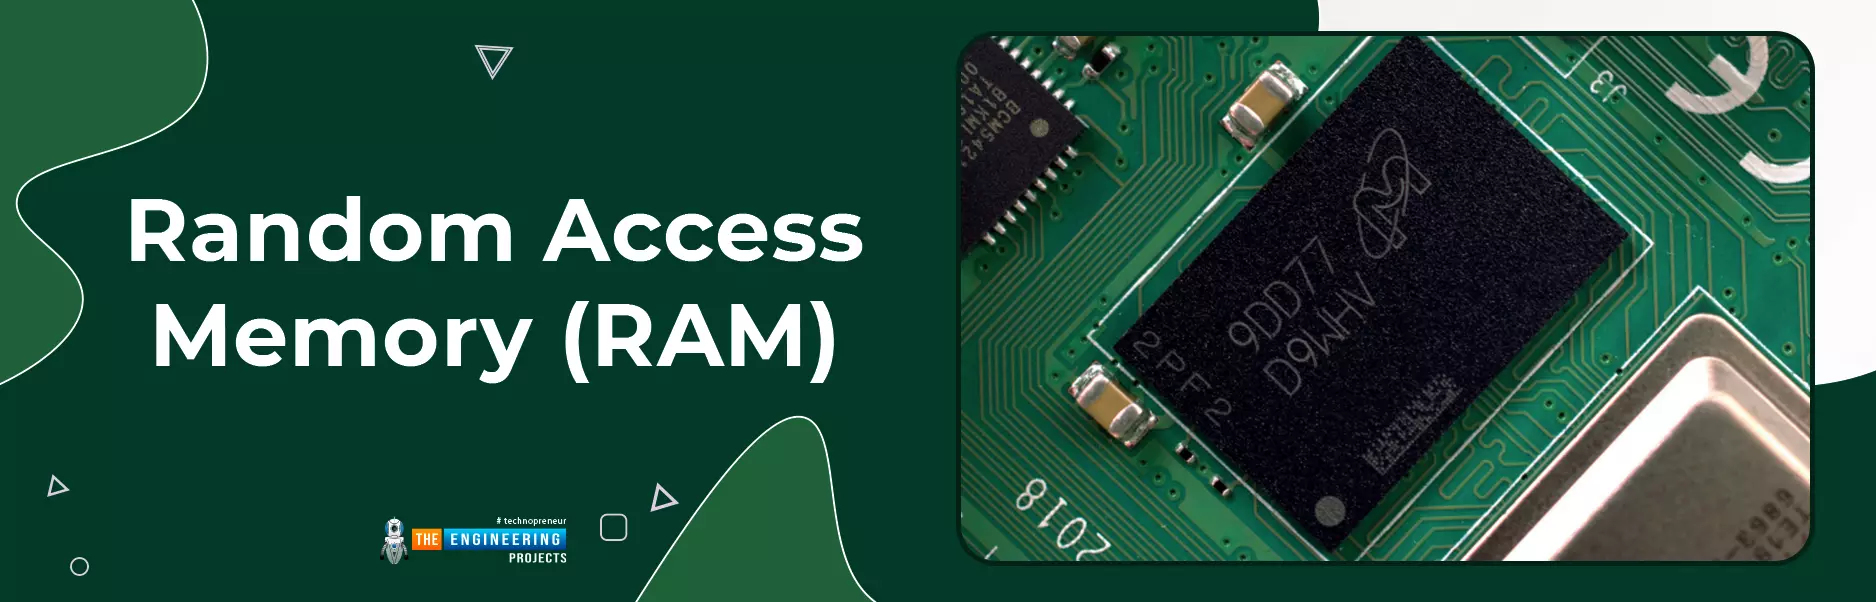
A brain is useless without memory, therefore you'll notice another chip to the side of the SoC, tiny and black plastic, like a cube where RAM is located. When you're working on a Raspberry Pi, the RAM stores your work; it's only when you save it to the microSD card that it's written to the microSD card. The volatile and non-volatile memories of the Raspberry Pi are made up of these components. When the Raspberry Pi is turned off, the volatile RAM loses its contents, however, the non-volatile microSD card retains them.
-
Raspberry pi`s radio module
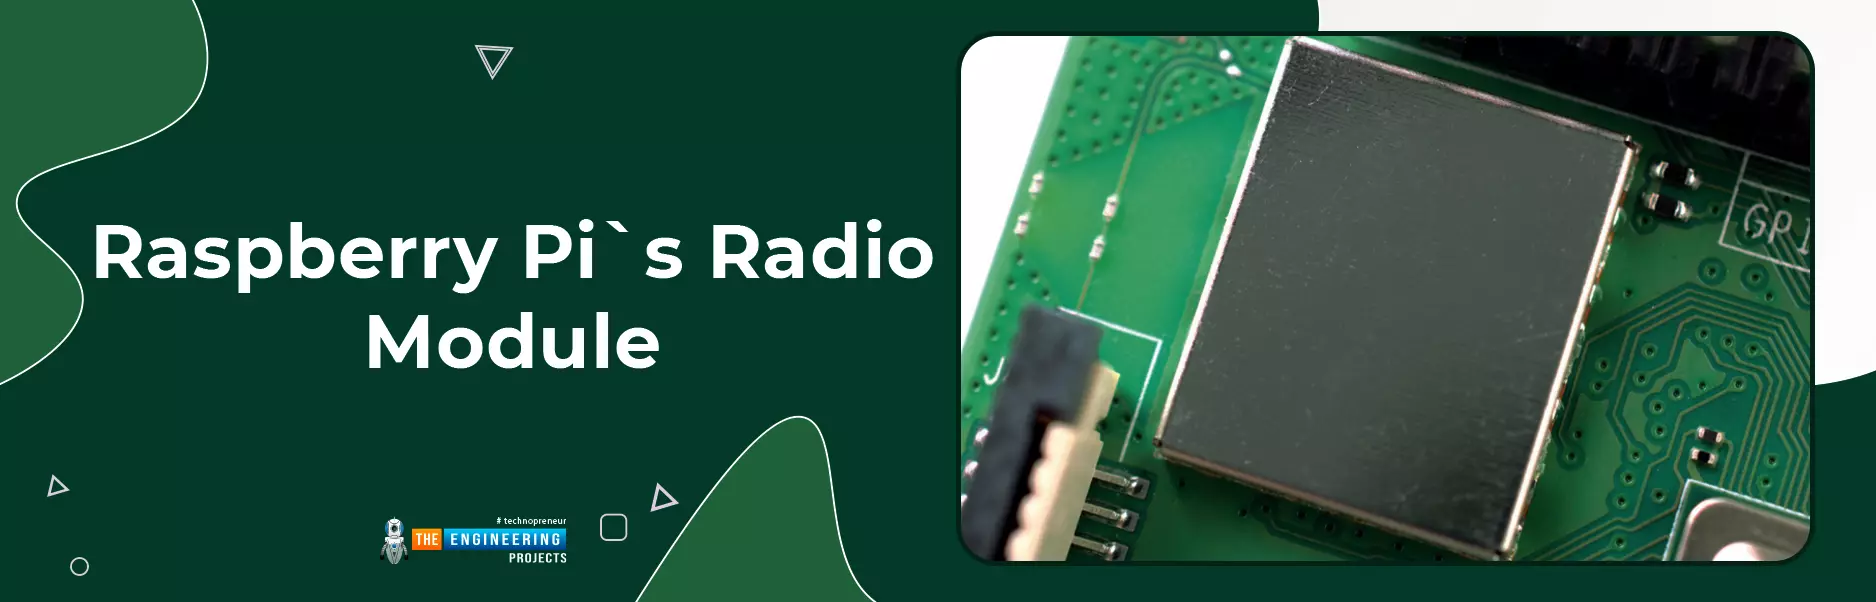
A metallic lid covers the Raspberry Pi's radio component, which allows it to communicate wirelessly with other devices. In actuality, the radio has two main functions. Wi-Fi and Bluetooth are built-in, so you can use them to communicate with your computer and other nearby smart devices, sensors or cellphones.
-
power management integrated circuit (PMIC)
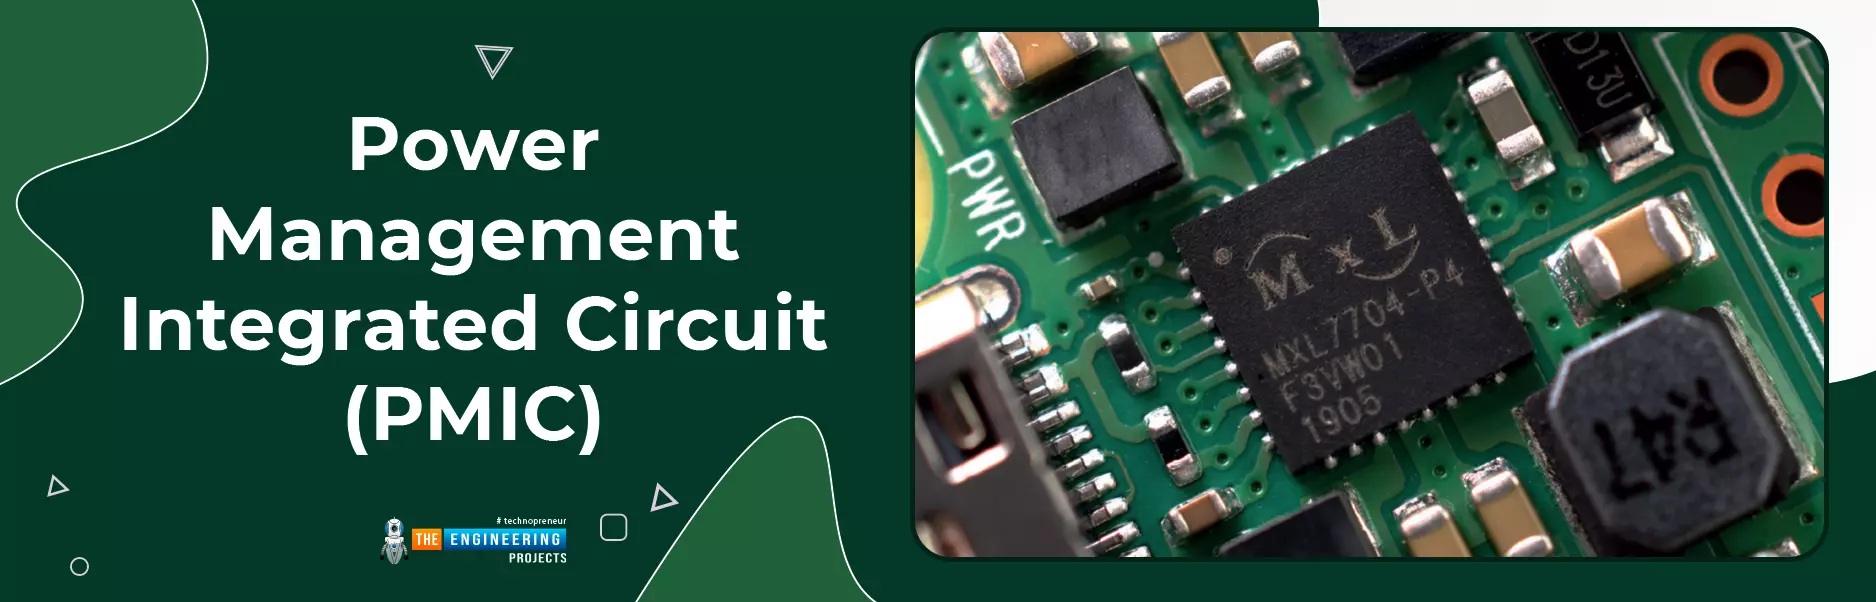
Just behind the middle row of USB ports, an additional black, plastic-covered chip is seen towards the board's bottom border. The USB controller manages the four USB ports. The network controller is positioned next to this chip. An integrated circuit (PMIC) is also located on the upper left side of this board. It is in charge of converting power from a USB port to the precise voltage that the Raspberry Pi needs.
-
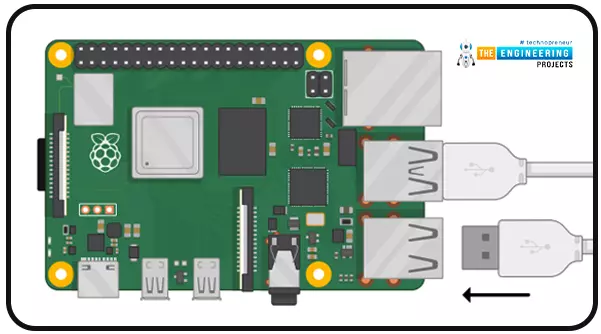
Ports for connecting USB devices
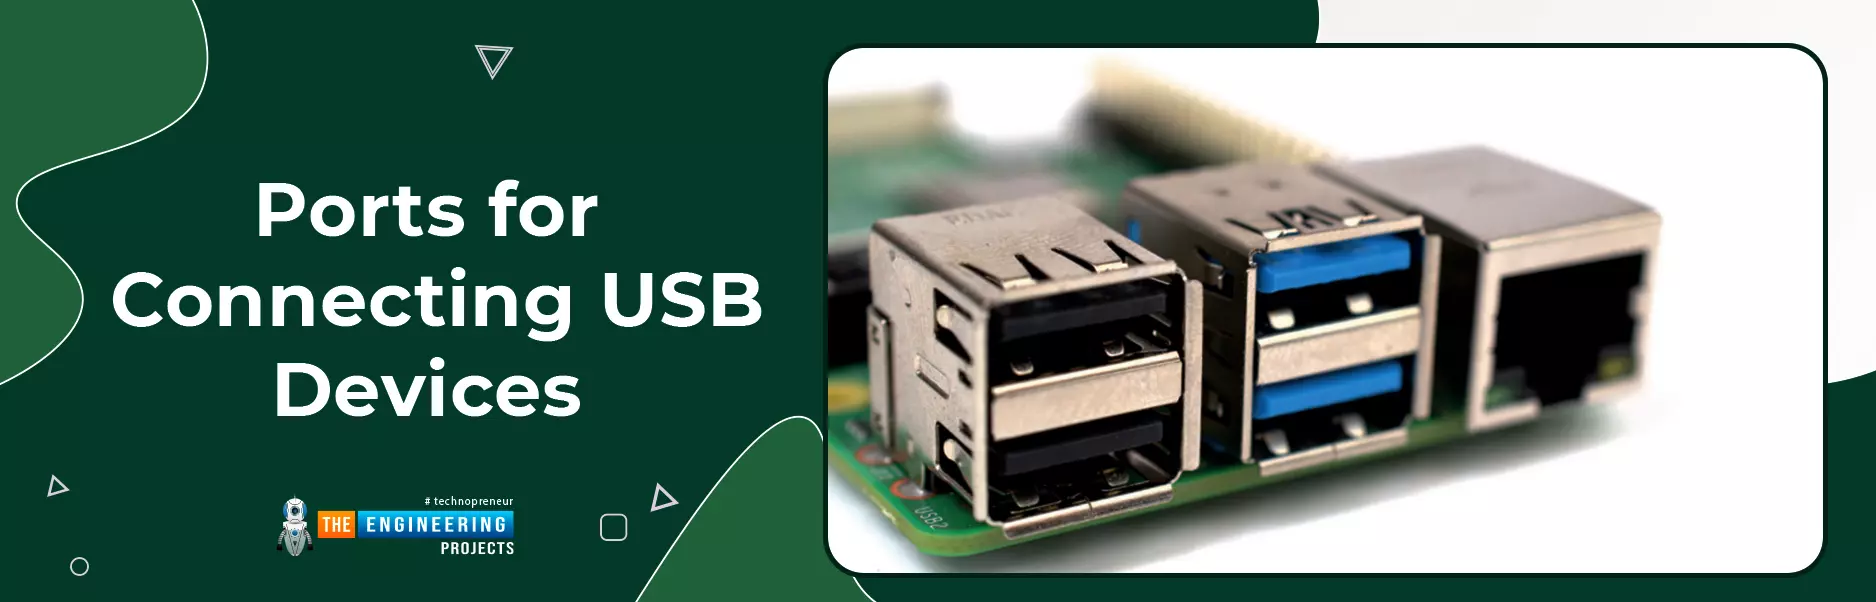
The circuit board contains a variety of ports, beginning with four ports in the right side of the bottom edge. You can connect any USB-compatible device to your Raspberry Pi using these ports, including keyboards, mice, digital cameras, and flash drives. One of the two types of USB ports is a USB 2.0 port, which uses version two of the USB standard; the other is a USB 3.0 port, which uses version three.
-
Ethernet port
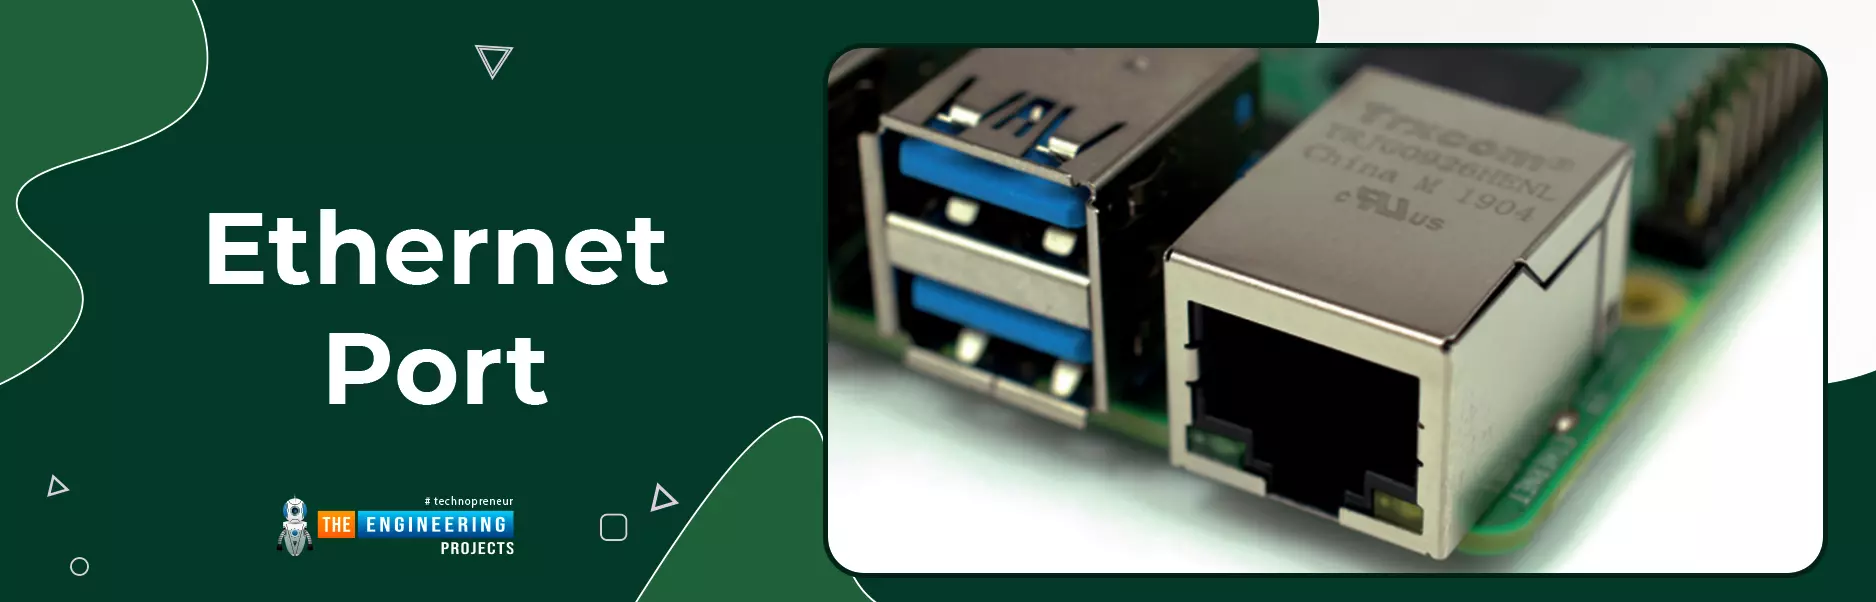
There is an Ethernet port. Using an RJ45 cable, a Raspberry Pi can be linked with a wired computer network via this port. You'll notice two LEDs at the bottom, which indicate the connection is operational.
-
Raspberry Pi AV jack
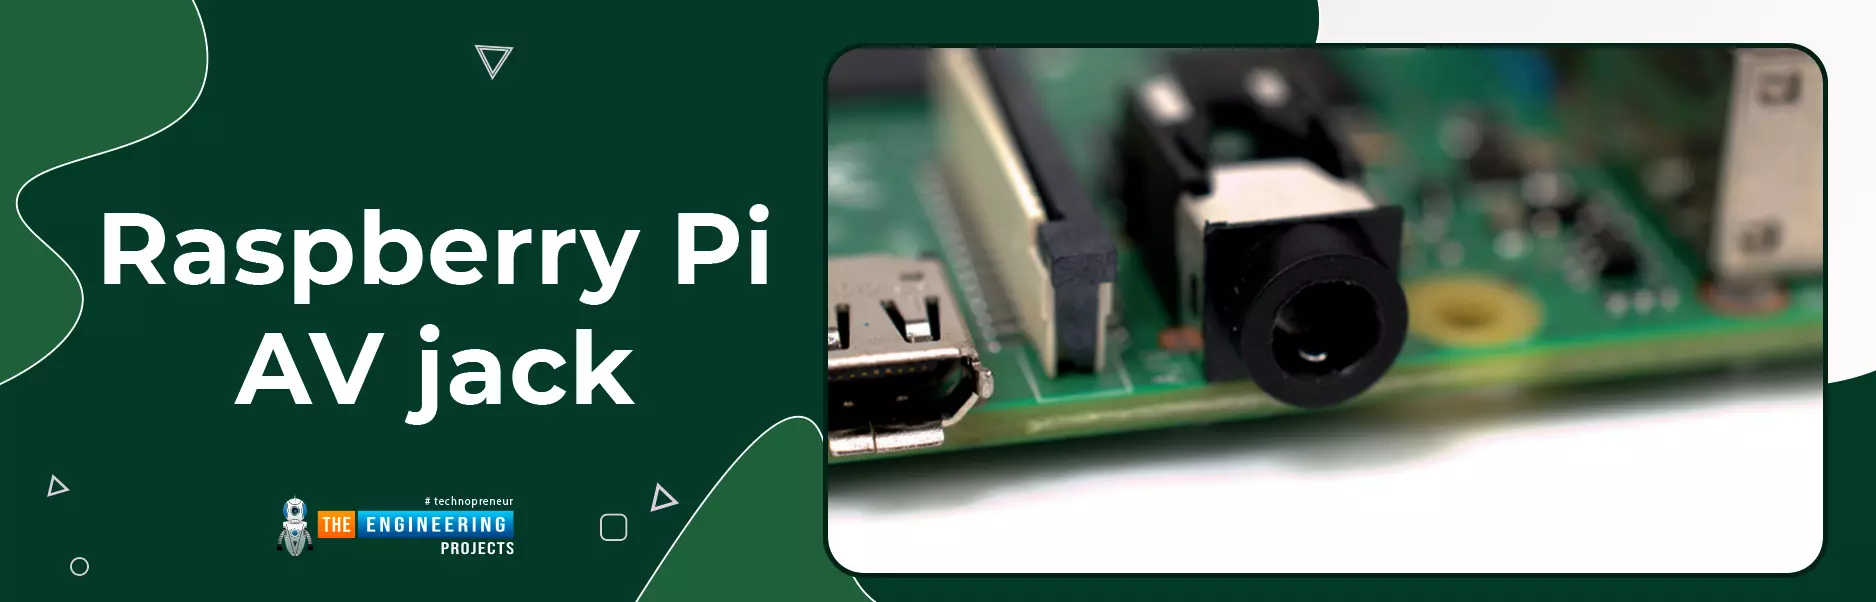
There is a 3.5 mm audio-visual jack. Connecting to amplified speakers rather than headphone jacks improves sound quality, but the headphone jack can still be used. Audio and video signals can be transmitted using the TRRS (tip-ring-ring-sleeve) adapter, which connects the 3.5 mm AV jack with projectors, tv, and other displays that can receive composite video signals.
-
Camera connector
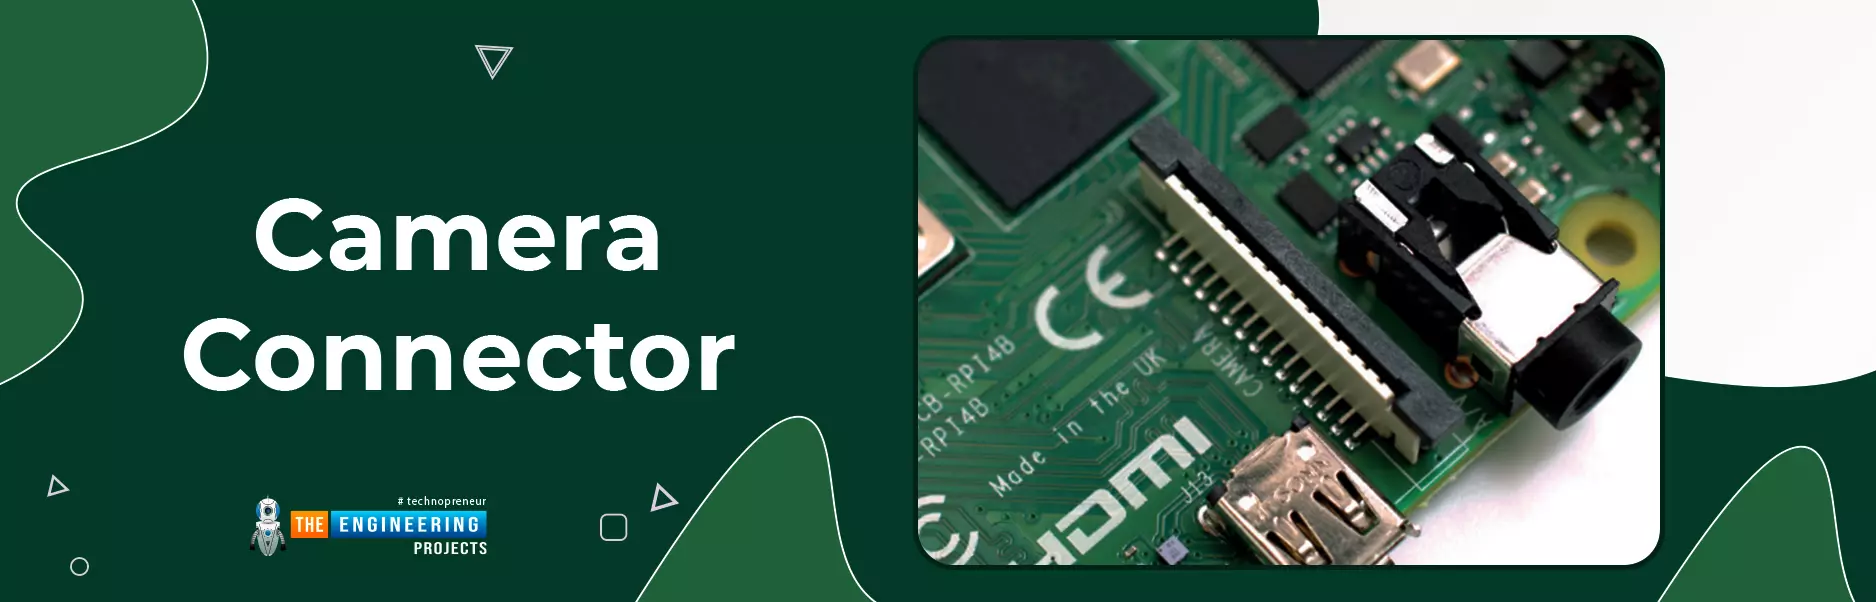
The camera serial interface (CSI), or camera connector, as it is most commonly called, is located above the AV jack and has a strange-looking plastic flap that may be pulled up (CSI). This allows you to connect a camera, which you'll learn later in this course.
-
micro-HDMI ports
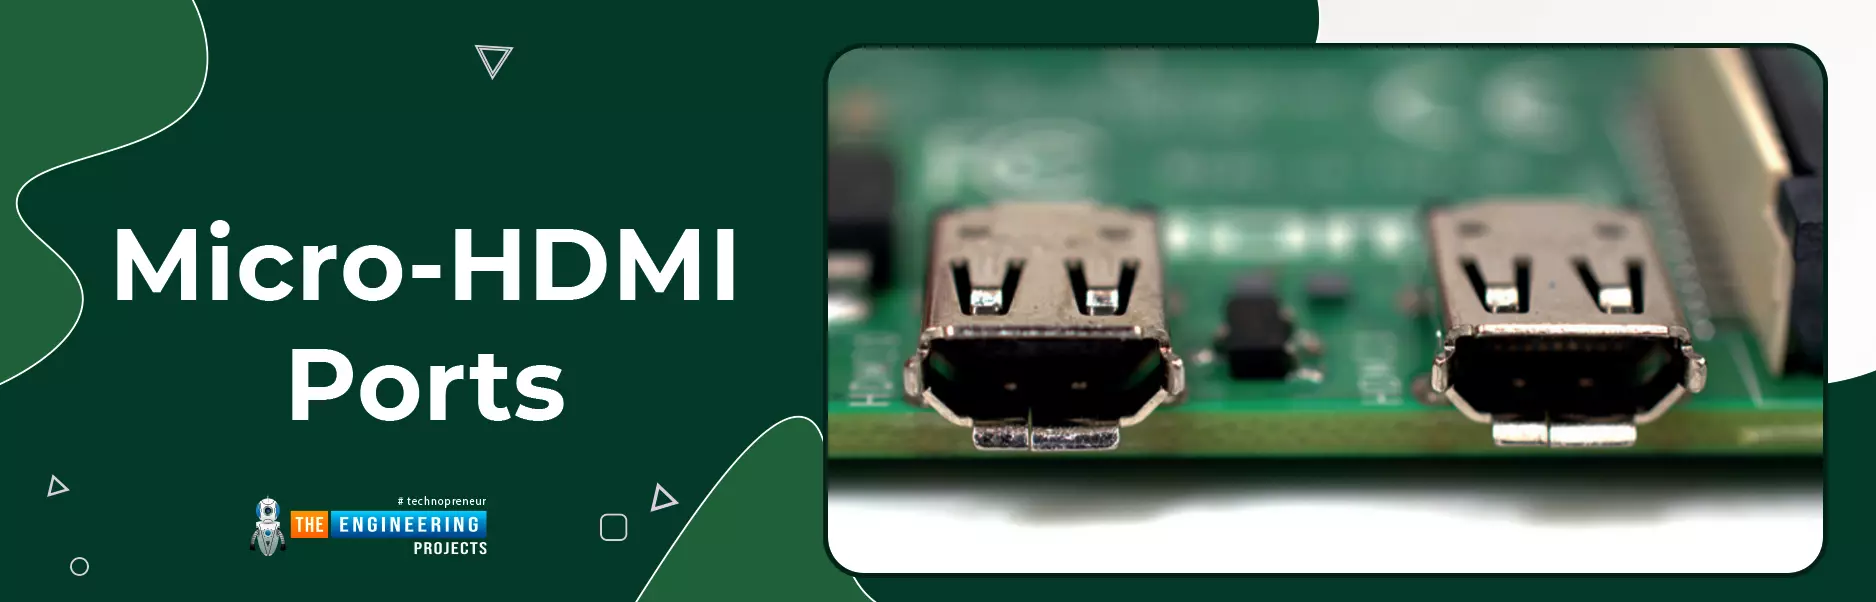
There are two micro HDMI connections available, which are a scaled-down version of the connectors seen on gaming consoles, set-top boxes, and televisions. Multimedia denotes that it can transport both audio and video information, and high-definition indicates that the quality will be excellent. A computer monitor, television, or projector will be needed to connect the Raspberry Pi to these adapters.
-
Type-C port
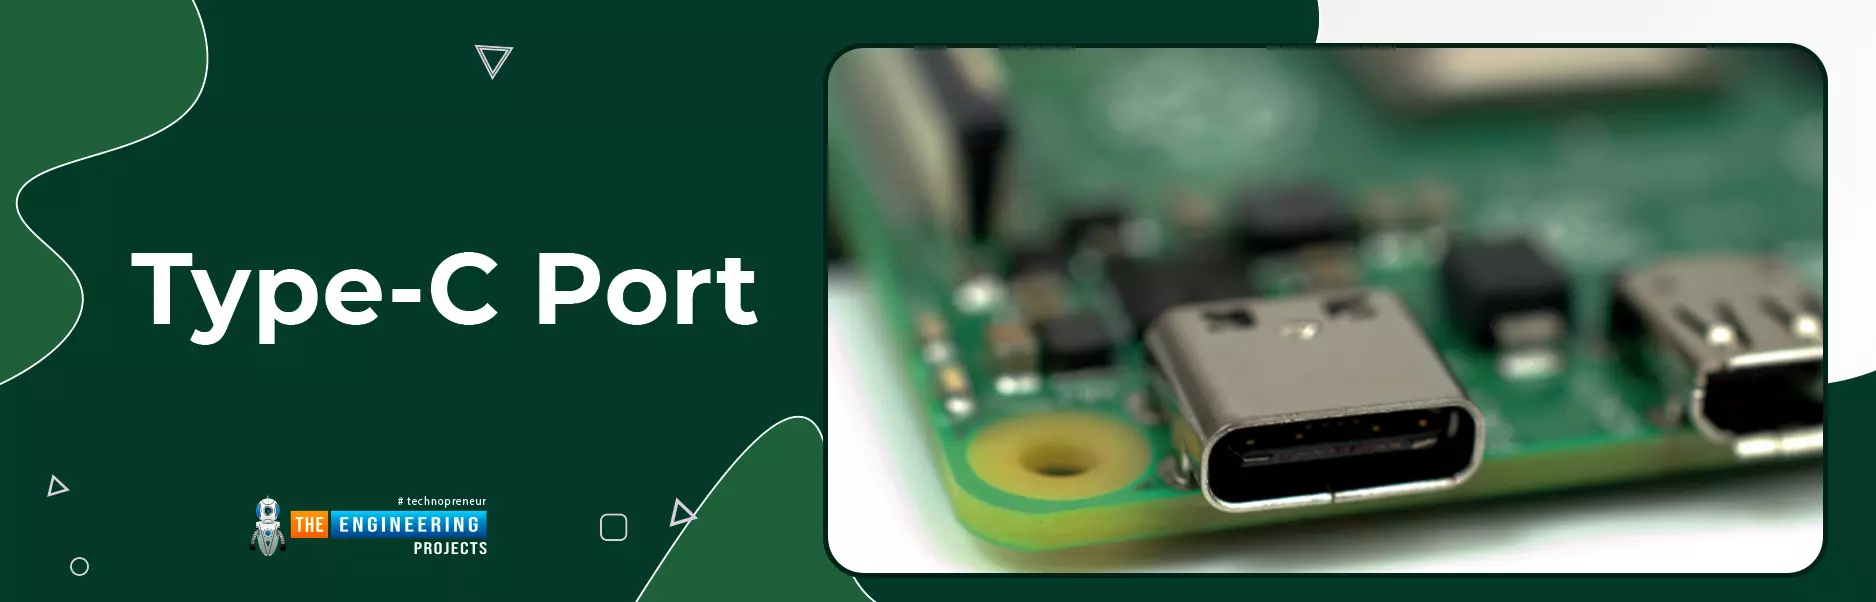
The port above the HDMI ports is where you'll plug in the Raspberry Pi's power supply. USB Type-C ports can be found on smartphones, tablets, and other mobile devices. Instead of a standard mobile charger, employ the certified Raspberry Pi USB Type-C Power Supply for the best results.
-
Display connector (DSI)
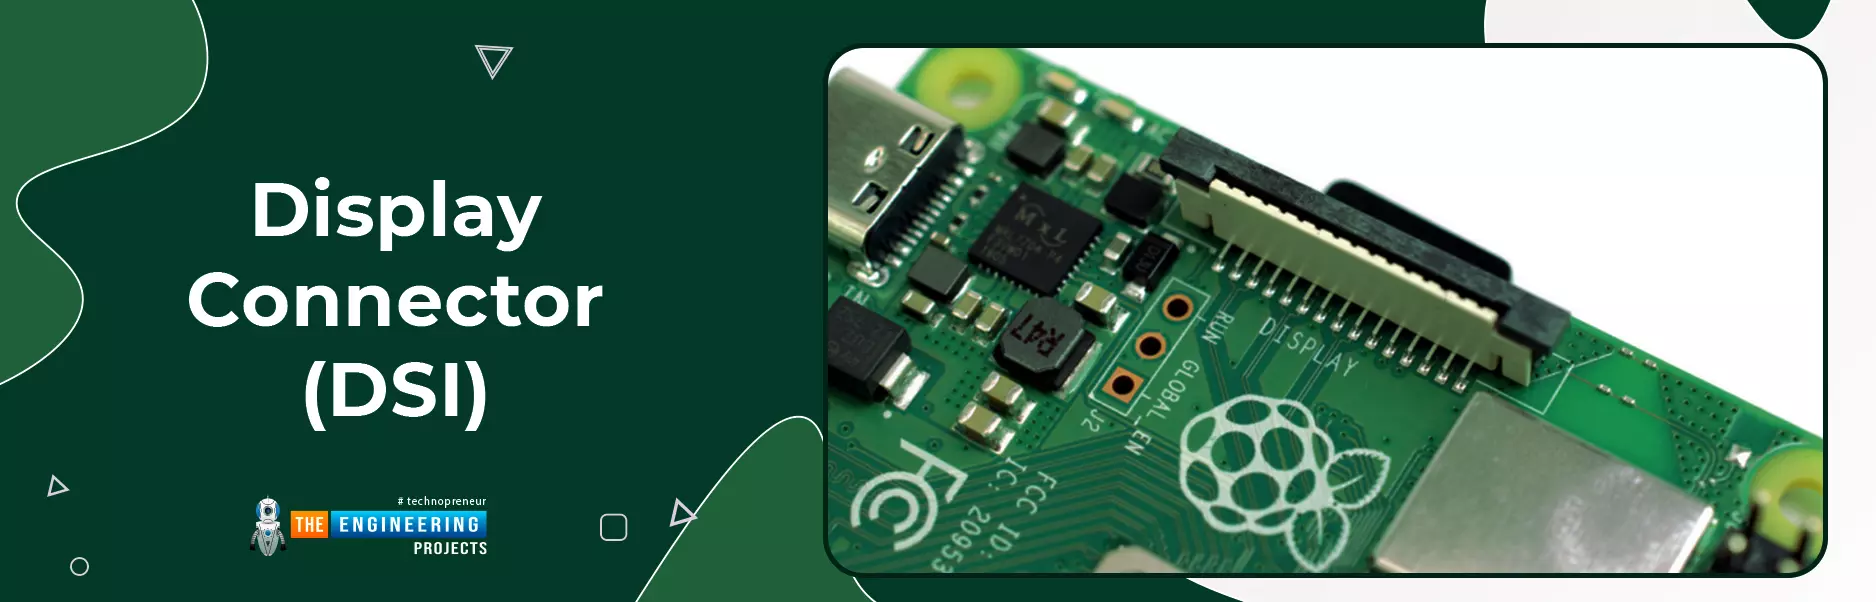
There is a strange-looking connector at the top of the board, which appears to be the camera connector at first sight, but it's not. It is for usage with a Raspberry Pi Touch Display.
-
Raspberry Pi’s GPIO header
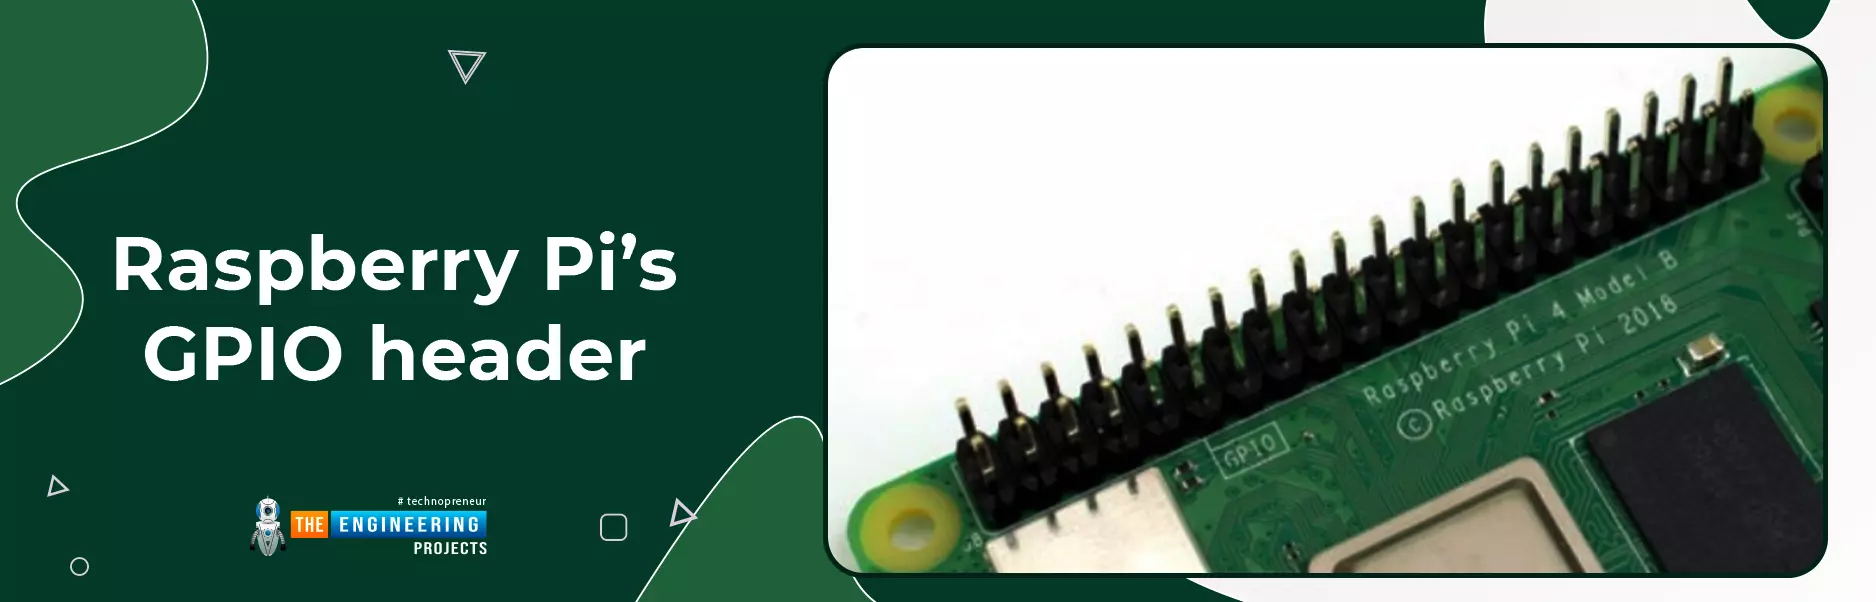
In two rows of 20 pins each, you'll find 40 metal pins along the right edge of the board. To communicate with peripherals such as LEDs and buttons to temperature sensors, joysticks, and pulse rate monitors, the Raspberry Pi includes a function known as GPIO (general-purpose input/output).
-
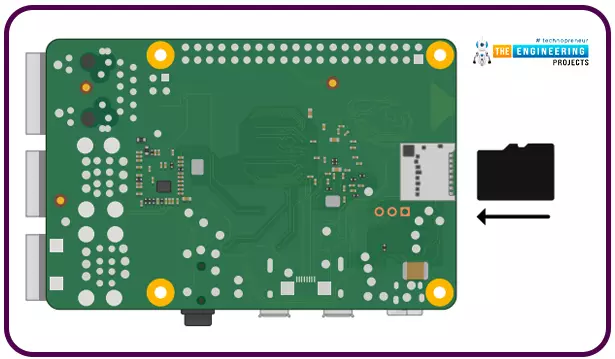
Raspberry Pi’s microSD card connector
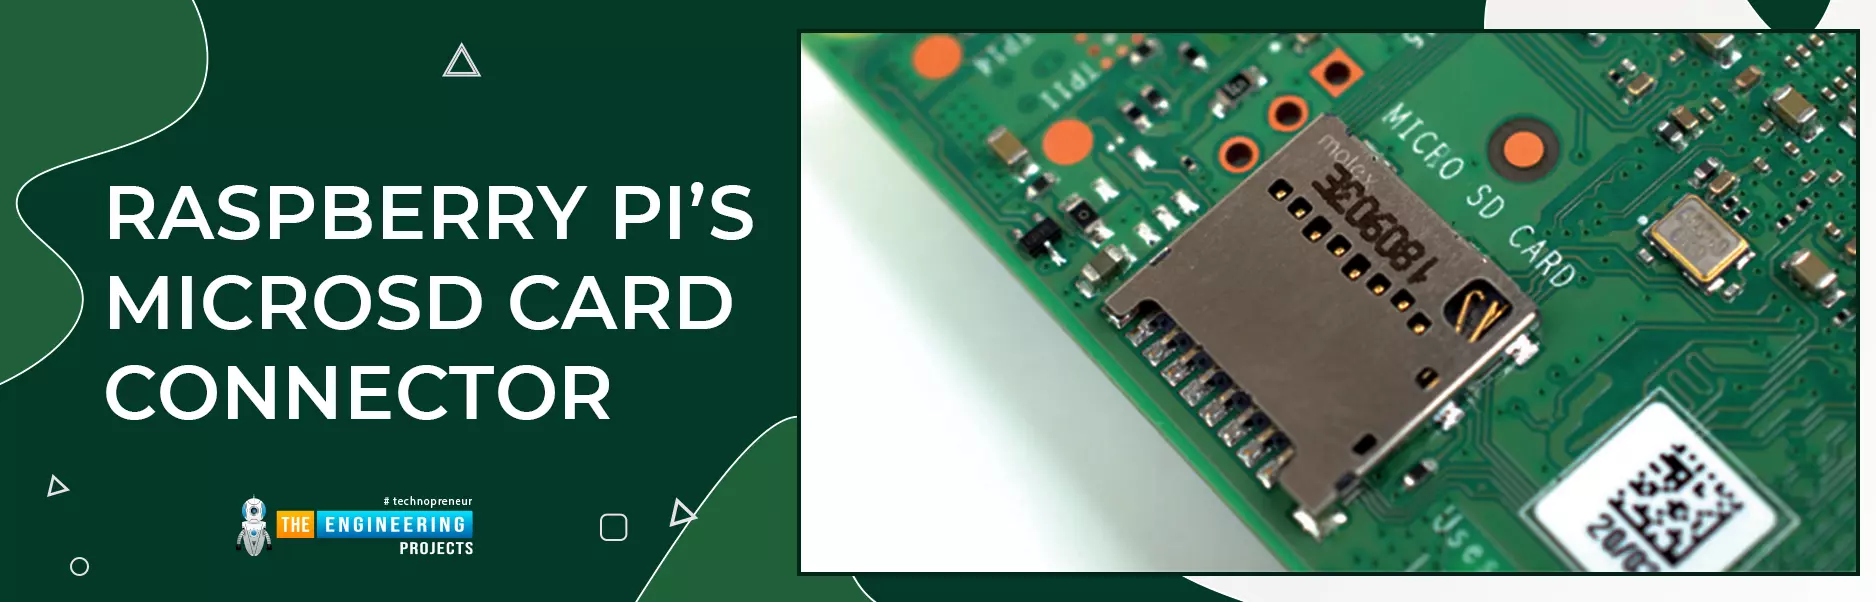
The Raspberry Pi has one more port, the micro-SD connector, which is on the other side of the circuit board. The MicroSD card is inserted here and you'll find all the files you've saved and installed as well as the operating system that makes your Raspberry Pi work.
What can you expect from the Raspberry Pi?
- 1GB of RAM, and dual-band 802.11ac wireless LAN
- This device has a Bluetooth 4.2 connection; it also has four USB 2.0 connections, an HDMI port, a composite video port, and 40 GPIO pins.
- 3D graphics, Camera interface (CSI), Display interface, and Micro SD card slot (DSI)
What operating system is it using?
Unfortunately, the Raspberry Pi lacks the ability to run either Macintosh or Windows. Instead, it uses Raspbian, a Linux distribution. Installing Raspbian on your own micro-SD card is also possible using the NOOBS installation. You'll see this loading screen when you insert in the microSD card with Raspbian installed and turn on the Raspberry Pi.
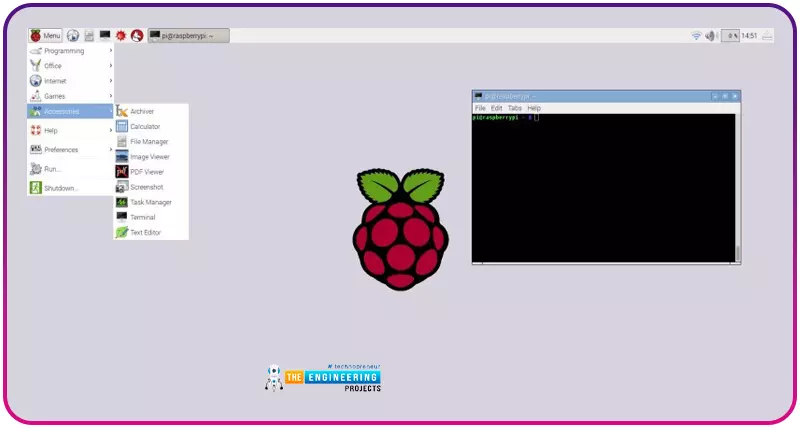
As you've seen, the desktop on your huge PC looks exactly like the one you are used to. A web browser, terminal, picture viewer, calculator, and a slew of other tools are all included by default.
Requirements before you begin
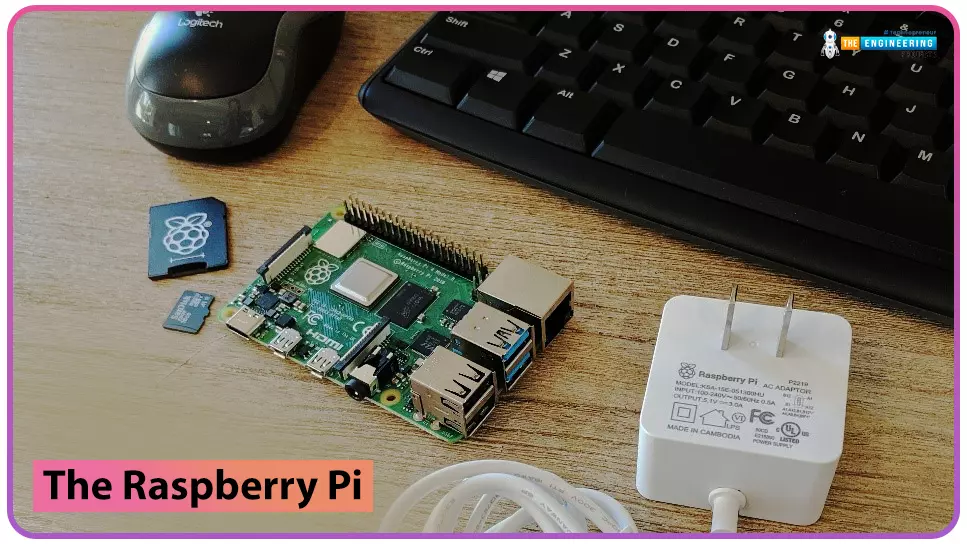
The Raspberry Pi is the heart of your project, but without a power supply or storage, it won't be able to go very far. To get started, you'll need the following:
-
The Raspberry Pi
-
-
-
A Power Supply
-
-
The power supply standard for the Raspberry Pi 4 has been upgraded from microUSB to USB-C, which is an improvement. Powering your Raspberry Pi is best done with a dedicated power adapter from the Raspberry Pi Foundation.
-
-
-
MicroSD Card
-
-
The later Pi models use microSD cards instead of the normal SD cards that were used in the original Pi models A and B. However, not all SD cards function correctly, therefore it's preferable to acquire a pre-loaded operating system with the original Raspberry Pi microSD card or a tested suitable card, such as the SanDisk Ultra 32GB.
-
-
-
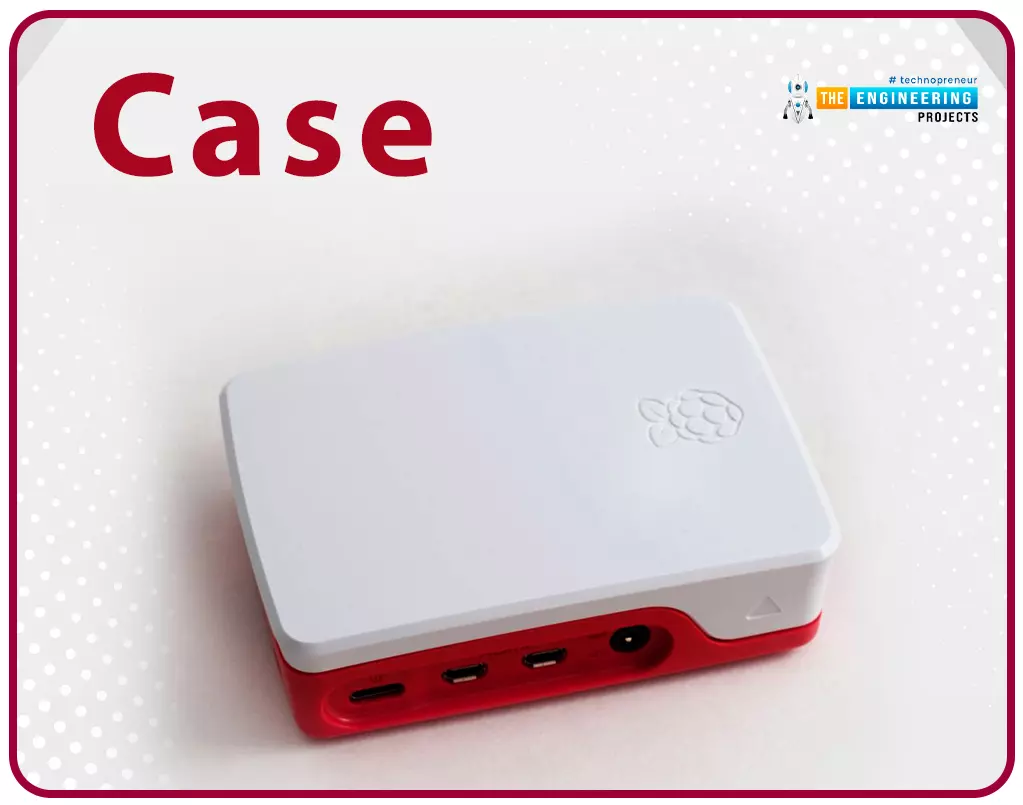
Case
-
-
This is technically optional, but we strongly advise it. It is a good idea to use a case to protect your bare board rather than leaving it exposed. The FLIRC case has a built-in heatsink, making it an excellent choice for older models of the Raspberry Pi.
-
-
-
Mouse, Keyboard, and HDMI Cable
-
-
You can control your Raspberry Pi using a keyboard and a mouse. Raspberry Pi can utilize almost any USB-connected keyboard and mouse, wired or wireless. However, don`t use 'gaming' keyboards with flashing lights since they consume too much power to be used successfully.
USB gamepads are also necessary when you are building consoles like a gaming rig, therefore, don't forget about them.
First time set up
We are now going to set up our minicomputer therefore follow these simple steps to get yours up and running:
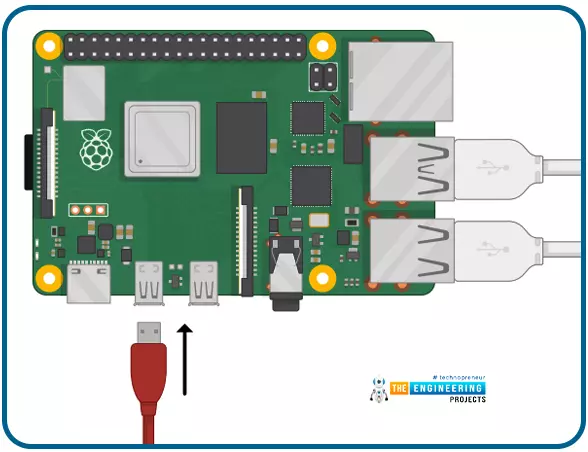
- An SD card should be inserted into the SD card slot on the pi board. For the time being, we strongly advise you to stick with Raspbian until you are more comfortable with its features.
- Use one of the USB ports to connect a mouse and a keyboard to the system. When using 'gaming' mice or other high-end equipment that requires software and drivers, it might waste power and place additional strain on the system. Just use 'plug-and-play' equipment to keep things easy and hassle-free.
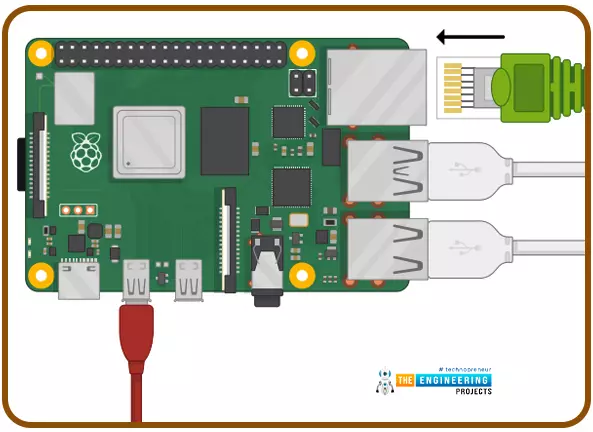
- Using the HDMI port, connect a monitor. Connect the monitor to a wall outlet, and then turn the power on and off as necessary. If you turn on the Raspberry Pi right now, nothing will happen. Adapters for non-HDMI monitors that don't impede access to the USB ports should be used.
- In order to use Ethernet instead of Wi-Fi, you will need to connect an Ethernet cable as well. The speaker or headphones should be plugged in as well if you wish to hear sound from the speakers. However, to get the Raspberry Pi up and running, you don't need either of these items.
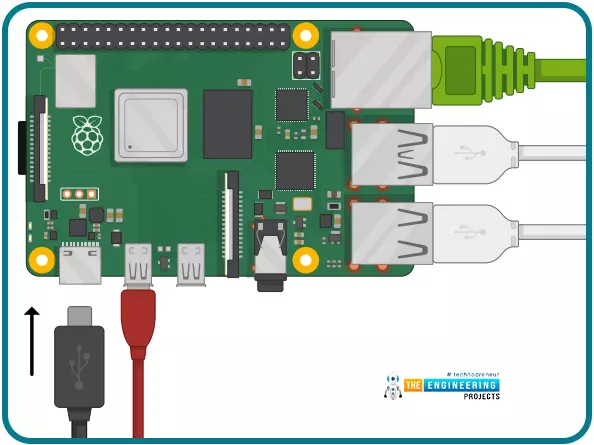
- Finally, insert the micro-USB cable into the power source and into the wall socket. The Raspberry Pi's red LED will light up, and you'll be able to see it booting up on the monitor. Once you get back to your computer, you'll see a desktop screen.
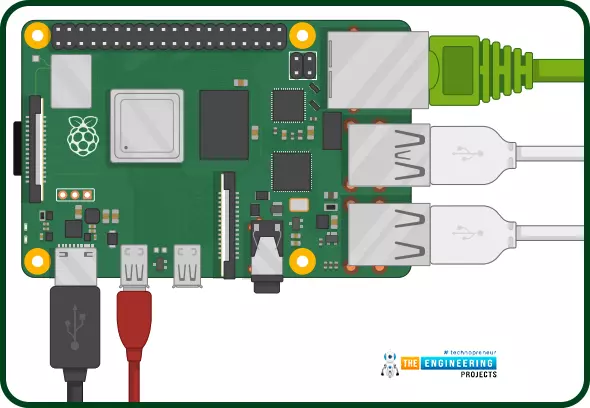
Congratulations! You've successfully assembled your Raspberry Pi! I hope you have something like this:
Conclusion
At this point in the course, we've learned about the Raspberry Pi computer and what each component does. Our minicomputer has now been set up, and in the next tutorial, we'll learn how to use the python programming language with the Raspbian operating system.