Hello friends, hope you all are fine and having fun with your lives. Today's post is about How to increase Workspace in Proteus. It's our 3rd tutorial in Proteus series. Its quite a simple tutorial and along with this trick, I will also share few commonly used features or Proteus. Once, I was working on a simulation project in which I have to design a complete load management system in Proteus and it was quite messy as I have to include a lot of components and the area of Proteus got quite small for that and then I encountered this problem i.e. where to place the components.
You have seen in Proteus software that there's a blue rectangle which is considered as the workspace in Proteus. This area is constant and doesn't increase or decrease on its own. So if we are dealing with some messy circuit design then we have to increase this area, which we are going to discuss today. If you have downloaded my Arduino Library for Proteus, then you must have seen that the size of Arduino Mega 2560 is quite big and when I design Proteus simulations in which I need to use Arduino Mega, I have to increase the Proteus workspace to embedded all the other components. So, let's get started with how to increase Workspace in Proteus:
How to Increase Workspace in Proteus ???
First of all, if you are working on some project in Proteus then simply don't increase the area because when you increase the area then components get too small and its quite difficult to arrange or connect them with each other.
So, my suggestion is to keep using the default size, unless your circuit got messy and you actually need more space.
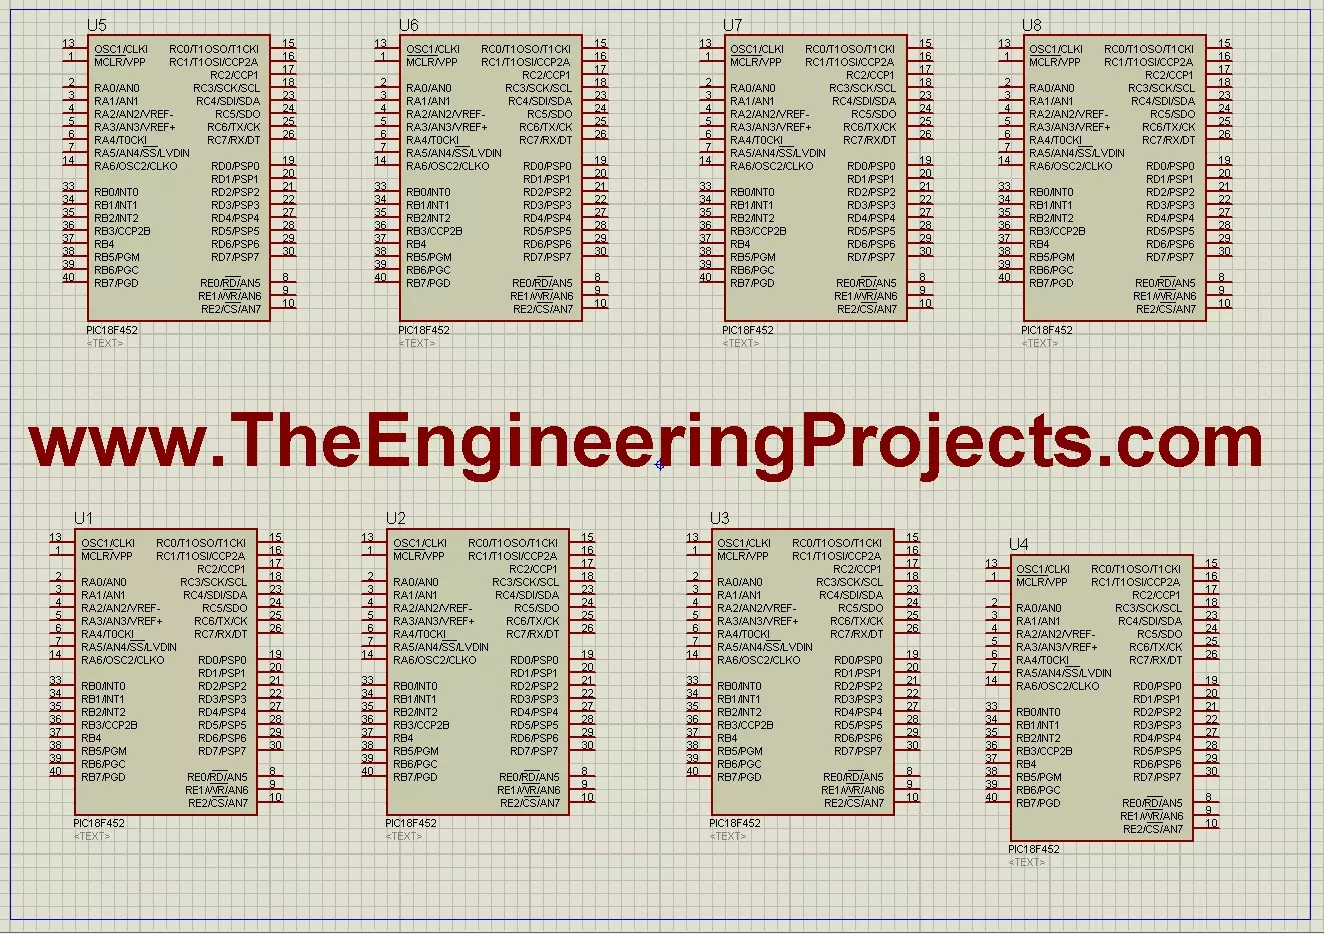
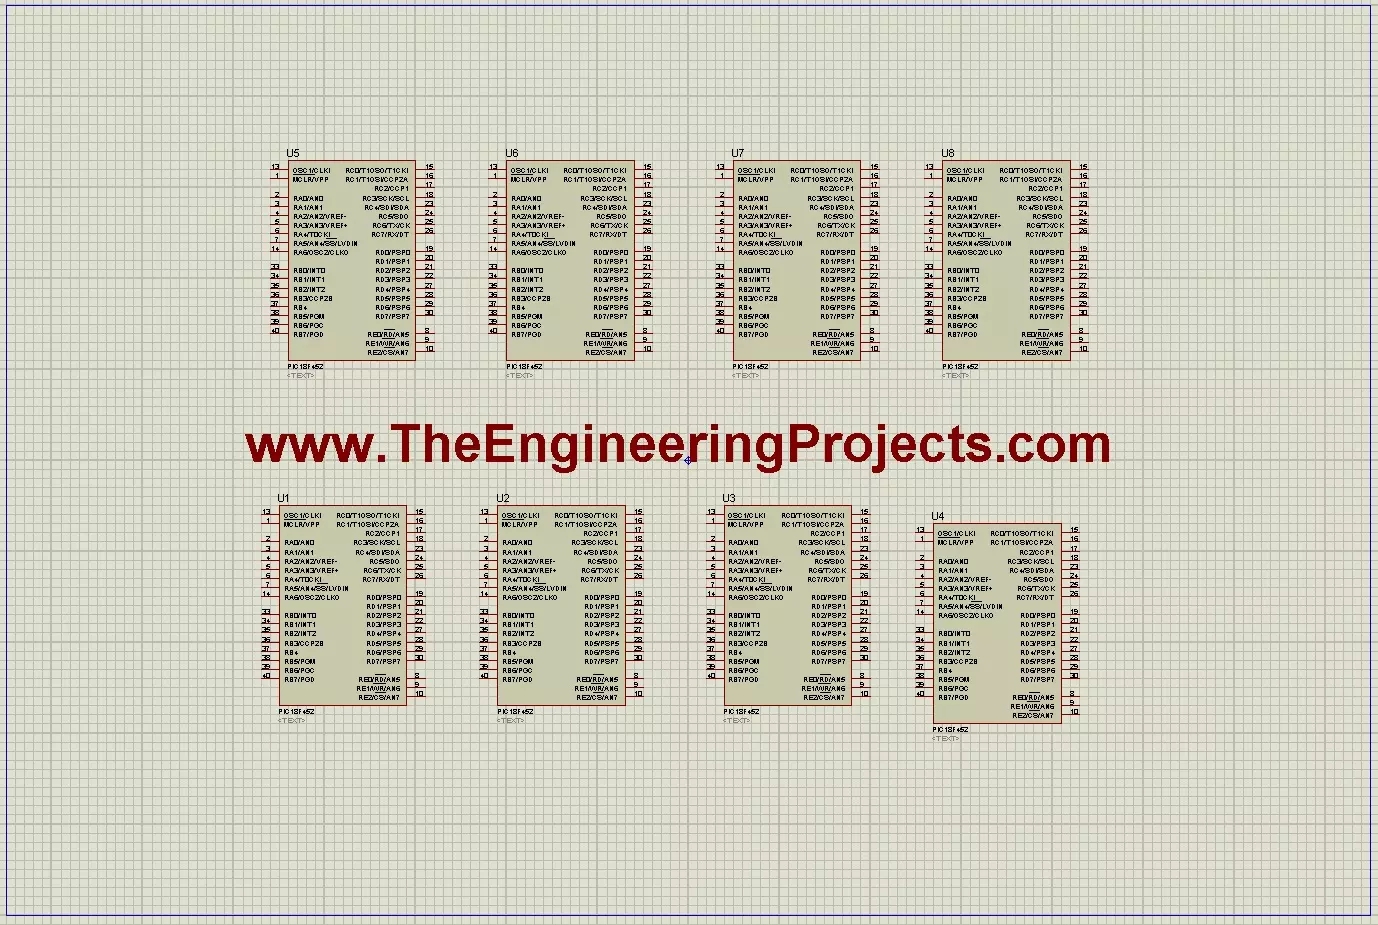
Let's open Proteus software and place few components in it, as an example I am just placing PIC Microcontrollers to cover the available space, as shown in below figure:
You can see in above figure, I have randomly placed 8 PIC Microcontrollers, just to fill the space.
Now suppose I want to add four more Microcontrollers in this Proteus file, there's no place to add them.
Now in order to add more components, we need to increase the size of available workspace in Proteus.
In order to do so, click on Systems in above menu bar and then click on Set Sheet Sizes as shown in below figure:
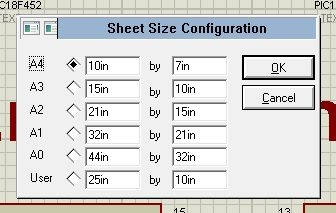
Now when you click it, a new pop up window will open up, as shown in the figure on right side.
You can see in the figure, there are six sizes available for the user to select.
First five are fixed sizes while the sixth one is user defined and you can set it to any size you want.
The default size of workspace in Proteus is A4, which is the first option i.e. 10inch by 7 inch.
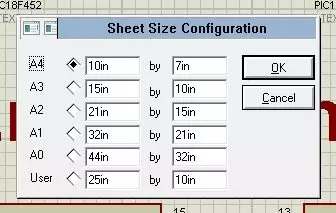
So, now let's change this selection and I am selecting the fifth option so now the size is 15inch by 10 inch, as shown in below figure:
Now its quite obvious from the above figure that the area has increased.
We have the same 8 PIC Microcontrollers but now we have more free space.
Right Click to Delete Component
Proteus has a quick way to delete any component or wire.
You need to right click on your component/wire for 2 times and it will be removed/deleted from the workspace.
It's quite helpful, especially in designing complex simulations.
Default Terminal in Proteus
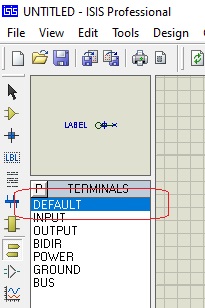
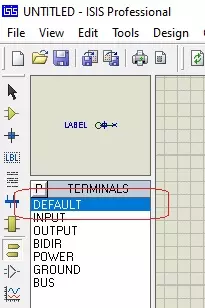
Let's discuss Default Terminal as well, which is used to keep the schematic organized & clear.
We can get them by clicking on Terminals Mode first and then click on Default, as shown in figure on right side.
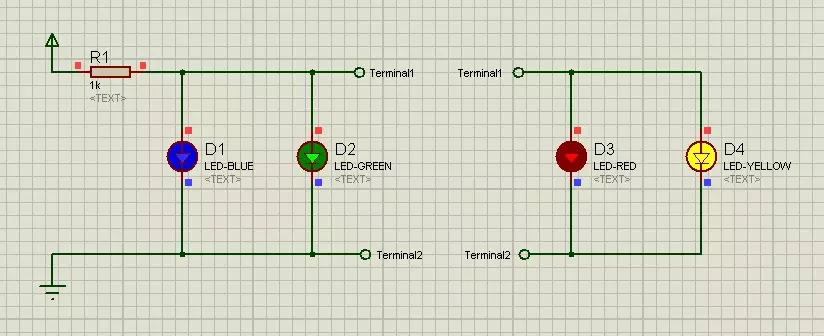
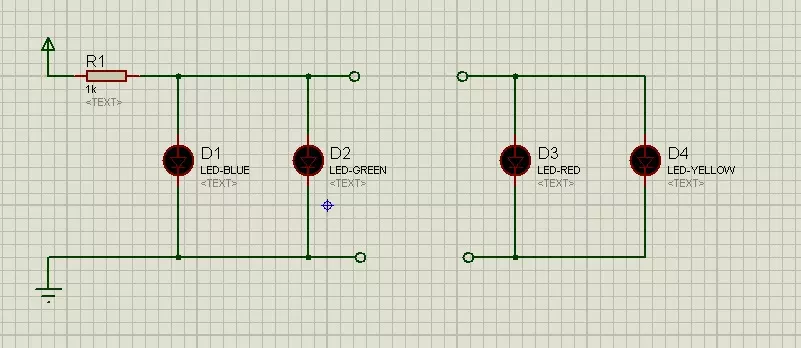
In our previous lecture, we have designed a simple LED circuit, so let's make small changes in it, as shown in below figure:
You can see in above figure that I have deleted the wires and placed these default terminals on both sides.
In order to delete these wires, I have simply double right clicked on each wire and placed these terminals.
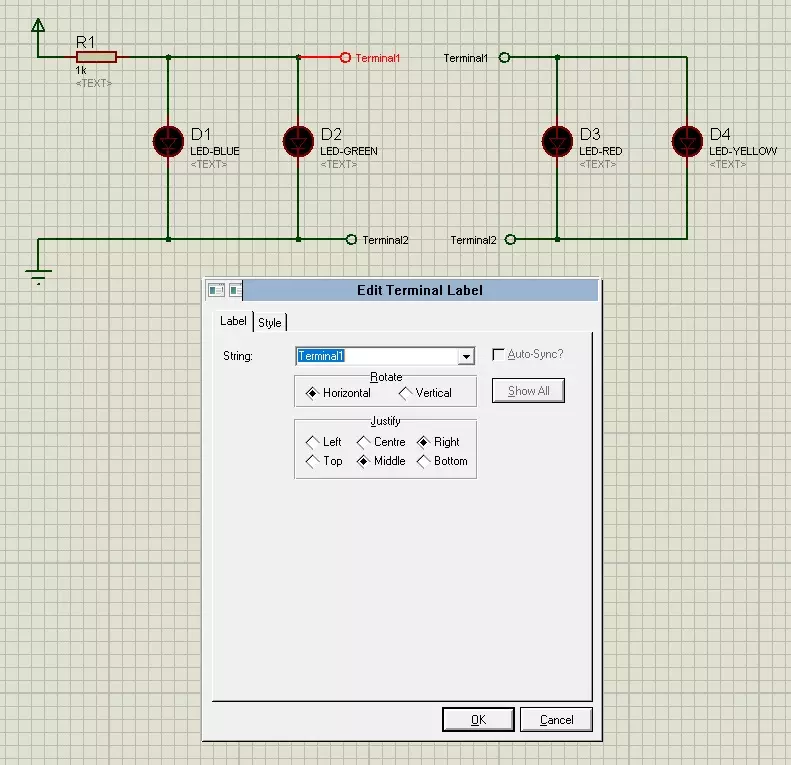
Now, double click on each terminal and provide it a name, as shown in below figure:
As you can see in above figure, top two Terminals are named as Terminal1 and below two terminals are named as Terminal2.
So, although these terminals are not connected together but Proteus considers "Terminals with same name" as connected.
If we run our simulation now, we will get the similar results, as shown in below figure:
These default Terminals are too helpful, as in complex projects, adding too much wires make the simulation quite messy. ( We will use them in coming lectures )
So, that's how you can quite easily increase workspace in Proteus ISIS. That's all for today, it was quite easy tutorial but still if you are having any problems, then ask in comments and I will resolve them. Till next tutorial, take care !!! :)
Hello mate !
I have my template to use in shematic capture but it's insufficient, I want to add a second siilar template in that same shematic capture or as if I add a second sheet in the same project ! so I can find all componants in PCB layout later. How can I do it ?
I need a help please !