


XBee Library for Proteus


As its the first version of our XBee Library for Proteus so its not quite perfect and can't do the complex tasks such as analog inputs etc. It will just do the serial communication. This xbee module has two pins TX and RX and you can do your communication with it quite easily. We have designed this XBee Library for Proteus, after quite a lot of effort and we are quite proud that we are presenting it first time for Proteus. Other bloggers are welcome to share this library on their blogs to share the knowledge but do mention our blog post link in your post. :) You should also have a look at XBee Arduino Interfacing. So, let's get started with it.
XBee Library for Proteus
- First of all, download this XBee Library for Proteus by clicking on the below button:
- Now once you click it you will get a zip file to download so download this zip and open it.
- In this zip file you will get two files named as:
- XBeeTEP.LIB
- XBeeTEP.IDX
- So, now place these two files in the libraries folder of your Proteus software.
- If you are new to Proteus 7 or 8 Professional, then you should have a look at How to add new Library in Proteus 8 Professional.
- Now, start your Proteus ISIS software or restart it if its already running.
- Go to your components library and search for XBee Module as shown in below figure:

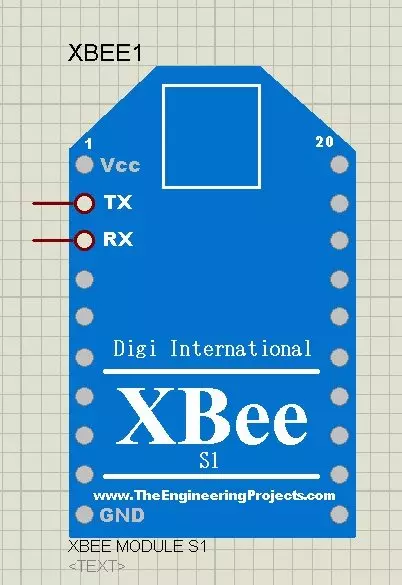
- Now place it in your workspace and it will look something as shown in below figure:
- If you don't know much about xbee module then you should also have a look at Introduction to XBee Module.
- As you can see in the above figure, its our xbee module in Proteus for the first time.
- As, I mentioned earlier, its a first version of xbee module so its not very advanced and it will do just the basic serial communication i.e. sending and receiving data.
- It has two pins on it which are TX and RX and using these two pins you can send and receive data quite easily.
- So, let's design a simple example and we will see How to do the Serial communication using this new XBee library for Proteus.
- Design a simple circuit as shown in below figure:

- Now what I did is, I simply place a Virtual terminal with both of these xbee modules.
- Now we need to change the Properties of one of these XBee module so double click on any one of these and you will get the below window:

- You should also have a look at Interfacing of XBee with Computer.
- Now, I have simply changed the Physical Port of this module to COM2 while the other module is at COM1.
- So, now one of my XBee module is at COM1 while the second module is at COM2.
- Now when I run my simulation then both XBee will start sending and receiving data on their respective COM Ports.
- So, what I need to do is to virtually combine these two ports and for that I have used a software named as Virtual Software Driver from Eltima and I combine these two ports.
- Now, run your simulation and whatever you type in the Virtual Terminal of first xbee will appear in the virtual terminal of second xbee. as shown in below figure:

- You can also interface this XBee modue with other microcontrollers like Arduino, PIC Microcontrollers or 8051 Microcontrollers etc.
- I have explained this whole tutorial in below video as well.


