I have designed this project using Arduino UNO and have simulated in the Proteus software, which you all know is my favorite simulating software. :) The code is also quite simple which I have given below for download. The simulation is also included in download package but again I suggest you to design it on your own. If you got into any trouble then ask in comments and I will try to resolve them. Anyways let's get started with How to measure frequency using Arduino.
How to Measure Frequency using Arduino ???
- You can download the simulation for this frequency measuring by clicking the below button:
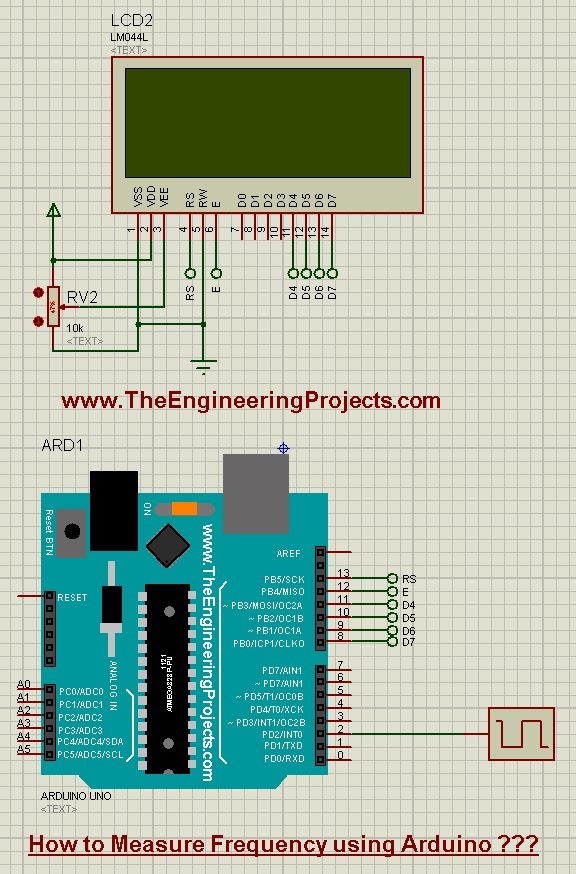
- Now let's design this project in Proteus. So, first of all, design a simulation as shown in below figure:

- The small block attached with the pin # 2 of Arduino is a frequency meter.
- We can create any kind of frequency signal using this component.
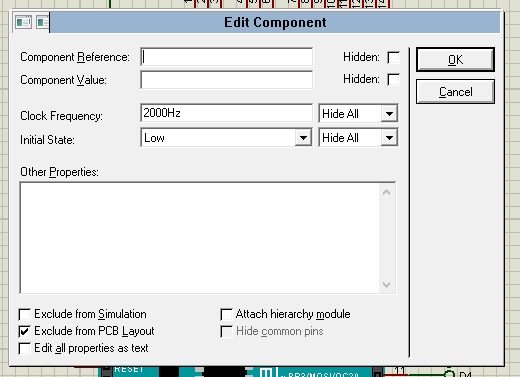
- If you double click it then its properties will open up where you can change the frequency as shown in below figure:

- You can see in the above figure that I have setted the Clock Frequency to 2000 Hz.
- Now, let's design the programming code for this project. So, paste the below code in your Arduino software:
#include <LiquidCrystal.h>

LiquidCrystal lcd(13,12,11,10,9,8);

long freq, tempo;
int pulsos;
boolean pulso;
void setup() {
  pulso=HIGH;
  pinMode(2,INPUT);
  lcd.begin(20, 4);
  lcd.setCursor(0,0);
  lcd.print("Frequency =");
  lcd.setCursor(1,2);
  lcd.print("www.TheEngineering");
  lcd.setCursor(4,3);
  lcd.print("Projects.com");
}

void loop() {
  tempo = millis();
  if(digitalRead(2)==HIGH)
  {
    if(pulso==HIGH)
    {
      pulsos = pulsos + 1;
    }

    pulso=LOW;

  }
  else{
    pulso=HIGH;
  }

  if(tempo%2000==0){
    freq = pulsos/2;
    lcd.setCursor(12,0);
    lcd.print(freq);
    lcd.print("Hz");
    pulsos=0;
  }
}
- Now using the above code, get your hex file from Arduino software and upload it in your Proteus software.
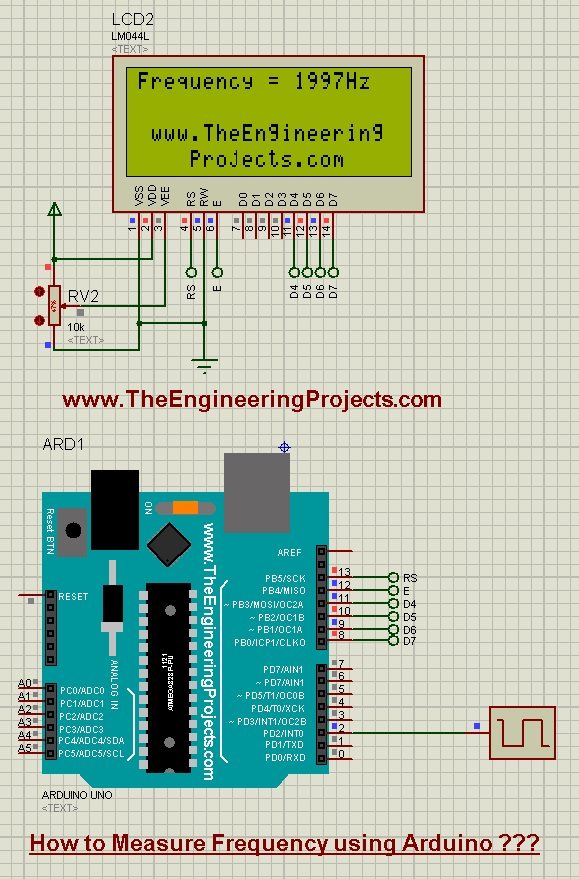
- Now once you are done then run your simulation and if everything goes fine then you will get results as shown in below figure:

- Now you can see the LCD is showing the same frequency as we set in the properties of the frequency meter.
- The code is quite simple, I don't think it needs any explanation but if you get into sme trouble then ask in comments.
- The below video will show you this project in detail:


