


Ultrasonic Sensor Arduino Interfacing
Ultrasonic sensor is also known as SONAR. It is used for measuring the distance between the object and the sensor itself. It transmits ultrasonic waves and receives it back after reflecting from the surface of an object. Then its measures the time during entire process which is equal to the distance between object and the sensor itself. It has four pins and is very easy to use. It is easily available in the market and is available at very low cost. It has a wide range of applications e.g. estimating the sea’s depth and many more. SONAR/ultrasonic sensor along with proper labeling is given in the figure shown below.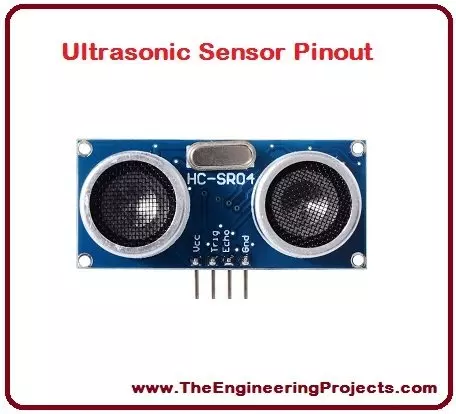
1. Ultrasonic Sensor Pins
- Ultrasonic sensor has total four pins, each pin has to perform different task.
- Ultrasonic sensor all pins are listed in the table shown in the figure below.

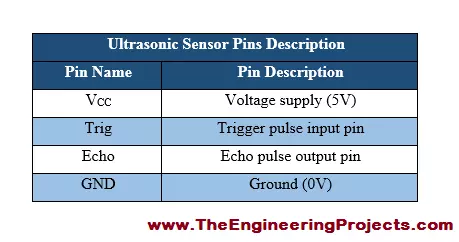
2. Ultrasonic Sensor Pins Description
- Since each pin has different task to perform, so we must know about the functionality of each pin.
- Ultrasonic sensor pins description is listed in the table given in the figure shown below.
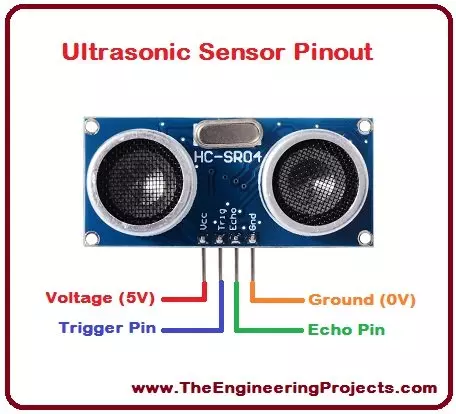
3. Ultrasonic Sensor Pinout
- Pinout diagram provides us the information about all the pins of electronic device.
- Ultrasonic pinout diagram is given in the figure show below.
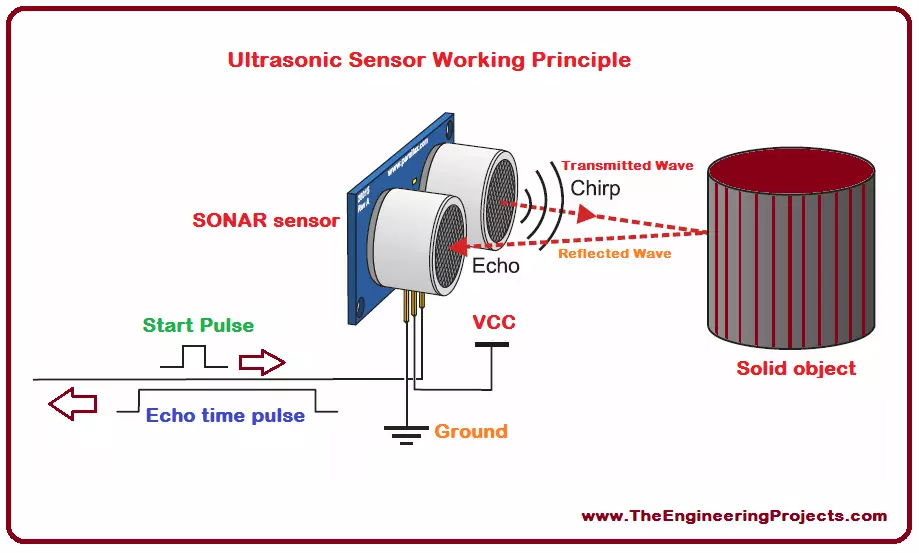
4. Ultrasonic Sensor Working Principle
- Ultrasonic sensor transmits sound waves.
- These waves are reflected back from the surface of an object.
- Ultrasonic sensors receives the reflected waves.
- Then it measures the time elapsed during the entire process, from transmission to receiving, it is known as round trip time.
- This time is equal to the distance between an object and the sensor itself.
- I have also provide some visual, so that you can easily understand its working principle.
- Ultrasonic sensor principle is shown in the figure given below.
5. Ultrasonic Sensor Arduino Interfacing Wiring Diagram
- I have also shared Interfacing of Ultrasonic Sensor with Arduino in previous tutorial.
- I have discussed a detailed information on Interfacing of Multiple Ultrasonic Sensor With Arduino.
- Ultrasonic sensor Arduino interfacing completely labeled wiring diagram is given in the figure shown below.
6. Ultrasonic Sensor Arduino Interfacing Source Code
- I have provided the complete Arduino code for ultrasonic sensor Arduino interfacing.
- You need to just copy and paste the entire code in your Arduino software.
- After uploading it to Arduino board, you will be able to get the desired results.
// defines arduino pins numbers
const int trigPin = 12;
const int echoPin = 11;
// defines variables
long duration;
int distance;
void setup()
{
pinMode(trigPin, OUTPUT); // Sets the trigPin as an Output
pinMode(echoPin, INPUT); // Sets the echoPin as an Input
Serial.begin(9600); // Starts the serial communication
}
void loop() {
// Clears the trigPin
digitalWrite(trigPin, LOW);
delayMicroseconds(2);
// Sets the trigPin on HIGH state for 10 micro seconds
digitalWrite(trigPin, HIGH);
delayMicroseconds(10);
digitalWrite(trigPin, LOW);
// Reads the echoPin, returns the sound wave travel time in microseconds
duration = pulseIn(echoPin, HIGH);
// Calculating the distance
distance= duration*0.034/2;
// Prints the distance on the Serial Monitor
Serial.print("Distance from the object = ");
Serial.print(distance);
Serial.println(" cm");
delay(1000);
}
- First of all I have defined the pins for Echo and Trig pin.
- Then I changed their mode to input and output as well.
- Then I defined the formula to calculate the distance.
- You can download the wiring diagram and complete Arduino source code here by clicking on the button below.
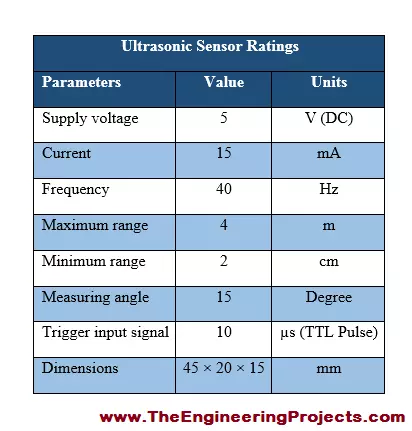
7. Ultrasonic Sensor Ratings
- From the ratings of a device we can learn about its power, voltage and current requirement.
- Ultrasonic sensor ratings are listed in the figure shown below.
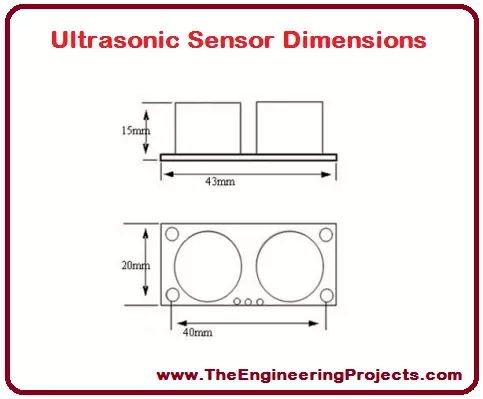
8. Ultrasonic Sensor Dimensions
- The dimensions of ultrasonic sensor are given in the figure shown below.
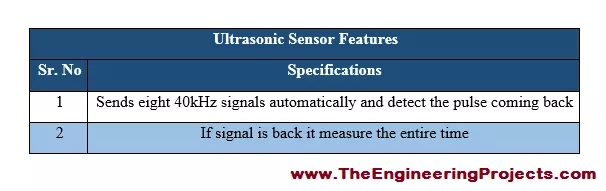
9. Ultrasonic Sensor Features & Formula to Measure Distance
- Ultrasonic sensor features are listed in the table given in the figure shown below.
- The formula to calculate the distance between an object and the sensor itself is given below.
Distance = (Speed of sound × Time)/2
In the tutorial Ultrasonic Sensor Arduino Interfacing, we have learnt about the pins and working principle of ultrasonic sensor to estimate the distance of an object from the sensor. I hope you enjoyed the tutorial. I have provided all the important details about ultrasonic sensor Arduino interfacing. If you find something missing, please let me know in comments, so that I can update the tutorial correspondingly. I will share further topics in my upcoming tutorials. Till my next post take care and bye :)